1 前言
环境如下:
- 服务器:腾讯云 Centos7
- 服务器公网IP:182.254.210.154
- 域名服务商:阿里云
2 步骤
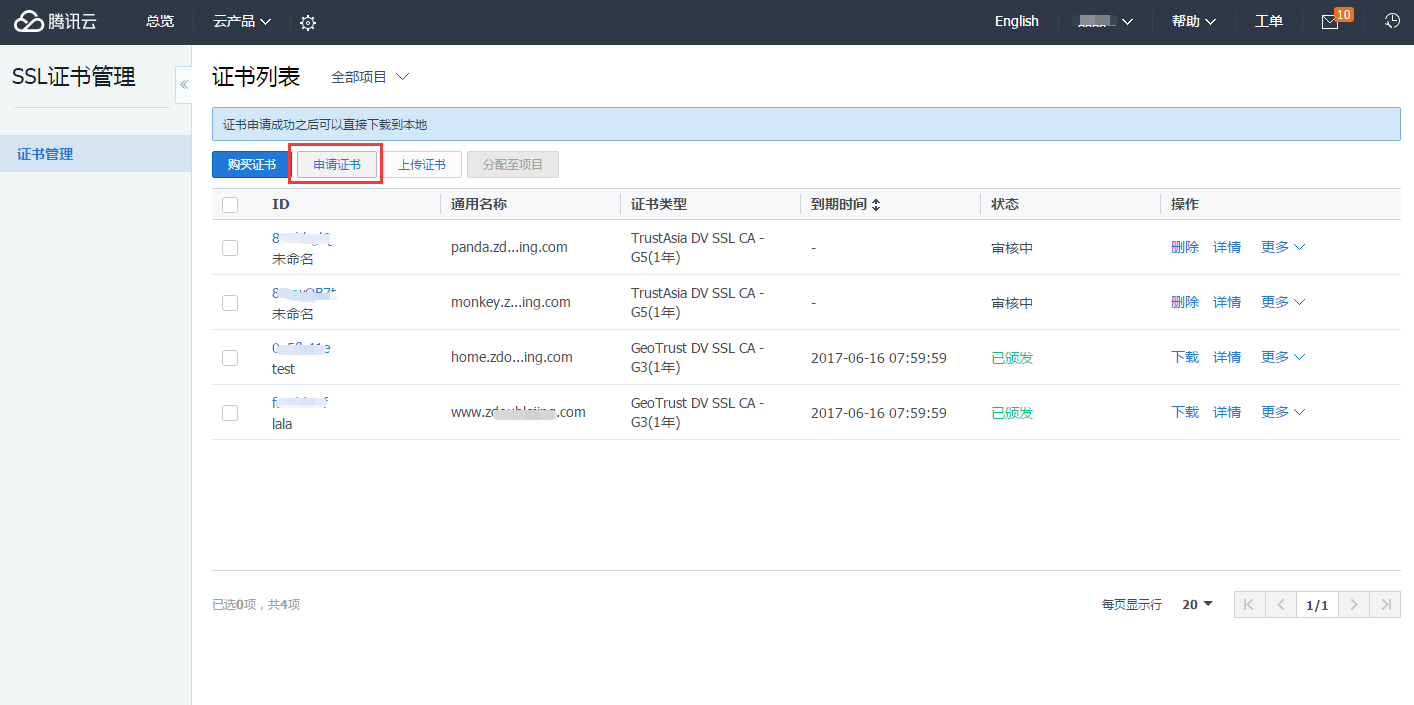
2.1 获取SSL证书
申请免费证书

2.1.2 填写申请域名,例如:UNIONLINE.TOP
2.2 完成域名身份验证
提交申请后,需要完成域名身份验证方可获取证书,具体可参考域名验证指引
2.2.1 手动 DNS 验证
-
登录 SSL 证书管理控制台。
-
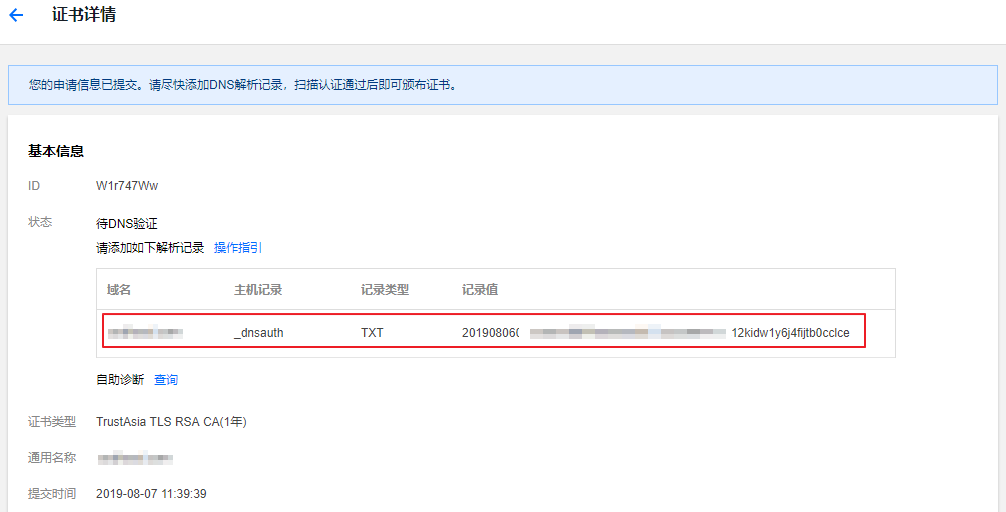
在 “证书列表” 页面,选择待查看证书详情的域名型证书 ID,进入 “证书详情” 页面。如下图所示:
-
添加解析记录。
-
登录 云解析控制台 ,查看已申请证书的域名,并单击操作栏的【解析】,进入【记录管理】页面。
- 单击【添加记录】,添加一条记录类型为 TXT 的 DNS 记录。具体操作请查看 TXT 记录。
- 若您的域名对应的域名解析商不在腾讯云,请您先将 证书详情 内容保存,并到域名对应的域名解析商处添加解析记录。
-
添加成功后,证书对应域名添加 TXT 记录值的系统会定时检查,若能检测到并且与指定的值匹配,即可完成域名所有权验证。如下图所示:

2.2.2 其它验证
详情见参考2
2.3 配置SSL文件
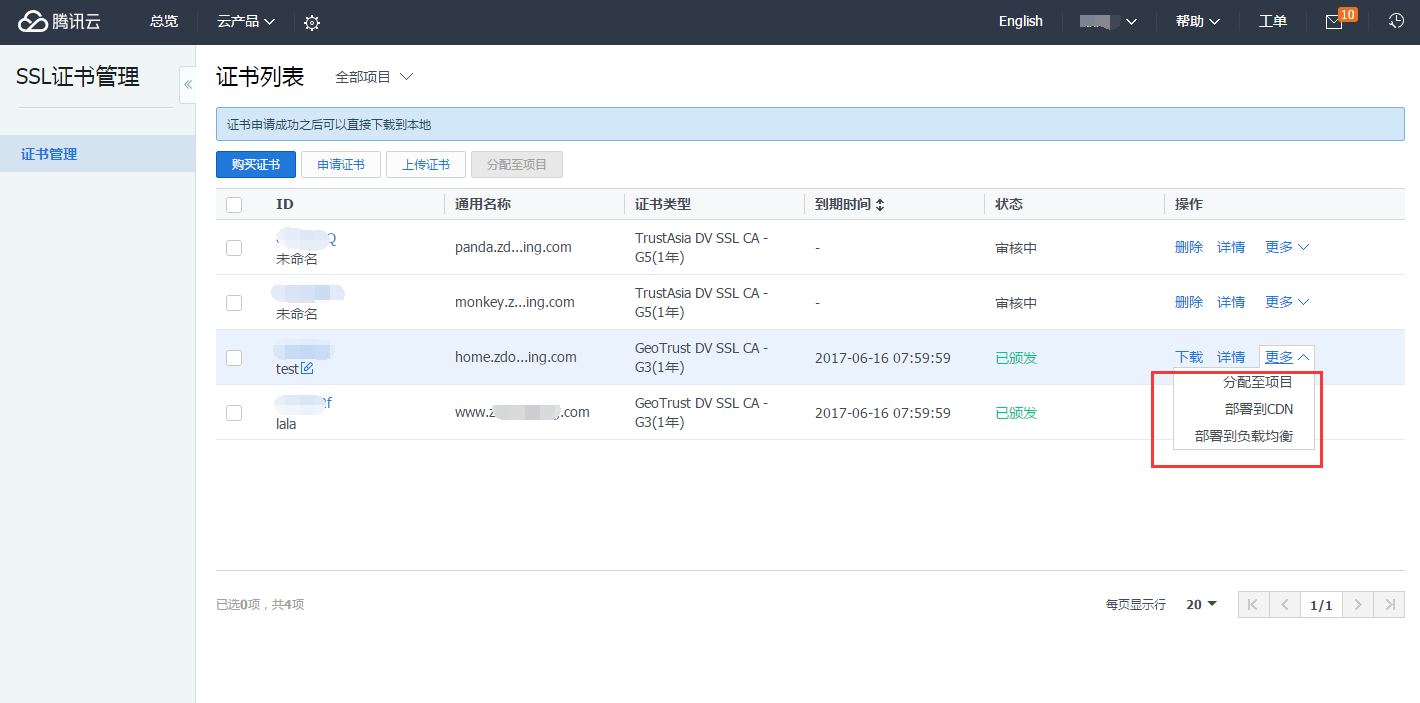
2.3.1 下载和部署
完成域名审核后,颁发的证书可下载到本地,或者部署到腾讯云相关云服务。
2.3.2 获取证书
下载获得证书后,您将拥有以下PEM编码文件:
Nginx文件夹内获得SSL证书文件1_www.domain.com_bundle.crt和私钥文件 2_www.domain.com.key,
1_www.domain.com_bundle.crt 文件包括两段证书代码 “-----BEGIN CERTIFICATE-----”和“-----END CERTIFICATE-----” 2_www.domain.com.key文件包括一段私钥代码“-----BEGIN RSA PRIVATE KEY-----”和“-----END RSA PRIVATE KEY-----”。
稍后,您将配置Web服务器以1_www.domain.com_bundle.crt用作证书文件和2_www.domain.com.key证书密钥文件。
2.3.3 在WEB服务器上配置TLS / SSL
现在您已拥有SSL证书,您需要配置Nginx Web服务器以使用它。
2.3.3.1 下载证书到服务器
采用现在下载到电脑本地,然后使用winscp连接到服务器拷贝过去
2.3.3.2 编写config文件
通过命令whereis ngnix可以查看Nginx的安装位置
1
2
|
[root@VM_0_12_centos fanbi]# whereis nginx
nginx: /usr/sbin/nginx /usr/lib64/nginx /etc/nginx /usr/share/nginx /usr/share/man/man8/nginx.8.gz
|
服务器nginx在/etc/nginx,bin文件在/usr/sbin/,进入nginx文件夹
1
2
3
4
5
6
7
8
9
10
11
12
13
|
[fanbi@VM_0_12_centos html]$ cd /etc/nginx/
[fanbi@VM_0_12_centos nginx]$ ll
总用量 40
drwxr-xr-x 2 root root 4096 11月 16 14:53 conf.d
-rw-r--r-- 1 root root 1007 10月 22 23:39 fastcgi_params
-rw-r--r-- 1 root root 2837 10月 22 23:39 koi-utf
-rw-r--r-- 1 root root 2223 10月 22 23:39 koi-win
-rw-r--r-- 1 root root 5231 10月 22 23:39 mime.types
lrwxrwxrwx 1 root root   29 11月 16 14:53 modules -> ../../usr/lib64/nginx/modules
-rw-r--r-- 1 root root 1336 11月 16 14:58 nginx.conf
-rw-r--r-- 1 root root  636 10月 22 23:39 scgi_params
-rw-r--r-- 1 root root  664 10月 22 23:39 uwsgi_params
-rw-r--r-- 1 root root 3610 10月 22 23:39 win-utf
|
把拷贝到服务器证书解压出来,拷贝到/etc/nginx/根目录下
1
2
3
4
5
6
7
8
9
10
11
12
13
14
15
|
[root@VM_0_12_centos conf.d]# unzip www.unionline.top.zip
Archive:  www.unionline.top.zip
  inflating: www.unionline.top.csr
   creating: Nginx/
  inflating: Nginx/1_www.unionline.top_bundle.crt
  inflating: Nginx/2_www.unionline.top.key
   creating: Apache/
  inflating: Apache/1_root_bundle.crt
  inflating: Apache/2_www.unionline.top.crt
  inflating: Apache/3_www.unionline.top.key
   creating: IIS/
  inflating: IIS/www.unionline.top.pfx
   creating: Tomcat/
  inflating: Tomcat/www.unionline.top.jks
[root@VM_0_12_centos conf.d]# mv  1_www.unionline.top_bundle.crt  2_www.unionline.top.key /etc/nginx/
|
进入conf.d文件夹,把default.conf 拷贝一份
1
2
3
|
cp default.conf default.conf.bk
mv default.conf unionline.top.conf
vi unionline.top.conf
|
添加以下内容
1
2
3
4
5
6
7
8
9
10
11
12
13
14
15
16
17
18
19
20
21
22
23
24
25
26
27
28
29
30
31
32
|
server {
	listen 80;
        server_name  www.unionline.top;
        location /html/ {
            proxy_pass http://182.254.210.154:9100/;
        }
		location /mobile/ {
            proxy_pass http://182.254.210.154:9101/;
        }

    }
    # HTTPS server
    server {
        listen       443 ssl;
        server_name  www.unionline.top;

        ssl_certificate      1_www.unionline.top_bundle.crt;
        ssl_certificate_key  2_www.unionline.top.key;

        ssl_session_cache    shared:SSL:1m;
        ssl_session_timeout  5m;

        ssl_ciphers  HIGH:!aNULL:!MD5;
        ssl_prefer_server_ciphers  on;

        location /html/ {
            proxy_pass https://182.254.210.154:9100/;
        }
        location /mobile/ {
            proxy_pass https://182.254.210.154:9101/;
        }
     }
|
重启nginx,使之生效
1
2
3
4
5
|
[root@VM_0_12_centos conf.d]# /usr/sbin/nginx -s stop
#已经停止,不能reload,直接启动就可以生效
[root@VM_0_12_centos conf.d]# /usr/sbin/nginx -s reload
nginx: [error] open() "/var/run/nginx.pid" failed (2: No such file or directory)
[root@VM_0_12_centos conf.d]# /usr/sbin/nginx
|
完成
3 参考
1.使用腾讯云SSL证书保护你的Nginx服务器
2.域名验证指引
3.Nginx在Centos中的使用