环境:
centos7
es 5.4.3
es安装
一.下载
wget https://artifacts.elastic.co/downloads/elasticsearch/elasticsearch-5.4.3.zip
解压。
二.配置
cd config
vi elasticsearch.yml
修改配置项
cluster.name 可不配置
node.name 如果是单机版可不配置,如果是集群,则不同节点node.name应该不同
path.data 数据存储目录
path.logs 日志目录
network.host 节点IP
http.port 节点端口
discovery.zen.ping.unicast.hosts: ["192.168.145.129"] 如果是集群,将当前节点以外的所有节点的IP加入此配置项
discovery.zen.minimum_master_nodes 配置当前集群中最少的主节点数,如果是单机版,此节为1,不然启动报错,如果是集群,最好配置多个,具体个数酌情考虑
三.启动
由于ElasticSearch可以接收用户输入的脚本并且执行,为了系统安全考虑,不能以root用户启动。
所以先建立一个用户。
adduser es
passwd es
同时将elasticsearch-5.4.3文件夹的权限赋给es用户
chown -R username 目录
切换到es用户
su es
启动命令
./bin/elasticsearch
这个时候往往会报错
ERROR: [2] bootstrap checks failed
[1]: max file descriptors [4096] for elasticsearch process is too low, increase to at least [65536]
[2]: max virtual memory areas vm.max_map_count [65530] is too low, increase to at least [262144]
解决方法
vim /etc/security/limits.conf
...
elasticsearch/当前用户名 hard nofile 65536 # 针对 max file descriptors
elasticsearch/当前用户名 soft nproc 2048 # 针对 max number of threadsvim /etc/sysctl.conf
...
vm.max_map_count=262144 # 针对 max virtual memory areas
重启服务器。再次执行./elasticsearch,访问http://192.168.145.133:9200/看到以下内容启动成功。

下面配置各种插件。
head插件
一.安装node.js
因为elasticsearch的head插件是个js项目,所以需要安装node.js。
选择一个node.js版本
# 4.x版本
curl --silent --location https://rpm.nodesource.com/setup_4.x | bash -
# 5.x版本
curl --silent --location https://rpm.nodesource.com/setup_5.x | bash -
然后执行
yum install -y nodejs
二.安装git
yum install git
三.下载
git clone git://github.com/mobz/elasticsearch-head.gitcd elasticsearch-headnpm installnpm run start
访问http://192.168.145.133:9100/
看到以下页面
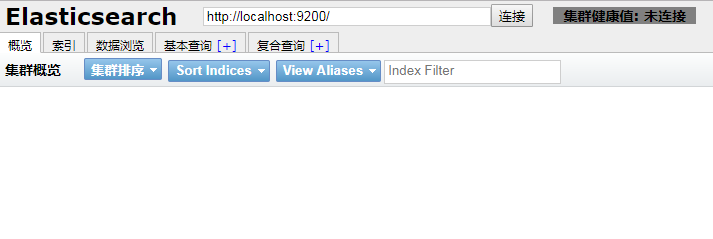
head连接成功,但显示连接es未成功。
vi _site/app.js
修改 http://localhost:9200中的连接地址与端口
然后修改elasticsearch.yml配置文件,加入
http.cors.enabled: true
http.cors.allow-origin: "*"
中文分词插件IK
一.下载
wget https://github.com/medcl/elasticsearch-analysis-ik/releases/download/v5.4.3/elasticsearch-analysis-ik-5.4.3.zip
解压到elasticsearch集群的插件目录下
unzip elasticsearch-analysis-ik-5.4.3.zip -d elasticsearch-5.4.3/plugins/ik/
重启elasticsearch。
二.验证IK
首先创建一个索引

在这个索引上对“我爱你中国”进行分词
http://192.168.145.133:9200/test/_analyze?analyzer=ik_smart&text=%E6%88%91%E7%88%B1%E4%BD%A0%E4%B8%AD%E5%9B%BD
分词成功
{"tokens":[{"token":"我爱你","start_offset":0,"end_offset":3,"type":"CN_WORD","position":0},{"token":"中国","start_offset":3,"end_offset":5,"type":"CN_WORD","position":1}]}
sql插件
head插件当然非常强大,但是查询太麻烦。使用sql插件可以直接使用sql语句查询,学习成本大大降低。
一.下载
https://github.com/NLPchina/elasticsearch-sql/releases/download/5.4.1.0/es-sql-site-standalone.zip
解压
二.执行
npm install express --save
三.配置
在es集群的elasticsearch.yml的文件里加入
http.cors.allow-headers: "X-Requested-With, Content-Type, Content-Length,Authorization"
四.下载包
将elasticsearch-sql所需要的jar包下载到elasticsearch的插件目录下
/elasticsearch-plugin install https://github.com/NLPchina/elasticsearch-sql/releases/download/5.4.3.0/elasticsearch-sql-5.4.3.0.zip
五.启动
node node-server.js
访问http://192.168.145.133:8080/,在界面中填入连接的elasticsearch地址,就可以使用sql查询了。
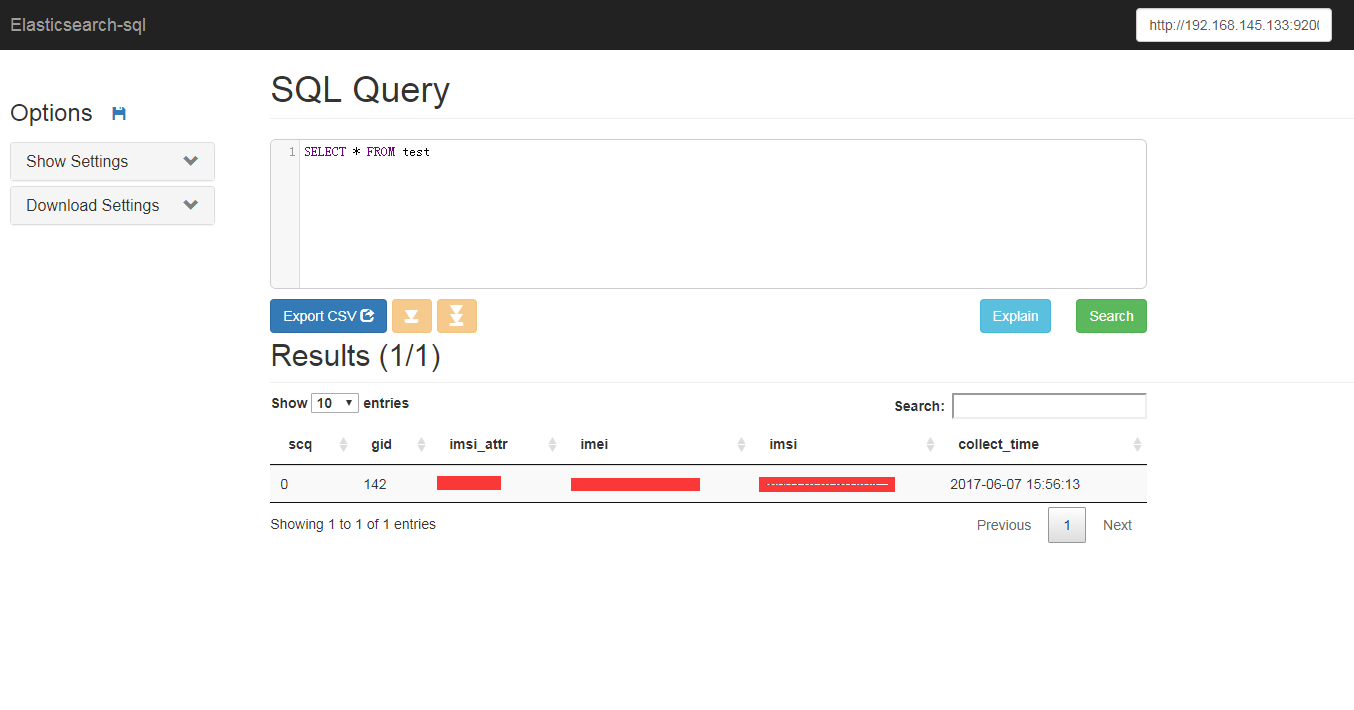
它将查询结果和聚合结果剥离了,比如,只返回聚合结果,没有查询结果。并且having也没有实现。所以,有一定的局限性。
