1.在前面帖子和工程的基础上,这里使用springboot整合dubbo,首先创建springboot项目:
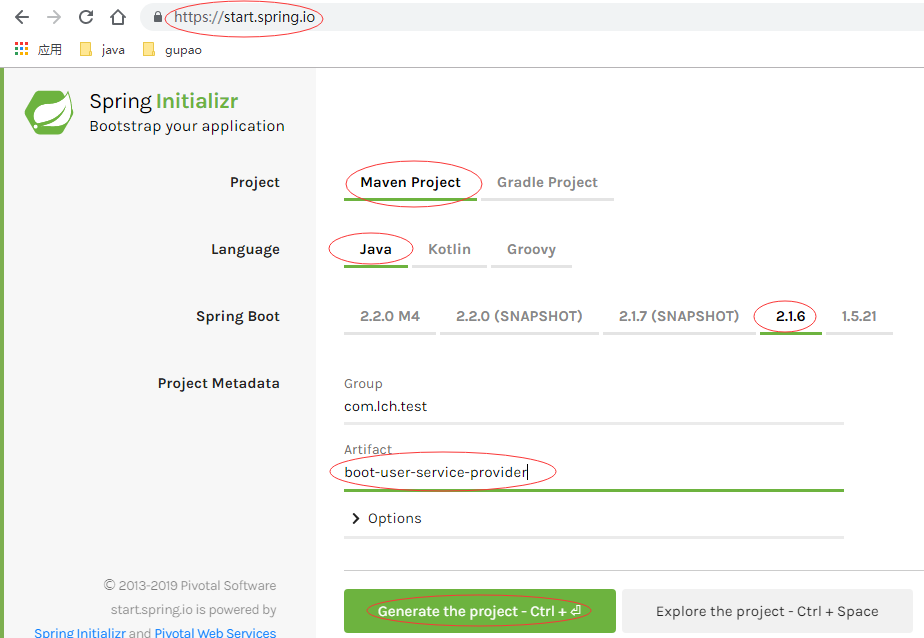
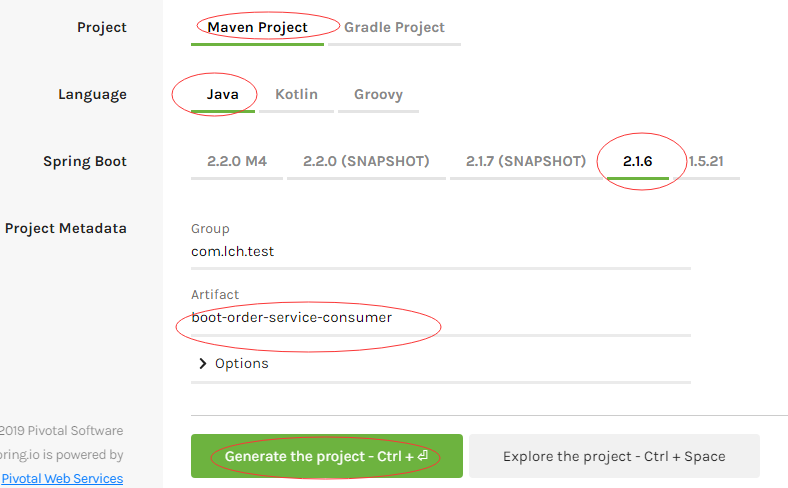
https://start.spring.io/ 进入spring Initializr ,创建服务提供者以及消费者的 springboot项目:
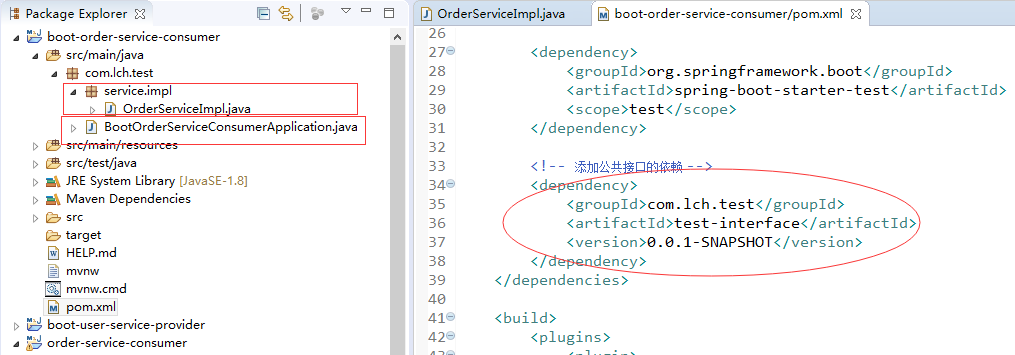
下载后保存到本机,然后解压,导入到eclipse里,并修改包名,把原来的接口的实现类复制过来,然后在pom文件中添加公共接口的依赖:

服务消费者工程同理:将OrderServiceImpl.java拷贝到springboot项目中
2.修改orderService接口(test-interface工程中)及实现类(boot-order-service-consumer工程中)的返回值为List<UserAddress>
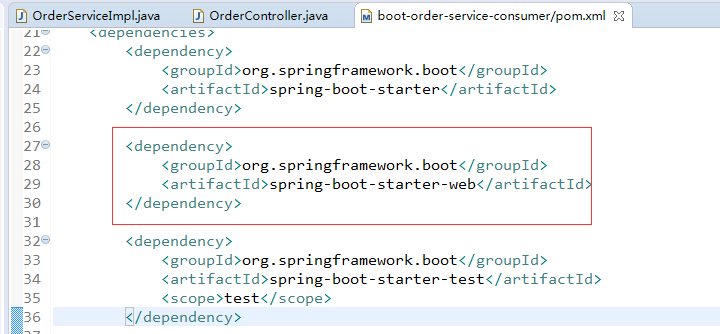
在boot-order-service-consumer工程中创建一个controller,并在pom文件引入sprongboot web模块的依赖:
编写测试用的controller:
 1 package com.lch.test.controller;
 2
 3 import org.springframework.beans.factory.annotation.Autowired;
 4 import org.springframework.stereotype.Controller;
 5 import org.springframework.web.bind.annotation.RequestMapping;
 6 import org.springframework.web.bind.annotation.RequestParam;
 7 import org.springframework.web.bind.annotation.ResponseBody;
 8
 9 import com.lch.test.service.OrderService;
10
11 @Controller
12 public class OrderController {
13
14     @Autowired
15     private OrderService orderService;
16
17     @RequestMapping("/initorder")
18     @ResponseBody
19     public Object initOrder(@RequestParam("uid") String userId) {
20         System.out.println("用户id=" + userId);
21         return orderService.initOrder(userId);
22
23     }
24
25 }
然后引入dubbo依赖:dubbo-spring-boot-starter,这时boot-user-service-provider工程的pom文件内容如下:蓝色部分是额外引入的依赖
 1 <?xml version="1.0" encoding="UTF-8"?>
 2 <project xmlns="http://maven.apache.org/POM/4.0.0" xmlns:xsi="http://www.w3.org/2001/XMLSchema-instance"
 3     xsi:schemaLocation="http://maven.apache.org/POM/4.0.0 http://maven.apache.org/xsd/maven-4.0.0.xsd">
 4     <modelVersion>4.0.0</modelVersion>
 5     <parent>
 6         <groupId>org.springframework.boot</groupId>
 7         <artifactId>spring-boot-starter-parent</artifactId>
 8         <version>2.1.6.RELEASE</version>
 9         <relativePath/> <!-- lookup parent from repository -->
10     </parent>
11     <groupId>com.lch.test</groupId>
12     <artifactId>boot-user-service-provider</artifactId>
13     <version>0.0.1-SNAPSHOT</version>
14     <name>boot-user-service-provider</name>
15     <description>Demo project for Spring Boot</description>
16
17     <properties>
18         <java.version>1.8</java.version>
19     </properties>
20
21     <dependencies>
22         <dependency>
23             <groupId>org.springframework.boot</groupId>
24             <artifactId>spring-boot-starter</artifactId>
25         </dependency>
26
27         <!-- springboot2.0版本以上,使用dubbo-spring-boot-starter 2.0.0及以上版本
28         默认会把curator-client也导入到工程中
29         参考https://github.com/apache/dubbo-spring-boot-project -->
30         <dependency>
31             <groupId>com.alibaba.boot</groupId>
32             <artifactId>dubbo-spring-boot-starter</artifactId>
33             <version>0.2.0</version>
34         </dependency>
35
36         <dependency>
37             <groupId>org.springframework.boot</groupId>
38             <artifactId>spring-boot-starter-test</artifactId>
39             <scope>test</scope>
40         </dependency>
41         <!-- 添加公共接口的依赖 -->
42         <dependency>
43             <groupId>com.lch.test</groupId>
44             <artifactId>test-interface</artifactId>
45             <version>0.0.1-SNAPSHOT</version>
46         </dependency>
47     </dependencies>
48
49     <build>
50         <plugins>
51             <plugin>
52                 <groupId>org.springframework.boot</groupId>
53                 <artifactId>spring-boot-maven-plugin</artifactId>
54             </plugin>
55         </plugins>
56     </build>
57
58 </project>
添加dubbo的配置文件:
1 #应用的名字
2 dubbo.application.name=user-service-provider
3 #dubbo注册中心的地址
4 dubbo.registry.address=127.0.0.1:2181
5 #dubbo注册中心使用的协议
6 dubbo.registry.protocol=zookeeper
7 # dubbo服务提供者与消费者通信使用的协议
8 dubbo.protocol.name=dubbo
9 # dubbo服务提供者与消费者通信的端口
10 dubbo.protocol.port=20880
11
12 # dubbo监控中心使用的协议:从注册中心自动发现
13 dubbo.monitor.protocol=registry
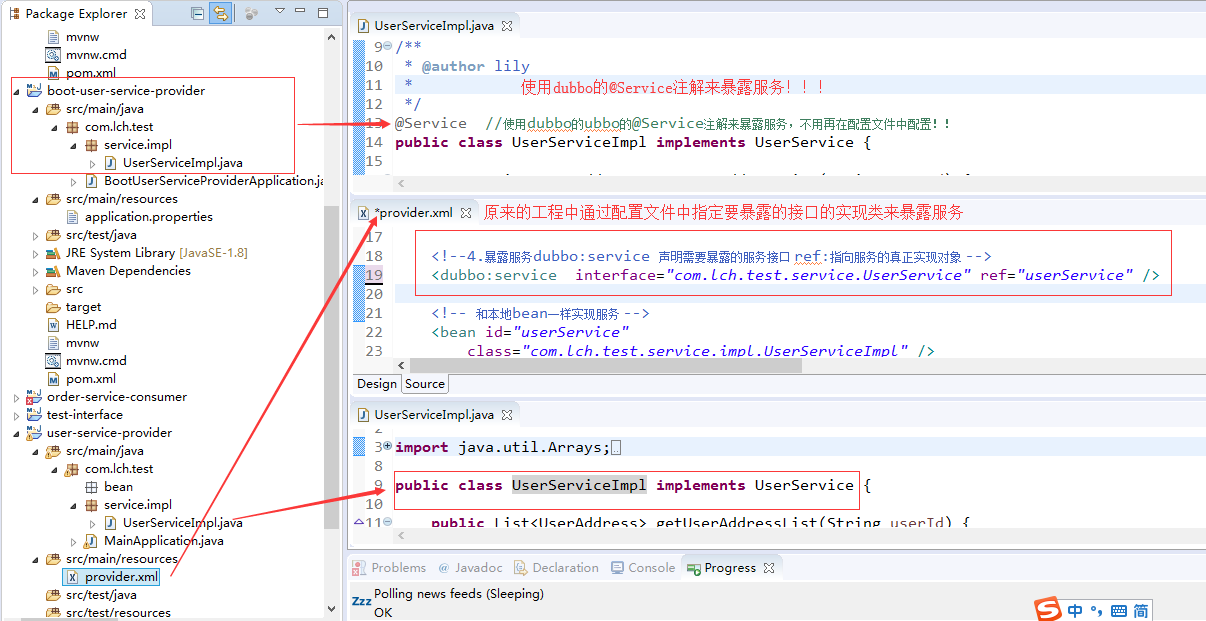
14 # 要暴露的服务 在需要暴露的服务(即接口的实现类)上面,加上dubbo的@Service注解即可!!!从而不用指定每个类来暴露服务
使用dubbo的@Service暴露服务:
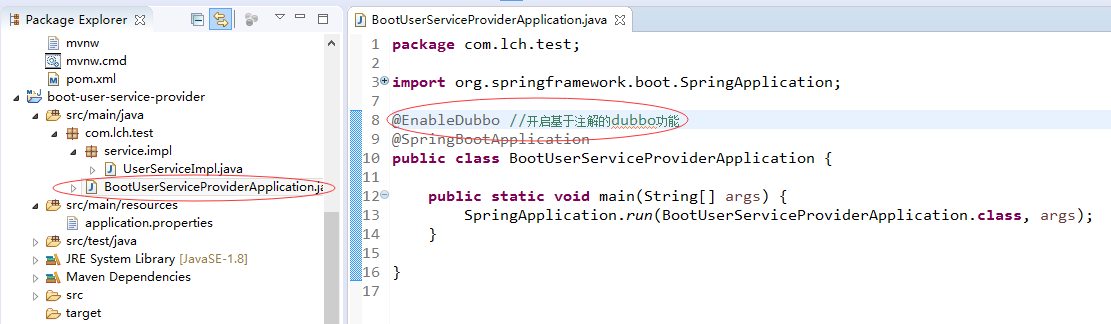
在启动函数中开启基于注解的dubbo功能
接下来改造boot-order-service-consumer工程:
(1)配置文件修改:
 1 #应用的名字
 2 dubbo.application.name=order-service-consumer
 3 #dubbo注册中心的地址
 4 dubbo.registry.address=zookeeper://127.0.0.1:2181
 5 #dubbo注册中心使用的协议
 6 #dubbo.registry.protocol=zookeeper
 7 # dubbo服务提供者与消费者通信使用的协议
 8 dubbo.protocol.name=dubbo
 9 # dubbo服务提供者与消费者通信的端口
10 dubbo.protocol.port=20880
11
12 # dubbo监控中心使用的协议:从注册中心自动发现
13 dubbo.monitor.protocol=registry
14 #使用dubbo的@Reference来调用远程服务
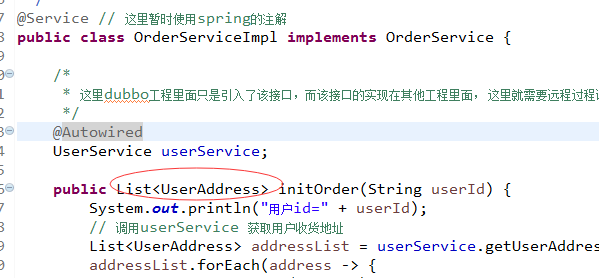
(2)使用dubbo的@Reference注解来调用远程服务:OrderServiceImpl类中@autowired注解替换成dubbo的@Reference注解即可!
 1 package com.lch.test.service.impl;
 2
 3 import java.util.List;
 4
 5 import org.springframework.beans.factory.annotation.Autowired;
 6 import org.springframework.stereotype.Service;
 7
 8 import com.alibaba.dubbo.config.annotation.Reference;
 9 import com.lch.test.bean.UserAddress;
10 import com.lch.test.service.OrderService;
11 import com.lch.test.service.UserService;
12
13 /**
14  * 1.将服务提供者注册到注册中心 2.让服务消费者去注册中心订阅服务提供者的服务地址
15  *
16  * @author
17  */
18 @Service // 这里暂时使用spring的注解
19 public class OrderServiceImpl implements OrderService {
20
21     /*
22      * 这里使用dubbo的@Reference注解来远程引用UserService的服务
23      */
24 //    @Autowired
25     @Reference
26     UserService userService;
27
28     public List<UserAddress> initOrder(String userId) {
29         System.out.println("用户id=" + userId);
30         // 调用userService 获取用户收货地址
31         List<UserAddress> addressList = userService.getUserAddressList(userId);
32         addressList.forEach(address -> {
33             System.out.println(address);
34         });
35         return addressList;
36     }
37
38 }
(3)主程序中启用dubbo注解
 1 package com.lch.test;
 2
 3 import org.springframework.boot.SpringApplication;
 4 import org.springframework.boot.autoconfigure.SpringBootApplication;
 5
 6 import com.alibaba.dubbo.config.spring.context.annotation.EnableDubbo;
 7
 8 @EnableDubbo
 9 @SpringBootApplication
10 public class BootOrderServiceConsumerApplication {
11
12     public static void main(String[] args) {
13         SpringApplication.run(BootOrderServiceConsumerApplication.class, args);
14     }
15
16 }
最后,开始测试:
(1)启动zookeeper
(2)启动boot-order-service-consumer ,boot-user-service-provider 的main程序
页面访问http://localhost:8080/initorder?uid=1 ,这时服务的消费者orderService就通过dubbo提供的RPC服务远程调用另外一个进程中的userService服务,返回页面一个地址列表

代码git地址:https://github.com/liuch0228/dubbo-learn.git