1. 通知
1.1 用法一览
实现通知步骤
一般实现通知需要如下步骤:
-
1.获取 NotificationManager 实例管理通知;
-
2.实例 Notification 对象;
-
低于Android 8.0 ((已经废弃))
Notification notification = new NotificationCompat.Builder(MainActivity.this) -
高于Android 8.0
Notification notification = new NotificationCompat.Builder(MainActivity.this,"通知渠道Id")
-
-
3.管理事件 Intent(可带要传的参数),PendingItent;
-
4.发送通知。
-
5.关闭通知:自动或手动
注:如不需在通知出现时,点击时有事件执行,步骤3可以忽略。
2. 低于 Android 8.0 的通知
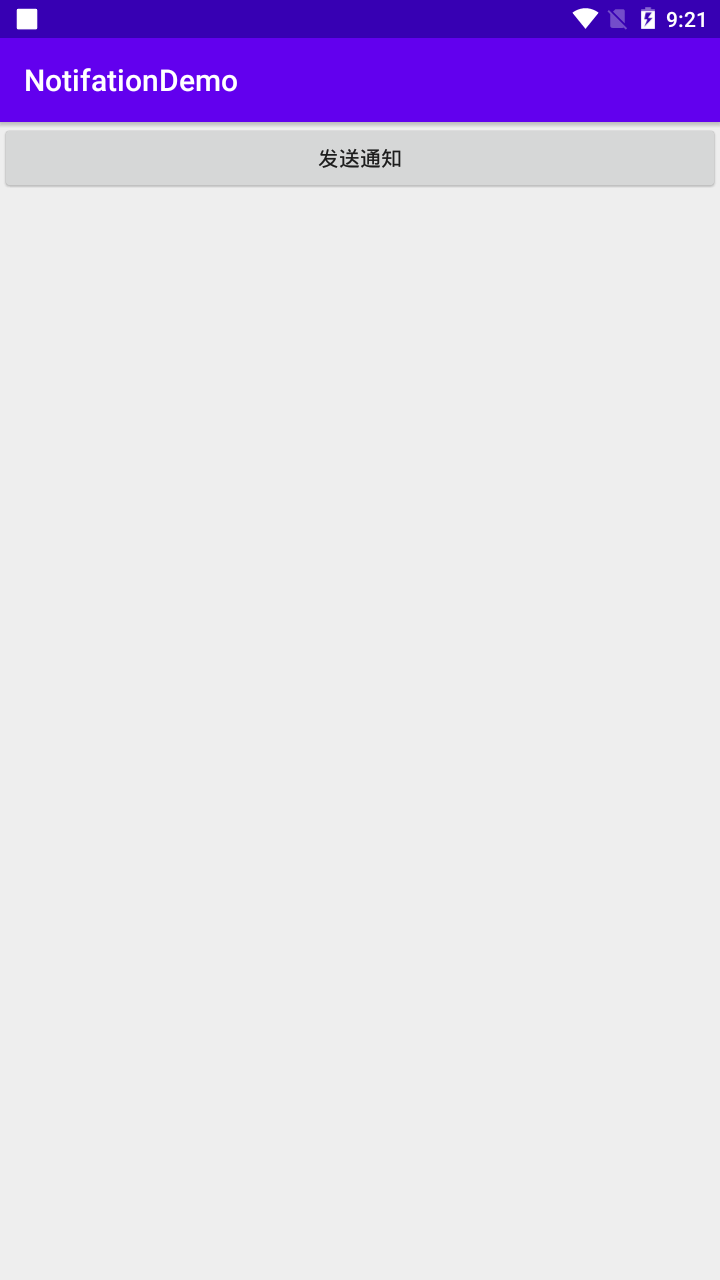
新建一个项目【NotifationDemo】:
- 添加依赖包
,在文件app->build.gradle中添加:
dependencies {
    ......
    implementation 'com.android.support:support-v4:28.0.0'
}
activity_main.xml
<?xml version="1.0" encoding="utf-8"?>
<LinearLayout xmlns:android="http://schemas.android.com/apk/res/android"
    android:layout_width="match_parent"
    android:layout_height="match_parent">

    <Button android:id="@+id/btn_send_notifation"
        android:layout_width="match_parent"
        android:layout_height="wrap_content"
        android:text="发送通知"/>

</LinearLayout>
MainActivity.java
-
获取通知管理器
NotificationManager notificationManager = (NotificationManager) getSystemService(NOTIFICATION_SERVICE); -
创建通知对象
NotificationCompat.Builder builder = new NotificationCompat.Builder(MainActivity.this); Notification notification = builder .setContentTitle("通知标题") .setContentText("通知内容") .setSmallIcon(R.mipmap.ic_launcher) //小图标 .setLargeIcon(BitmapFactory.decodeResource(getResources(),R.mipmap.ic_launcher_round)) //大图标 .build(); -
发送通知
//发送通知:
//第一个参数:是通知的Id,可用此id进行手动关闭
notificationManager.notify(AppConstant.NotificationId_Goto_NotifationActivity, notification);
public class MainActivity extends AppCompatActivity {

    @Override
    protected void onCreate(Bundle savedInstanceState) {
        super.onCreate(savedInstanceState);
        setContentView(R.layout.activity_main);

        Button btn_send_notifation = findViewById(R.id.btn_send_notifation);
        btn_send_notifation.setOnClickListener(new View.OnClickListener() {
            @Override
            public void onClick(View v) {

                NotificationManager notificationManager = (NotificationManager) getSystemService(NOTIFICATION_SERVICE);
                NotificationCompat.Builder builder =  new NotificationCompat.Builder(MainActivity.this);
                Notification notification = builder
                        .setContentTitle("通知标题")
                        .setContentText("通知内容")
                        .setSmallIcon(R.mipmap.ic_launcher) //小图标
                        .setLargeIcon(BitmapFactory.decodeResource(getResources(),R.mipmap.ic_launcher_round)) //大图标
                        .setAutoCancel(true) //设置点击通知后自动删除通知
                        .build();

                //发送通知:
                //第一个参数:是通知的Id,可用此id进行手动关闭
                notificationManager.notify(AppConstant.NotificationId_Goto_NotifationActivity, notification);

            }
        });
    }
}
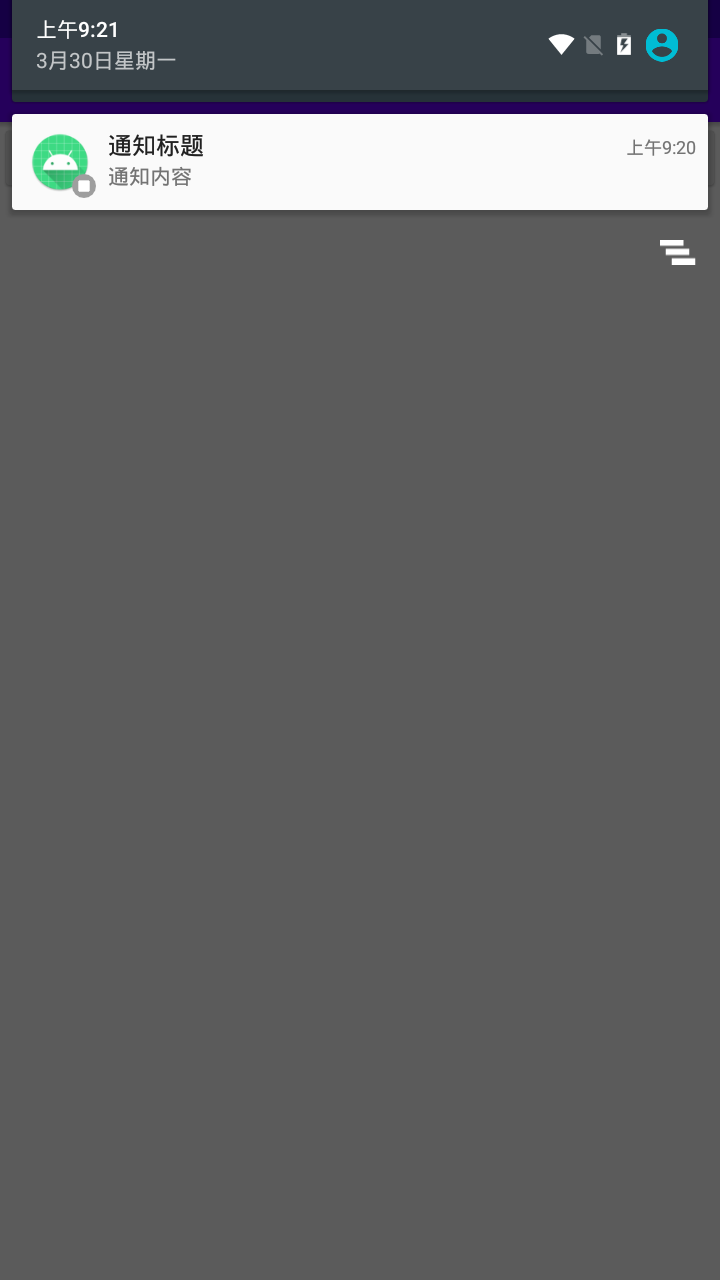
效果:点击发送按钮
- 状态栏:内容小图标
小图标是空白,原因是没有做 >=Android8.0(sdk>+26) 图标适配,参见: 一起来学习Android 8.0系统的通知栏适配吧
- 通知内容
3.通知渠道(>=Android8.0(sdk>+26)的通知)
上面的代码适用于Android的低版本,当版本高于8.0(sdk>+26)以后,就会无法弹出通知,因为在8.0中所有通知的实现都需要提供通知渠道
,否则,所有通知在8.0系统上面都不能正常显示,原本的方法被遗弃:
NotificationCompat.Builder builder = new NotificationCompat.Builder(MainActivity.this);
从Android 8.0系统开始,Google引入了通知渠道这个概念。
什么是通知渠道呢?顾名思义,就是每条通知都要属于一个对应的渠道。每个App都可以自由地创建当前App拥有哪些通知渠道,但是这些通知渠道的控制权都是掌握在用户手上的。用户可以自由地选择这些通知渠道的重要程度,是否响铃、是否振动、或者是否要关闭这个渠道的通知。 详情参见
一起来学习Android 8.0系统的通知栏适配吧
其它一些安卓的通知适配资料 :
https://blog.csdn.net/qq_37206616/article/details/87991525
示例:
activity_main.xml
<?xml version="1.0" encoding="utf-8"?>
<LinearLayout xmlns:android="http://schemas.android.com/apk/res/android"
    android:layout_width="match_parent"
    android:layout_height="match_parent"
    android:orientation="vertical">

    <Button android:id="@+id/btn_send_notification"
        android:layout_width="match_parent"
        android:layout_height="wrap_content"
        android:text="发送通知(小于Android 8.0)"/>

    <Button android:id="@+id/btn_send_notification_chat"
        android:layout_width="match_parent"
        android:layout_height="wrap_content"
        android:text="发送渠道通知:聊天类别"/>

    <Button android:id="@+id/btn_send_notification_subcribe"
        android:layout_width="match_parent"
        android:layout_height="wrap_content"
        android:text="发送渠道通知:订阅类别"/>

</LinearLayout>
- 创建
AppConstant类: 通知Id,渠道Id统一放这里
public class AppConstant {
    public static final int NotificationId_Goto_NotifationActivity = 1;
    public static final int NotificationId_Chat = 2;
    public static final int NotificationId_Subcribe = 3;

    public static final String ChannelId_Chat = "ChannelId_Chat";
    public static final String ChannelId_Subcribe = "ChannelId_Subcribe";
}
MainActivity.java
public class MainActivity extends AppCompatActivity {

    @Override
    protected void onCreate(Bundle savedInstanceState) {
        super.onCreate(savedInstanceState);
        setContentView(R.layout.activity_main);

        initNotificationChannel();

        //发送通知(< Andriod 8.0)
        Button btn_send_notification = findViewById(R.id.btn_send_notification);
        btn_send_notification.setOnClickListener(new View.OnClickListener() {
            @Override
            public void onClick(View v) {

                NotificationManager notificationManager = (NotificationManager) getSystemService(NOTIFICATION_SERVICE);

                NotificationCompat.Builder builder =  new NotificationCompat.Builder(MainActivity.this);
                Notification notification = builder
                        .setContentTitle("通知标题")
                        .setContentText("通知内容")
                        .setSmallIcon(R.mipmap.ic_launcher) //小图标
                        .setLargeIcon(BitmapFactory.decodeResource(getResources(),R.mipmap.ic_launcher_round)) //大图标
                        .build();

                //发送通知:
                //第一个参数:是通知的Id,可用此id进行手动关闭
                notificationManager.notify(AppConstant.NotificationId_Goto_NotifationActivity, notification);

            }
        });

        //发送通知:Chat
        Button btn_send_notification_chat = findViewById(R.id.btn_send_notification_chat);
        btn_send_notification_chat.setOnClickListener(new View.OnClickListener() {
            @Override
            public void onClick(View v) {
                NotificationManager manager = (NotificationManager) getSystemService(NOTIFICATION_SERVICE);
                Notification notification = new NotificationCompat.Builder(MainActivity.this, AppConstant.ChannelId_Chat)
                        .setContentTitle("收到一条聊天消息")
                        .setContentText("今天中午吃什么?")
                        .setWhen(System.currentTimeMillis())
                        .setSmallIcon(R.drawable.notif_ico_round) //小图标
                        .setLargeIcon(BitmapFactory.decodeResource(getResources(),R.drawable.notif_ico)) //大图标
                        .setAutoCancel(true) //设置点击通知后自动删除通知
                        .build();
                manager.notify(AppConstant.NotificationId_Chat, notification);
            }
        });

        //发送通知:Subcribe
        Button btn_send_notification_subcribe = findViewById(R.id.btn_send_notification_subcribe);
        btn_send_notification_subcribe.setOnClickListener(new View.OnClickListener() {
            @Override
            public void onClick(View v) {
                NotificationManager manager = (NotificationManager) getSystemService(NOTIFICATION_SERVICE);
                Notification notification = new NotificationCompat.Builder(MainActivity.this, AppConstant.ChannelId_Subcribe)
                        .setContentTitle("收到一条订阅消息")
                        .setContentText("地铁沿线30万商铺抢购中!")
                        .setWhen(System.currentTimeMillis())
                        .setSmallIcon(R.drawable.notif_ico_round) //小图标
                        .setLargeIcon(BitmapFactory.decodeResource(getResources(),R.drawable.notif_ico)) //大图标
                        .setAutoCancel(true) //设置点击通知后自动删除通知
                        .build();
                manager.notify(AppConstant.NotificationId_Subcribe, notification);
            }
        });
    }

    /**
     * 因为低版本的手机系统并没有通知渠道这个功能,不做系统版本检查的话会在低版本手机上造成崩溃。
     * */
    private void initNotificationChannel() {
        // targetSdkVersion >=26
        if (Build.VERSION.SDK_INT >= Build.VERSION_CODES.O) {

            String channelName = "聊天消息";
            int importance = NotificationManager.IMPORTANCE_HIGH;
            createNotificationChannel(AppConstant.ChannelId_Chat, channelName, importance);

            channelName = "订阅消息";
            importance = NotificationManager.IMPORTANCE_DEFAULT;
            createNotificationChannel(AppConstant.ChannelId_Subcribe, channelName, importance);
        }
    }

    /**
     * 创建 NotificationChannel
     * */
    @TargetApi(Build.VERSION_CODES.O)
    private void createNotificationChannel(String channelId, String channelName, int importance) {

        /*-------------------------------------------------------------------
         创建一个通知渠道至少需要渠道ID、渠道名称以及重要等级这三个参数,
         其中
         渠道ID:  可以随便定义,只要保证全局唯一性就可以。
         渠道名称:是给用户看的,需要能够表达清楚这个渠道的用途。
         重要等级:重要等级的不同则会决定通知的不同行为,当然这里只是初始状态下的重要等级,
                 用户可以随时手动更改某个渠道的重要等级,App是无法干预的
         */
        NotificationChannel channel = new NotificationChannel(channelId, channelName, importance);
        NotificationManager notificationManager = (NotificationManager) getSystemService(NOTIFICATION_SERVICE);
        notificationManager.createNotificationChannel(channel);
    }
}
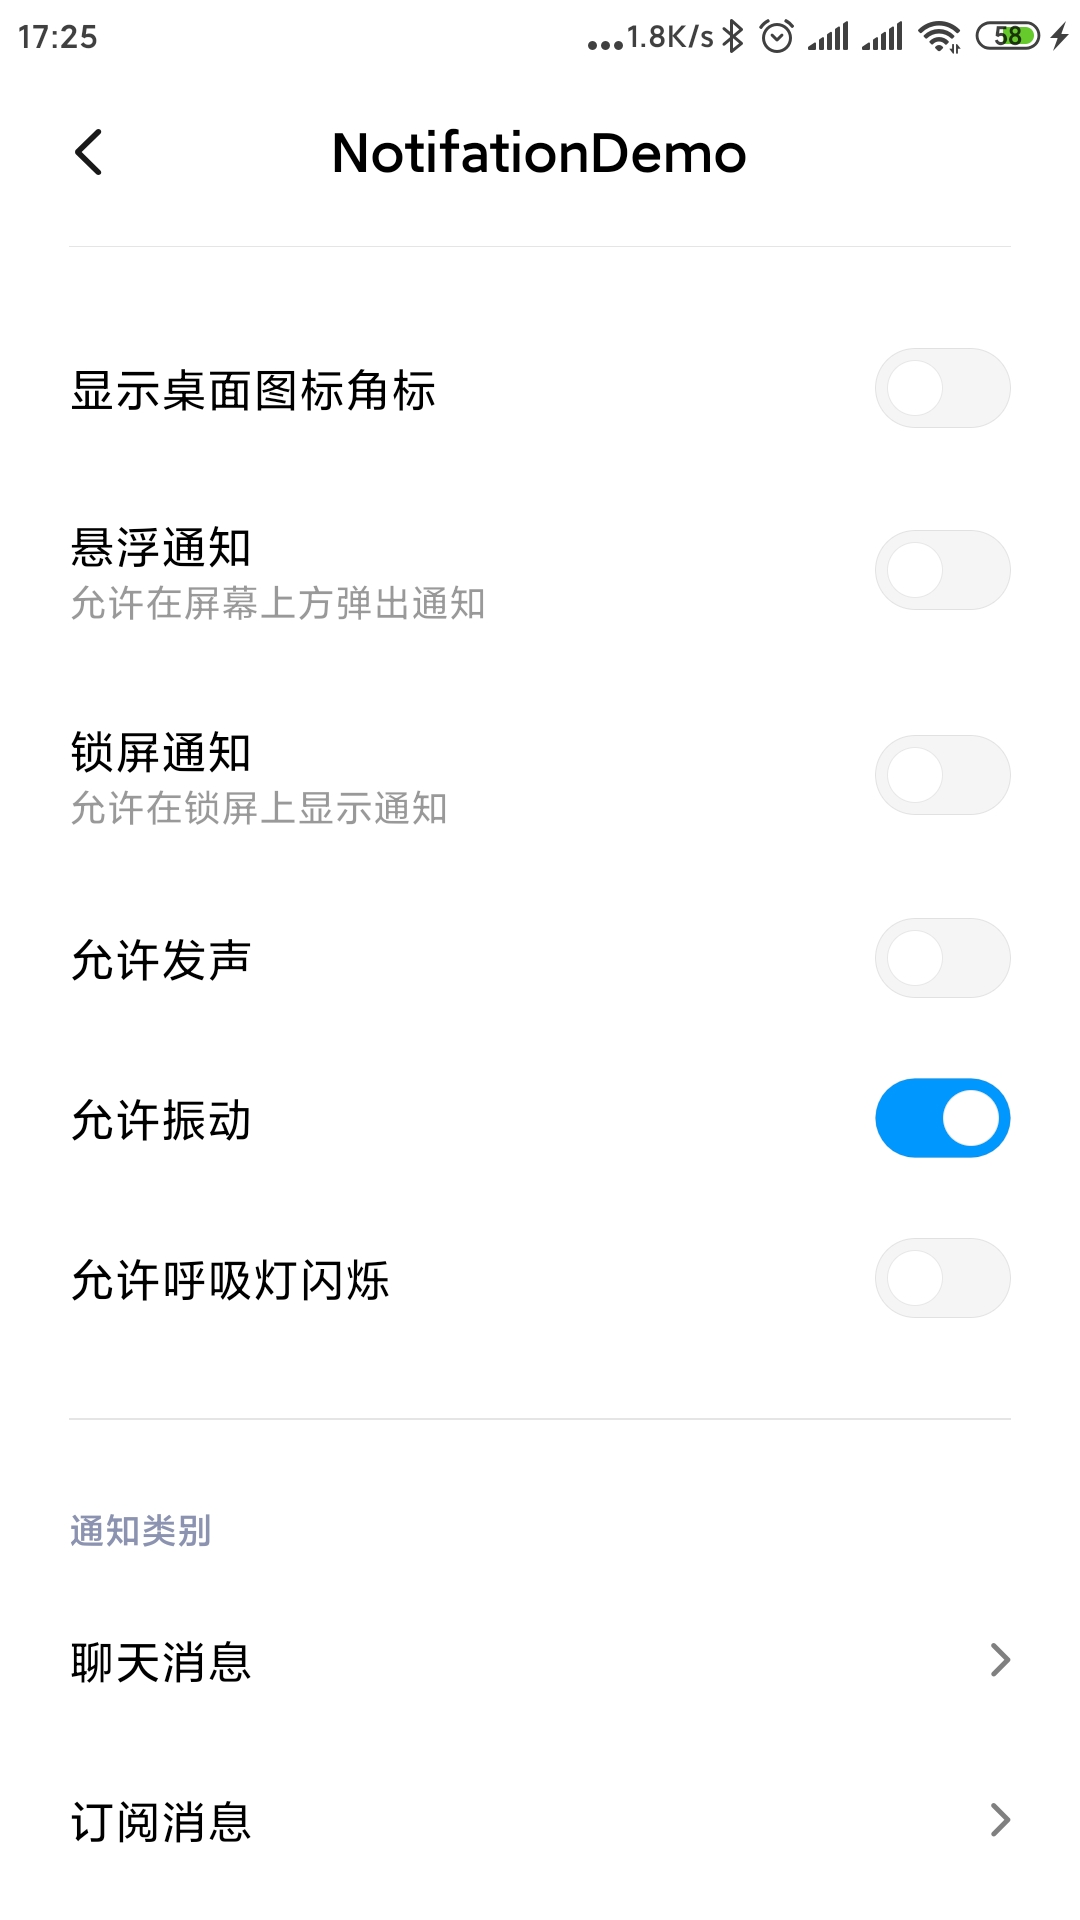
运行效果解析:
-
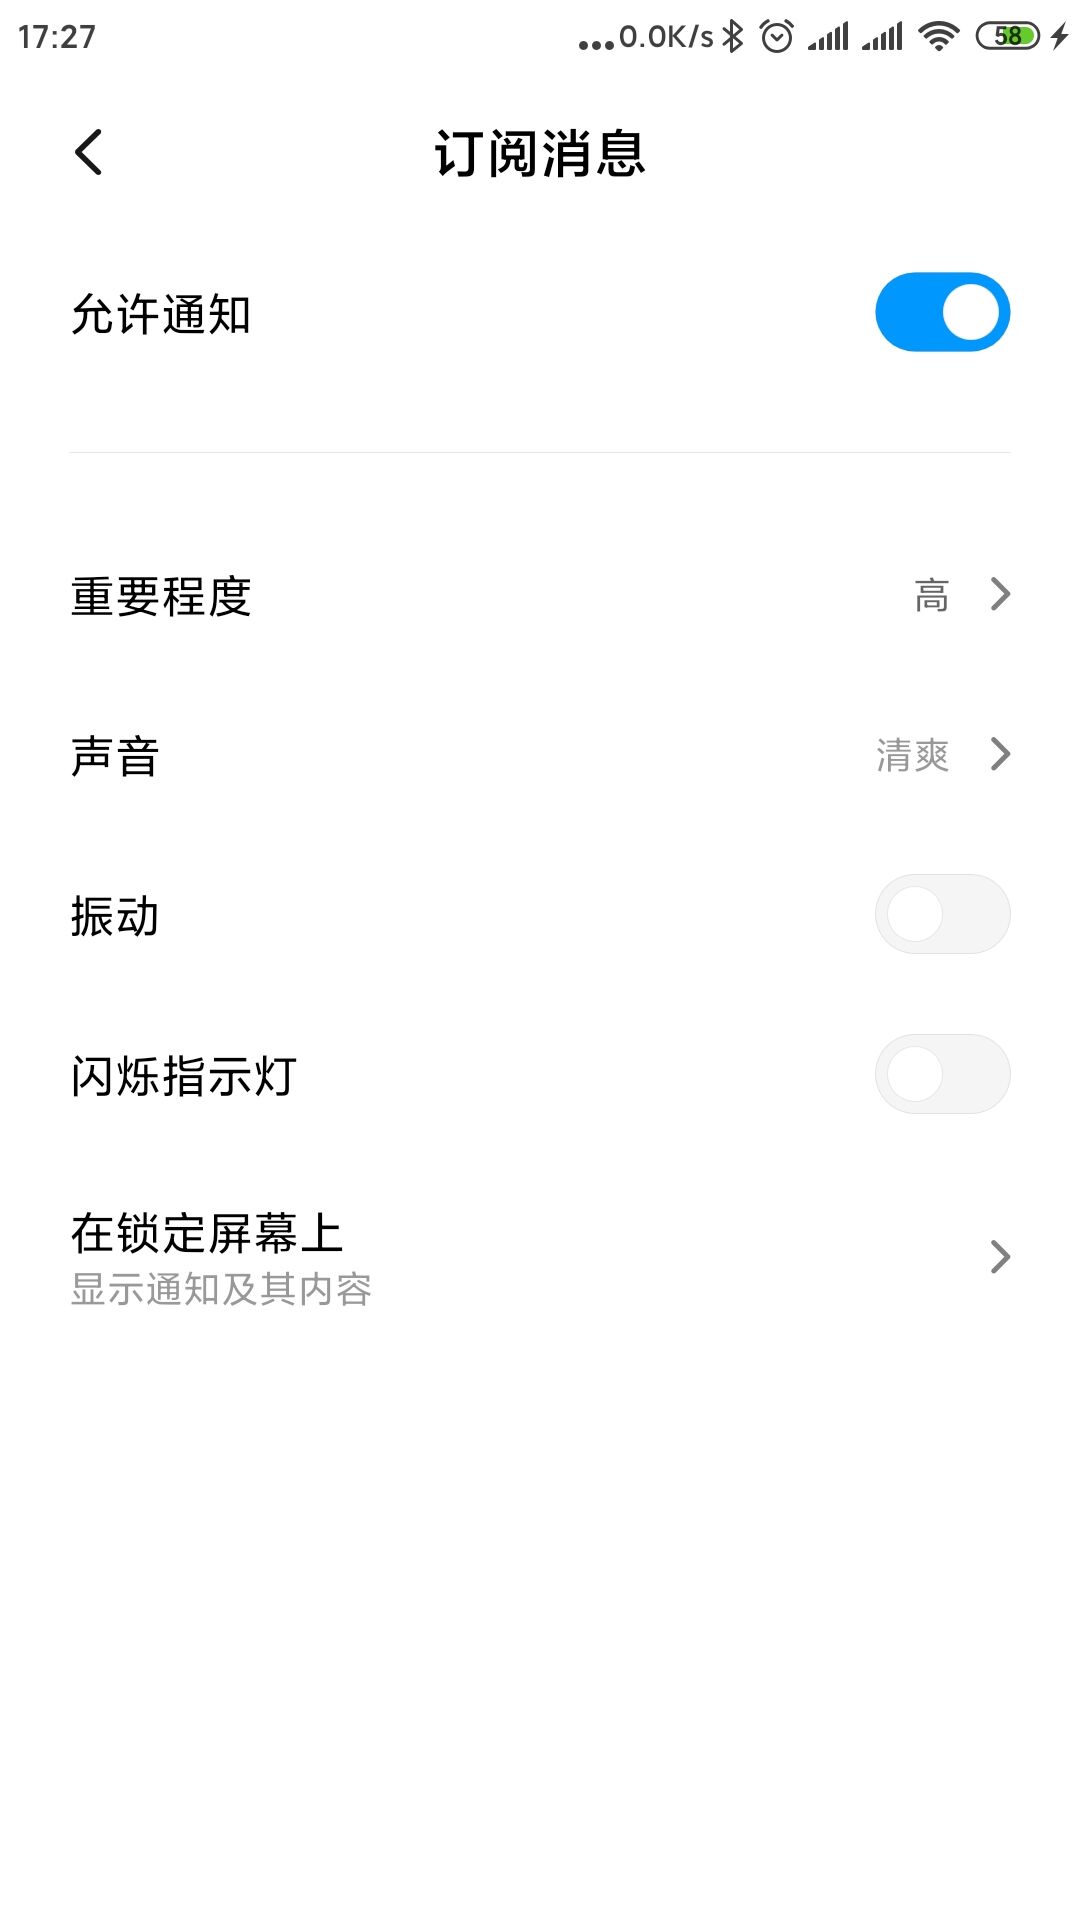
创建渠道后,App的信息->通知管理->通知类别 栏 多出2个类别:
【聊天信息】、【订阅消息】
-
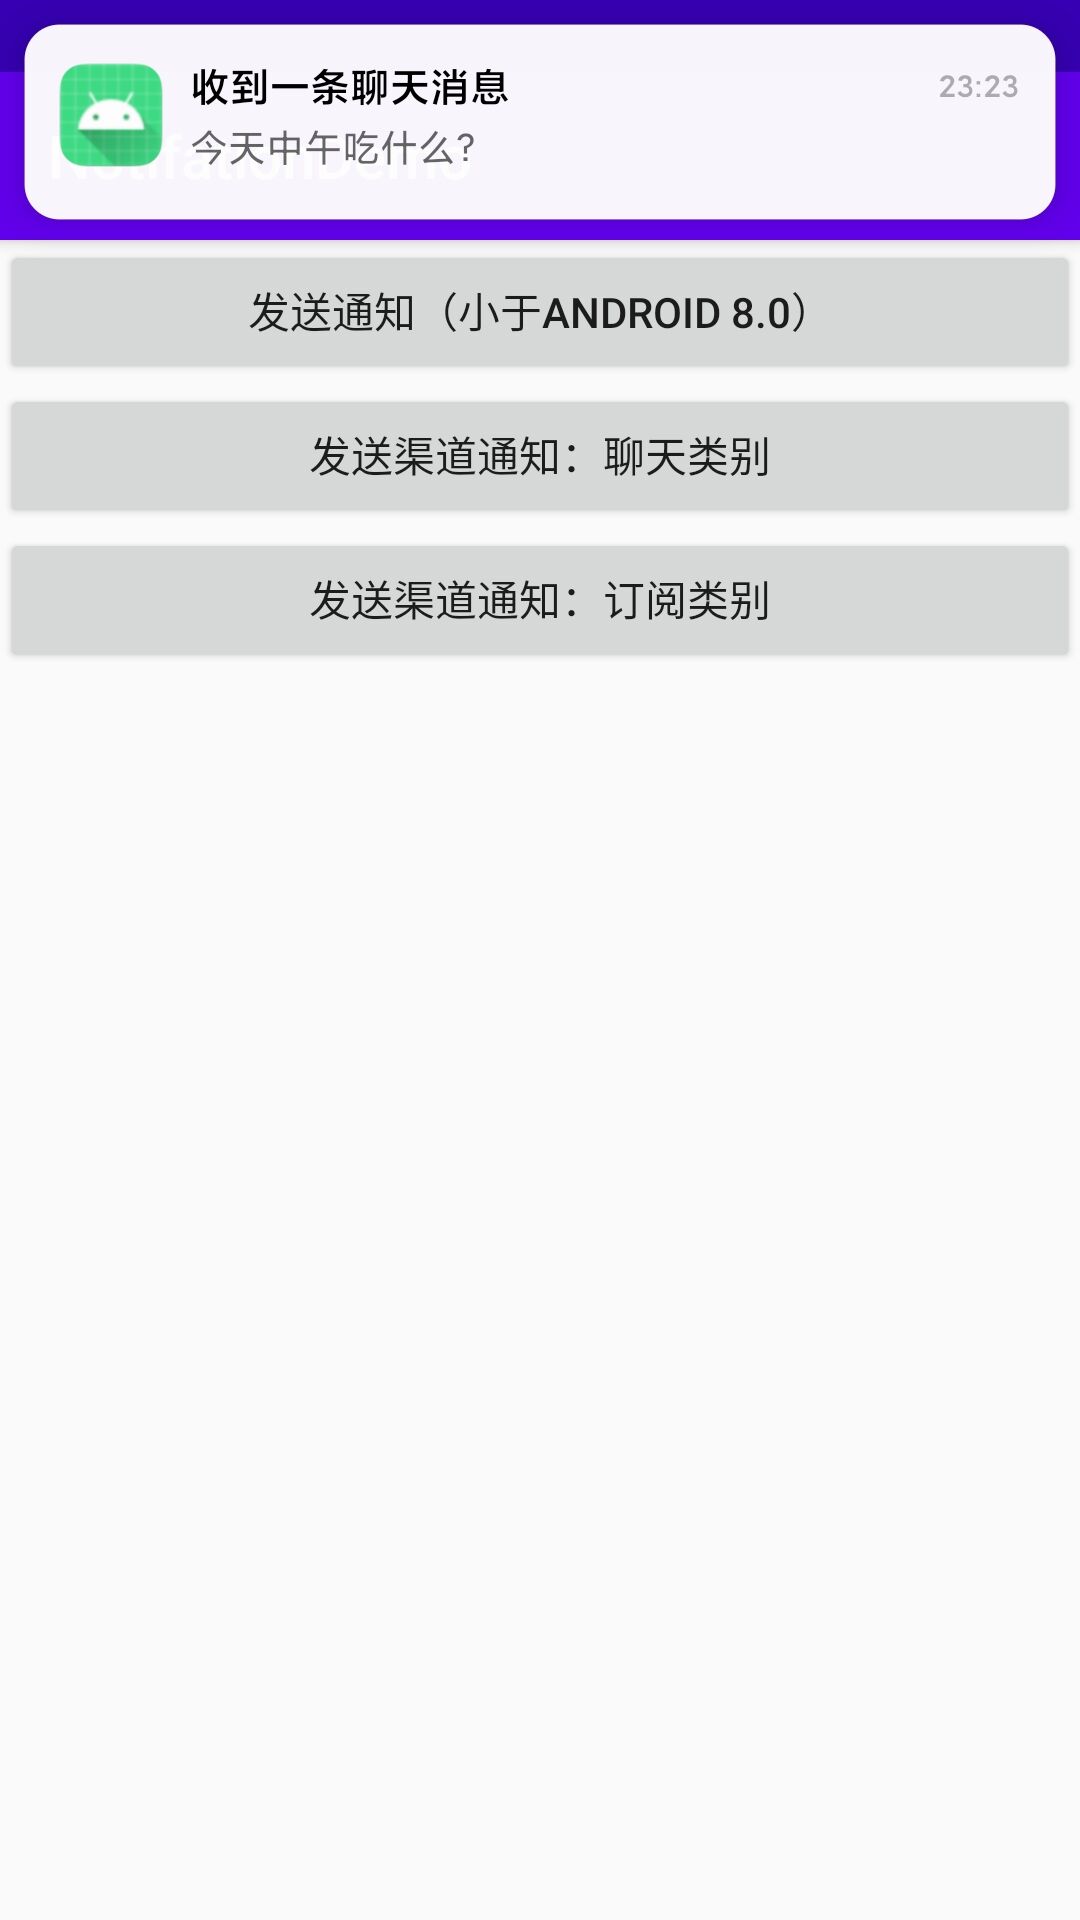
通知栏效果:
分别点击【发送渠道通知:订阅类别】、【发送渠道通知:聊天类别】

-
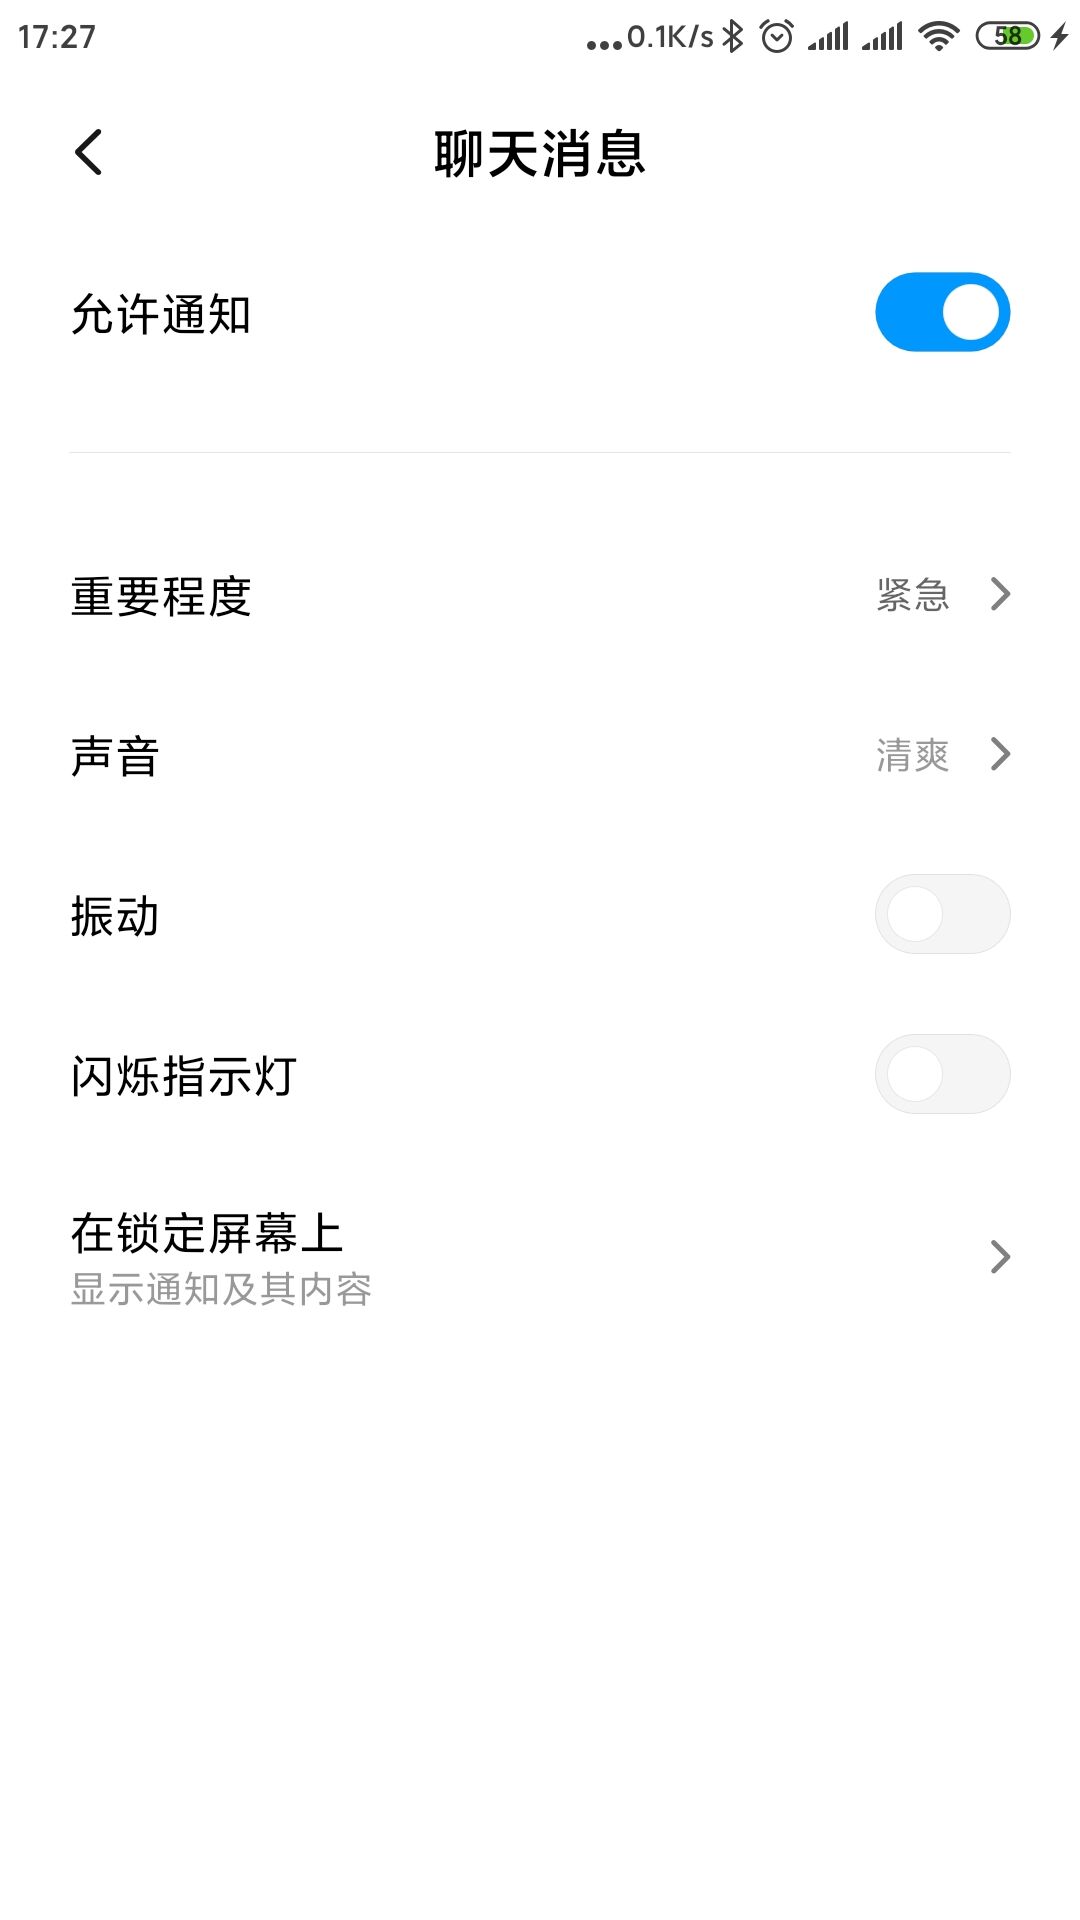
通知
重要程度不同,表现的行为也会不同,
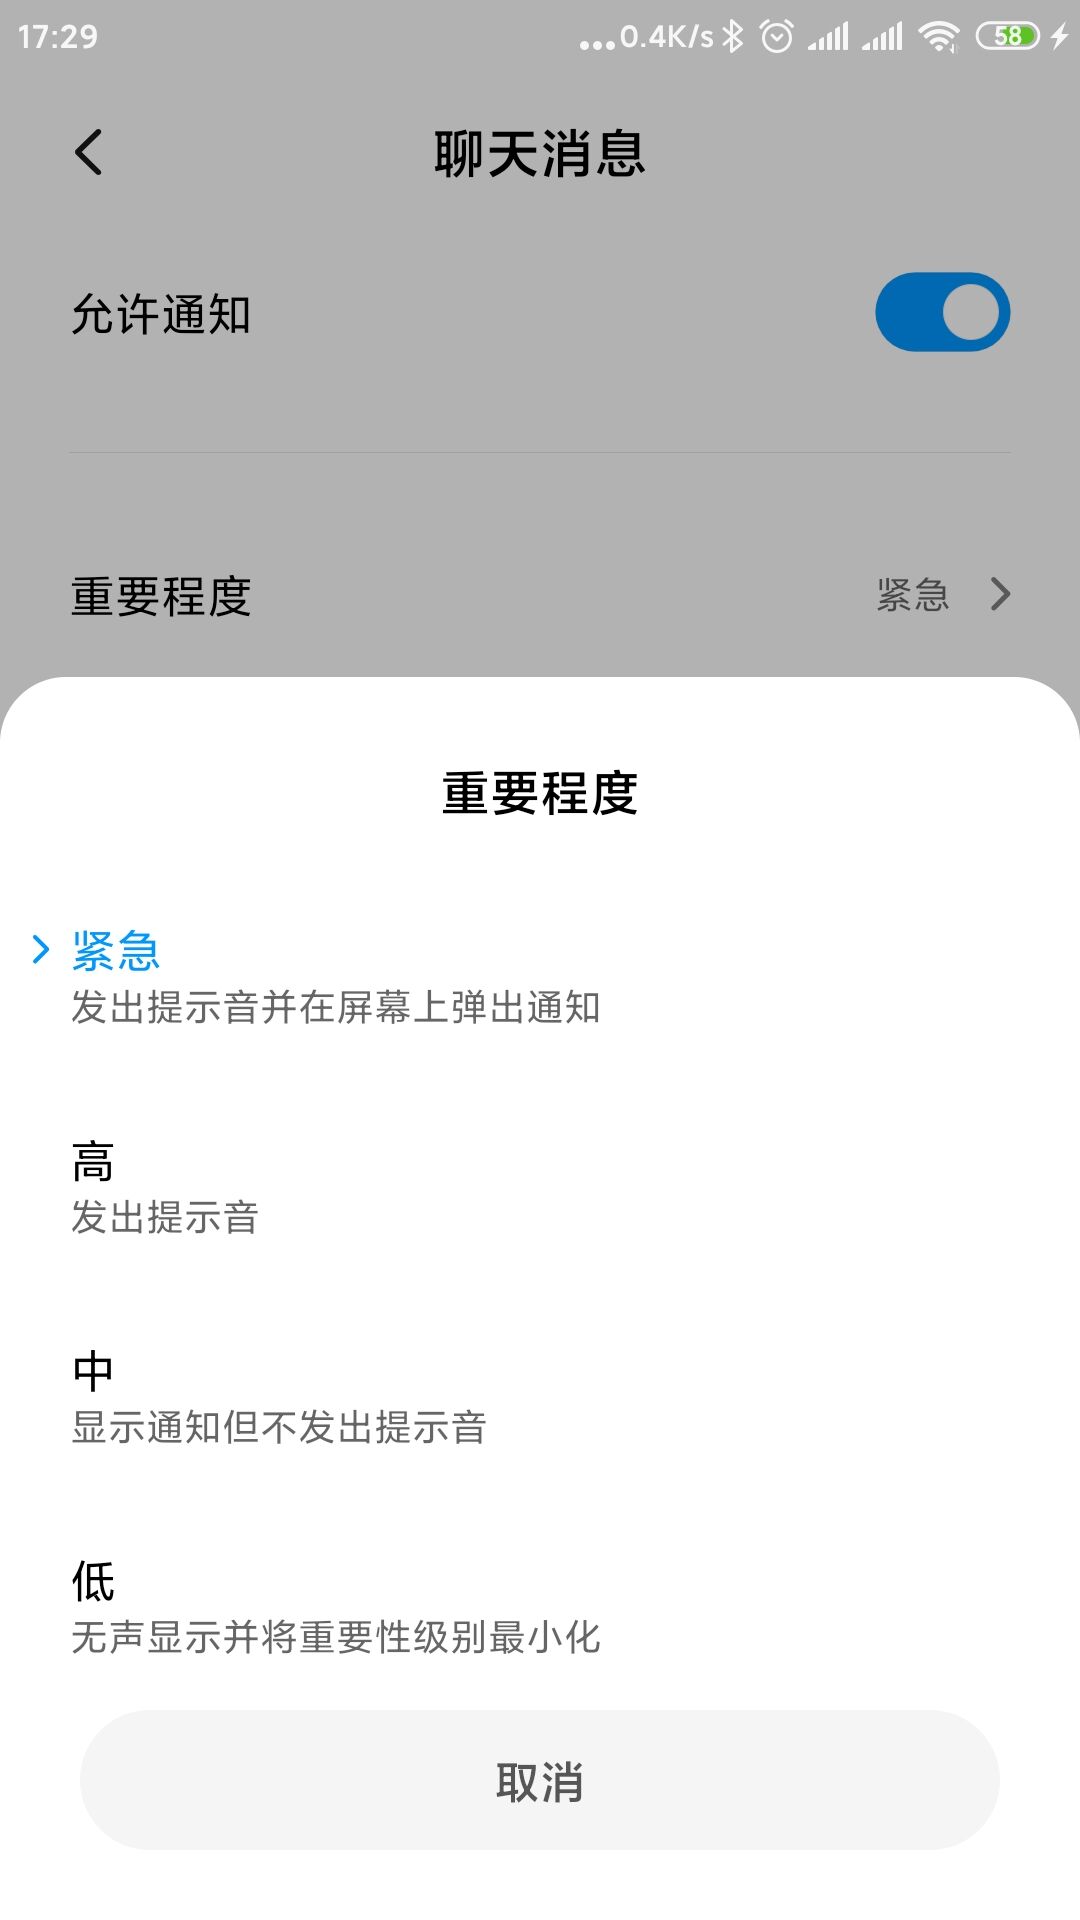
【紧急】级别的通知是允许在屏幕上弹出通知,
现在在手机中开启这个软件的:“悬浮通知(允许在屏幕上弹出通知)”权限,-
点击【发送渠道通知:聊天类别】:有一个悬浮弹框,因为重要程度是:
NotificationManager.IMPORTANCE_HIGH

-
点击【发送渠道通知:订阅类别】:是没有悬浮弹框,因为的重要程度是:
NotificationManager.IMPORTANCE_DEFAULT
-
4.点击通知跳转
点击通知跳转的另一个活动,创建一个新的活动:NotifationAtivity:
activity_notifation_ativity.xml:
<?xml version="1.0" encoding="utf-8"?>
<LinearLayout xmlns:android="http://schemas.android.com/apk/res/android"
    android:layout_width="match_parent"
    android:layout_height="match_parent">

    <TextView
        android:layout_width="match_parent"
        android:layout_height="match_parent"
        android:text="这里是通知跳转界面"/>

</LinearLayout>
NotifationAtivity.java:
public class NotifationAtivity extends AppCompatActivity {

    @Override
    protected void onCreate(Bundle savedInstanceState) {
        super.onCreate(savedInstanceState);
        setContentView(R.layout.activity_notifation_ativity);

        Intent intent = getIntent();
        String extData_notifi_xiao_v26 = intent.getStringExtra("extData_notifi_xiao-v26");
        Log.d("extData", "extData: " + extData_notifi_xiao_v26);
        if (extData_notifi_xiao_v26!= null && !extData_notifi_xiao_v26.isEmpty()){
            Toast.makeText(this, "点击通知跳转,额外信息->" + extData_notifi_xiao_v26, Toast.LENGTH_LONG).show();
        }

        String extData_notifi_Chat = intent.getStringExtra("extData_notifi_Chat");
        Log.d("extData", "extData: " + extData_notifi_Chat);
        if (extData_notifi_Chat!= null && !extData_notifi_Chat.isEmpty()){
            Toast.makeText(this, "点击通知跳转,额外信息->" + extData_notifi_Chat, Toast.LENGTH_LONG).show();
        }

        String extData_notifi_Subcribe = intent.getStringExtra("extData_notifi_Subcribe");
        Log.d("extData", "extData: " + extData_notifi_Subcribe);
        if (extData_notifi_Subcribe!= null && !extData_notifi_Subcribe.isEmpty()){
            Toast.makeText(this, "点击通知跳转,额外信息->" + extData_notifi_Subcribe, Toast.LENGTH_LONG).show();
        }

    }
}
MainActivity.java:
        //发送通知(< Andriod 8.0)
        Button btn_send_notification = findViewById(R.id.btn_send_notification);
        btn_send_notification.setOnClickListener(new View.OnClickListener() {
            @Override
            public void onClick(View v) {

                NotificationManager notificationManager = (NotificationManager) getSystemService(NOTIFICATION_SERVICE);

                NotificationCompat.Builder builder =  new NotificationCompat.Builder(MainActivity.this);

                //点击通知的响应动作
                Intent intent = new Intent(MainActivity.this, NotifationAtivity.class);
                intent.putExtra("extData_notifi_xiao-v26", "发送通知(< Andriod 8.0)时的额外信息");
                PendingIntent pendingIntent = PendingIntent.getActivity(MainActivity.this, 0, intent, PendingIntent.FLAG_UPDATE_CURRENT);

                Notification notification = builder
                        .setContentTitle("通知标题")
                        .setContentText("通知内容")
                        .setSmallIcon(R.mipmap.ic_launcher) //小图标
                        .setLargeIcon(BitmapFactory.decodeResource(getResources(),R.mipmap.ic_launcher_round)) //大图标
                        .setContentIntent(pendingIntent)//点击通知的响应动作
                        .setAutoCancel(true) //设置点击通知后自动删除通知
                        .build();

                //发送通知:
                //第一个参数:是通知的Id,可用此id进行手动关闭
                notificationManager.notify(AppConstant.NotificationId_Goto_NotifationActivity, notification);

            }
        });

        //发送通知:Chat
        Button btn_send_notification_chat = findViewById(R.id.btn_send_notification_chat);
        btn_send_notification_chat.setOnClickListener(new View.OnClickListener() {
            @Override
            public void onClick(View v) {
                NotificationManager manager = (NotificationManager) getSystemService(NOTIFICATION_SERVICE);

                //点击通知的响应动作
                Intent intent = new Intent(MainActivity.this, NotifationAtivity.class);
                intent.putExtra("extData_notifi_Chat", "送通知:Chat的额外信息");
                PendingIntent pendingIntent = PendingIntent.getActivity(MainActivity.this, 0, intent, PendingIntent.FLAG_UPDATE_CURRENT);

                Notification notification = new NotificationCompat.Builder(MainActivity.this, AppConstant.ChannelId_Chat)
                        .setContentTitle("收到一条聊天消息")
                        .setContentText("今天中午吃什么?")
                        .setWhen(System.currentTimeMillis())
                        .setSmallIcon(R.drawable.notif_ico_round) //小图标
                        .setLargeIcon(BitmapFactory.decodeResource(getResources(),R.drawable.notif_ico)) //大图标
                        .setAutoCancel(true) //设置点击通知后自动删除通知
                        .setContentIntent(pendingIntent)//点击通知的响应动作
                        .build();
                manager.notify(AppConstant.NotificationId_Chat, notification);
            }
        });

        //发送通知:Subcribe
        Button btn_send_notification_subcribe = findViewById(R.id.btn_send_notification_subcribe);
        btn_send_notification_subcribe.setOnClickListener(new View.OnClickListener() {
            @Override
            public void onClick(View v) {
                NotificationManager manager = (NotificationManager) getSystemService(NOTIFICATION_SERVICE);
                Intent intent = new Intent(MainActivity.this, NotifationAtivity.class);
                intent.putExtra("extData_notifi_Subcribe", "发送通知:Subcribe的额外信息");
                PendingIntent pendingIntent = PendingIntent.getActivity(MainActivity.this, 0, intent, PendingIntent.FLAG_UPDATE_CURRENT);

                Notification notification = new NotificationCompat.Builder(MainActivity.this, AppConstant.ChannelId_Subcribe)
                        .setContentTitle("收到一条订阅消息")
                        .setContentText("地铁沿线30万商铺抢购中!")
                        .setWhen(System.currentTimeMillis())
                        .setSmallIcon(R.drawable.notif_ico_round) //小图标
                        .setLargeIcon(BitmapFactory.decodeResource(getResources(),R.drawable.notif_ico)) //大图标
                        .setAutoCancel(true) //设置点击通知后自动删除通知
                        .setContentIntent(pendingIntent)//点击通知的响应动作
                        .build();
                manager.notify(AppConstant.NotificationId_Subcribe, notification);
            }
        });
要点解析:
-
(1) 创建Intent,并且可以使用
putExtxxx系列参数传输一下额外的数据; -
(2)创建
PendingIntent,使用创建PendingIntent的3中方法,
getActivity()、getBroadcast()、getService()根据需求选取,这里使用方法
PendingIntent.getActivit()
PendingIntent pendingIntent = PendingIntent.getActivity(MainActivity.this, 0, intent, PendingIntent.FLAG_UPDATE_CURRENT );
特别注意:第4个参数有4种值:
- int FLAG_CANCEL_CURRENT:如果该PendingIntent已经存在,则在生成新的之前取消当前的;
- int FLAG_NO_CREATE:如果该PendingIntent不存在,直接返回null而不是创建一个PendingIntent;
- int FLAG_ONE_SHOT:该PendingIntent只能用一次,在send()方法执行后,自动取消。
- int FLAG_UPDATE_CURRENT:如果该PendingIntent已经存在,则用新传入的Intent更新当前的数据。
我们需要把最后一个参数改为PendingIntent.FLAG_UPDATE_CURRENT,这样在启动的Activity里就可以用接收Intent传送数据的方法正常接收。
-(3)通过 Builder.setContentIntent(pendingIntent)....设置点击通知的响应动作
-(4)NotifationAtivity 中获取传递的参数:
   ```
   Intent intent = getIntent();
   String extData_notifi_xiao_v26 = intent.getStringExtra("extData_notifi_xiao-v26");
   ```
特别提醒:
各个类别的 通知或通知渠道,跳转响应的是同一个Activity,这时通过
Intent intent = getIntent();
获取的Intent 是最后一个通知或通知渠道的Intent,会使得早先的通知的Intent丢失
故,如果通知跳转,对传的参数有要求,最好独立有自己的响应Activity。
5.通知的一些高级设置
5.1在Builder的一系列方法中进行高级设置
 Notification notification = new NotificationCompat.Builder(MainActivity.this, AppConstant.ChannelId_Chat)
  .setXXX() //这里的一系列方法中进行高级设置
  .build();
build.setXXX()一系列方法有:
-
声音
build..setSound(Uri.fromFile(new File("/system/media/audio/ringtones/Luna.ogg"))) -
振动
build.setVibrate(new long[]{0, 1000,2000, 3000 }) //振动,频率:静止,振动1秒,静止2秒,振动3秒 /*得添加权限:android.permission.VIBRATE*/振动得声明振动权限
<?xml version="1.0" encoding="utf-8"?> <manifest xmlns:android="http://schemas.android.com/apk/res/android" package="com.example.notifationdemo"> <uses-permission android:name="android.permission.VIBRATE"/> -
亮灯
build..setLights(Color.RED, 1000, 3000) /*亮1秒, 暗3秒*/ -
富文本
富文本内容将替换:
.setContentText("今天中午吃什么?")设置的内容,但是悬浮弹框中的文字还是显示的是.setContentText("今天中午吃什么?")设置的内容,见下图:
查看消息,显示的是setStyle()设置的文本:
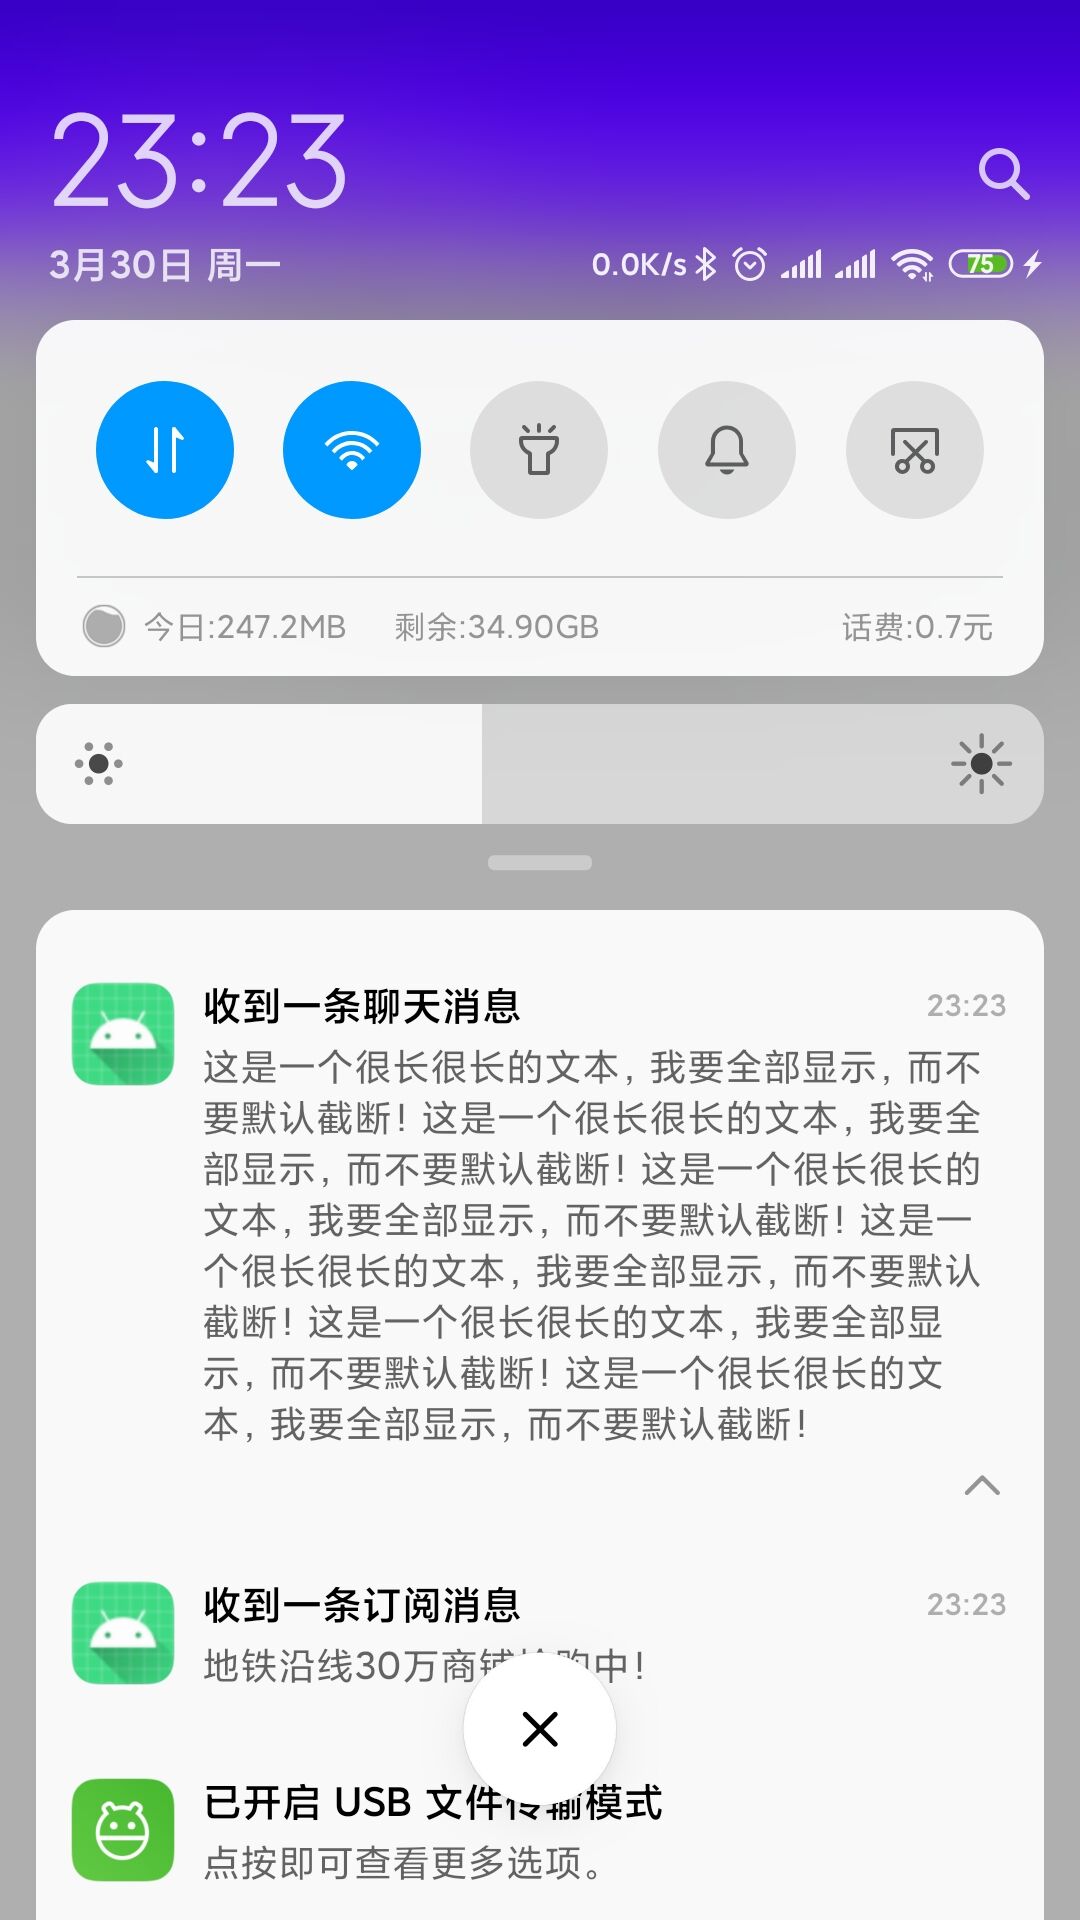
(1) 设置长文字:
 build.setStyle(new NotificationCompat.BigTextStyle().bigText("这是一个很长很长的文本,我要全部显示,而不要默认截断!" +
         "这是一个很长很长的文本,我要全部显示,而不要默认截断!" +
         "这是一个很长很长的文本,我要全部显示,而不要默认截断!" +
         "这是一个很长很长的文本,我要全部显示,而不要默认截断!" +
         "这是一个很长很长的文本,我要全部显示,而不要默认截断!" +
         "这是一个很长很长的文本,我要全部显示,而不要默认截断!"))
(2) 设置图片:
   ```java
   build..setStyle(new NotificationCompat.BigPictureStyle().bigPicture(BitmapFactory.decodeResource(getResources(), R.drawable.notif_ico_round)))
   ```
-
优先级
build.setPriority(NotificationCompat.PRIORITY_MAX) //设置优先级
5.2 为什么声音、振动、亮灯不起作用
NotificationChannel 适配填坑指南:https://www.jianshu.com/p/99bc32cd8ad6
build.setXXX 系列的设置的声音、振动、亮灯不起作用
要使用 NotificationChannel 设置 声音、振动、亮灯
上一节:5.1 , 在【聊天消息】通知渠道 中, 使用 NotificationCompat.Builder.setXXX()系列中设置 声音、振动、亮灯 没有起作用
现使用【订阅消息】通知渠道 做实验,看看使用 NotificationChannel设置通知的 设置 声音、振动、亮灯 是否起作用
- 重新写一个方法用于创建【订阅消息】通知渠道
   @RequiresApi(api = Build.VERSION_CODES.O)
private void initNotificationChannelForSubcribe(){
   String channelName = "订阅消息";
   String description = "订阅消息,接收一些日常刚兴趣的资讯!!!";
   int importance = NotificationManager.IMPORTANCE_HIGH;

   NotificationChannel channel = new NotificationChannel(AppConstant.ChannelId_Subcribe, channelName, importance);
   channel.enableVibration(true);
   channel.setVibrationPattern(new long[]{0, 1000,2000, 3000, 5000, 2000,2000,1000 } );
   channel.enableLights(true);
   channel.setLightColor(Color.GREEN);
   //channelSubcribe.setSound(Uri.fromFile(new File("/system/media/audio/ringtones/Luna.ogg")); //通知声音

   NotificationManager notificationManager = (NotificationManager) getSystemService(NOTIFICATION_SERVICE);
   notificationManager.createNotificationChannel(channel);
}

...

       //发送通知:Subcribe
       Button btn_send_notification_subcribe = findViewById(R.id.btn_send_notification_subcribe);
       btn_send_notification_subcribe.setOnClickListener(new View.OnClickListener() {
           @Override
           public void onClick(View v) {
               NotificationManager manager = (NotificationManager) getSystemService(NOTIFICATION_SERVICE);
               Intent intent = new Intent(MainActivity.this, NotifationAtivity.class);
               intent.putExtra("extData_notifi_Subcribe", "发送通知:Subcribe的额外信息");
               PendingIntent pendingIntent = PendingIntent.getActivity(MainActivity.this, 0, intent, PendingIntent.FLAG_UPDATE_CURRENT);

               Notification notification = new NotificationCompat.Builder(MainActivity.this, AppConstant.ChannelId_Subcribe)
                       .setContentTitle("收到一条订阅消息")
                       .setContentText("地铁沿线30万商铺抢购中!")
                       .setWhen(System.currentTimeMillis())
                       .setSmallIcon(R.drawable.notif_ico_round) //小图标
                       .setLargeIcon(BitmapFactory.decodeResource(getResources(),R.drawable.notif_ico)) //大图标
                       .setAutoCancel(true) //设置点击通知后自动删除通知
                       .setContentIntent(pendingIntent)//点击通知的响应动作
                       .build();

               manager.notify(AppConstant.NotificationId_Subcribe, notification);
           }
       });
-
结果还是没起作用,原因不明,暂留个记录
build.gradle
android {
    compileSdkVersion 29
    buildToolsVersion "29.0.3"
 defaultConfig {
    applicationId "com.example.notifationdemo"
    minSdkVersion 16
    targetSdkVersion 29
    versionCode 1
    versionName "1.0"

    testInstrumentationRunner "androidx.test.runner.AndroidJUnitRunner"
}
测试真机:小米6,Android版本:9
6.关闭通知
- 方法一:
build.setAutoCancel(true) //设置点击通知后自动删除通知
- 方法二:
   NotificationManager manager = (NotificationManager) getSystemService(NOTIFICATION_SERVICE);
   manager.cancel(通知Id);//int类型
7.填坑指南
使用示例:https://blog.csdn.net/yxncl/article/details/72801230
Android Support Library详细介绍:https://www.cnblogs.com/Jeely/p/11043703.html
什么是AndroidX?https://blog.csdn.net/guolin_blog/article/details/97142065
支持库:https://developer.android.google.cn/topic/libraries/support-library
NotificationChannel 适配填坑指南:https://www.jianshu.com/p/99bc32cd8ad6
通知版本适应:https://www.jianshu.com/p/a5040cc7a693