1、安装Maven,具体步骤,参照博客【maven的安装与配置】http://www.cnblogs.com/dyh004/p/8523260.html
2、配置阿里云为Maven中央仓库,具体步骤,参照【maven配置阿里云中央仓库】http://www.cnblogs.com/dyh004/p/8511220.html
3、配置eclipse,集成Maven,具体步骤,参照【eclipse添加maven环境】http://www.cnblogs.com/dyh004/p/8523354.html
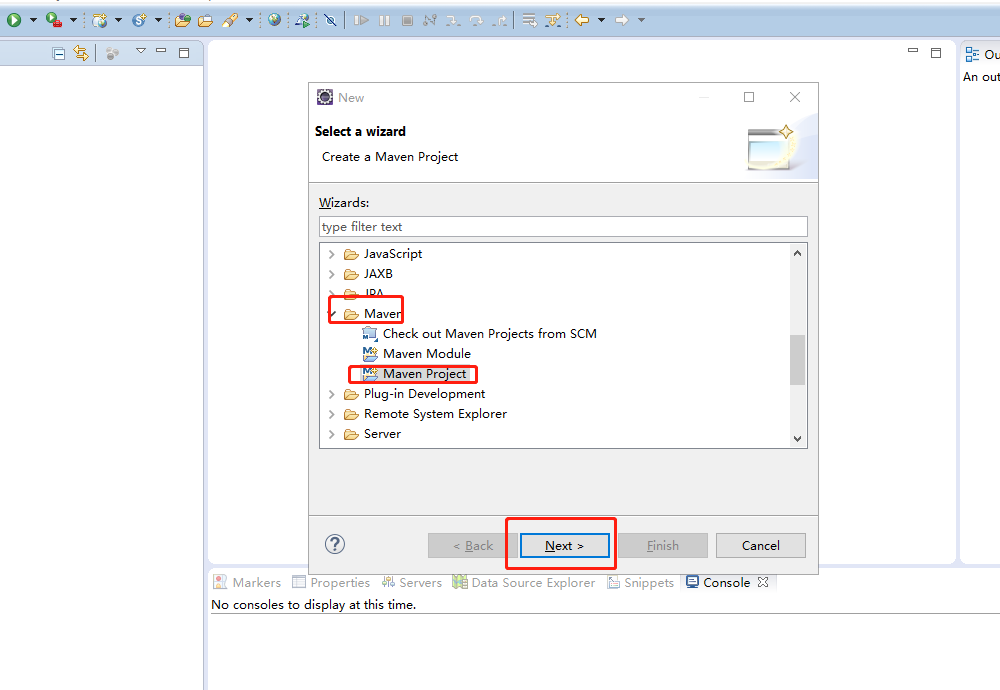
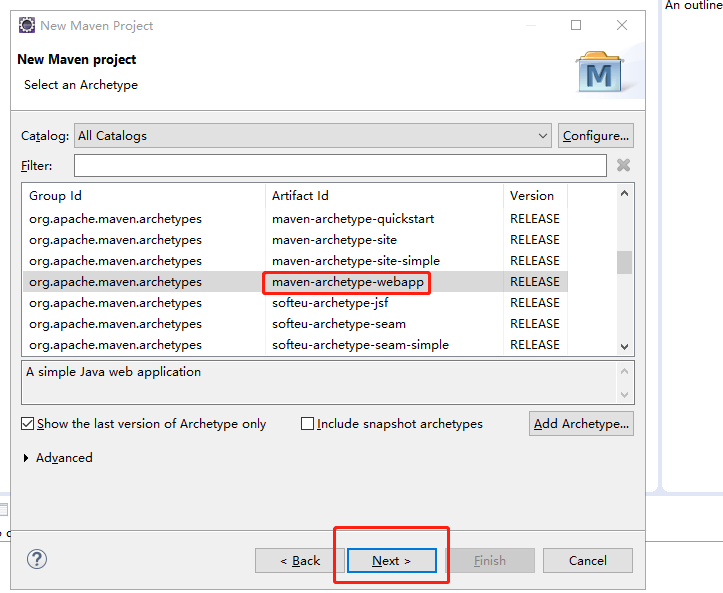
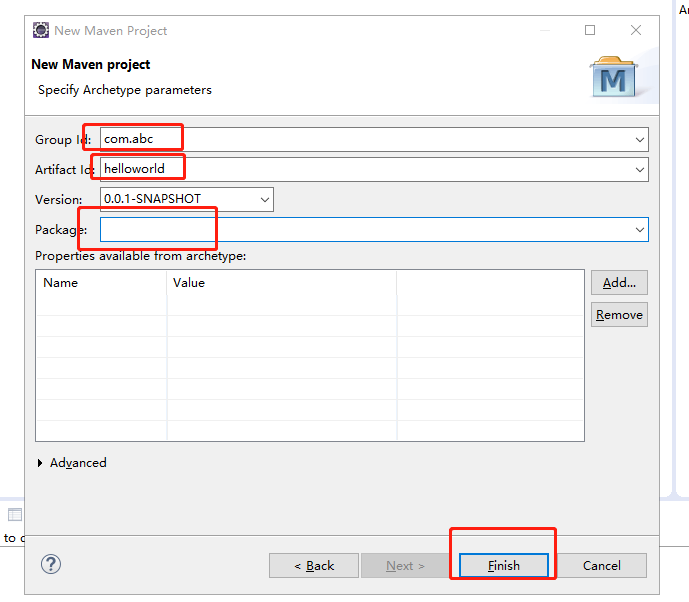
4、新建Maven Web工程,加下图:

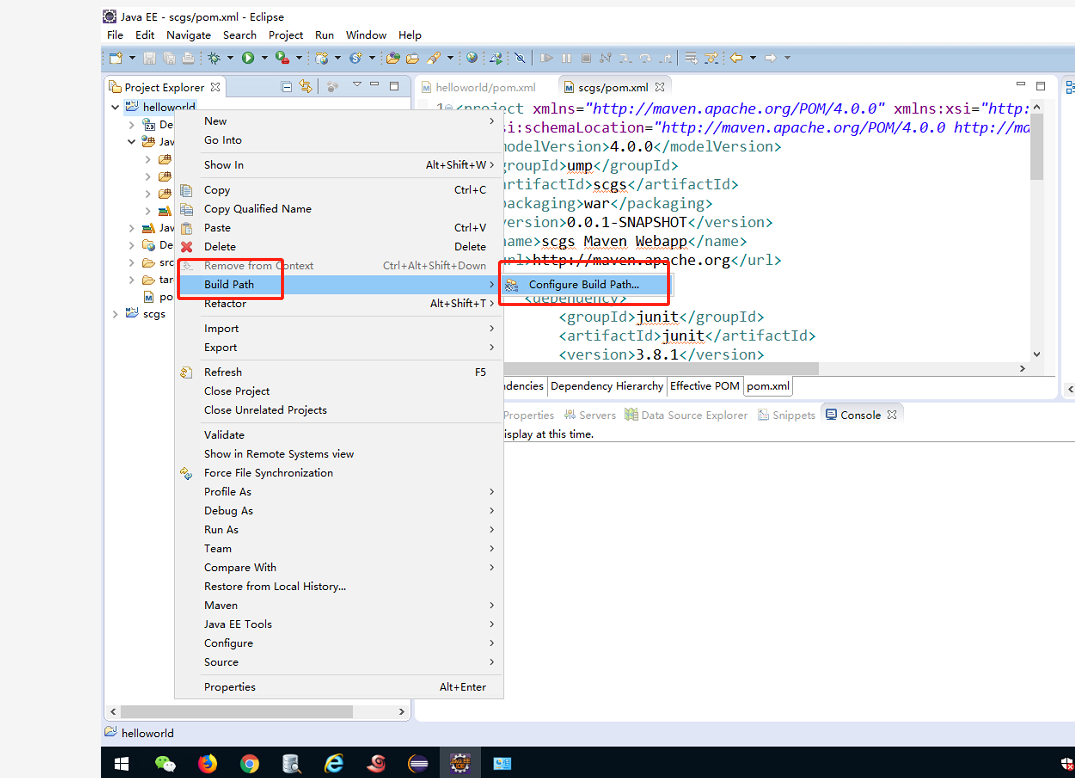
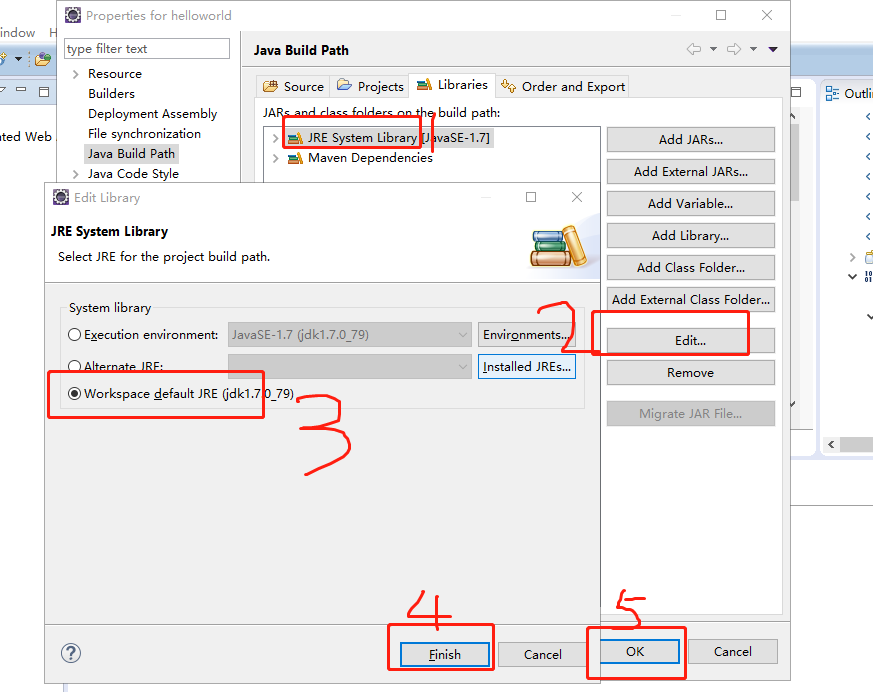
配置jdk环境,右键工程-build path - configration,如下图
选用系统jdk(这里安装的是java7)
5、新建完工程之后,报错,暂时不用管,打开pom.xml文件,1、添加编译环境;2、添加servlet接口包,文件内容如下:
<project xmlns="http://maven.apache.org/POM/4.0.0" xmlns:xsi="http://www.w3.org/2001/XMLSchema-instance"
  xsi:schemaLocation="http://maven.apache.org/POM/4.0.0 http://maven.apache.org/maven-v4_0_0.xsd">
  <modelVersion>4.0.0</modelVersion>
  <groupId>com.abc</groupId>
  <artifactId>helloworld</artifactId>
  <packaging>war</packaging>
  <version>0.0.1-SNAPSHOT</version>
  <name>helloworld Maven Webapp</name>
  <url>http://maven.apache.org</url>

  <!-- 系统依赖包,添加处 -->
  <dependencies>

  <!-- 单元测试依赖包 -->
    <dependency>
      <groupId>junit</groupId>
      <artifactId>junit</artifactId>
      <version>3.8.1</version>
      <scope>test</scope>
    </dependency>

    <!-- servlet接口包-运行环境包 -->
     <dependency>
            <groupId>javax.servlet</groupId>
            <artifactId>javax.servlet-api</artifactId>
            <version>3.1.0</version>
            <scope>provided</scope>
        </dependency>

  </dependencies>

  <build>
      <plugins>
          <!-- 配置java7位编译环境 -->
          <plugin>
                <groupId>org.apache.maven.plugins</groupId>
                <artifactId>maven-compiler-plugin</artifactId>
                <version>2.3.2</version>
                <configuration>
                    <source>1.7</source>
                    <target>1.7</target>
                </configuration>
            </plugin>
      </plugins>
    <finalName>helloworld</finalName>
  </build>
</project>
这个时候,报错信息就消失了(如果没有消失,右键工程-》Maven-》update project)
6、添加maven Tomcat插件,在pom.xml文件中plugins标签下添加:
<plugin>
                <groupId>org.apache.tomcat.maven</groupId>
                <artifactId>tomcat7-maven-plugin</artifactId>
                <version>2.2</version>
                <!-- Config: contextPath and Port (Default - /HelloSpringMVC : 8080) -->
                <!-- <configuration> <path>/</path> <port>8899</port> </configuration> -->
            </plugin>
最终的pom.xml文件,内容如下:
<project xmlns="http://maven.apache.org/POM/4.0.0" xmlns:xsi="http://www.w3.org/2001/XMLSchema-instance"
  xsi:schemaLocation="http://maven.apache.org/POM/4.0.0 http://maven.apache.org/maven-v4_0_0.xsd">
  <modelVersion>4.0.0</modelVersion>
  <groupId>com.abc</groupId>
  <artifactId>helloworld</artifactId>
  <packaging>war</packaging>
  <version>0.0.1-SNAPSHOT</version>
  <name>helloworld Maven Webapp</name>
  <url>http://maven.apache.org</url>

  <!-- 系统依赖包,添加处 -->
  <dependencies>

  <!-- 单元测试依赖包 -->
    <dependency>
      <groupId>junit</groupId>
      <artifactId>junit</artifactId>
      <version>3.8.1</version>
      <scope>test</scope>
    </dependency>

    <!-- servlet接口包-运行环境包 -->
     <dependency>
            <groupId>javax.servlet</groupId>
            <artifactId>javax.servlet-api</artifactId>
            <version>3.1.0</version>
            <scope>provided</scope>
        </dependency>

  </dependencies>

  <build>
      <plugins>
          <!-- 配置java7位编译环境 -->
          <plugin>
                <groupId>org.apache.maven.plugins</groupId>
                <artifactId>maven-compiler-plugin</artifactId>
                <version>2.3.2</version>
                <configuration>
                    <source>1.7</source>
                    <target>1.7</target>
                </configuration>
            </plugin>

            <!-- 添加Tomcat插件 -->
            <plugin>
                <groupId>org.apache.tomcat.maven</groupId>
                <artifactId>tomcat7-maven-plugin</artifactId>
                <version>2.2</version>
                <!-- Config: contextPath and Port (Default - /HelloSpringMVC : 8080) -->
                <!-- <configuration> <path>/</path> <port>8899</port> </configuration> -->
            </plugin>
      </plugins>
    <finalName>helloworld</finalName>
  </build>
</project>
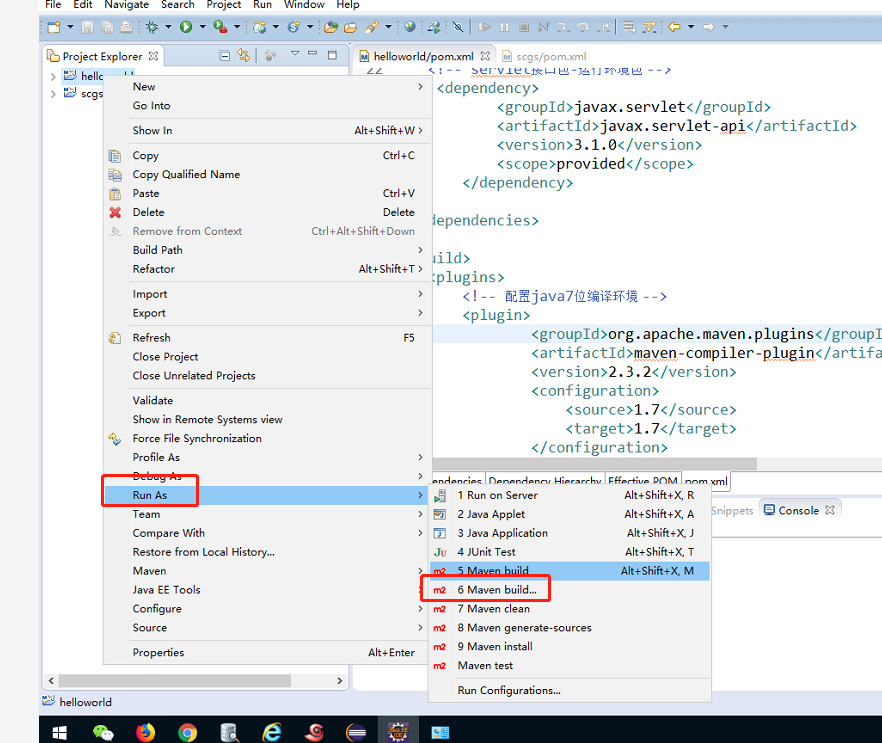
7、运行Maven工程,具体步骤如下图所示:
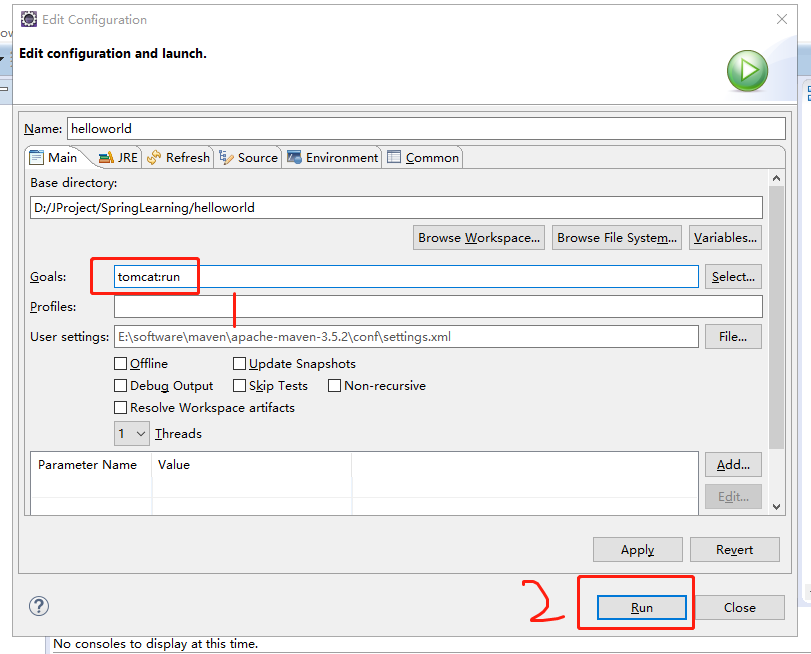
在弹出的goals框中输入:tomcat:run,点击运行,如下图所示
如果没有反应,需要如下配置:

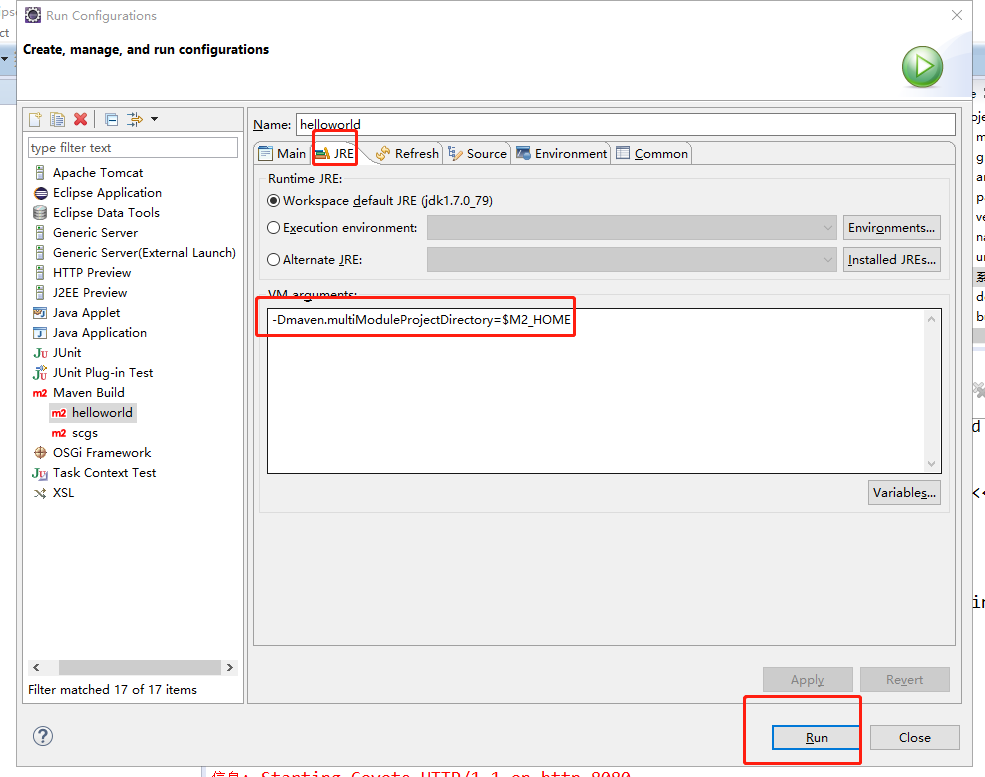
在vm中添加:-Dmaven.multiModuleProjectDirectory=$M2_HOME
控制台,输出:
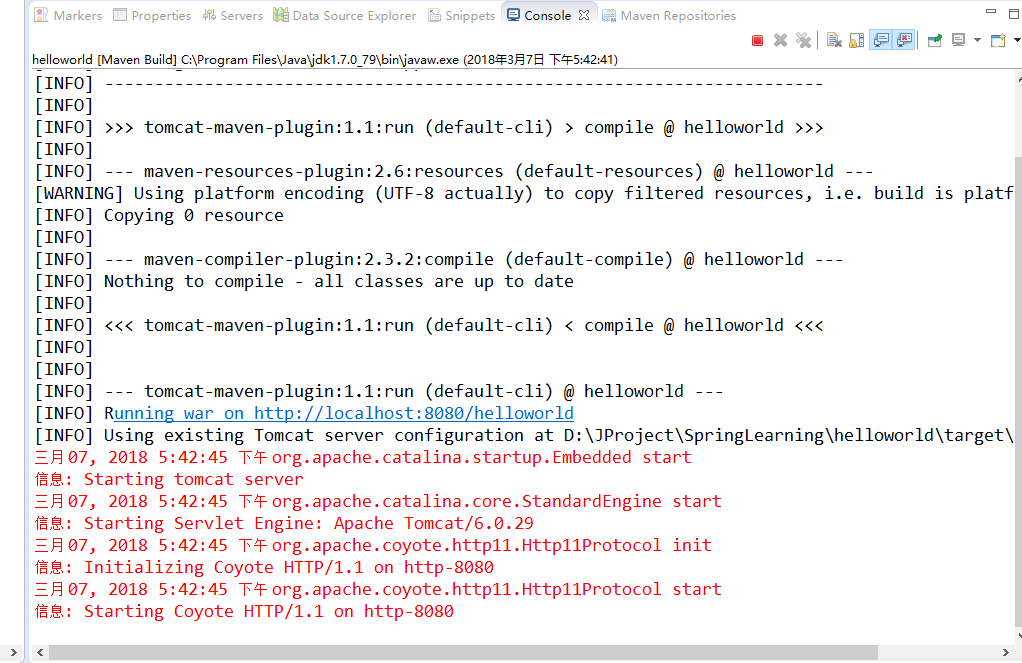
说明启动成功,访问:http://localhost:8080/helloworld/
如果出现如下错误:

最后是在pom.xml中做了配置
<!-- https://mvnrepository.com/artifact/javax.servlet/javax.servlet-api -->
<dependency>
<groupId>javax.servlet</groupId>
<artifactId>javax.servlet-api</artifactId>
<version>3.1.0</version>
<scope>provided</scope>
</dependency>
原因是没有加 <scope>provided</scope>
加上如上就可以了,具体为什么不细说了,可以去学下maven
修改后重启,访问,出现如下图所示,说明完成。
