内容简介
将Alpha Matting抠图算法由c++ 版本移植至c#环境。 主要采用OpenCV的C#版本Emgu取代c++支撑的OpenCV。
参考资料
http://www.inf.ufrgs.br/~eslgastal/SharedMatting/
这个网页是算法的论文介绍页,可以从该网页下载到论文原文以及测试用图以及linux下的Demo。
https://github.com/np-csu/AlphaMatting
我从该网页下载了Alpha Matting算法的c++源码。
https://www.cnblogs.com/Imageshop/p/3550185.html
这是我在查询Alpha Matting算法资料时看见的比较友善的算法介绍。作者优化了C++版的算法。
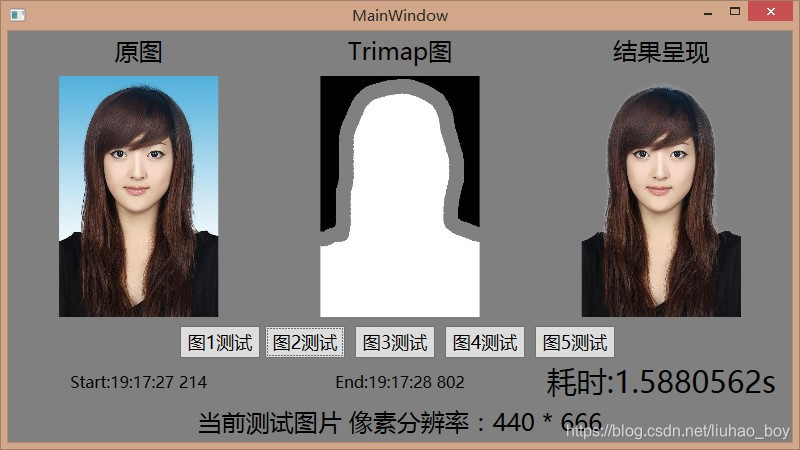
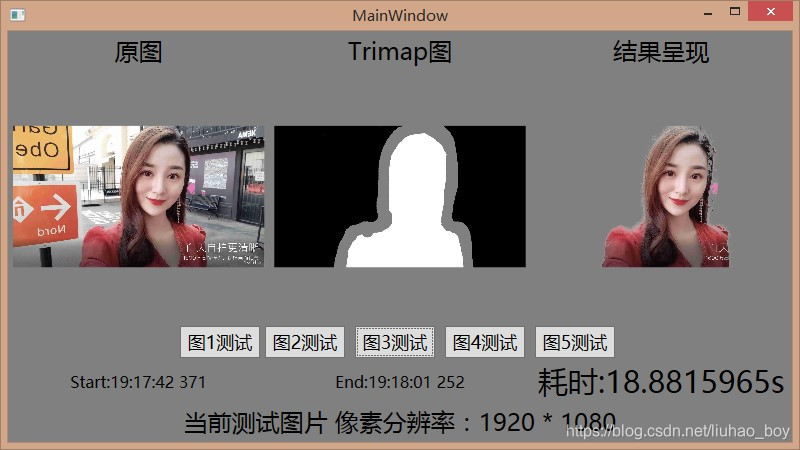
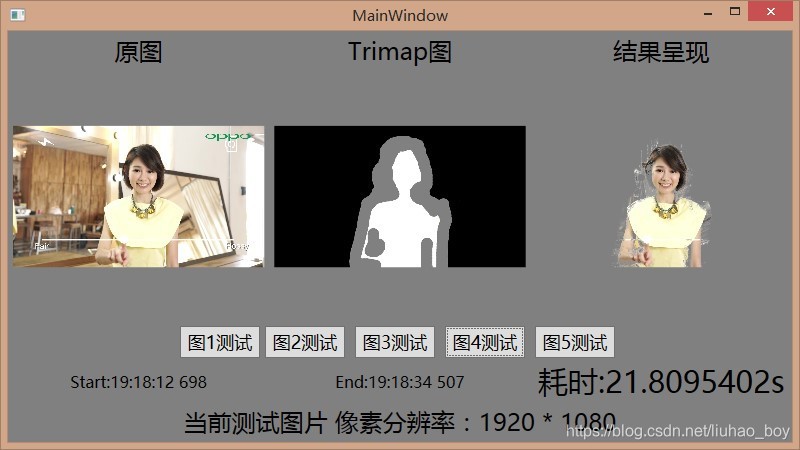
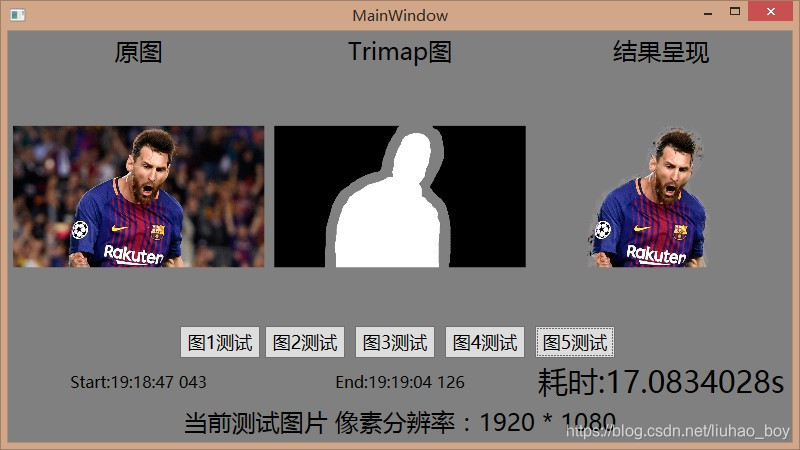
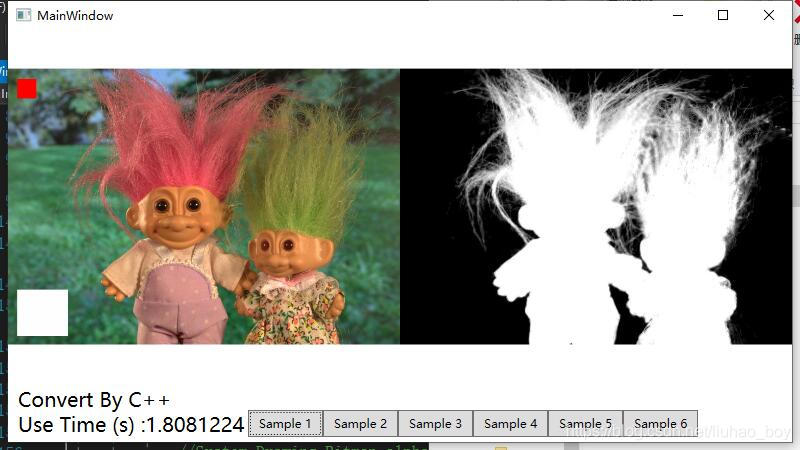
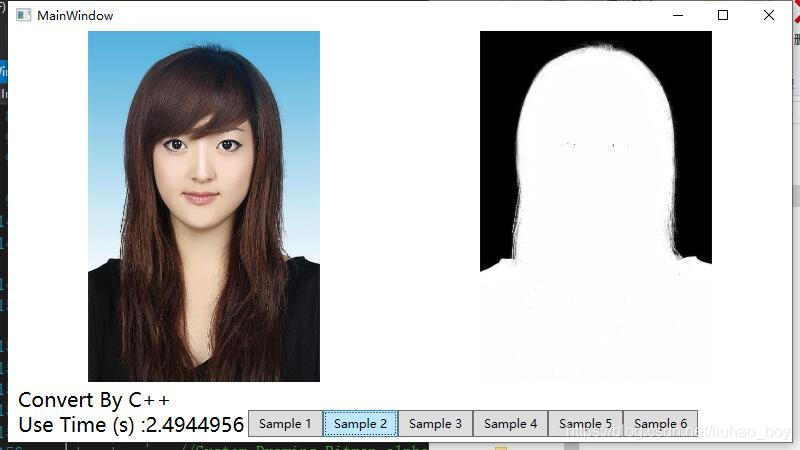
我的实现效果

![]()
![]()
![]()
![]()
![]()
实验环境
系统: Windows 8.1 专业版
工具:Visual Studio 2017
Emgu:emgucv-windesktop 3.2.0.2682
C#测试工程: WPF工程项目
避免采坑
- 最好不要用最新版Vs2019
我刚开始采用VS2019,安装OpenCv后测试运行C++,各种不通。后续发现vs2019新建的项目自动配置为VC16 环境。 而下载的OpenCv明确指定了需要VC14或VC15. 如我下载的OpenCV: opencv-3.4.5-vc14_vc15.exe. 从名称即可看出。废了我许多不必要的尝试时间。
2、版本差异
刚开始下载OpenCV 最新的4.1.1 版本,报了很多类型错误。 建议使用3.* 的版本。 4.1.1版本我注释掉了部分OpenCv的代码,算法可以继续无差运行,但总感觉不完美,所以我替换成了3.* 的版本。
关键信息
|
C++类型 |
我处理成的对应c#类型 |
|
cv::Point |
System.Drawing.Point |
|
vector<cv::Point>& |
List<System.Drawing.Point> |
|
vector<vector<cv::Point>>& |
List<List<System.Drawing.Point>> |
|
char* |
string |
|
struct labelPoint |
public class labelPoint |
|
Tuple |
public class TupleInfo |
|
Ftuple |
public class FtupleInfo |
|
int** |
Int[,] |
|
uchar* |
Byte[] |
|
iterator |
更改为For循环 |
|
Scalar |
Emgu: MCvScalar |
深化尝试
从我的调试结果来看,可以实现抠图,如果你也同时在C++环境下运行了算法,你会发现C#环境下的算法运行时间远超C++。然后我就考虑将抠图算法在C++环境下打包成dll供C#调用。
由于不熟悉c#与C++的交互,我踩了很多坑,实现的也并不算完美,不过总之调通了。
我将提前准备好的原图以及Trimap图的路径传给C++的dll,期望返回处理过后的Alpha数组。
c#端:
首先添加我生成的C++ Dll并声明引用。
 [DllImport("ImgIntelligHelper.dll", CharSet = CharSet.Unicode)]
 public extern static IntPtr GetMatteMap([MarshalAs(UnmanagedType.LPStr)] string sInput,
 [MarshalAs(UnmanagedType.LPStr)] string sOutput);
然后对dll中的函数进行调用,返回透明度矩阵的内存地址,然后赋值到我创建的数组中。
// sInput - 原图路径; sTrimap: Trimap图路径
System.Drawing.Bitmap oBitmap = new Bitmap(sInput);
int nlength = oBitmap.Width * oBitmap.Height;
IntPtr intptr = GetMatteMap(sInput, sTrimap);
int[] arrAlpha = new int[nlength];
Marshal.Copy(intptr, arrAlpha, 0, nlength);
C++端:
新增了一个方法,将矩阵转换为int数组。
void AlphaMatting::GetAlphaMap()
{
    int h = matte.rows;
    int w = matte.cols;
    Map = new int[h*w];
    for (int i = 0; i < h; ++i)
    {
        for (int j = 0; j < w; ++j)
        {
            Map[i * w + j] = alpha[i][j];
        }
    };
}

// 接收图片并处理
int* GetMatteMap(char* sInput, char* sTrimap)
{
    AlphaMatting alphaMatHelper;
    alphaMatHelper.loadImage(sInput);
    alphaMatHelper.loadTrimap(sTrimap);
    alphaMatHelper.solveAlpha();
    alphaMatHelper.GetAlphaMap();
    return alphaMatHelper.Map;
}
最后用原图以及dll返回的Alpha数组实现抠图。 这是可行的方式,整个流程进行下来效率相对于纯C#版会有较大的改进。但是相对于纯C++版本来说,消耗还是过高。
然后我又尝试将C++版算法改成控制台应用程序。在C#中采用启动进程的方式,传入原图、Trimap图、输出图路径值,然后以不显示应用程序窗口的方式在后台静默执行。 进程结束后见到了C++应用程序处理过后的结果。
C#中调用C++生成的控制台应用exe。
private void DoConvert(string sIndex)
{
    string sBasePath = AppDomain.CurrentDomain.BaseDirectory;
    string sExeFile = sBasePath + @"AlphaMattingPlugin.exe";
    string sInput = sBasePath + @"Datasinput" + sIndex+ ".jpg";
    string sTrimap = sBasePath + @"Datas	rimap" + sIndex + ".jpg";
    string sOutput = sBasePath + @"DatasAlphaMattingPluginSample" + sIndex + ".png";

     Process process = new Process();
     process.StartInfo.FileName = sExeFile;
     // 调用C++版本的控制台Exe,传入原图、Trimap图、抠图结果输出文件路径
     process.StartInfo.Arguments = " " + sInput + " " + sTrimap + " " + sOutput;
     process.StartInfo.CreateNoWindow = false;
     process.StartInfo.WindowStyle = ProcessWindowStyle.Hidden;
     process.Start();
     process.WaitForExit();

     if (File.Exists(sOutput))
         this.ShowImage(this.ImgResult, sOutput);
}

private void ShowImage(Image img, string sFile)
{
     byte[] bytes = System.IO.File.ReadAllBytes(sFile);
     BitmapImage bitImg = new BitmapImage();
     bitImg.BeginInit();
     bitImg.StreamSource = new System.IO.MemoryStream(bytes);
     bitImg.EndInit();
     bitImg.Freeze();
     img.Source = bitImg;
}
这样处理后比纯C++环境多耗时0.5s左右,这个结论对于我是能接受的。
采用这种方式,抠图算法执行时间消耗我进行了测试,如下图

![]()
原来需要10-20s的现在仅用1-3s就能实现。如下图在C#环境下WPF工程调用C++版exe的调试截图:
![]()
![]()
结论
Alpha Matting抠图算法可以移植至C#平台,但是最佳实践还是用C++去处理,采用C#调用C++的方式会大大节省耗时。
图片越大耗时会越高,目前我尚未尝试4K图。
原本还想将Global Matting 及其他几种抠图算法也想法移植到C#平台,但是经过上文中一些列测试,发现还是保留原版本更为合理,用C#直接去调用Dll 或 包装的exe应用即可,而且效率更高。
源码下载:微信扫描下方二维码文章末尾获取链接。