1、安装tomcat
2、安装CXF
一、为新渠道webservice加入到项目中
首先,创建一个springboot项目,名为webservice-baffle(附件中)。
第二步,新建web service 服务端
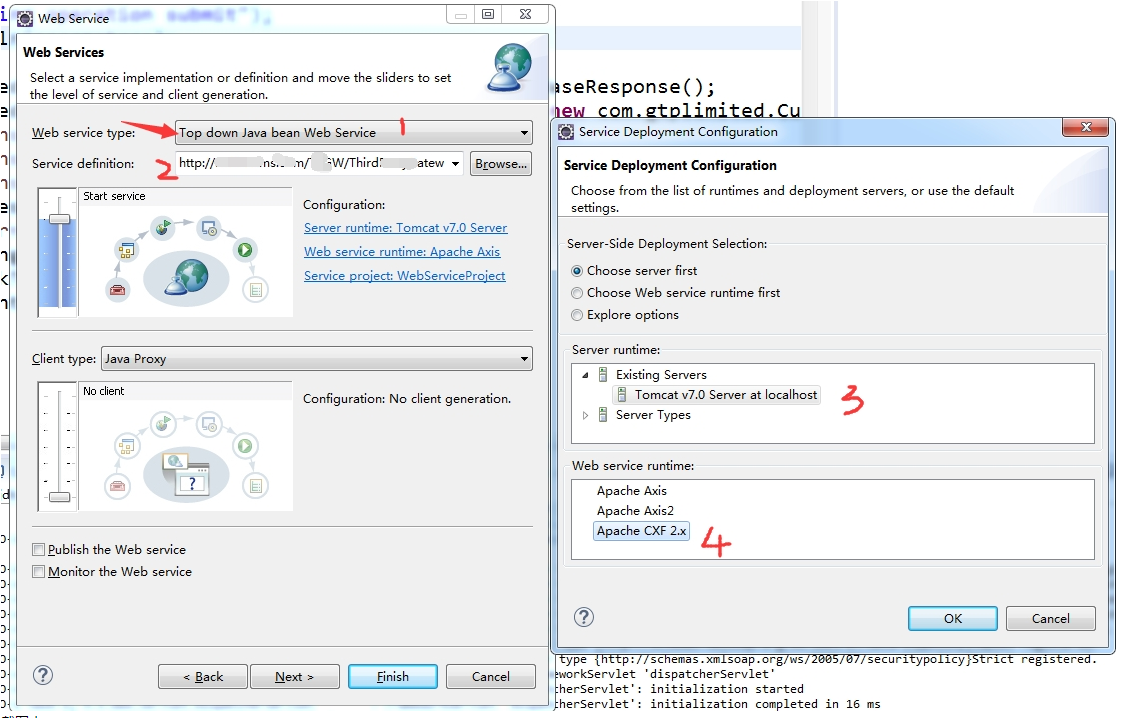
右击webservice-baffle项目,新建“other”,在弹出框中选择“web service”,出现如下弹出框

.jpg)
截图中:
1、web service type:选择 Top down java bean web service
2、web service的http url
3、选择tomcat,如果没有环境,自己下载tomcat并安装配置下
4、选择apache CXF 2.x,如果没有,自己下载和安装下
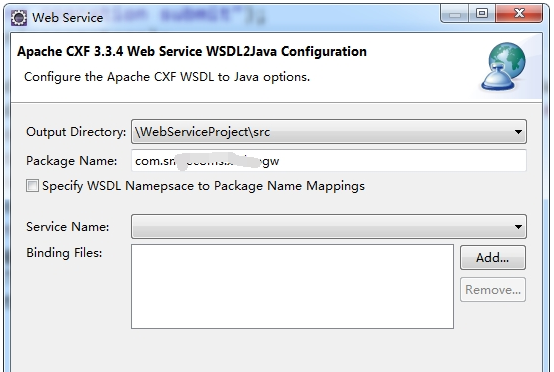
下一步,出现如下提示框,默认到完成。

.jpg)
最后,生成一个WebServiceProject项目。
第三步:将生产的java类拷贝到webservice-baffle项目中:

.jpg)
第四步:注册webservice接口到servlet中:
该操作的代码在com.xxx.xxx.config.EndpointConfig.java
@Configuration
public class CxfConfig {

    @Autowired
    private Bus bus;   //private SpringBus bus;
    @Autowired
    private CommonService commonService;

    //  配置CXF服务发布,默认服务是在host:port/services/发布地址
    // 访问地址 http://127.0.0.1:8080/Service/common?wsdl
    @Bean
    public Endpoint another_endpoint() {
        EndpointImpl endpoint = new EndpointImpl(bus, commonService);
        endpoint.publish("/common");   //发布地址
        return endpoint;
    }
    // 访问地址 http://127.0.0.1:8080/Service/hello?wsdl
    @Bean
    public Endpoint endpoint() {
        EndpointImpl endpoint = new EndpointImpl(bus,  new HelloServiceImpl());
        endpoint.publish("/hello");    //发布地址
        return endpoint;
    }
.jpg)
完成。
问题:
1、与Spring整合问题
Caused by: org.apache.cxf.ws.policy.PolicyException: These policy alternatives can not be satisfied:
{http://docs.oasis-open.org/ws-sx/ws-securitypolicy/200702}SupportingTokens
{http://docs.oasis-open.org/ws-sx/ws-securitypolicy/200702}UsernameToken
at org.apache.cxf.ws.policy.AssertionInfoMap.checkEffectivePolicy(AssertionInfoMap.java:166)
at org.apache.cxf.ws.policy.PolicyVerificationInInterceptor.handle(PolicyVerificationInInterceptor.java:101)
解决方法
esb-server.xml配置增加
<cxf:bus>
<cxf:properties>
<entry key="org.apache.cxf.message.Message.ENCODING" value="UTF-8"/>
</cxf:properties>
<cxf:features>
<cxf:logging/>
<p:policies enabled="false" />
</cxf:features>
</cxf:bus>
    @Bean(name = Bus.DEFAULT_BUS_ID)
    public SpringBus springBus() {
        SpringBus springBus = new SpringBus();
        WSPolicyFeature wpf = new WSPolicyFeature();
        wpf.setEnabled(false);
        Collection<Feature> features = springBus.getFeatures();
        features.add(wpf);
        return springBus;
    }