Select boot-target :
– via /etc/systemd/system/default.target symlink;
– appending number or systemd.unit=<target> to bootargs.
root@ubuntu:/# systemctl status  Openvmi-Xvfb-Manger.service
* Openvmi-Xvfb-Manger.service - Openvmi Xvfb Manger
   Loaded: loaded (/lib/systemd/system/Openvmi-Xvfb-Manger.service; enabled; ven
dor preset: enabled)
   Active: inactive (dead)
root@ubuntu:/# find ./ -name  Openvmi-Xvfb-Manger.service
./lib/systemd/system/Openvmi-Xvfb-Manger.service
./etc/systemd/system/multi-user.target.wants/Openvmi-Xvfb-Manger.service
 优先级
systemd的使用大幅提高了系统服务的运行效率, 而unit的文件位置一般主要有三个目录:


Table 1.  Load path when running in system mode (--system).
┌────────────────────────┬─────────────────────────────┐
│Path                    │ Description                 │
├────────────────────────┼─────────────────────────────┤
│/etc/systemd/system     │ Local configuration         │
├────────────────────────┼─────────────────────────────┤
│/run/systemd/system     │ Runtime units               │
├────────────────────────┼─────────────────────────────┤
│/lib/systemd/system     │ Units of installed packages │
└────────────────────────┴─────────────────────────────┘
这三个目录的配置文件优先级依次从高到低,如果同一选项三个地方都配置了,优先级高的会覆盖优先级低的
systemctl list-unit-files -t service
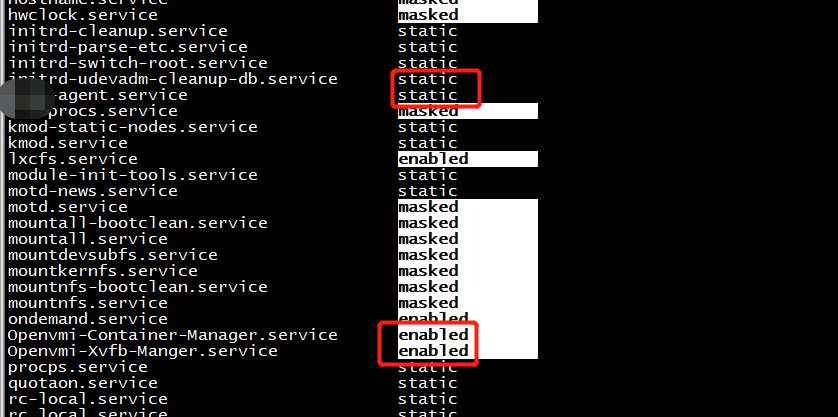
PS:使用命令 systemctl is-enabled postfix.service 得到的值可以是enable、disable或static,这里的 static 它是指对应的 Unit 文件中没有定义[Install]区域,因此无法配置为开机启动服务。
a template for multiple Xvfb services
Simple xvfb.service systemd unit files for xvfb can be found at https://www.centos.org/forums/viewtopic.php?f=48&t=49080#p208363 and at https://askubuntu.com/a/621256/43344 . However, as I mentioned at the latter one can also take a templatized approach:

[Unit]
Description=virtual frame buffer X server for display %I
After=network.target

[Service]
ExecStart=/usr/bin/Xvfb %I -screen 0 1280x1024x24

[Install]
WantedBy=multi-user.target
As a locally-written, non-system non-packaged, unit file for system-wide (as opposed to per-user) services this goes into /etc/systemd/system/xvfb@.service of course.

controlling the services
One instantiates the template, into an actual named service, with the display number that is desired. For display :99, therefore, there is an actual service instance named xvfb@:99.service.

Set the service to auto-start on bootstrap with systemctl enable xvfb@:99.service .
Unset auto-starting the service with systemctl disable xvfb@:99.service .
Start the service manually with systemctl start xvfb@:99.service .
Stop the service manually with systemctl stop xvfb@:99.service .
Inspect the current service status in detail with systemctl status xvfb@:99.service .
场景
某些程序在启动时,会报出 (xxx 为你的程序名)

xxx.service Failed to connect stdout to the journal socket, ignoring: Permission denied
说明:
systemd 启动该程序期间,默认将标准输出和标准错误之类的定向输出给 journal。

如果权限不足,就会报出上述的错误。这个只是启动时的信息,并不是程序自身的日志机制。

一般来说等启动完成之后,程序自己的日志机制才会生效。在此之前都是由 systemd 在处理。

方法1
chmod 777 /run/systemd/journal/stdout
systemctl stop xxx.service
systemctl start xxx.service
方法2
在 /usr/lib/systemd/system/ 下打开 xxx.service

找到以下的代码,如果没有的,自行添加

StandardOutput=journal
StandardError=journal
更改为你自定义的路径,也可以设置为 syslog

StandardOutput=file:/path/to/your/custom.log
StandardError=file:/path/to/your/custom.log
重启服务 (有多余步骤,主要防止修改不生效的问题)

systemctl daemon-reload
systemctl reset-failed
systemctl stop xxx.service
systemctl disable xxx.service
systemctl enable xxx.service
systemctl start xxx.service
[Unit]
Description=customprocess
After=network.target

[Service]
Type=forking
ExecStart=/usr/local/bin/binary1 agent -config-dir /etc/sample.d/server
StandardOutput=/var/log1.log
StandardError=/var/log2.log
Restart=always

[Install]
WantedBy=multi-user.target