---恢复内容开始---
把React的官网入门例子全看一遍,理解了,但自己从头开始写有点困难,这次强迫自己从头开始写,并写好注释:
import React, { Component } from 'react';


class CountTag extends Component {
    constructor(props) {
        super(props)
        //与render函数的onClick绑定,必须绑定,不然js找不到这两个函数
        this.onClickAdd = this.onClickAdd.bind(this)
        this.onCLickReduce = this.onCLickReduce.bind(this)
    }
    onClickAdd()
    {

    }
    onCLickReduce()
    {

    }

    render() {
        return (
            <div>
                {/*与html的标签无异,定义两个按钮和点击函数,但还没有实现它,预定一个props.num让父组件传值*/}
                <button onClick={this.onClickAdd}>+</button>
                <button onClick={this.onCLickReduce}>-</button>
                counter:{this.props.num}
            </div>
        )
    }
}
export default CountTag
运行结果:

接下来该实现点击+ -功能了,当我们只做这个页面时,也就是说不需要父组件,可以把thisp.props.num换成state:
import React, { Component } from 'react';


class CountTag extends Component {
    constructor(props) {
        super(props)
        //与render函数的onClick绑定,必须绑定,不然js找不到这两个函数
        this.onClickAdd = this.onClickAdd.bind(this)
        this.onCLickReduce = this.onCLickReduce.bind(this)
        this.state = {

            initValue: 0
        }
    }
    //+ =>函数
    onClickAdd()
    {

        this.state.initValue++
        //设置state
        this.setState({initValue:this.state.initValue})
    }
    //- => 函数
    onCLickReduce()
    {
        this.state.initValue--
        //设置state
        this.setState({initValue: this.state.initValue})
    }

    render() {
        return (
            <div>
                {/*与html的标签无异,定义两个按钮和点击函数,但还没有实现它,预定一个props.num让父组件传值*/}
                <button onClick={this.onClickAdd}>+</button>
                <button onClick={this.onCLickReduce}>-</button>
                counter: {this.state.initValue}
            </div>
        )
    }
}
export default CountTag
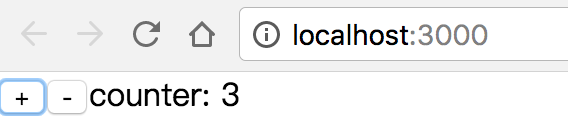
现在按钮功能可以正常使用了:
接下来让我们做一个相对比较复杂的计数器,先看一下运行结果:

三个计数器,下面是一个总和,现在可以新建一个父组件CountParent.js
两个文件的完整代码附上:CountTag.js
import React, { Component } from 'react';


class CountTag extends Component {
    constructor(props) {
        super(props)
        //与render函数的onClick绑定,必须绑定,不然js找不到这两个函数
        this.onClickAdd = this.onClickAdd.bind(this)
        this.onCLickReduce = this.onCLickReduce.bind(this)
        this.state = {
            initValue: this.props.num
        }
    }
    //+ =>函数
    onClickAdd()
    {

        this.onUpdateFunc(true)
    }
    //- => 函数
    onCLickReduce()
    {
        this.onUpdateFunc(false)
    }

    onUpdateFunc(flag)
    {
        const previousValue = this.state.initValue
        //当点击+时flag为真,返回++,反之亦然
        const newValue = flag ? ++this.state.initValue : --this.state.initValue
        this.setState({initValue: newValue})
        //这个函数作为一个props来传递数据,这里是最重要的
        this.props.updateCount(previousValue,newValue)
    }


    render() {
        return (
            <div style={style}>
                {/*与html的标签无异,定义两个按钮和点击函数,但还没有实现它,预定一个props.num让父组件传值*/}
                <button style={style} onClick={this.onClickAdd}>+</button>
                <button style={style} onClick={this.onCLickReduce}>-</button>
                {/*countername表示第一个计数器,num表示父组件给的初值,并把这个初始值赋给当前组件的state*/}
                {this.props.countername} counter: {this.state.initValue}
            </div>
        )
    }
}
const style = {
    margin: '16px'
}
export default CountTag
CountParen.js
其中CountTag.js里面的onUpdateFunc(flag)比较重要,里面有个this.props.uodateCount(previousValue,newValue),这个是组件间传递数据的关键所在,
父组件也用一个函数名不同,但参数相同的来接送子组件传递的数据,从而达到计数器总和的效果。