1 Lua介绍
Lua是一门以其性能著称的脚本语言,被广泛应用在很多方面。Lua一般用于嵌入式应用,现在越来越多应用于游戏 当中,魔兽世界,愤怒的小鸟都有用到。
优势
- Lua极易嵌入到其他程序,可当做一种配置语言。
- 提升应用性能,比如:游戏脚本,nginx,wireshark的脚本
- 兼容性强,可以直接使用 C 代码写的函数。比如corona 移动应用开发平台,跟PhonePap类似,不过使用Lua做开发 语言,应用可以build到iOS,Android,kindle fire,nook平台; 服务器端应该也是Lua。
- 在给软件提供嵌入式脚本编程能力上,Lua是绝佳选择。
官网:http://www.lua.org/
Lua脚本的作用:嵌入到应用程序中,给应用程序提供扩展功能。
2 安装
依赖安装:
yum install gcc -y
安装
curl -R -O http://www.lua.org/ftp/lua-5.4.4.tar.gz

tar zxf lua-5.4.4.tar.gz
mv lua-5.4.4/usr/local/
cd  /usr/local/lua-5.4.4
make linux test

ln -s /usr/local/lua-5.4.4/src/lua /usr/bin/lua
查看版本
[root@q101 lua-5.4.4]# lua -v
Lua 5.4.4  Copyright (C) 1994-2022 Lua.org, PUC-Rio
3 Lua语法
3.1 基础语法
参考:https://www.lua.org/manual/5.4/
运行方法
可以编写xxx.lu脚本,通过lua xxx.lua 运行,或者通过 lua -i 交互式编程
helloworld
[root@q101 lua_script]# vi helloworld.lua
[root@q101 lua_script]# lua helloworld.lua
hello!
注释
单行:两个减号
--
多行注释
--[[
多行注释
多行注释
--]]
变量
全局变量:默认情况下,定义一个变量都是全局变量;
局部变量:局部变量声明时使用local关键字,例如:
--全局变量
a=1
--局部变量
local b=2
如果变量没有初始化,则默认值为nil这和Java中的null不同,例如
[root@q101 ~]# lua -i
Lua 5.4.4  Copyright (C) 1994-2022 Lua.org, PUC-Rio
> name="hello"
> local address="beijin"
> print(name)
hello
> print(address)
nil
>
数据类型
Lua 是动态类型语言,变量不要类型定义,只需要为变量赋值。 值可以存储在变量中,作为参数传递或结果返回。 Lua 中有 8 个基本类型分别为:nil、boolean、number、string、userdata、function、thread 和 table。
| 数据类型 | 描述 |
|---|---|
| nil | 只有值nil属于该类,表示一个无效值(在条件表达式中相当于false)。 |
| boolean | 包含两个值:false和true。nil和false是 false |
| number | 表示双精度类型的实浮点数 |
| string | 字符串由一对双引号或单引号来表示 |
| function | 由 C 或 Lua 编写的函数 |
| userdata | 表示任意存储在变量中的C数据结构 |
| thread | 表示执行的独立线路,用于执行协同程序 |
| table | Lua 中的表(table)其实是一个"关联数组"(associative arrays),数组的索引可以是数字、字 符串或表类型。在 Lua 里,table 的创建是通过"构造表达式"来完成,最简单构造表达式是{},用 来创建一个空表。 |
lua中可以通过type函数查看对象类型,例如
> print(type("hello"))
string
> print(type(10.4))
number
> print(type(print))
function
> print(type(type))
function
> print(type(true))
boolean
> print(type(nil))
nil
3.2 流程控制
if语句
Lua if语句 由一个布尔表达式作为条件判断,其后紧跟其他语句组成。 语法:
if(布尔表达式)
then
    --[[ 布尔表达式为true时执行语句--]]
end
示例:
> age = 9
> if(age < 18)
>> then print("study")
>> end
study
if ...else 语句
语法:
if(布尔表达式)
then
    --[[表达式为true执行--]]
else
     --[[表达式为flase执行--]]
end
示例:
> age=30
> if(age<18)
>> then print("study")
>> else
>> print("work")
>> end
work
3.3 循环
while循环
语法:
while(condition)
do
    --[[满足条件执行内容--]]
end
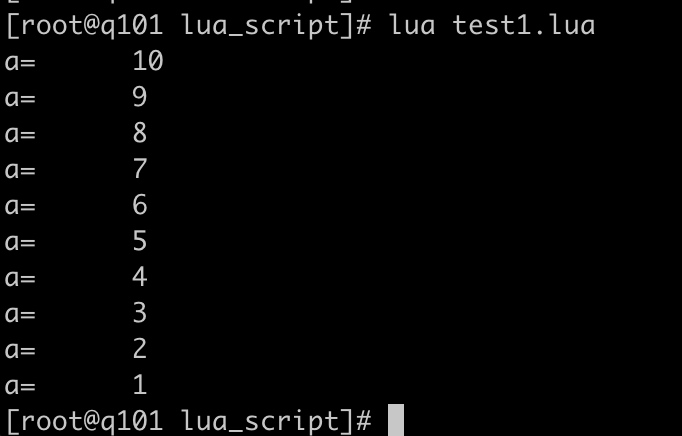
示例:
a=10
while(a>0)
do
  print("a=",a)
  a=a-1
end
for循环
语法:
Lua 编程语言中 for 循环语句可以重复执行指定语句,重复次数可在 for 语句中控制。
语法:
for var=exp1,exp2,exp3
do
    --[[执行体--]]
end
var 从 exp1 变化到 exp2,每次变化以 exp3 为步长递增 var,并执行一次执行体内容。exp3 是可选的,如果不指定,默认为1。
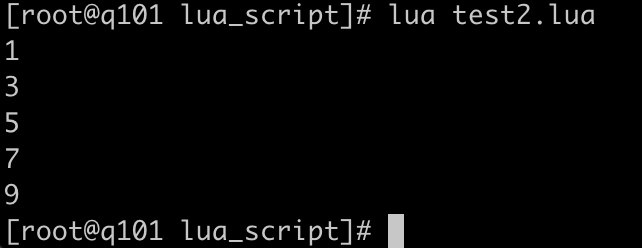
示例:
for a=1,10,2
do
   print(a)
end
for a=1,10,2 a=1从1开始循环,10循环数据到10结束,2每次递增2
repeat...until语句
repeat...until 循环语句不同于 for 和 while循环,for 和 while 循环的条件语句在当前循环执行开始
时判断,而 repeat...until 循环的条件语句在当前循环结束后判断,满足until条件后循环结束。
语法:
repeat
    --[[执行体--]]
until(conditon)
示例:
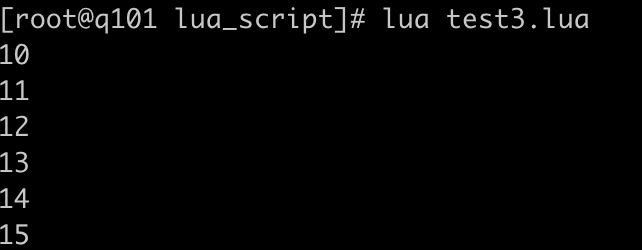
num=10
repeat
   print(num)
   num=num+1
until(num>15)
3.4 函数
lua中也可以定义函数,类似于java中的方法。例如:
--比较2个值大小
function max(num1,num2)
   if(num1>num2) then
       result=num1
   else
       result=num2
   end

   return result
end

print("最大值是:",max(5,3))
print("最大值是:",max(11,12))

表
table 是 Lua 的一种数据结构用来帮助我们创建不同的数据类型,如:数组、字典等。 Lua也是通过table来解决模块(module)、包(package)和对象(Object)的。
-- 初始化表
mytable = {}
-- 指定值
mytable[0]= "Lua"
-- 移除引用
mytable = nil
模块
模块定义
模块类似于一个封装库,从 Lua 5.1 开始,Lua 加入了标准的模块管理机制,可以把一些公用的代码放在一个文件里,以 API 接口的形式在其他地方调用,有利于代码的重用和降低代码耦合度。
创建一个文件叫module.lua,在module.lua中创建一个独立的模块,代码如下:
-- 文件名为 module.lua
-- 定义一个名为 module 的模块
module = {}
-- 定义一个常量
module.constant = "这是一个常量"
-- 定义一个函数
function module.func1()
    print("这是一个公有函数")
end
local function func2()
    print("这是一个私有函数!")
end
function module.func3()
    func2()
end
return module
由上可知,模块的结构就是一个 table 的结构,因此可以像操作调用 table 里的元素那样来操作调用模块里的常量或 函数。
上面的 func2 声明为程序块的局部变量,即表示一个私有函数,因此是不能从外部访问模块里的这个私有函数,必须 通过模块里的公有函数来调用.
require 函数
require 用于 引入其他的模块,类似于java中的类要引用别的类的效果。
语法:
require("模块名")
require "模块名"
两种都可以。 我们可以将上面定义的module模块引入使用,创建一个test_module.lua文件,代码如下:
 -- test_module.lua 文件
-- module 模块为上文提到到
module.lua require("module")
print(module.constant)
module.func3()
4 Redis + Lua
Redis 在 2.6 版本中推出了脚本功能,允许开发者将 Lua 语言编写的脚本传到 Redis 中执行。使用 Lua 脚本的优点有如下几点:
- 减少网络开销:本来需要多次请求的操作,可以一次请求完成,从而节约网络开销;
- 原子操作:Redis 会将整个脚本作为一个整体执行,中间不会执行其它命令;
- 复用:客户端发送的脚本会存储在 Redis 中,从而实现脚本的复用。
4.1 Redis执行lua脚本
# 将lua脚本载到redis
redis-cli script load "$(cat xxx.lua)"
# 执行上一步返回的sha值
redis-cli evalsha "xxx" 0
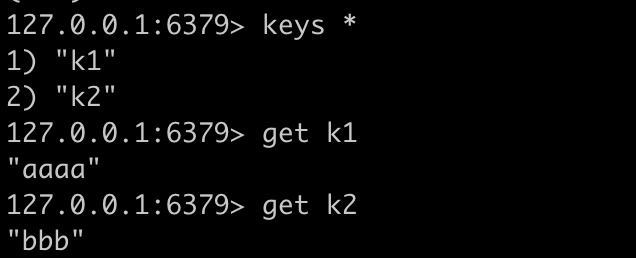
根据key获取Redis中的value
Redis中目前存在的数据
编写redis1.lua脚本
--索引以数值1开始
local key=KEYS[1]
local list=redis.call("get",key);
return list;
通过脚本获取Redis中的值
[root@q101 lua_script]# redis-cli --eval redis1.lua k1
"aaaa"
[root@q101 lua_script]# vi redis1.lua
[root@q101 lua_script]# redis-cli --eval redis1.lua k2
"bbb"
统计点击数
目前Redis中没有count值
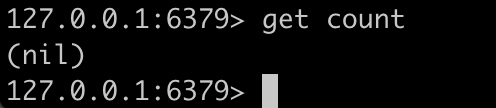
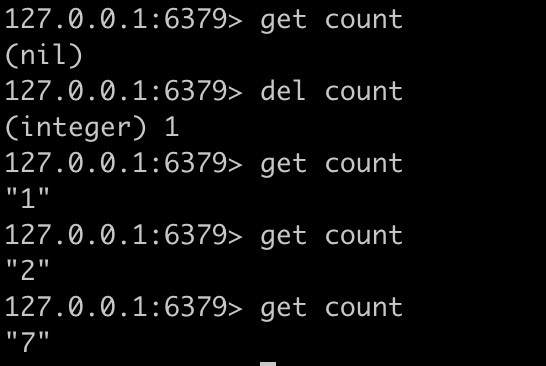
编写redis2.lua
--每次执行count +1
local msg='count:'
local count = redis.call("get","count")
if not count then
        redis.call("set","count",0)
end

redis.call("incr","count")

return msg..count+1
执行redis2.lua
redis-cli --eval redis2.lua 0
redis中查询count值
4.2 redis2-nginx-module
redis2-nginx-module是一个支持 Redis 2.0 协议的 Nginx upstream 模块,它可以让 Nginx 以非阻塞方式直接防问远方的 Redis 服务,同时支持 TCP 协议和 Unix Domain Socket 模式,并且可以启用强大的 Redis 连接池功能。
GitHub:https://github.com/openresty/redis2-nginx-module
openresty自带redis2-nginx-module,可以直接使用
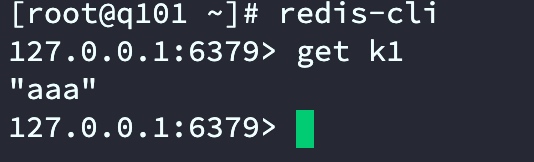
Nginx配置
location = /foo {
     default_type text/html;
     redis2_query set k1 'aaa';
     # 请求转发Redis
     redis2_pass 127.0.0.1:6379;
}
重启后访问http://192.168.88.101/foo,查看Redis中k1值
get请求
# 访问 ip/get?key=xxx
location = /get {
     default_type text/html;
     redis2_pass 127.0.0.1:6379;
     #redis2_query auth 123123;
     set_unescape_uri $key $arg_key;  # this requires ngx_set_misc
     redis2_query get $key;
}
set请求
location = /set {
    default_type text/html;
    redis2_pass 127.0.0.1:6379;
    #redis2_query auth 123123;
     # $arg_xxx未自定义
     set_unescape_uri $key $arg_uid;  # this requires ngx_set_misc
     set_unescape_uri $val $arg_uname;  # this requires ngx_set_misc
     redis2_query set $key $val;
 }
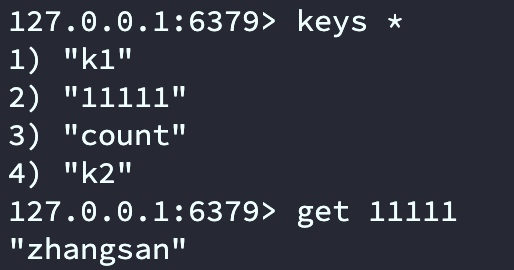
请求http://192.168.88.101/set?uid=11111&uname=zhangsan,查看Redis
操作集群
upstream redis_cluster {
     server 192.168.88.101:6379;
     server 192.168.88.102:6379;
 }
location = /redis {
default_type text/html;
         redis2_next_upstream error timeout invalid_response;
         redis2_query get foo;
         redis2_pass redis_cluster;
}
其他更多方法,参考官方文档。通过redis2-nginx-module需要对Nginx配置进行修改,不适用于复杂场景。通常使用更多的是通过外置lua脚本编写业务逻辑,Nginx conf引用lua,比如lua-resty-redis。
4.3 lua-resty-redis访问redis
nginx配置增加
location /luaresty {
    default_type text/html;
    content_by_lua_file script/luaresty.lua;
}
编写luaresty.lua
vi /usr/local/openresty/nginx/script/luaresty.lua
local redis = require "resty.redis"
local red = redis:new()
local ok,err = red:connect("127.0.0.1",6379)

if not ok then
   ngx.say("failed to connect:",err)
   return
end
--set key=user1   value=zhangsan
ok,err = red:set("user1","zhangsan")
if not ok then
   ngx.say("failed to set user1:",err)
   return
end
ngx.say("set result:",ok)

--get key=user1
local res,err = red:get("user1")
if not res then
   ngx.say("failed to get user1:",err)
   return
end

if res == ngx.null then
   ngx.say("user1 not found")
   return
end
ngx.say("user1:",res)
访问:http://192.168.88.101/luaresty

更多使用参考:https://github.com/openresty/lua-resty-redis
redis-cluster支持
参考:https://github.com/steve0511/resty-redis-cluster
5 OpenResty Nginx + Lua
5.1 OpenResty Nginx 安装
官网地址:http://openresty.org/cn/linux-packages.html
yum install yum-utils
yum-config-manager --add-repo https://openresty.org/package/centos/openresty.repo
yum install openresty -y
yum install openresty-resty -y
启动\关闭\重启等命令
# 启动
systemctl start openresty
# 查看状态
systemctl status openresty
# 加载配置
systemctl reload openresty
# 关闭
systemctl stop openresty
查看版本openresty -v
[root@q101 utils]# openresty -v
nginx version: openresty/1.19.9.1
测试lua脚本
vi /usr/local/openresty/nginx/conf/nginx.conf

# 在nginx.conf server中写入
location /lua {

    default_type text/html;
    content_by_lua 'ngx.say("<p>Hello, OpenResty!</p>")';
  }

# 保存后重新加载配置
systemctl reload openresty
浏览器访问http://192.168.88.101/lua

获取请求nginx uri中的变量
nginx配置修改
location /nginx_var {
      default_type text/html;
      content_by_lua_block {
         # arg_a表示获取参数名为a的参数值
         ngx.say(ngx.var.arg_a)
     }
 }
重新加载配置后浏览器访问:http://192.168.88.101/nginx_var?a=123123

5.2 lua-resty-http
下载安装
GitHub主页:https://github.com/ledgetech/lua-resty-http
下载后将lua-resty-http/lib/resty下所有文件上传到/usr/local/openresty/lualib/resty

编写脚本
vi /usr/local/openresty/nginx/script/resty1.lua
内容如下
local http = require("resty.http")
local httpc = http.new()

--http://www.baidu.com/s?wd=test
local resp, err = httpc:request_uri("http://www.baidu.com", {
    method = "GET",
    path = "/s?wd=test",
    headers = {
        ["User-Agent"] = "Mozilla/5.0 (Windows NT 6.1; WOW64) AppleWebKit/537.36 (KHTML, like Gecko) Chrome/40.0.2214.111 Safari/537.36"
    }
})

if not resp then
    ngx.say("request error :", err)
    return
end

ngx.status = resp.status

for k, v in pairs(resp.headers) do
    if k ~= "Transfer-Encoding" and k ~= "Connection" then
        ngx.header[k] = v
    end
end

ngx.say(resp.body)
httpc:close()
配置nginx
resolver 8.8.8.8;
location /resty1 {
    default_type text/html;
    content_by_lua_file script/resty1.lua;
}
测试
访问:http://192.168.88.101/resty1

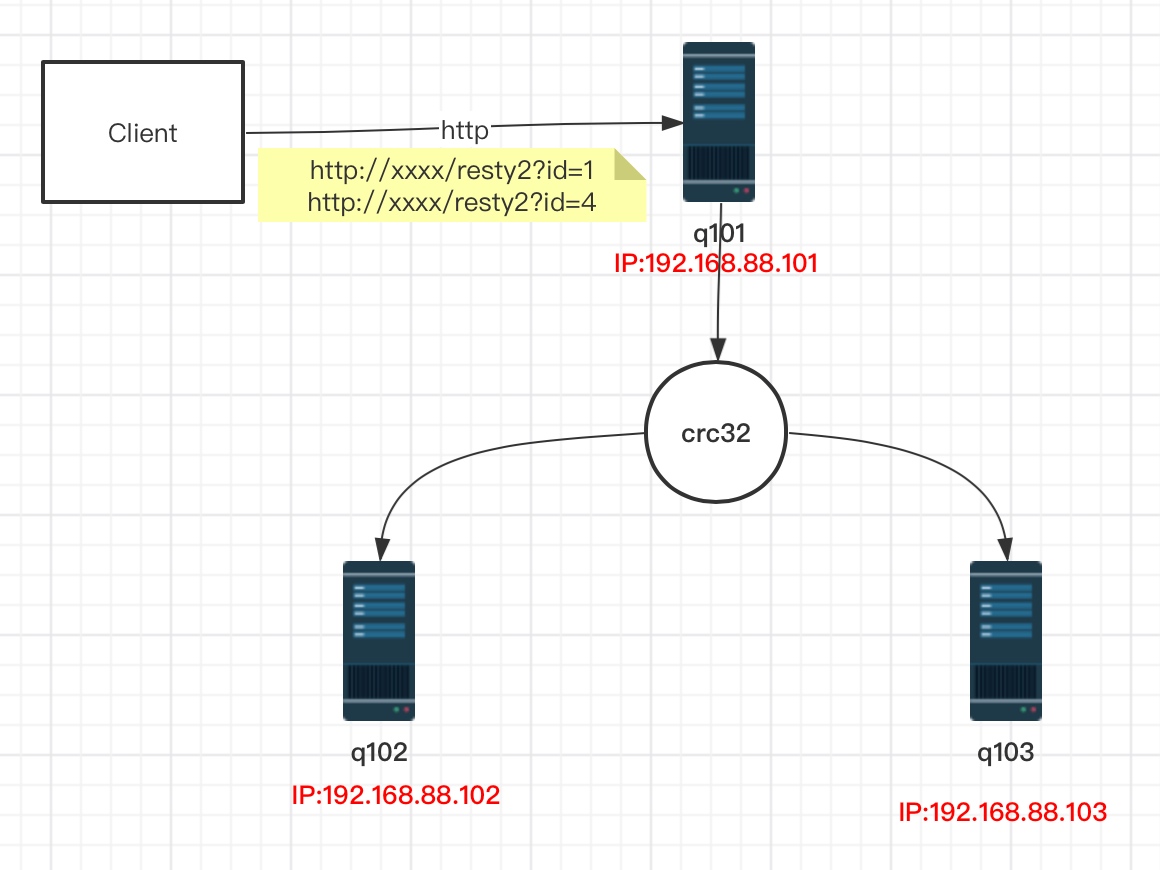
5.3 lua-resty-http实现一致性hash负载均衡
本节主要讲解使用lua脚本根据URL做定向转发,实现负载均衡。比如当商品详情访问增加,需要对商品访问进行分流,不同的商品走不同的服务器。网络拓扑图如下:
nginx配置
location /resty2 {
    default_type text/html;
    content_by_lua_file script/resty2.lua;
}
lua脚本编写
vi /usr/local/openresty/nginx/script/resty2.lua
内容如下:
local http = require("resty.http")
local httpc = http.new()
local hosts = {"192.168.88.102","192.168.88.103"}
local item_id= ngx.var.arg_id
--根据参数名为id的值进行hash计算
local id_hash = ngx.crc32_long(item_id)
local index = (id_hash % 2) +1

local resp, err = httpc:request_uri("http://"..hosts[index], {
    method = "GET",
    path = "/",
    headers = {
        ["User-Agent"] = "Mozilla/5.0 (Windows NT 6.1; WOW64) AppleWebKit/537.36 (KHTML, like Gecko) Chrome/40.0.2214.111 Safari/537.36"
    }
})

if not resp then
    ngx.say("request error :", err)
    return
end
ngx.say(resp.body)
httpc:close()
测试
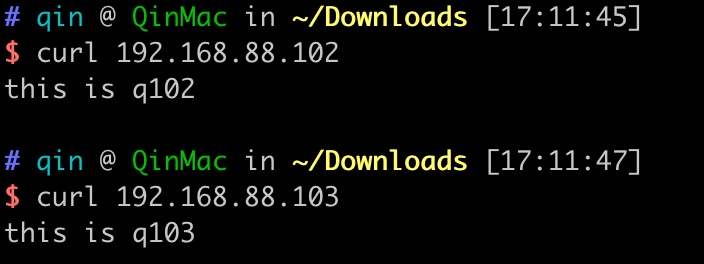
再准备两台服务器q102和q103上都安装httpd服务器(测试使用):
# 下载安装httpd服务,命令如下
yum install -y httpd
# 设置首页内容(q103把内容改为this is q103)
echo this is q102 > /var/www/html/index.html
# 启动httpd
systemctl start httpd
通过单独访问192.168.88.101和192.168.88.102可以正常访问。