一、介绍
Spring Cloud Config项目是一个解决分布式系统的配置管理方案。它包含了Client和Server两个部分,server提供配置文件的存储、以接口的形式将配置文件的内容提供出去,client通过接口获取数据、并依据此数据初始化自己的应用。
二、服务端搭建
1、pom文件添加依赖
      <dependency>
            <groupId>org.springframework.boot</groupId>
            <artifactId>spring-boot-starter-web</artifactId>
        </dependency>
        <!--配置中心服务端依赖-->
        <dependency>
            <groupId>org.springframework.cloud</groupId>
            <artifactId>spring-cloud-config-server</artifactId>
        </dependency>
        <!--eureka客户端-->
        <dependency>
            <groupId>org.springframework.cloud</groupId>
            <artifactId>spring-cloud-starter-netflix-eureka-client</artifactId>
        </dependency>
        <!--监控-->
        <dependency>
            <groupId>org.springframework.boot</groupId>
            <artifactId>spring-boot-starter-actuator</artifactId>
        </dependency>
        <!--配置rabbitMQ-->
        <dependency>
            <groupId>org.springframework.cloud</groupId>
            <artifactId>spring-cloud-starter-bus-amqp</artifactId>
        </dependency>
2、启动类上添加注解@SpringBootApplication,@EnableDiscoveryClient和@EnableConfigServer
@SpringBootApplication
@EnableDiscoveryClient
@EnableConfigServer
public class ConfigApp {
    public static void main(String[] args){
        SpringApplication.run(ConfigApp.class,args);
    }
}
3、application.yml配置
server:
  port: 8901
spring:
  application:
    name: config-server
  rabbitmq: #rabbitmq相关配置
    host: localhost
    port: 5672
    username: guest
    password: guest
  cloud:
    config:
      server:
        git: #配置存储配置信息的Git仓库
          uri: https://gitee.com/xx/xx.git   #git仓库配置文件地址
          username: git账号
          password: git密码
          clone-on-start: true #其他的配置中心的客户端启动时直接从git获取配置
eureka:
  instance:
    hostname: localhost #指定主机地址
    instance-id: ${spring.cloud.client.ip-address}:${server.port}
  client:
    service-url:
      defaultZone: http://localhost:8761/eureka/

# 刷新
management:
  endpoints: #暴露bus刷新配置的端点
    web:
      exposure:
        include: 'bus-refresh'
三、客户端搭建
1、pom文件添加依赖
      <!--客户端client-->
        <dependency>
            <groupId>org.springframework.cloud</groupId>
            <artifactId>spring-cloud-starter-netflix-eureka-client</artifactId>
        </dependency>
        <!--监视和管理应用程序-->
        <dependency>
            <groupId>org.springframework.boot</groupId>
            <artifactId>spring-boot-starter-actuator</artifactId>
        </dependency>
        <!--配置中心客户端依赖-->
        <dependency>
            <groupId>org.springframework.cloud</groupId>
            <artifactId>spring-cloud-starter-config</artifactId>
        </dependency>
        <!--配置rabbitMQ-->
        <dependency>
            <groupId>org.springframework.cloud</groupId>
            <artifactId>spring-cloud-starter-bus-amqp</artifactId>
        </dependency>
2、bootstrap.yml配置(采用bootstrap.yml,而不是application.yml)
spring:
  profiles:
    active: default
  application:
    name: user-app
  rabbitmq: #rabbitmq相关配置
    host: localhost
    port: 5672
    username: guest
    password: guest
  cloud:
    #Config客户端配置
    config:
      #启用配置后缀名称
      profile: dev
      #分支名称
      label: master
      #配置中心地址
      uri: http://localhost:8901
      #配置文件名称
      name: user

#刷新配置
management:
  endpoints:
    web:
      exposure:
        include: 'refresh'
eureka:
  client:
    service-url:
      defaultZone: http://localhost:8761/eureka/
  instance:
    instance-id: ${spring.cloud.client.ip-address}:${server.port}

#默认节点
---
spring:
  profiles: default
server:
  port: 9000

#节点1
---
spring:
  profiles: user1
server:
  port: 8103

#节点2
---
spring:
  profiles: user2
server:
  port: 8104
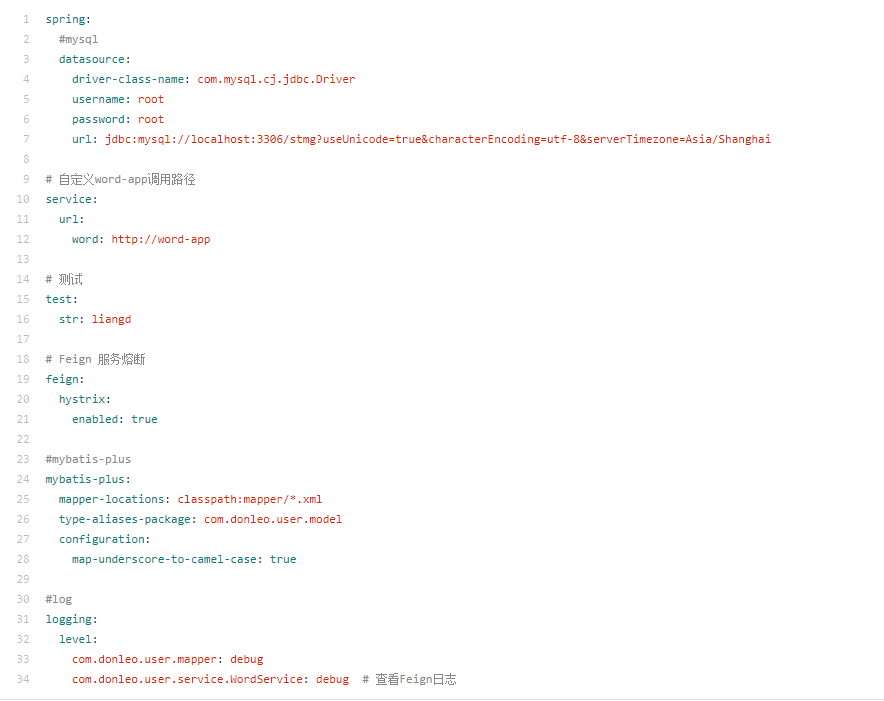
3、git远程配置(将一些容易改变的配置放到git上)

四、通过配置中心获取配置信息
1、获取配置文件访问格式
1)获取配置信息
/{label}/{application}-{profile}
2)获取配置文件信息
/{label}/{application}-{profile}.yml
- application:代表应用名称,默认为配置文件中的spring.application.name,如果配置了spring.cloud.config.name,则为该名称;
- label:代表分支名称,对应配置文件中的spring.cloud.config.label;
- profile:代表环境名称,对应配置文件中的spring.cloud.config.profile。
2、测试访问
http://localhost:端口/master/配置文件名
http://localhost:端口/master/配置文件名.yml
五、刷新配置
- 当修改了远程配置文件时,本地不能同时更新配置文件信息,可以借助消息中间件通知远程配置文件已改变,这里通过rabbitMq的方式进行配置更新
- 刷新访问端口:http://localhost:端口号/actuator/bus-refresh (Post请求方式)
- 这里的端口号是配置中心的端口号