1、nginx:
官网:www.nginx.org
下载:wget -c http://nginx.org/download/nginx-1.14.0.tar.gz
解压:tar -zxvf nginx-1.14.0.tar.gz
进入:cd nginx-1.14.6
安装依赖包:yum install gcc gcc-c++ glibc pcre pcre-devel zlib zlib-devel
生成配制文件:./configure --prefix=/usr/local/nginx --user=*** --group=*** --with-http_ssl_module --with-http_stub_status_module
编译安装:make && make install
升级、降级:下载安装包后,按照原来的参数进行编译后,不再安装(make install) 然后复制cp obj/nginx 到原安装目录下,就可以了。
注意:
a,编译前可以隐藏版本:编辑源码包里:vim nginx-1.14.0/src/core/nginx.h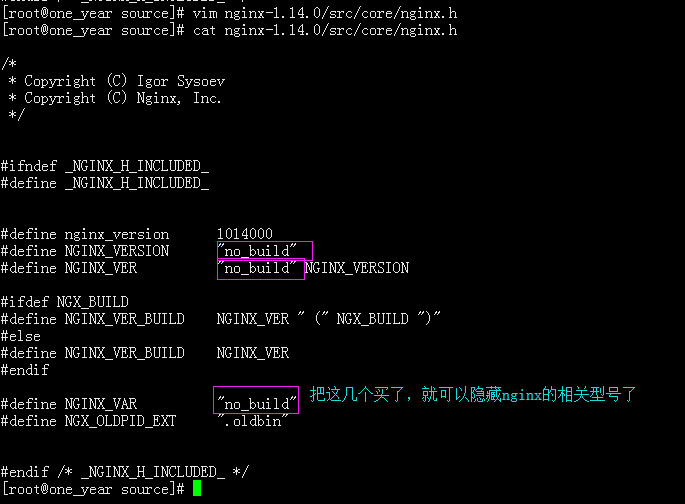
查看: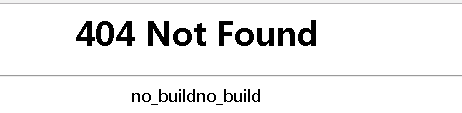
安装完成后,编辑配制文件:
cp /usr/local/nginx/conf/nginx.conf /usr/local/nginx/conf/nginx.conf.bak
vim /usr/local/nginx/conf/nginx.conf
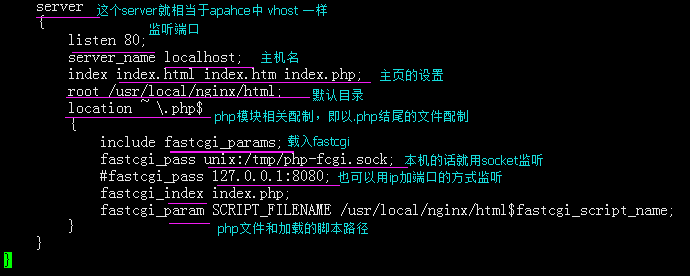
把内容全部删除后 加入这这些语句:
/usr/local/nginx/sbin/nginx -t
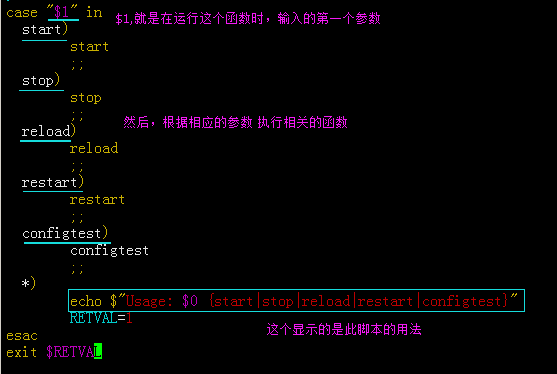
vim /etc/init.d/nginx
加入以下代码:
加入后,更加权限:
chmod 755 /etc/init.d/nginx
若需要开机启动的话,再加入服务启动列表:
chkconfig --list 查看有哪些服务列表
chkconfig --add /etc/init.d/nginx (增加nginx服务)
chkconfig --level 2345 nginx on (设置为2345模式下为自动启动)
查检语法:
/usr/local/nginx/sbin/nginx -t
启动查看:
/etc/init.d/nginx start
ps aux |grep nginx
netstat -tulnp
图例:
安装无成后的目录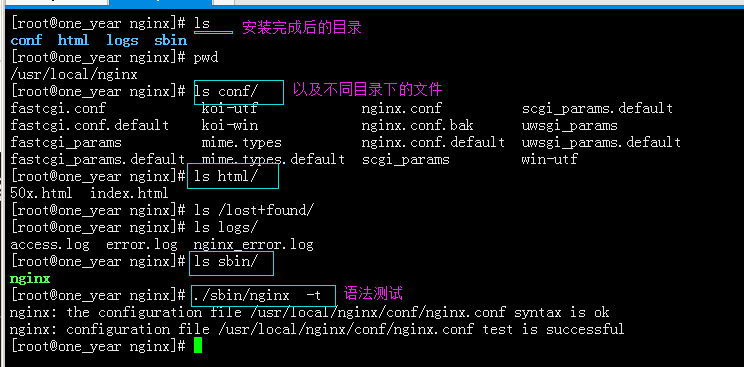
配制文件相关: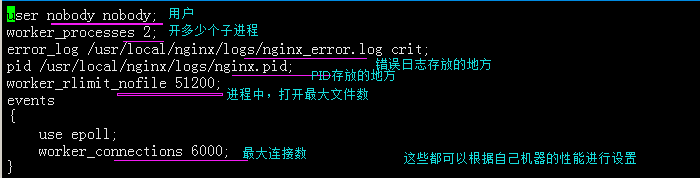

启动文件相关: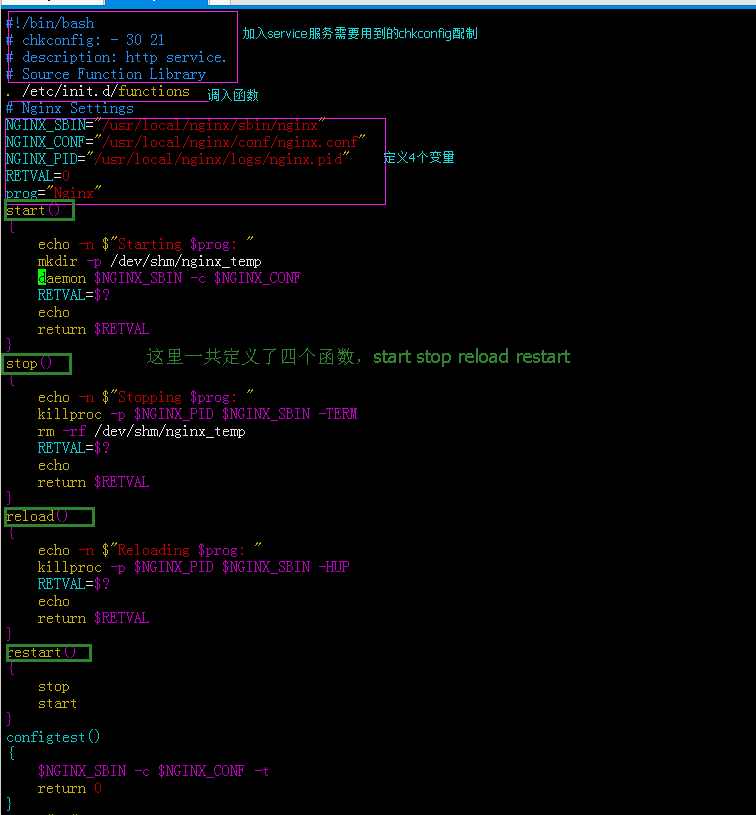
启动、查看: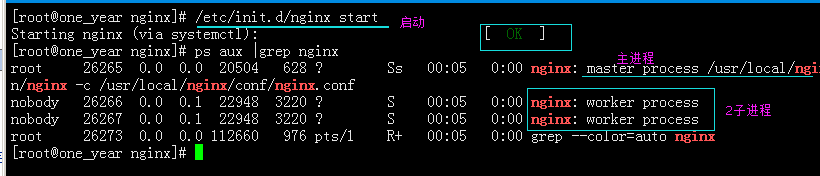
2、Nginx默认虚拟主机
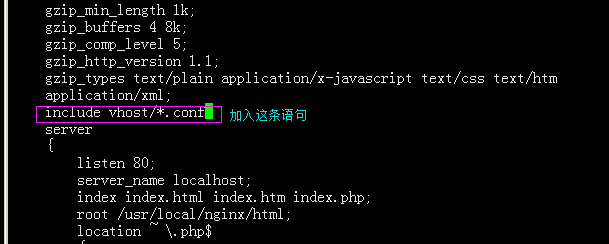
编辑:/usr/local/nginx/conf/nginx.conf
加入这条语句(在http下)include vhost/*.conf
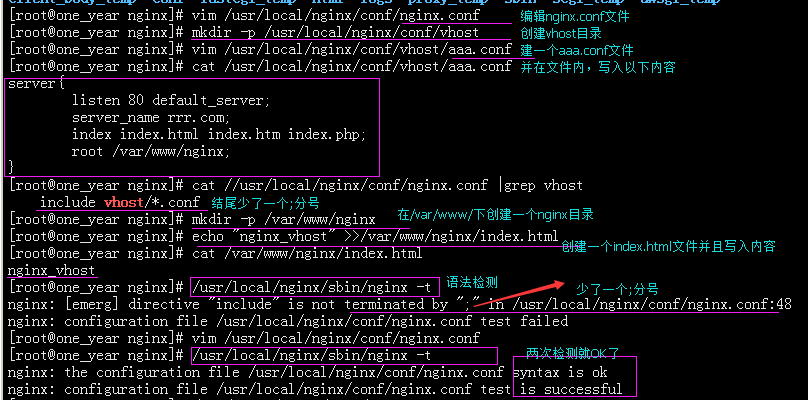
然后,在 conf目录下 创建vhost 目录
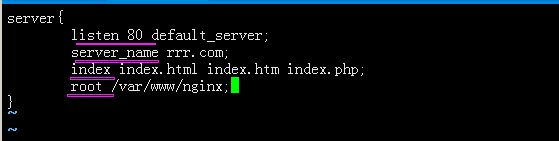
最后在conf目录下,创建以 .conf 结尾的文件,写入:
server{
listen 80 default_server;
server_name rrr.com;
index index.html index.htm index.php;
root /var/www/nginx;
}
若/var/www/目录下没有nginx目录,那么就需要创建:mkdir -p /var/www/nginx
再创建index.html文件:
echo "nginx_vhost" >>/var/www/nginx/index.html
配制完成后测试语法:/usr/local/nginx/sbin/nginx -t
最后重新加载nginx服务:/usr/local/nginx/sbin/nginx -s reload
访问测试:curl -x127.0.0.1:80 rrr.com

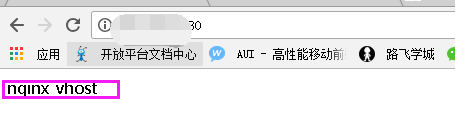
到此nginx虚拟主机配制完成。
3、nginx用户认证
若没有安装httpd需要先安装:
yum install httpd -y
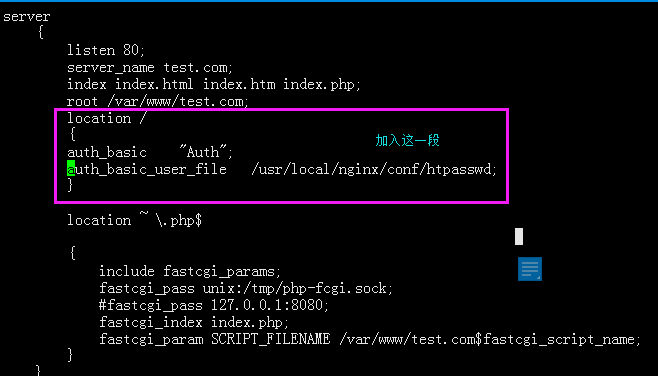
在/usr/local/nginx/conf/vhost/ 下面新建一个test.com.conf
写入以下代码:
location /
{
auth_basic "Auth";
auth_basic_user_file /usr/local/nginx/conf/htpasswd;
}
语法检查:
/usr/local/nginx/sbin/nginx -t
生成密码文件:
htpasswd -c -m /usr/local/nginx/conf/htpasswd test (-c 是创建文件 -m 是md5加密)
htpasswd -m /usr/local/nginx/conf/htpasswd test1
重新加载nginx:
/usr/local/nginx/sbin/nginx -s reload
访问查看: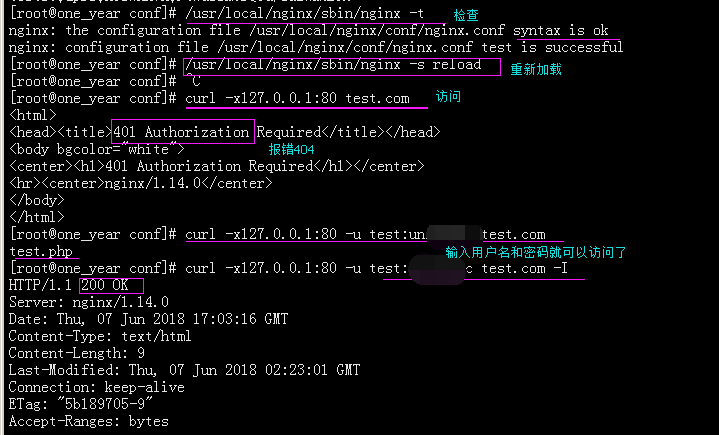
若要配制某个目录的权限只需要改:
若需要对某个文件进行权限设置的话,就改成:
查看测试: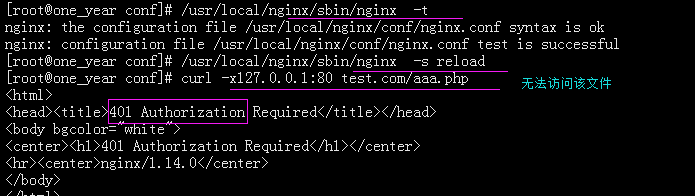

4、nginx 域名重定向:
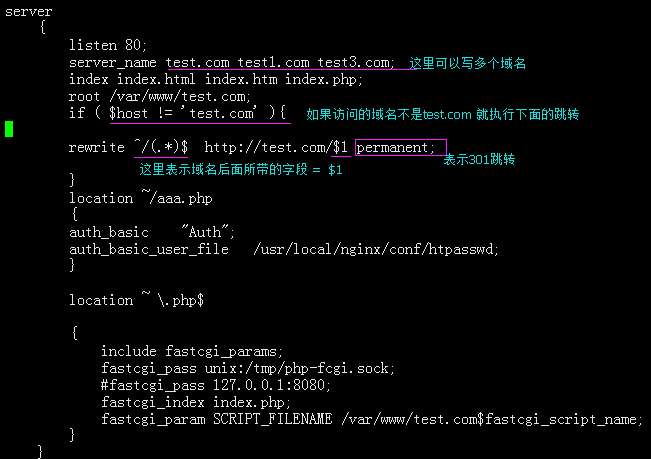
在vhost目录下的配制文件test.com.conf 加入:
和多设置几个域名:server_name test.com test1.com test3.com;
if ( $host != 'test.com' ){
rewrite ^/(.*)$ http://test.com/$1 permanent;
}
然后,查检和测试:
/usr/local/nginx/sbin/nginx -t
/usr/local/nginx/sbin/nginx -s reload
curl -x127.0.0.1:80 test3.com/index.html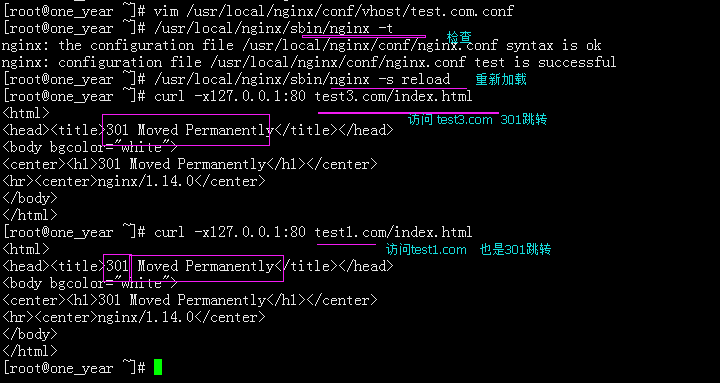
到此,域名跳转配制完成。