关于getForEntity,postForEntity,分别提供了三个接口
<T> ResponseEntity<T> getForEntity(String url, Class<T> responseType, Object... uriVariables)
<T> ResponseEntity<T> getForEntity(String url, Class<T> responseType, Map<String, ?> uriVariables)
<T> ResponseEntity<T> getForEntity(URI url, Class<T> responseType)

参数说明
url:请求地址;
responseType:请求响应体body的包装类型;

uriVariables:URL中的参数绑定


<T> ResponseEntity<T> postForEntity(String url, @Nullable Object request, Class<T> responseType, Object... uriVariables)
<T> ResponseEntity<T> postForEntity(String url, @Nullable Object request, Class<T> responseType, Map<String, ?> uriVariables)
<T> ResponseEntity<T> postForEntity(URI url, @Nullable Object request, Class<T> responseType)
在上一节中,我们搭建了注册中心,服务提供者;
新建DemoController
package com.example.demo;

import org.springframework.beans.factory.annotation.Autowired;
import org.springframework.http.ResponseEntity;
import org.springframework.web.bind.annotation.GetMapping;
import org.springframework.web.bind.annotation.RequestParam;
import org.springframework.web.bind.annotation.RestController;
import org.springframework.web.client.RestTemplate;

/**
 * @author: DevanYan
 * @create: 2019-05-21 16:39
 */
@RestController
public class DemoController {

    @Autowired
    RestTemplate restTemplate;

    @GetMapping("hello")
    public String hello(@RequestParam("name")String name){

        String url = "http://SERVER-ONE/hello?name=N"+Math.random();
        ResponseEntity<String> str = restTemplate.getForEntity(url,String.class);
        return  str.getBody();
    }
}
启动项目,并访问http://localhost:8080/hello?name=jack
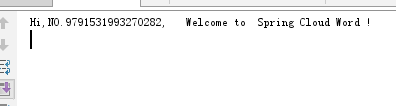
输出
创建服务消费者SERVER-TWO
①创建步骤同SERVER-ONE,端口是8090,具体步骤略;
②RestTemplate的使用
package com.example.demo;

import ...


@SpringBootApplication
@EnableDiscoveryClient
public class DemoApplication {

    public static void main(String[] args) {
        SpringApplication.run(DemoApplication.class, args);
    }

    @Bean
    @LoadBalanced
    RestTemplate restTemplate(){
        return new RestTemplate();
    }

}
③创建消费Controller
package com.example.demo;

import ...

/**
 * @author: DevanYan
 * @create: 2019-05-21 16:39
 */
@RestController
public class DemoController {

    @Autowired
    RestTemplate restTemplate;

    @GetMapping("hello")
    public String hello(@RequestParam("name")String name){

        String url = "http://SERVER-ONE/hello?name=N"+Math.random();
        ResponseEntity<String> str = restTemplate.getForEntity(url,String.class);
        return  str.getBody();
    }
}
访问 http://localhost:8090/hello?name=jack
可看到server-one后台输出