RCF的使用教程
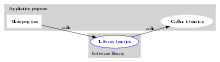
RCF(Remote Call Framework)是一个使用C++编写的RPC框架,在底层RCF支持多种传输实现方式(transport implementations). 包括TCP,UDP,多播,组播,win32命名管道和unix domain socket。下面我以一个例子讲述如何使用TCP完成一次RPC操作。
需要注意的是,RCF官网上提供的是源码包,所以在使用时我们要么自己将其编译为动态库,要么将整个源码加入我们的项目中。
1. 定义接口
使用RCF框架,我们不必像CORBA那样,需要使用IDL去定义接口。直接使用RCF提供的宏就可以定义。
以下代码定义了一个名为I_PrintService的接口,该接口包含了名为Print的函数,函数返回值为void,参数是const string &类型。
值得注意的是RCF_METHOD_V1表示函数返回值为空且只有一个形参,类似的,RCF_METHOD_V2表示函数返回值为空且有两个参数,最多支持15个参数。那么如果我们想要函数有返回值呢?比如一个返回值为int,有一个参数的函数。这时可以使用RCF_METHOD_R1宏来声明该函数。严谨一点的表达如下所示,
RCF_METHOD_{V|R}{
}()
// Define the I_PrintService RCF interface.
RCF_BEGIN(I_PrintService, "I_PrintService")
    RCF_METHOD_V1(void, Print, const std::string &)
RCF_END(I_PrintService)
2. 服务端的编写
该代码的目的是在服务端实现一个Print函数,然后客户端使用自己的参数调用服务端的Print函数。
- 创建一个初始化对象RcfInit init. RcfInit的默认构造函数会调用init(RcfConfigT *=nullptr)初始化RCF库的引用计数值。
- 实例化一个RCF server,参数是具体的传输方式,TCP,UDP,命名管道等等。
- 将服务器绑定到声明的接口
- 启动服务器
#include <iostream>
#include <RCF/RCF.hpp>
// Define the I_PrintService RCF interface.
RCF_BEGIN(I_PrintService, "I_PrintService")
    RCF_METHOD_V1(void, Print, const std::string &)
RCF_END(I_PrintService)
// Server implementation of the I_PrintService RCF interface.
class PrintService
{
public:
    void Print(const std::string & s)
    {
        std::cout << "I_PrintService service: " << s << std::endl;
    }
};

int main()
{
    try
    {
        // Initialize RCF.
        1. RCF::RcfInit rcfInit;
        // Instantiate a RCF server.
        2. RCF::RcfServer server(RCF::TcpEndpoint("127.0.0.1", 50001));
        // Bind the I_PrintService interface.
        3. PrintService printService;
        server.bind<I_PrintService>(printService);
        // Start the server.
        4. server.start();
        std::cout << "Press Enter to exit..." << std::endl;
        std::cin.get();
    }
    catch ( const RCF::Exception & e )
    {
        std::cout << "Error: " << e.getErrorMessage() << std::endl;
    }
    return 0;
}
3. 客户端的编写
- 声明接口
- 创建一个初始化对象RcfInit init.
- 实例化一个RCF客户端
- 调用服务器的函数
RCF_BEGIN(I_PrintService, "I_PrintService")
    RCF_METHOD_V1(void, Print, const std::string &)
RCF_END(I_PrintService)
int main()
{
    try
    {
        // Initialize RCF.
        RCF::RcfInit rcfInit;
        std::cout << "Calling the I_PrintService Print() method." << std::endl;

        // Instantiate a RCF client.
        RcfClient<I_PrintService> client(RCF::TcpEndpoint("127.0.0.1", 50001));
        // Connect to the server and call the Print() method.
        client.Print("message from dennis");
    }
    catch ( const RCF::Exception & e )
    {
        std::cout << "Error: " << e.getErrorMessage() << std::endl;
    }
    return 0;
}
4. 编译运行
编译时注意添加头文件的目录和-luuid
g++ server.cpp ../src/RCF/RCF.cpp -lpthread -ldl -std=c++1y -luuid -I ../include/ -o server

参考
http://www.deltavsoft.com/doc/_init_deinit_8hpp.html#a450dd848bd45776c9a277ded406522c1
回调函数(callback)
1. 什么是回调函数
回调函数就是由调用方实现,但是由被调用函数(库函数)调用的函数。常见于c标准库和java,c++中的事件处理机制。回调函数可分为两种同步回调和异步回调。
2. 同步回调
同步回调函数在调用方(caller)调用后立即执行
下面我们以一个c实例讲解什么是同步回调,以及使用回调函数的好处。
可以看到在server.c中,我们定义的库函数为callbk,该函数接受三个参数,前两个参数是函数指针fp的参数。
在头文件server.h中我们声明了一个接口funcp,该接口是一个接受两个int参数,返回值为int的函数指针。
库函数的实现
//   server.c
#include <stdio.h>
#include <stdlib.h>
#include <unistd.h>
#include "server.h"

int callbk(int a, int b, funcp fp)
{
    return fp(a, b);
}

//   server.h
#ifndef _SERVER_H
#define _SERVER_H
typedef int (*funcp)(int, int);
int callbk(int, int, funcp);
#endif
我们可以将server.c制作成动态库并将其放置到/usr/lib目录中
gcc -shared -fPIC server.c -o libserver.so
调用方的实现
调用方调用库函数,并将自己实现的函数作为参数传递给库函数callbk。
#include "server.h"

int add_int(int a, int b)
{
    return (a+b);
}

int main()
{
    int sum = callbk(1, 2, add_int);
    printf("sum=%d
", sum);
    return 0;
}

以上就是同步回调的实现。
3. 异步回调
异步回调在unix编程,窗口程序,以及需要事件处理机制的程序中被广泛使用。举几个例子,
1 pthread创建线程
int pthread_create(pthread_t *thread, const pthread_attr_t *attr,
                  void *(*start_routine) (void *), void *arg);
2 unix注册信号处理函数
以下代码为信号SIGUSR1注册了一个用户自定义的sig_usr函数
if ( signal(SIGUISR1, sig_usr)  == SIG_ERR)
    perrror("sig err");
3 java swing
以下代码用户自定义了回调类MyListener
class MyListener implements ActionListener
{
    ...
    public void actionPerformed(ActionEvent event)
    {
            //some operation
    }
}

JButton yButton = new JButton();
yButton.addActionListener(new MyListener);
4. reference
https://www.ibm.com/developerworks/cn/linux/l-callback/
https://blog.csdn.net/morixinguan/article/details/65494239
http://blog.chinaunix.net/xmlrpc.php?r=blog/article&uid=26000296&id=5782305
https://en.wikipedia.org/wiki/Callback_(computer_programming)
https://stackoverflow.com/questions/9596276/how-to-explain-callbacks-in-plain-english-how-are-they-different-from-calling-o/9652434#9652434