前言
现在很多应用都有截图分享的功能,今天就来讲讲截图分享吧
今天涉及到以下内容:
- android权限设置及申请
- 截图分享功能解析
- 截图分享功能的调用
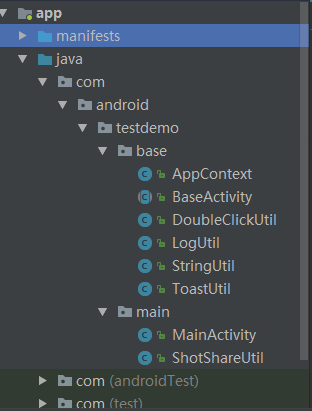
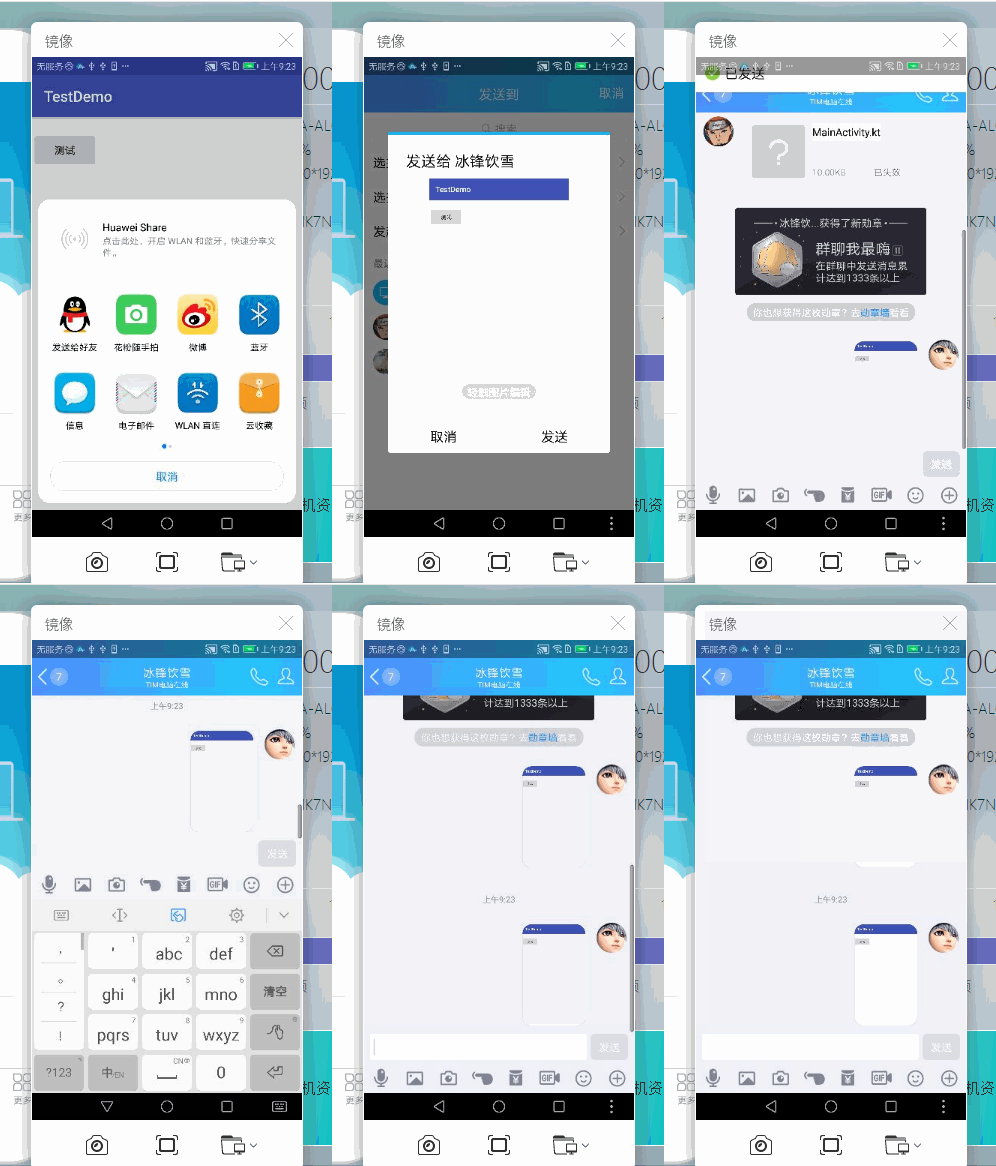
- 项目结构图和效果图
一. android权限设置及申请
在实现截图分享功能的的时候,会涉及到读写权限的申请问题。
第一步,你需要在mainfast.xml中注册读写权限:
    <uses-permission android:name="android.permission.WRITE_EXTERNAL_STORAGE" />
    <uses-permission android:name="android.permission.READ_EXTERNAL_STORAGE" />
为了适应android6.0及以上手机的使用,我们最好也要加上6.0以上读写权限的申请。关于android6.0以上权限的申请,我之前封装过一个工具类,使得权限申请变得异常简单,有兴趣的同学可以看看我的另一篇文章:
android权限申请Permission
这里就不做详细解释了。
二.截图分享功能解析
2.1 原理
截屏分享的原理是首先获取当前屏幕的bitmap,然后将它生成图片文件保存到本地,接着调用分享功能,将它分享到你要分享的地方,下面做些讲解。
2.2 获取屏幕大小
在截屏开始的时候,需要获取屏幕的宽高:
        DisplayMetrics dm = new DisplayMetrics();
        WindowManager mWindowManager = (WindowManager) AppContext.getInstance().getSystemService(Context.WINDOW_SERVICE);
        Display display = mWindowManager.getDefaultDisplay();
        display.getMetrics(dm);


        int width = dm.widthPixels;
        int height = dm.heightPixels;
然后是获取屏幕的bitmap:
Bitmap bmp = view.getDrawingCache();
bp = Bitmap.createBitmap(bmp, 0, statusBarHeight, width, height - statusBarHeight);
获取bitmap之后,我们需要将bitmap保存到本地,保存之前,我们需要在手机上设置一个保存路径,sdard的判断必不可少:
        if (Environment.getExternalStorageState().equals(Environment.MEDIA_MOUNTED)) {
            return true;
        }
        return false;
在sdcard存在的情况下,获取手机内部缓存路径:
File cacheFile = AppContext.getInstance().getExternalCacheDir();
然后将bitmap保存到本地:
            try {
                // 图片文件路径
                imagePath = getDiskCachePath()+"share.png";
                LogUtil.i("====imagePath====" + imagePath);
                File file = new File(imagePath);
                FileOutputStream os = new FileOutputStream(file);
                bitmap.compress(Bitmap.CompressFormat.PNG, 100, os);
                os.flush();
                os.close();
                return imagePath;
            } catch (Exception e) {
                LogUtil.e("====screenshot:error====" + e.getMessage());
            }
这一切搞定后,调用分享功能:
        //分享
        if(StringUtil.isNotEmpty(path)){
            ShareImage(context,path);
        }
以上是对截屏分享的一个原理流程介绍,代码显得有些杂乱,不过不要紧,我已经将这些代码整合成一个工具类ShotShareUtil,方便大家调用,下面看看ShotShareUtil在mainActivity中的调用吧
三.截图分享功能的调用
直接给出MainActivity的代码吧,方便大家理解:
package com.android.testdemo.main;

import android.view.View;
import android.widget.Button;

import com.android.testdemo.R;
import com.android.testdemo.base.BaseActivity;
import com.android.testdemo.base.LogUtil;

import butterknife.BindView;

public class MainActivity extends BaseActivity{

    @BindView(R.id.button1)
    Button mBtnText;

    @Override
    protected int getContentViewId() {
        return R.layout.activity_main;
    }

    @Override
    protected void initData() {
        //这里需要检测android6.0以上读写权限,关于权限申请我之前已经讲过,有需要的同学可以参考以下链接
        //android6.0以上权限申请:http://www.demodashi.com/demo/12432.html
    }

    @Override
    protected void setListener() {
        mBtnText.setOnClickListener(this);
    }

    @Override
    public void onClick(View v) {
        super.onClick(v);
        switch (v.getId()) {
           case R.id.button1:
               LogUtil.i("=====截屏分享====");
               ShotShareUtil.shotShare(mContext);
               break;
           default:
               break;
         }
    }

}
activity_main.xml文件中就布了一个按钮,方便测试:
<?xml version="1.0" encoding="utf-8"?>
<android.support.constraint.ConstraintLayout xmlns:android="http://schemas.android.com/apk/res/android"
    xmlns:app="http://schemas.android.com/apk/res-auto"
    xmlns:tools="http://schemas.android.com/tools"
    android:layout_width="match_parent"
    android:layout_height="match_parent"
    tools:context="com.android.testdemo.main.MainActivity">

    <Button
        android:id="@+id/button1"
        android:layout_width="wrap_content"
        android:layout_height="wrap_content"
        android:layout_marginTop="20dp"
        android:text="测试"
        app:layout_constraintTop_toTopOf="parent"
        tools:ignore="MissingConstraints"
        tools:layout_editor_absoluteX="148dp" />


</android.support.constraint.ConstraintLayout>
最后给出项目结构图和效果图
四.项目结构图和效果图
项目结构图

运行效果图

Android实现截图分享qq,微信
注:本文著作权归作者,由demo大师代发,拒绝转载,转载需要作者授权