概述
通过微信web开发者工具创建登录,获取用户信息,发送至后台,进行用户数据解密
详细
一、准备工作
1、由于用到了 Redis 缓存,需要安装 Redis(安装略过)
2、后台开发环境Idea 15,java开发环境(安装略过),由于是 Maven 构建的项目,在 Eclipse 下也可以运行
3、下载安装微信Web开发者工具
4、本实例通过客户端登录请求后台,进行微信用户信息解密
二、程序实现
1、原理
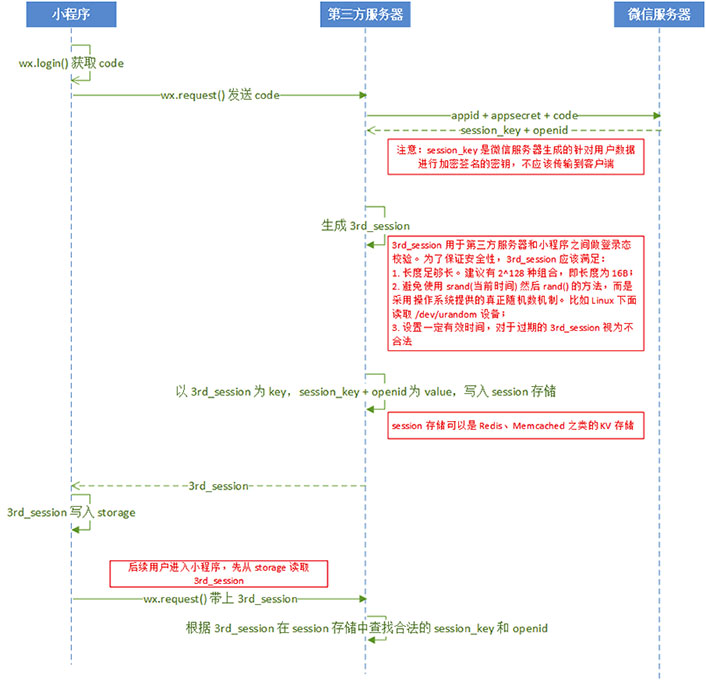
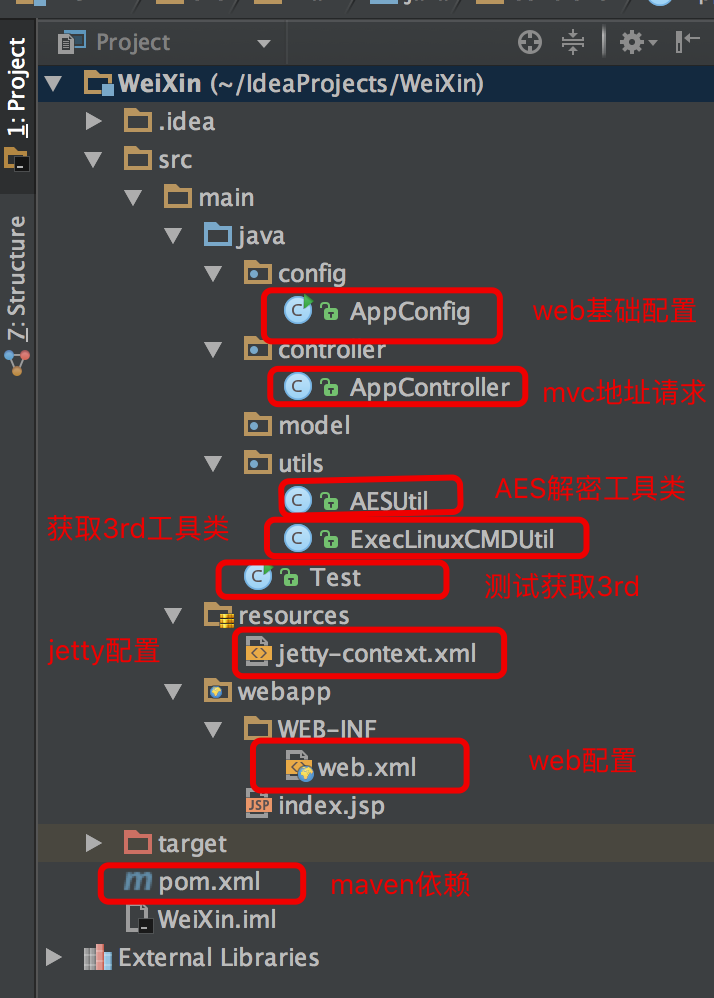
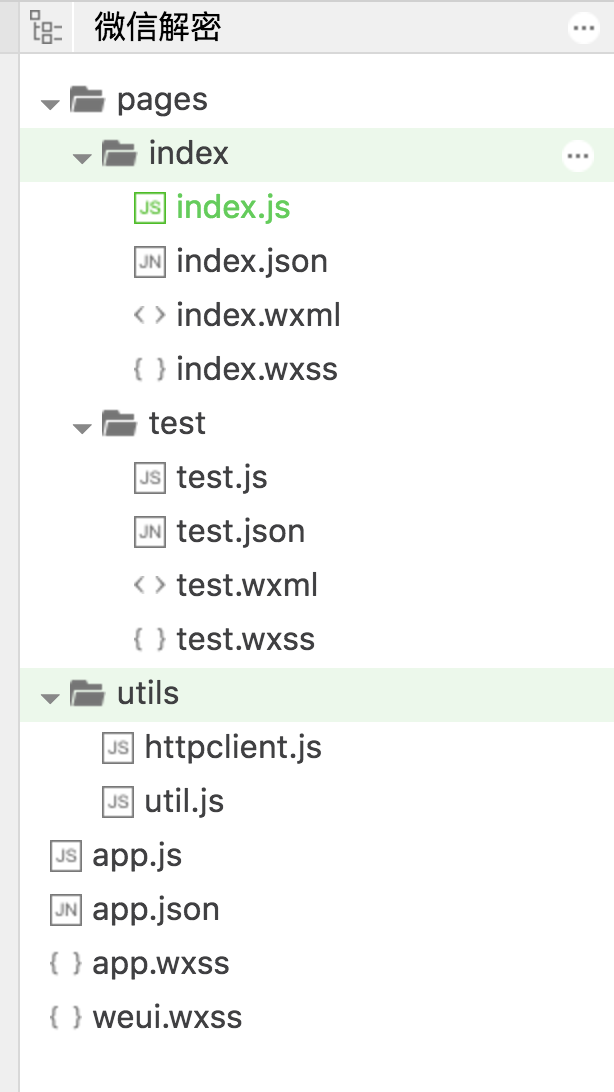
2、程序包括后台和客户端,后台使用 Idea 15 进行开发实现,客户端通过微信 web 开发者工具开发实现
后台截图:
客户端截图:
3、思路
a、在web开发者工具上扫描二维码登录成功后
b、发送获取 3rd_session 请求,获取 3rd_session 数据
c、然后调用解密地址请求,对用户信息进行解密
4、涉及到的关键代码
a、客户端获取code
onLoad: function (options) {
    // 页面初始化 options为页面跳转所带来的参数
    let that = this
    wx.login({
      success: function (res) {
        // success
        let code = res.code
        that.setData({ code: code })
        wx.getUserInfo({
          success: function (res) {
            // success
            that.setData({ userInfo: res.userInfo })
            that.setData({ iv: res.iv })
            that.setData({ encryptedData: res.encryptedData })
            that.get3rdSession()
          }
        })
      }
  })
}
b、 客户端发送 code 到服务端,获取 3rd_session
get3rdSession:function(){
    let that = this
    wx.request({
      url: 'https://localhost:8443/get3rdSession',
      data: {
        code: this.data.code
      },
      method: 'GET', // OPTIONS, GET, HEAD, POST, PUT, DELETE, TRACE, CONNECT
      // header: {}, // 设置请求的 header
      success: function (res) {
        // success
        var sessionId = res.data.session;
        that.setData({ sessionId: sessionId })
        wx.setStorageSync('sessionId', sessionId)
        that.decodeUserInfo()
      }
    })
  }
c、服务端发送 appid、appsecret、code 到微信服务器换取 session_key 和 openid
public void get3rdSession() {    //获取名为userInfo的Redis Cache对象
    Cache userInfoCache = Redis.use("userInfo");
    String sessionId = "";
    JSONObject json = new JSONObject();
    String code = getPara("code");
    String url = "https://api.weixin.qq.com/sns/jscode2session?appid=wx7560b8008e2c445d&secret=f1af3312b7038513fd17dd9cbc3b357c&js_code=" + code + "&grant_type=authorization_code";    //执行命令生成3rd_session
    String session = ExecLinuxCMDUtil.instance.exec("cat /dev/urandom |od -x | tr -d ' '| head -n 1").toString();
    json.put("session", session);    //创建默认的httpClient实例
    CloseableHttpClient httpClient = getHttpClient();    try {        //用get方法发送http请求
        HttpGet get = new HttpGet(url);
        System.out.println("执行get请求:...." + get.getURI());
        CloseableHttpResponse httpResponse = null;        //发送get请求
        httpResponse = httpClient.execute(get);        try {            //response实体
            HttpEntity entity = httpResponse.getEntity();            if (null != entity) {
                String result = EntityUtils.toString(entity);
                System.out.println(result);
                JSONObject resultJson = JSONObject.fromObject(result);
                String session_key = resultJson.getString("session_key");
                String openid = resultJson.getString("openid");                //session存储
                userInfoCache.set(session,session_key+","+openid);
                }
            } finally {
                httpResponse.close();
            }
        } catch (Exception e) {
            e.printStackTrace();
        } finally {            try {
                closeHttpClient(httpClient);
            } catch (IOException e) {
                e.printStackTrace();
            }
        }
        renderJson(json);
}private CloseableHttpClient getHttpClient() {    return HttpClients.createDefault();
}private void closeHttpClient(CloseableHttpClient client) throws IOException {    if (client != null) {
        client.close();
    }
}
d、客户端发送请求解密用户数据
decodeUserInfo:function(){
    let that = this
    wx.request({
      url: 'https://localhost:8443/decodeUserInfo',
      data: {
        encryptedData: that.data.encryptedData,
        iv: that.data.iv,
        session: wx.getStorageSync('sessionId')
      },
      method: 'GET', // OPTIONS, GET, HEAD, POST, PUT, DELETE, TRACE, CONNECT
      // header: {}, // 设置请求的 header
      success: function (res) {
        // success
        console.log(res)
      }
    })
}
5、配置文件
a、由于微信小程序使用的是https请求,所以需要生成ssl请求,即 keystore,生成自己的 keystore 后替换 pom.xml 文件里
<keystore> /Users/LJaer/Workspaces/tomcat.keystore</keystore>
b、由于使用了 Redis 缓存,需要对 Redis 地址进行修改,AppConfig 类中,替换 redis 服务地址
RedisPlugin userInfoRedis = new RedisPlugin("userInfo","192.168.99.100");
三、运行效果
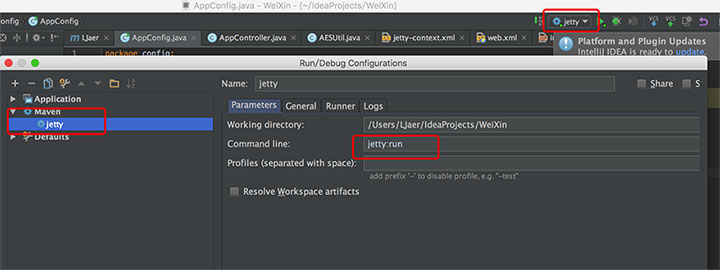
1、服务端启动,使用命令 jetty:run 进行服务端的启动
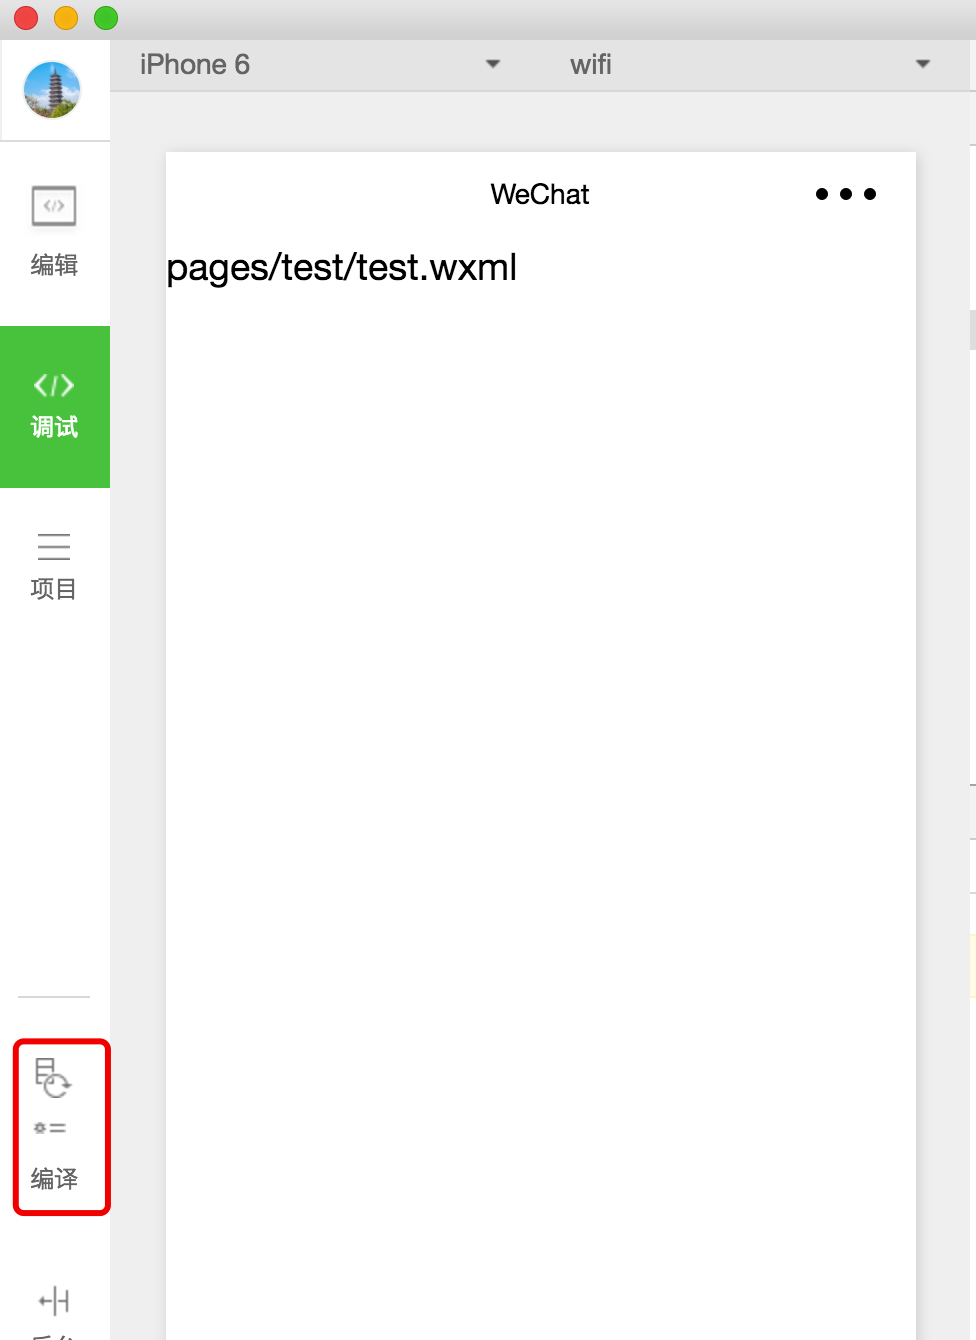
2、客户端启动,点击编译即可运行
3、用户数据解密截图

四、其他补充
官网文档地址:https://mp.weixin.qq.com/debug/wxadoc/dev/api/api-login.html?t=20161222#wxloginobject