概述
详细
随着界面的整体效果的各种展现, 起始时间选择器的展现也需求突出!
最近项目中发现时间选择器使用处还挺多, 数了数原型图发现有6处. 便决定自定义时间选择器视图写个 Demo, 封装好在所需控制器里直接调用!
一、实现功能及主要思路
实现功能:
自定义起始时间选择器视图, 调起时间选择器, 传值(起始时间/截止时间), 两者时间均要合理, 不能超过未来时间, 并且起始时间不能大于截止时间. 点击取消或空白处收起时间选择器.
其中两者时间(起始时间/截止时间)是可以做限制,例如:当月月初1日 到 当天时间.
主要思路:
-
1. 创建时间选择器Picker 且确认取消按钮实现功能逻辑
-
2. 创建展示时间菜单的按钮视图 (按钮: 图片在右,标题在左的按钮)
-
3. 创建时间选择器视图 且 起始时间/截止时间逻辑判断
-
4. 使用代理传值起始时间/截止时间(时间串转换)
二、程序实现
第一步. 创建时间选择器Picker 且确认取消按钮实现功能逻辑
自定义ZLDatePickerView 文件:
@property (nonatomic, assign) id<ZLDatePickerViewDelegate> deleagte;
// 最初/小时间(一般为左边值)
@property (nonatomic, strong) NSDate *minimumDate;
// 截止时间(一般为右边值)
@property (nonatomic, strong) NSDate *maximumDate;
// 当前选择时间
@property (nonatomic, strong) NSDate *date;
+ (instancetype)datePickerView;
- (void)showFrom:(UIView *)view;
使用代理传值:
@protocol ZLDatePickerViewDelegate <NSObject>
- (void)datePickerView:(ZLDatePickerView *)pickerView backTimeString:(NSString *)string To:(UIView *)view;
@end
使用 xib 展现datePicker:
+ (instancetype)datePickerView {

    ZLDatePickerView *picker = [[NSBundle mainBundle] loadNibNamed:@"ZLDatePickerView" owner:nil options:nil].lastObject;
    picker.frame = CGRectMake(0, UI_View_Height - 250, UI_View_Width, 250);
    picker.maximumDate = [NSDate date];

    return picker;
}
- (void)showFrom:(UIView *)view {
    UIView *bgView = [[UIView alloc] initWithFrame:[[UIScreen mainScreen] bounds]];
    bgView.backgroundColor = [UIColor lightGrayColor];
    bgView.alpha = 0.5;

    UITapGestureRecognizer *tap = [[UITapGestureRecognizer alloc] initWithTarget:self action:@selector(tap:)];
    [bgView addGestureRecognizer:tap];

    self.fromView = view;
    self.bgView = bgView;
    [[UIApplication sharedApplication].keyWindow addSubview:self.bgView];
    [[UIApplication sharedApplication].keyWindow addSubview:self];
}
起始时间/截止时间设值:
- (void)setMinimumDate:(NSDate *)minimumDate {
    self.datePicker.minimumDate = minimumDate;
}
- (void)setMaximumDate:(NSDate *)maximumDate {
    self.datePicker.maximumDate = maximumDate;
}
- (void)setDate:(NSDate *)date {
    self.datePicker.date = date;
}
确认/取消按钮实现功能逻辑:
- (IBAction)cancel:(id)sender {
    [self dismiss];
}
- (IBAction)makeSure:(id)sender {

    [self dismiss];

    NSDate *date = self.datePicker.date;

    if ([self.deleagte respondsToSelector:@selector(datePickerView:backTimeString:To:)]) {
        [self.deleagte datePickerView:self backTimeString:[self fomatterDate:date] To:self.fromView];
    }
}
第二步. 创建展示时间菜单的按钮视图 (按钮: 图片在右,标题在左的按钮)
这个可以根据需求来,有些不需要这个按钮图片在右边的,则没必要添加.
自定义ZLOppositeButton文件:
- (void)layoutSubviews {
    [super layoutSubviews];

    CGFloat margin = 10;

    // 替换 title 和 image 的位置
    // 图片在右,标题在左
    // 由于 button 内部的尺寸是自适应的.调整尺寸即可
    CGFloat maxWidth = self.width - self.imageView.width - margin;
    if (self.titleLabel.width >= maxWidth) {
        self.titleLabel.width = maxWidth;
    }

    CGFloat totalWidth = self.titleLabel.width + self.imageView.width;

    self.titleLabel.x =  (self.width - totalWidth - margin) * 0.5;
    self.imageView.x = CGRectGetMaxX(self.titleLabel.frame) + margin;
}
接着利用上面的按钮创建一个展示时间菜单的按钮视图ZLTimeBtn文件:
- (void)setup {
    self.backgroundColor = [UIColor clearColor];
    [self setImage:[UIImage imageNamed:@"xiangxiadianji"] forState:UIControlStateNormal];
    [self setTitle:[self timeStringDefault] forState:UIControlStateNormal];
    [self setTitleColor:ZLColor(102, 102, 102) forState:UIControlStateNormal];
    self.titleLabel.font = [UIFont systemFontOfSize:14];
}
// 时间默认展示当天
- (NSString *)timeStringDefault {
    NSDate *date = [NSDate date];
    return [date timeFormat:@"yyyy-MM-dd"];
}
其中我们上传时间一般都是字符串而不是时间戳, 则需要进行转换:
#import "NSDate+ZLDateTimeStr.h"
- (NSString *)timeFormat:(NSString *)dateFormat {

    NSDateFormatter *formatter = [[NSDateFormatter alloc] init];
    [formatter setDateStyle:NSDateFormatterMediumStyle];
    [formatter setTimeStyle:NSDateFormatterShortStyle];
    [formatter setTimeZone:[NSTimeZone timeZoneWithAbbreviation:@"UTC"]];
    [formatter setDateFormat:dateFormat];

    return [formatter stringFromDate:self];
}
第三步. 创建时间选择器视图 且 起始时间/截止时间逻辑判断
利用第二步自定义的按钮来自定义ZLTimeView文件:
- (void)layoutSubviews {
    [super layoutSubviews];

    self.beginTimeBtn.frame = CGRectMake(0, 0, self.width / 5.0 * 2, self.height);
    self.label.frame = CGRectMake(CGRectGetMaxX(self.beginTimeBtn.frame), 0, self.width / 5, self.height);
    self.endTimeBtn.frame = CGRectMake(CGRectGetMaxX(self.label.frame),0 , self.width / 5.0 * 2, self.height);
    self.line.frame = CGRectMake(0, self.height - 1, self.width, 1);
}
- (void)setupSubview {
    // 起始时间按钮
    YYPTimeBtn *beginTimeBtn = [[YYPTimeBtn alloc] init];
    beginTimeBtn.backgroundColor = [UIColor clearColor];
    [beginTimeBtn addTarget:self action:@selector(beginTimeBtnClick:) forControlEvents:UIControlEventTouchUpInside];
    // 起始时间默认展示当月一号
 //   [beginTimeBtn setTitle:[self timeStringDefaultWith:@"yyyy-MM-01"] forState:UIControlStateNormal];
    [self addSubview:beginTimeBtn];
    self.beginTimeBtn = beginTimeBtn;

    // 至label
    UILabel *label = [[UILabel alloc] init];
    label.backgroundColor = [UIColor clearColor];
    label.text = @"——";
    label.textColor = YYPWhiteTitleColor;
    label.font = [UIFont systemFontOfSize:14];
    label.textAlignment = NSTextAlignmentCenter;
    self.label = label;
    [self addSubview:label];

    // 终止时间按钮
    YYPTimeBtn *endTimeBtn = [[YYPTimeBtn alloc] init];
    [endTimeBtn addTarget:self action:@selector(endTimeBtnClick:) forControlEvents:UIControlEventTouchUpInside];
    // 终止时间默认展示当天
 //   [endTimeBtn setTitle:[self timeStringDefaultWith:@"yyyy-MM-dd"] forState:UIControlStateNormal];
    self.endTimeBtn = endTimeBtn;
    [self addSubview:endTimeBtn];

    UIView *line = [[UIView alloc] init];
    line.backgroundColor = YYPColor(204, 204, 204);
    self.line = line;
    [self addSubview:line];
}
这里强调一点: 如果默认展示的起始时间均为当天时间时,则在可在自定义按钮里设置就好,不需添加下面方法.
// 自定义默认展示的当月起始时间
- (NSString *)timeStringDefaultWith:(NSString *)timeFormat {
    NSDate *date = [NSDate date];
    return [date timeFormat:timeFormat];
}
使用代理:
@protocol ZLTimeViewDelegate <NSObject>
/**
 *  时间选择器视图
 *
 *  @param beginTime           起始时间/开始时间
 *  @param endTime             终止时间按/结束时间
 *
 */
- (void)timeView:(ZLTimeView *)timeView seletedDateBegin:(NSString *)beginTime end:(NSString *)endTime;
@end
使用第一步创建的时间选择器Picker, 来进行起始时间/截止时间逻辑判断:
#pragma mark - ZLDatePickerViewDelegate
- (void)beginTimeBtnClick:(UIButton *)btn {

    ZLDatePickerView *beginTimePV = [ZLDatePickerView datePickerView];
    beginTimePV.date = [NSDate stringChangeTimeFormat:@"yyyy-MM-dd" string:btn.titleLabel.text];
    if (self.maxDate) {
        beginTimePV.maximumDate = self.maxDate;
    }
    beginTimePV.deleagte = self;
    [beginTimePV showFrom:btn];
}
- (void)endTimeBtnClick:(UIButton *)btn {

    ZLDatePickerView *endTimePV = [ZLDatePickerView datePickerView];
    endTimePV.date = [NSDate stringChangeTimeFormat:@"yyyy-MM-dd" string:btn.titleLabel.text];
    if (self.minDate) {
        endTimePV.minimumDate = self.minDate;
    }

    endTimePV.deleagte = self;
    [endTimePV showFrom:btn];
}
- (void)datePickerView:(ZLDatePickerView *)pickerView backTimeString:(NSString *)string To:(UIView *)view {
    UIButton *btn = (UIButton *)view;
    if (btn == self.beginTimeBtn) {
        self.minDate = [NSDate stringChangeTimeFormat:@"yyyy-MM-dd" string:string];
    }
    if (btn == self.endTimeBtn) {
        self.maxDate = [NSDate stringChangeTimeFormat:@"yyyy-MM-dd" string:string];
    }

    [btn setTitle:string forState:UIControlStateNormal];

    if ([self.delegate respondsToSelector:@selector(timeView:seletedDateBegin:end:)]) {
        [self.delegate timeView:self seletedDateBegin:self.beginTimeBtn.titleLabel.text end:self.endTimeBtn.titleLabel.text];
    }
}
第四步. 使用代理传值起始时间/截止时间
在所需控制器里创建起始时间选择器控件:
#import "ZLTimeView.h"
懒加载:
- (ZLTimeView *)timeView {
    if (!_timeView) {
        ZLTimeView *timeView = [[ZLTimeView alloc] initWithFrame:CGRectMake(0, 100, UI_View_Width, 50)];
        timeView.backgroundColor = [UIColor greenColor];
        timeView.delegate = self;
        _timeView = timeView;
    }
    return _timeView;
}
创建添加起始时间选择器控件:
[self.view addSubview:self.timeView];
使用代理<ZLTimeViewDelegate>:
#pragma mark - ZLTimeViewDelegate
- (void)timeView:(ZLTimeView *)timeView seletedDateBegin:(NSString *)beginTime end:(NSString *)endTime {
    // TODO: 进行上传时间段
}
三、压缩文件截图及运行效果
-
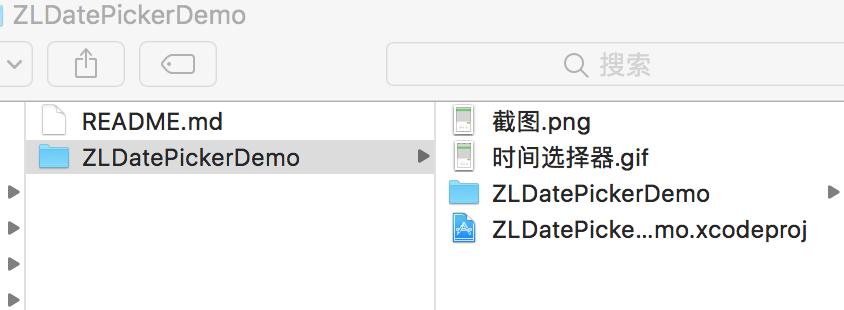
压缩文件截图:

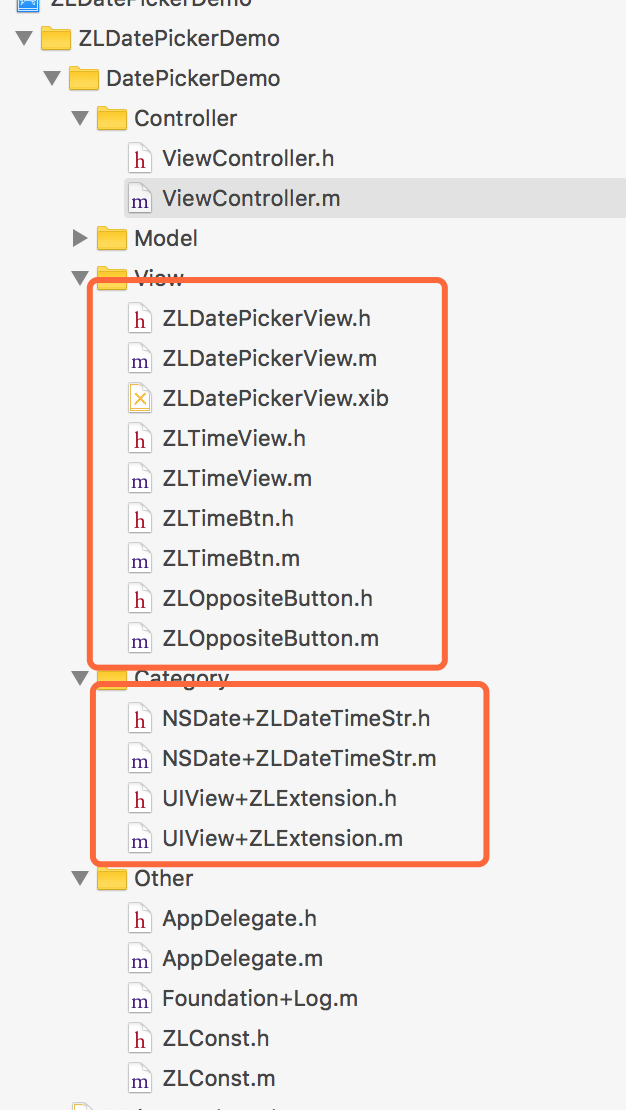
2. 项目截图

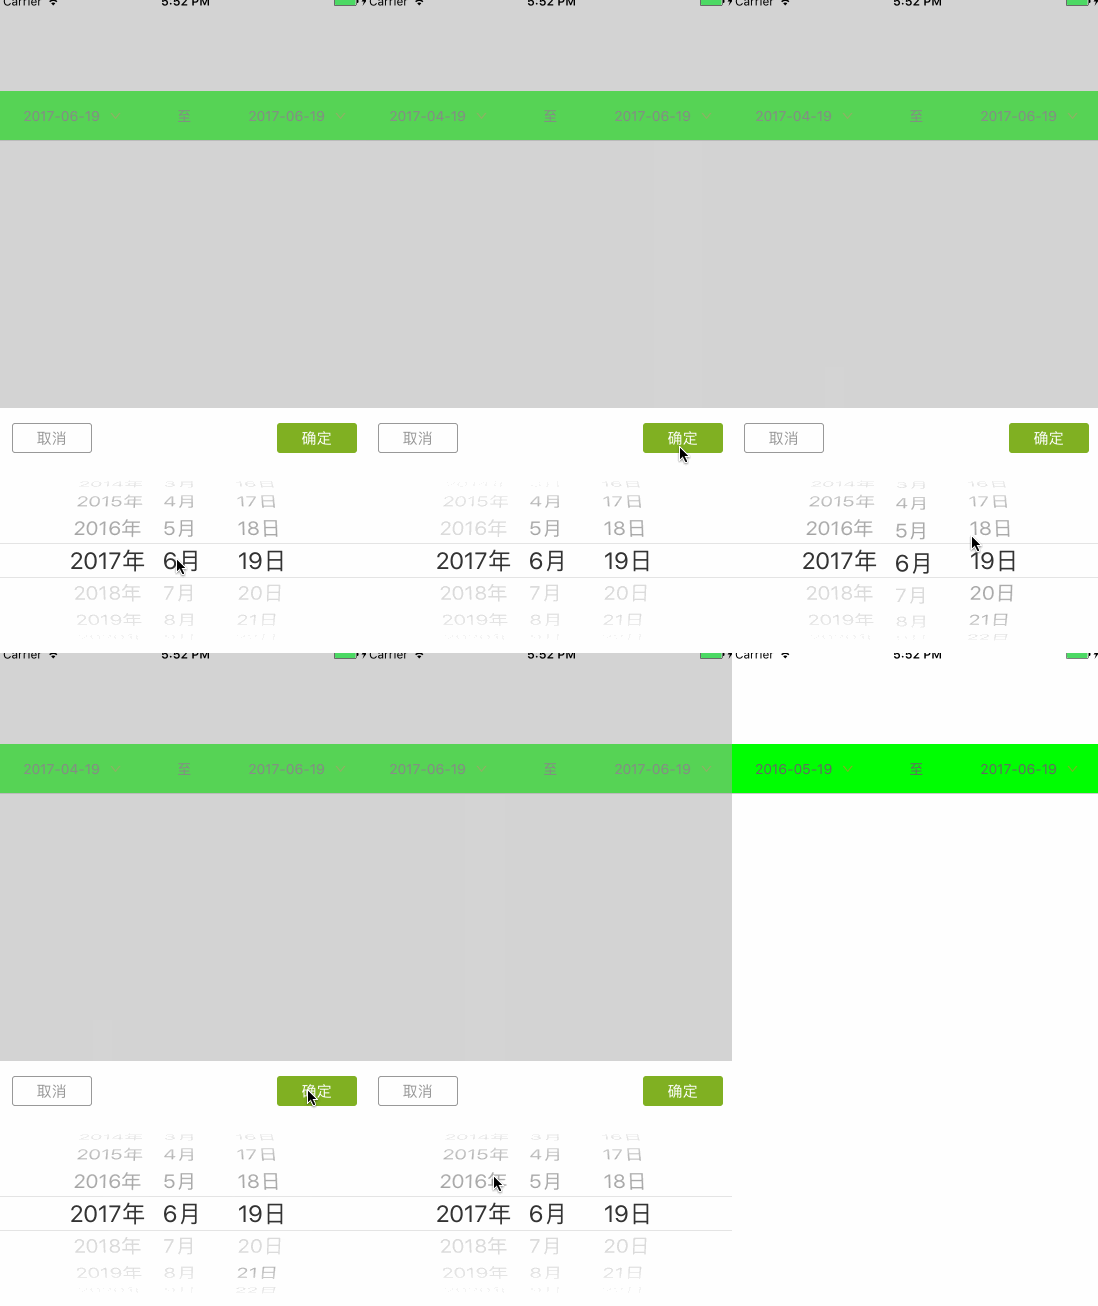
3.运行效果:

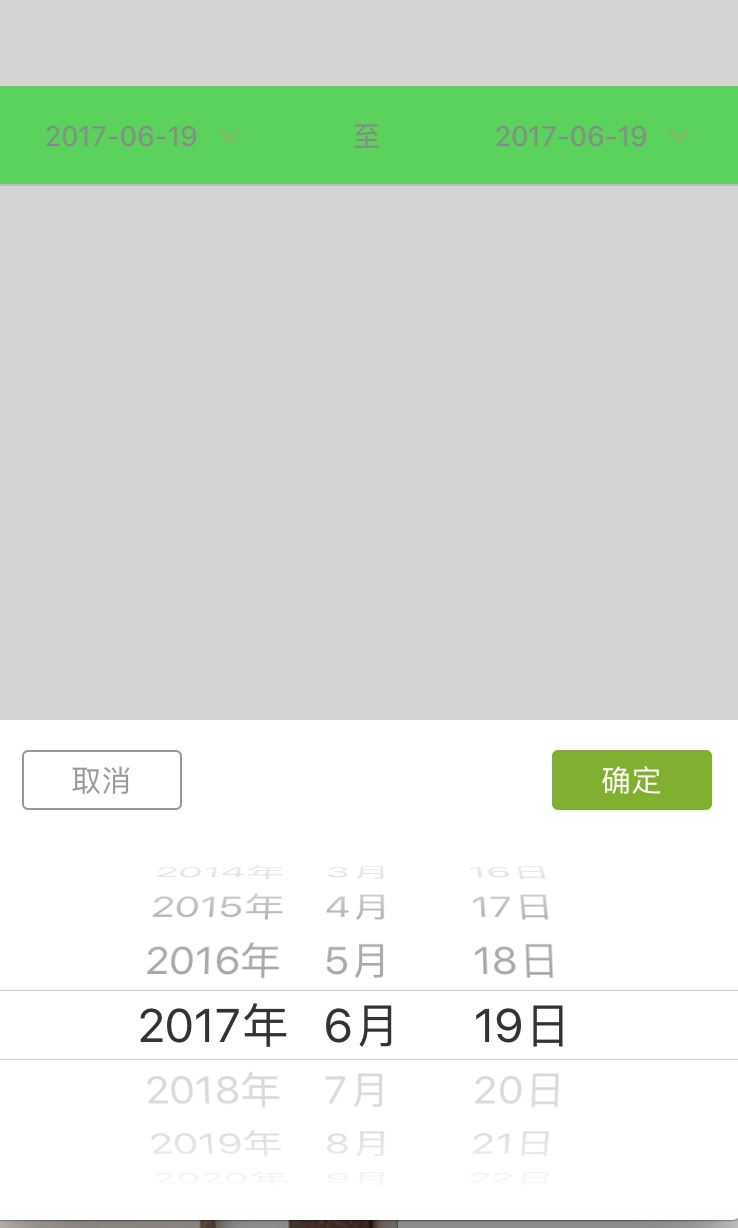
4.效果截图:

四、其他补充
界面性问题可以根据自己项目需求调整即可, 具体可参考代码, 项目能够直接运行!