1.创建django项目:
[vagrant@CentOS7 vagrant]$ django-admin startproject devops
[vagrant@CentOS7 vagrant]$ tree devops/
devops/ 项目目录/项目容器
├── devops 项目中实际的python包
│ ├── __init__.py 空文件,告诉python该目录是一python包
│ ├── __pycache__
│ │ ├── __init__.cpython-36.pyc
│ │ ├── settings.cpython-36.pyc
│ │ ├── urls.cpython-36.pyc
│ │ └── wsgi.cpython-36.pyc wsgi兼容的web服务器的入口
│ ├── settings.py
│ ├── urls.py
│ └── wsgi.py
├── manage.py 入口程序/一个实用的命令行工具,可让你以各种方式与该Django项目进行交互
└── __pycache__
└── manage.cpython-36.pyc
2.启动服务:
[vagrant@CentOS7 vagrant]$ source /home/vagrant/python36env/bin/activate
(python36env) [vagrant@CentOS7 vagrant]$
(python36env) [vagrant@CentOS7 devops]$ python manage.py runserver 默认是127.0.0.1:8000起动
(python36env) [vagrant@CentOS7 devops]$ python manage.py 它会列出相关命令
[auth]
changepassword
createsuperuser
[contenttypes]
remove_stale_contenttypes
[django]
check
compilemessages
createcachetable
dbshell
diffsettings
dumpdata
flush
inspectdb
loaddata
makemessages
makemigrations
migrate
sendtestemail
shell
showmigrations
sqlflush
sqlmigrate
sqlsequencereset
squashmigrations
startapp
startproject
test
testserver
[sessions]
clearsessions
[staticfiles]
collectstatic
findstatic
runserver
3.新建django app:
(python36env) [vagrant@CentOS7 devops]$ python manage.py startapp dashboard 或django-admin starapp dashboard
(python36env) [vagrant@CentOS7 devops]$ ls
dashboard devops manage.py
(python36env) [vagrant@CentOS7 devops]$ tree dashboard
dashboard
├── admin.py
├── apps.py
├── __init__.py
├── migrations
│ └── __init__.py
├── models.py
├── tests.py
└── views.py
app要想与project关联起来:就要先配置app的url。
4.配置url---让django项目知道有这个dashboard app的存在
(1)urls.py---先加载app的url--
from django.conf.urls import include, url
from django.contrib import admin
urlpatterns = [
    url(r'^admin/', admin.site.urls),
    url(r'^dashboard/', include("dashboard.urls")),   以dashboard开头的所有的请求都交给dashboard下面urls这个模块去处理。
]
(2)新建dashboard/urls.py
from django.conf.urls import include, url
urlpatterns = [

]
5激活app:settings.py
INSTALLED_APPS = [
'.......',
'dashboard'
]
这样app就与project关联上了。
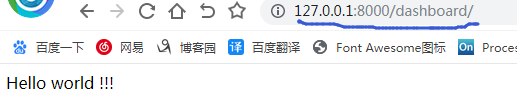
6.编写视图函数(函数必须接收request参数的函数就是视图函数,视图函数要返回一httpresponse):dashboard/views.py:
from django.http import HttpResponse

def index(request):
    return HttpResponse("Hello world !!!")
7.配置url dashbboard/urls.py:导入视图函数
from django.conf.urls import include, url
from .views import index   因为此urls文件与views文件在同一目录下所以用点views就可
urlpatterns = [
    url(r'^$', index, name='index'),  路由,视图函数,视图函数别名
]