程序爬取目标
获取博客园精华区文章的标题、标题链接、作者、作者博客主页链接、摘要、发布时间、评论数、阅读数和推荐数,并存储到MongoDB中。
程序环境
- 已安装scrapy
- 已安装MongoDB
创建工程
scrapy startproject cnblogs
在命令提示符中执行上述命令后,会建立一个名为cnblogs的文件夹。
创建爬虫文件
cd cnblogs
scrapy genspider cn cnblogs.com
执行上述命令后,会在cnblogs\spiders\下新建一个名为cn.py的爬虫文件,cnblogs.com为允许爬取的域名。
编写items.py文件
定义需要爬取的内容。
import scrapy

class CnblogsItem(scrapy.Item):
    # define the fields for your item here like:
    post_author = scrapy.Field()    #发布作者
    author_link = scrapy.Field()    #作者博客主页链接
    post_date = scrapy.Field()      #发布时间
    digg_num = scrapy.Field()       #推荐数
    title = scrapy.Field()          #标题
    title_link = scrapy.Field()     #标题链接
    item_summary = scrapy.Field()   #摘要
    comment_num = scrapy.Field()    #评论数
    view_num = scrapy.Field()       #阅读数
编写爬虫文件cn.py
import scrapy
from cnblogs.items import CnblogsItem

class CnSpider(scrapy.Spider):
    name = 'cn'
    allowed_domains = ['cnblogs.com']
    start_urls = ['https://www.cnblogs.com/pick/']

    def parse(self, response):
        div_list = response.xpath("//div[@id='post_list']/div")
        for div in div_list:
            item = CnblogsItem()
            item["post_author"] = div.xpath(".//div[@class='post_item_foot']/a/text()").extract_first()
            item["author_link"] = div.xpath(".//div[@class='post_item_foot']/a/@href").extract_first()
            item["post_date"] = div.xpath(".//div[@class='post_item_foot']/text()").extract()
            item["comment_num"] = div.xpath(".//span[@class='article_comment']/a/text()").extract_first()
            item["view_num"] = div.xpath(".//span[@class='article_view']/a/text()").extract_first()
            item["title"] = div.xpath(".//h3/a/text()").extract_first()
            item["title_link"] = div.xpath(".//h3/a/@href").extract_first()
            item["item_summary"] = div.xpath(".//p[@class='post_item_summary']/text()").extract()
            item["digg_num"] = div.xpath(".//span[@class='diggnum']/text()").extract_first()
            yield item

        next_url = response.xpath(".//a[text()='Next >']/@href").extract_first()
        if next_url is not None:
            next_url = "https://www.cnblogs.com" + next_url
            yield scrapy.Request(
                next_url,
                callback=self.parse
            )
编写pipelines.py文件
对抓取到的数据进行简单处理,去除无效的字符串,并保存到MongoDB中。
from pymongo import MongoClient
import re

client = MongoClient()
collection = client["test"]["cnblogs"]

class CnblogsPipeline(object):
    def process_item(self, item, spider):
        item["post_date"] = self.process_string_list(item["post_date"])
        item["comment_num"] = self.process_string(item["comment_num"])
        item["item_summary"] = self.process_string_list(item["item_summary"])
        print(item)
        collection.insert(dict(item))
        return item

    def process_string(self,content_string):
        if content_string is not None:
            content_string = re.sub(" |\s","",content_string)
        return content_string

    def process_string_list(self,string_list):
        if string_list is not None:
            string_list = [re.sub(" |\s","",i) for i in string_list]
            string_list = [i for i in string_list if len(i) > 0][0]
        return string_list
修改settings.py文件
添加USER_AGENT
USER_AGENT = 'Mozilla/5.0 (Windows NT 6.1; Win64; x64) AppleWebKit/537.36 (KHTML, like Gecko) Chrome/70.0.3538.102 Safari/537.36'
启用pipelines
ITEM_PIPELINES = {
   'cnblogs.pipelines.CnblogsPipeline': 300,
}
运行程序
执行下面的命令,开始运行程序。
scrapy crawl cn
程序运行结果
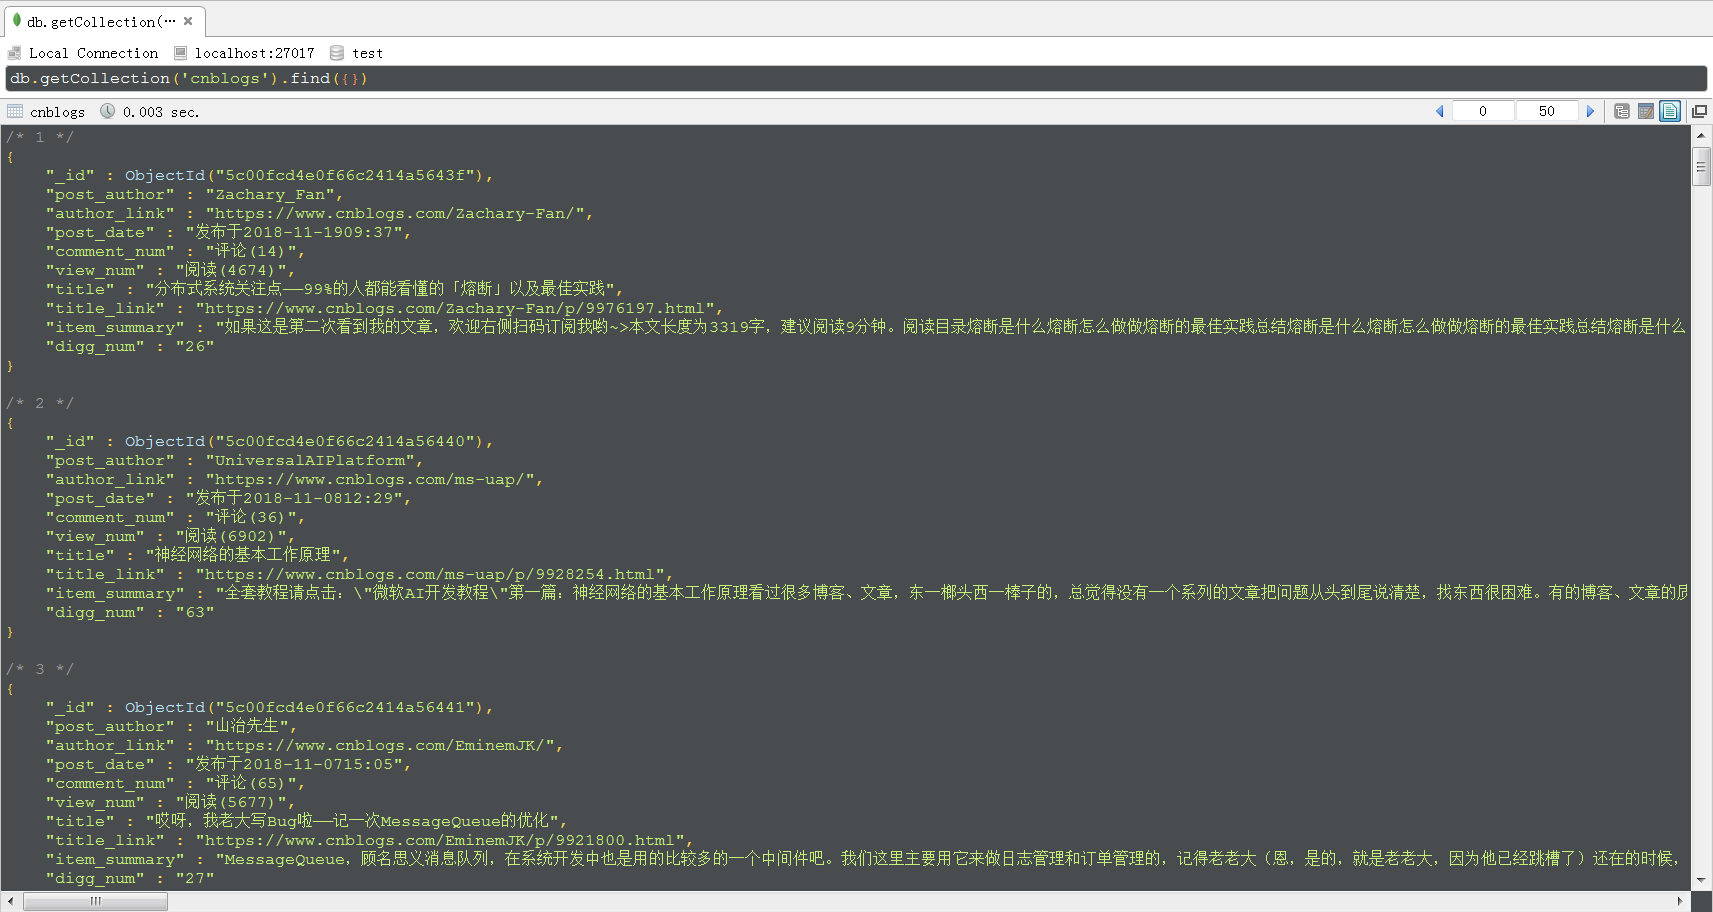
程序运行结束后,MongoDB中的数据如下图所示,采用的可视化工具是Robo 3T。
感谢大家的阅读,如果文中有不正确的地方,希望大家指出,我会积极地学习、改正。
再次感谢您耐心的读完本篇文章。