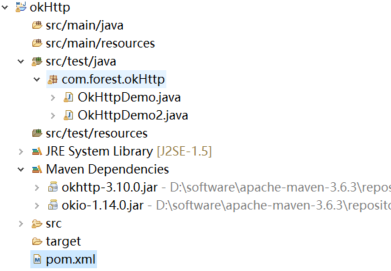
OkHttp框架是java模拟发送http协议请求的框架,下面就是使用该框架简单编写get请求和post请求。
1、首先是添加坐标
在项目pom.xml文件中添加坐标内容如下:
<dependencies>
  <dependency>
    <groupId>com.squareup.okhttp3</groupId>
    <artifactId>okhttp</artifactId>
    <version>3.10.0</version>
  </dependency>
</dependencies>
保存后如下:

2、get请求
get请求示例如下:
package com.forest.okHttp;

import java.io.IOException;

import okhttp3.OkHttpClient;
import okhttp3.Request;
import okhttp3.Response;

public class OkHttpDemo {

    public static void main(String[] args) throws Exception {
        String url = "http://localhost/visitor/login.html";    //练习的时候换成实际存在的、不带参数的get接口url即可
        //1、创建OKhttpClient
        OkHttpClient client = new OkHttpClient();
        //2、构建request
        Request request = new Request.Builder()
                        .url(url)
                        .get()
                        .build();
        //3、使用client发送一个请求,返回一个响应
        Response response = client.newCall(request).execute();
        System.out.println(response.code());
        System.out.println(response.headers());
        System.out.println(response.body().string());
    }
}
3、post请求示例如下:
package com.forest.okHttp;

import java.io.IOException;

import okhttp3.MediaType;
import okhttp3.OkHttpClient;
import okhttp3.Request;
import okhttp3.RequestBody;
import okhttp3.Response;

public class OkHttpDemo2 {

    public static void main(String[] args) throws Exception {
        String url = "http://localhost:8999/vistor/login";   //练习的时候换成实际的post接口
        //1.创建okhttpclient对象
        OkHttpClient client = new OkHttpClient();
        //2.创建RequestBody
        MediaType type = MediaType.parse("application/x-www-form-urlencoded");    //该接口表单形式提交,应根据接口实际情况做替换
        RequestBody body = RequestBody.create(type, "username=test&password=test123456");
        //3.构建request
        Request request = new Request.Builder()
                .url(url)
                .post(body)
                .build();

        //3.使用client发送一个post请求,并返回一个响应
        Response response = client.newCall(request).execute();
        System.out.println(response.code());
        System.out.println(response.headers());
        System.out.println(response.body().string());
    }

}