XamarinSQLite教程在Xamarin.Android项目中使用数据库
在Xamarin.Android项目中使用预设数据库的具体操作步骤如下:
(1)创建一个Xamarin.Android项目,如AndroidSQLiteDemo。
(2)在AndroidSQLiteDemo项目的Resources文件夹下创建一个Raw文件夹。
(3)将上一节中创建的Documents.db数据库拖动到Raw文件夹中。
(4)打开MainActivity.cs文件,将Documents.db数据库的内容复制到/data/data/[your packageName/files/ MyDocuments.db中,代码如下:
using System;

using Android.App;

using Android.Content;

using Android.Runtime;

using Android.Views;

using Android.Widget;

using Android.OS;

using Android.Support.V7.App;

using System.IO;

using System.Text;

namespace AndroidSQLiteDemo

{

    [Activity(Label = "@string/app_name", MainLauncher = true, LaunchMode = Android.Content.PM.LaunchMode.SingleTop, Icon = "@drawable/icon")]

    public class MainActivity : AppCompatActivity

    {

        protected override void OnCreate(Bundle bundle)

        {

            base.OnCreate(bundle);

            SetContentView(Resource.Layout.main);

            var toolbar = FindViewById<Android.Support.V7.Widget.Toolbar>(Resource.Id.toolbar);

            if (toolbar != null)

            {

                SetSupportActionBar(toolbar);

                SupportActionBar.SetDisplayHomeAsUpEnabled(false);

                SupportActionBar.SetHomeButtonEnabled(false);

            }

            // Get our button from the layout resource,

            // and attach an event to it

            var clickButton = FindViewById<Button>(Resource.Id.my_button);

            clickButton.Click += (sender, args) =>

              {

                  var sqliteFilename = "MyDocuments.db";

                  string documentsPath = System.Environment.GetFolderPath(System.Environment.SpecialFolder.Personal); // Documents folder

                  var path = Path.Combine(documentsPath, sqliteFilename);

                  Console.WriteLine("数据库文件的目录:{0}",path);

                  if (!File.Exists(path))

                  {

                      var s = Resources.OpenRawResource(Resource.Raw.Documents);

                      //创建写入列

                      FileStream writeStream = new FileStream(path, FileMode.OpenOrCreate, FileAccess.Write);

                      ReadWriteStream(s, writeStream);

                  }

              };

        }

        void ReadWriteStream(Stream readStream, Stream writeStream)

        {

            int Length = 256;

            Byte[] buffer = new Byte[Length];

            int bytesRead = readStream.Read(buffer, 0, Length);

            // 写入所需字节

            while (bytesRead > 0)

            {

                writeStream.Write(buffer, 0, bytesRead);

                bytesRead = readStream.Read(buffer, 0, Length);

            }

            readStream.Close();

            writeStream.Close();

        }

    }

}
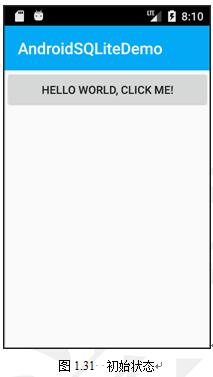
运行程序后,初始状态如图1.31所示。
轻拍HELLO WORLD,CLICK ME!按钮后,会在输出窗口输出以下的内容:
数据库文件的目录:/data/user/0/com.company.AndroidSQLiteDemo/files/MyDocuments.db
此时Documents.db数据库中的内容就会复制到MyDocuments.db文件中。