UITableViewCell:自定义的单元格,可以在xib中创建单元格,也可以在storyBorad中创建单元格。有四种创建方式
<1>在storyBorad中创建的单元格,它是静态的单元格,单元格一开始就存在,可以直接根据自定义的重用标识名加载使用;
<2>当然,storyBorad中单元格也可以关联一个自定义的类,这个类必须是继承UITableViewCell,这种情况下,直接根据自定义的重用标识名加载使用也是可以的。
<3>在xib中创建的单元格,如果直接通过bundel的loadNibNme的方法加载,也可以直接根据重用标识符加载使用;
<4>当然,xib文件中的单元格可以关联一个自定义的类,这个类必须是继承UITableViewCell,这种情况下,如果直接根据自定义的重用标识符加载使用是行不通的,因为此时代理的方法没有对单元格对象进行初始化,此时,需要对创建单元格对象的过程封装到自己关联的类中进行,即一个创建的单元格的类方法用来加载xib文件,一个类对象的实例方法,用来设置单元格中属性。
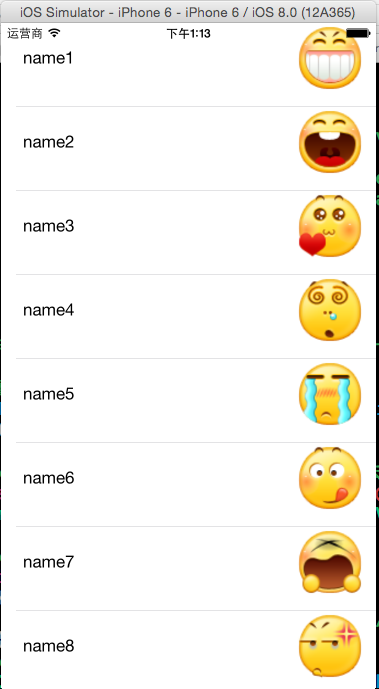
这是一个类似于联系人表格的实例,有姓名和图像,以下四种方式都可以实现:
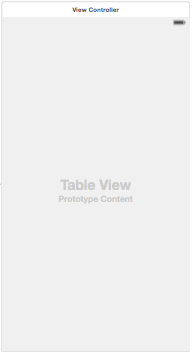
方法一:直接在storyBoard中创建单元格并直接加载,自定义的单元格位置一个UITableView的上面
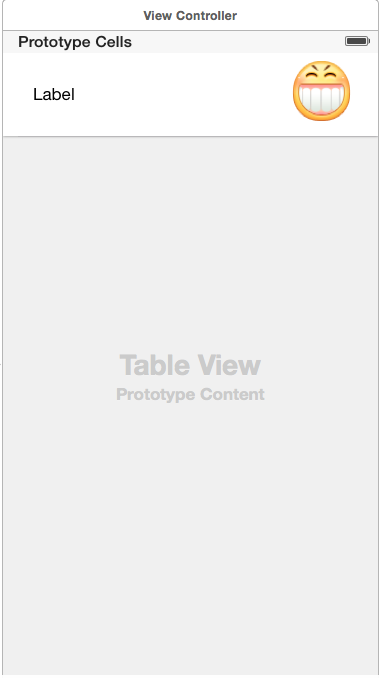
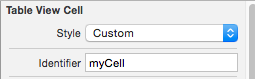
需要设置单元格的重用标识符identifier:

代码如下:
为初始化数据创建的一个类:

1 #import <Foundation/Foundation.h>
2
3 @interface Contact : NSObject
4 @property (copy,nonatomic)NSString *name;
5 @property (copy,nonatomic)NSString *faceName;
6 -(instancetype)initWithName:(NSString*)name andFaceName:(NSString*) faceName;
7 @end
 1 #import "Contact.h"
 2
 3 @implementation Contact
 4 -(instancetype)initWithName:(NSString*)name andFaceName:(NSString*) faceName
 5 {
 6     self = [super init];
 7     if(self)
 8     {
 9         _name = [name copy];
10         _faceName = [faceName copy];
11     }
12     return self;
13 }
14 @end
在视图控制器中完成代码:(需要用tag获取单元格的属性控件)
 1 #import "ViewController.h"
 2 #import "Contact.h"
 3 @interface ViewController ()<UITableViewDataSource>
 4 @property (weak, nonatomic) IBOutlet UITableView *tableView;
 5 @property (strong,nonatomic)NSMutableArray *contacts;
 6 @end
 7
 8 @implementation ViewController
 9
10 - (void)viewDidLoad {
11     [super viewDidLoad];
12     //初始化数据
13     self.contacts = [NSMutableArray arrayWithCapacity:9];
14     for(int i=0; i<9; i++)
15     {
16         Contact *conatct = [[Contact alloc]initWithName:[NSString stringWithFormat:@"name%d",i+1] andFaceName:[NSString stringWithFormat:@"%d.png",i]];
17         [self.contacts addObject:conatct];
18     }
19
20     //设置tableView的数据源
21     self.tableView.dataSource = self;
22 }
23
24 #pragma mark -tableView的数据源方法
25 //每一组多少行
26 -(NSInteger)tableView:(UITableView *)tableView numberOfRowsInSection:(NSInteger)section
27 {
28     return self.contacts.count;
29 }
30 //设置每一个单元格的内容
31 -(UITableViewCell *)tableView:(UITableView *)tableView cellForRowAtIndexPath:(NSIndexPath *)indexPath
32 {
33     //1.根据reuseIdentifier,先到对象池中去找重用的单元格对象
34     static NSString *reuseIdentifier = @"myCell";
35     UITableViewCell *cell = [self.tableView dequeueReusableCellWithIdentifier:reuseIdentifier];
36     //2.设置单元格对象的内容
37     Contact *contact = [self.contacts objectAtIndex:indexPath.row];
38     UILabel *label = (UILabel*)[cell viewWithTag:1];
39     label.text = contact.name;
40     UIImageView *imageView = (UIImageView*)[cell viewWithTag:2];
41     [imageView setImage:[UIImage imageNamed:contact.faceName]];
42     return cell;
43 }
44
45 @end
方法二:直接在storyBoard中创建单元格并关联自定义的类并直接加载,自定义的单元格位置一个UITableView的上面

需要设置单元格的重用标识符identifier
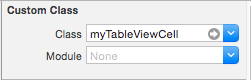
将单元格与对应的自定义类关联
代码如下:
为初始化创建的一个类:
#import <Foundation/Foundation.h>

@interface Contact : NSObject
@property (copy,nonatomic)NSString *name;
@property (copy,nonatomic)NSString *faceName;
-(instancetype)initWithName:(NSString*)name andFaceName:(NSString*) faceName;
@end


#import "Contact.h"

@implementation Contact
-(instancetype)initWithName:(NSString*)name andFaceName:(NSString*) faceName
{
    self = [super init];
    if(self)
    {
        _name = [name copy];
        _faceName = [faceName copy];
    }
    return self;
}
@end
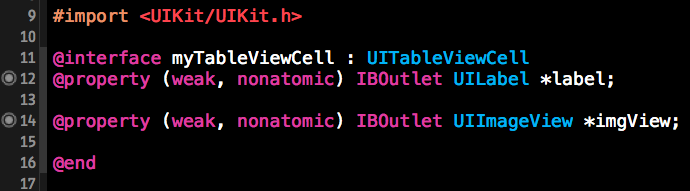
与单元格关联的自定义的类,关联单元格的属性控件(不需要再用tag获取了,直接用self.获取)

还是在视图控制器中完成加载:
 1 #import "ViewController.h"
 2 #import "Contact.h"
 3 #import "myTableViewCell.h"
 4 @interface ViewController ()<UITableViewDataSource>
 5 @property (weak, nonatomic) IBOutlet UITableView *tableView;
 6 @property (strong,nonatomic)NSMutableArray *contacts;
 7 @end
 8
 9 @implementation ViewController
10
11 - (void)viewDidLoad {
12     [super viewDidLoad];
13     //初始化数据
14     self.contacts = [NSMutableArray arrayWithCapacity:9];
15     for(int i=0; i<9; i++)
16     {
17         Contact *conatct = [[Contact alloc]initWithName:[NSString stringWithFormat:@"name%d",i+1] andFaceName:[NSString stringWithFormat:@"%d.png",i]];
18         [self.contacts addObject:conatct];
19     }
20
21     //设置tableView的数据源
22     self.tableView.dataSource = self;
23 }
24
25 #pragma mark -tableView的数据源方法
26 //每一组多少行
27 -(NSInteger)tableView:(UITableView *)tableView numberOfRowsInSection:(NSInteger)section
28 {
29     return self.contacts.count;
30 }
31 //设置每一个单元格的内容
32 -(UITableViewCell *)tableView:(UITableView *)tableView cellForRowAtIndexPath:(NSIndexPath *)indexPath
33 {
34     //1.根据reuseIdentifier,先到对象池中去找重用的单元格对象
35     static NSString *reuseIdentifier = @"myCell";
36     myTableViewCell *cell = [self.tableView dequeueReusableCellWithIdentifier:reuseIdentifier];
37     //2.设置单元格对象的内容
38     Contact *contact = [self.contacts objectAtIndex:indexPath.row];
39     cell.label.text = contact.name;
40     [cell.imgView setImage:[UIImage imageNamed:contact.faceName]];
41     return cell;
42 }
43
44 @end
方法三:在xib文件中创建单元格,然后再视图控制器中直接加载使用
首先在storyBoard中添加一个UITableView
然后在已经创建好的MyCell.xib中创建自定义的单元格为:
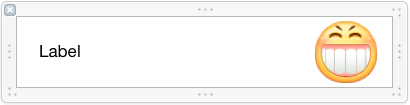
设置该单元格的重用标识符identifier:

创建一个联系人初始化的类:
 1 #import <Foundation/Foundation.h>
 2
 3 @interface Contact : NSObject
 4 @property (copy,nonatomic)NSString *name;
 5 @property (copy,nonatomic)NSString *faceName;
 6 -(instancetype)initWithName:(NSString*)name andFaceName:(NSString*) faceName;
 7 @end
 8
 9
10 #import "Contact.h"
11
12 @implementation Contact
13 -(instancetype)initWithName:(NSString*)name andFaceName:(NSString*) faceName
14 {
15     self = [super init];
16     if(self)
17     {
18         _name = [name copy];
19         _faceName = [faceName copy];
20     }
21     return self;
22 }
23 @end
还是在视图控制器中完成加载:
 1 #import "ViewController.h"
 2 #import "Contact.h"
 3 #import "myTableViewCell.h"
 4 @interface ViewController ()<UITableViewDataSource>
 5 @property (weak, nonatomic) IBOutlet UITableView *tableView;
 6 @property (strong,nonatomic)NSMutableArray *contacts;
 7 @end
 8
 9 @implementation ViewController
10
11 - (void)viewDidLoad {
12     [super viewDidLoad];
13     //初始化数据
14     self.contacts = [NSMutableArray arrayWithCapacity:9];
15     for(int i=0; i<9; i++)
16     {
17         Contact *conatct = [[Contact alloc]initWithName:[NSString stringWithFormat:@"name%d",i+1] andFaceName:[NSString stringWithFormat:@"%d.png",i]];
18         [self.contacts addObject:conatct];
19     }
20
21     //设置tableView的数据源
22     self.tableView.dataSource = self;
23 }
24
25 #pragma mark -tableView的数据源方法
26 //每一组多少行
27 -(NSInteger)tableView:(UITableView *)tableView numberOfRowsInSection:(NSInteger)section
28 {
29     return self.contacts.count;
30 }
31
32
33 //直接从xib文件中加载
34
35 //设置每一个单元格的内容
36 -(UITableViewCell *)tableView:(UITableView *)tableView cellForRowAtIndexPath:(NSIndexPath *)indexPath
37 {
38     //1.根据reuseIdentifier,先到对象池中去找重用的单元格对象
39     static NSString *reuseIdentifier = @"myCell";
40       UITableViewCell *cell = [self.tableView dequeueReusableCellWithIdentifier:reuseIdentifier];
41     //2.如果没找到,就自己创建cell
42     if(!cell)
43     {
44         //从xib文件中加载视图
45        NSArray *views = [[NSBundle mainBundle]loadNibNamed:@"MyCell" owner:nil options:nil];
46         cell = (UITableViewCell*)[views lastObject];
47     }
48     //3.设置单元格对象的内容
49     Contact *contact = [self.contacts objectAtIndex:indexPath.row];
50     UILabel *label = (UILabel*)[cell viewWithTag:1];
51     label.text = contact.name;
52     UIImageView *imgView = (UIImageView*)[cell viewWithTag:2];
53     [imgView setImage:[UIImage imageNamed:contact.faceName]];
54
55     return cell;
56 }
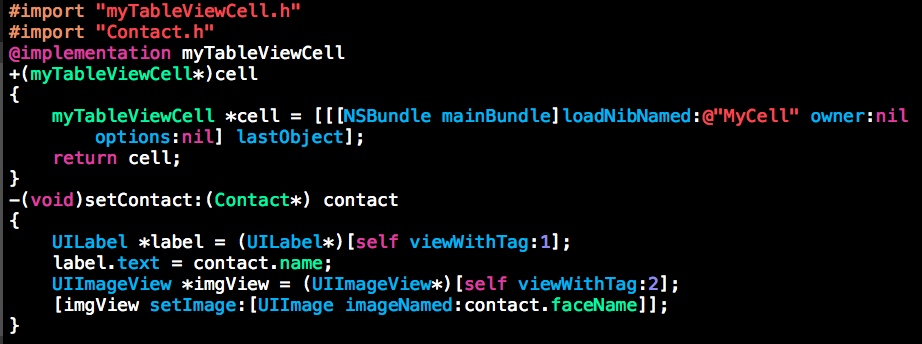
方法四:在xib文件中创建单元格,并创建与之关联的的类,然后将加载过程封装到它的类中帮助初始化完成,同时该类提供类方法,最后再视图控制器中通过这个类方法获取单元格。
首先在storyBoard中添加一个UITableView

然后在已经创建好的MyCell.xib中创建自定义的单元格为:

给单元格设置重用标识符identifier

将单元格与自定义的类关联

创建一个联系人初始化的类:
 1#import <Foundation/Foundation.h>
 2
 3 @interface Contact : NSObject
 4 @property (copy,nonatomic)NSString *name;
 5 @property (copy,nonatomic)NSString *faceName;
 6 -(instancetype)initWithName:(NSString*)name andFaceName:(NSString*) faceName;
 7 @end
 8
 9
10 #import "Contact.h"
11
12 @implementation Contact
13 -(instancetype)initWithName:(NSString*)name andFaceName:(NSString*) faceName
14 {
15     self = [super init];
16     if(self)
17     {
18         _name = [name copy];
19         _faceName = [faceName copy];
20     }
21     return self;
22 }
23 @end
创建一个与单元格关联的类:(将加载单元格的过程和属性封装起来)
在视图控制器中通过上面的类方法获取单元格
 1 #import "ViewController.h"
 2 #import "Contact.h"
 3 #import "myTableViewCell.h"
 4 @interface ViewController ()<UITableViewDataSource>
 5 @property (weak, nonatomic) IBOutlet UITableView *tableView;
 6 @property (strong,nonatomic)NSMutableArray *contacts;
 7 @end
 8
 9 @implementation ViewController
10
11 - (void)viewDidLoad {
12     [super viewDidLoad];
13     //初始化数据
14     self.contacts = [NSMutableArray arrayWithCapacity:9];
15     for(int i=0; i<9; i++)
16     {
17         Contact *conatct = [[Contact alloc]initWithName:[NSString stringWithFormat:@"name%d",i+1] andFaceName:[NSString stringWithFormat:@"%d.png",i]];
18         [self.contacts addObject:conatct];
19     }
20
21     //设置tableView的数据源
22     self.tableView.dataSource = self;
23 }
24
25 #pragma mark -tableView的数据源方法
26 //每一组多少行
27 -(NSInteger)tableView:(UITableView *)tableView numberOfRowsInSection:(NSInteger)section
28 {
29     return self.contacts.count;
30 }
31 //在与xib关联的类中加载xib文件(其实就是封装了一下而已)
32
33 //设置每一个单元格的内容
34 -(UITableViewCell *)tableView:(UITableView *)tableView cellForRowAtIndexPath:(NSIndexPath *)indexPath
35 {
36     //1.根据reuseIdentifier,先到对象池中去找重用的单元格对象
37     static NSString *reuseIdentifier = @"myCell";
38     myTableViewCell *cell = [self.tableView dequeueReusableCellWithIdentifier:reuseIdentifier];
39     //2.如果没找到,就自己创建cell
40     if(!cell)
41     {
42         cell = [myTableViewCell cell];//调用类方法
43     }
44     //3.设置单元格对象的内容
45     Contact *contact = [self.contacts objectAtIndex:indexPath.row];
46     [cell setContact:contact];//调用实例方法
47
48     return cell;
49 }
50
51 @end