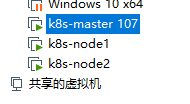
先安装一台虚拟机,然后进行克隆,因为前面的步骤都是一样的,具体代码如下:
Last login: Mon Nov 25 00:40:34 2019 from 192.168.180.1

##安装依赖包
[root@master ~]# yum install -y conntrack ntpdate ntp ipvsadm ipset jq iptables curl sysstat libseccomp wget vim net-tools git
已加载插件:fastestmirror, langpacks
Loading mirror speeds from cached hostfile
 * base: mirrors.163.com
 * extras: mirrors.163.com
 * updates: mirrors.huaweicloud.com
base                                                    | 3.6 kB     00:00
docker-ce-stable                                        | 3.5 kB     00:00
extras                                                  | 2.9 kB     00:00
k8s                                                     | 1.4 kB     00:00
updates                                                 | 2.9 kB     00:00
软件包 conntrack-tools-1.4.4-5.el7_7.2.x86_64 已安装并且是最新版本
软件包 ntpdate-4.2.6p5-29.el7.centos.x86_64 已安装并且是最新版本
软件包 ntp-4.2.6p5-29.el7.centos.x86_64 已安装并且是最新版本
软件包 ipvsadm-1.27-7.el7.x86_64 已安装并且是最新版本
软件包 ipset-7.1-1.el7.x86_64 已安装并且是最新版本
没有可用软件包 jq。
软件包 iptables-1.4.21-33.el7.x86_64 已安装并且是最新版本
软件包 curl-7.29.0-54.el7.x86_64 已安装并且是最新版本
软件包 sysstat-10.1.5-18.el7.x86_64 已安装并且是最新版本
软件包 libseccomp-2.3.1-3.el7.x86_64 已安装并且是最新版本
软件包 wget-1.14-18.el7_6.1.x86_64 已安装并且是最新版本
软件包 2:vim-enhanced-7.4.629-6.el7.x86_64 已安装并且是最新版本
无须任何处理

##设置防火墙为 Iptables 并设置空规则
[root@master ~]# systemctl stop firewalld && systemctl disable firewalld
[root@master ~]# yum -y install iptables-services && systemctl start iptables && systemctl enable iptables && iptables -F && service iptables save
已加载插件:fastestmirror, langpacks
Loading mirror speeds from cached hostfile
 * base: mirrors.163.com
 * extras: mirrors.163.com
 * updates: mirrors.huaweicloud.com
软件包 iptables-services-1.4.21-33.el7.x86_64 已安装并且是最新版本
无须任何处理
iptables: Saving firewall rules to /etc/sysconfig/iptables:[  确定  ]

##关闭 SELINUX
[root@master ~]# swapoff -a && sed -i '/ swap / s/^(.*)$/#1/g' /etc/fstab
[root@master ~]# setenforce 0 && sed -i 's/^SELINUX=.*/SELINUX=disabled/' /etc/selinux/config
setenforce: SELinux is disabled

##调整内核参数,对于 K8S
[root@master ~]# cat > kubernetes.conf <<EOF
> net.bridge.bridge-nf-call-iptables=1
> net.bridge.bridge-nf-call-ip6tables=1
> net.ipv4.ip_forward=1
> net.ipv4.tcp_tw_recycle=0
> vm.swappiness=0 # 禁止使用 swap 空间,只有当系统 OOM 时才允许使用它
> vm.overcommit_memory=1 # 不检查物理内存是否够用
> vm.panic_on_oom=0 # 开启 OOM
> fs.inotify.max_user_instances=8192
> fs.inotify.max_user_watches=1048576
> fs.file-max=52706963
> fs.nr_open=52706963
> net.ipv6.conf.all.disable_ipv6=1
> net.netfilter.nf_conntrack_max=2310720
> EOF
[root@master ~]# cp kubernetes.conf /etc/sysctl.d/kubernetes.conf
[root@master ~]# sysctl -p /etc/sysctl.d/kubernetes.conf
net.bridge.bridge-nf-call-iptables = 1
net.bridge.bridge-nf-call-ip6tables = 1
net.ipv4.ip_forward = 1
net.ipv4.tcp_tw_recycle = 0
vm.swappiness = 0 # 禁止使用 swap 空间,只有当系统 OOM 时才允许使用它
vm.overcommit_memory = 1 # 不检查物理内存是否够用
vm.panic_on_oom = 0 # 开启 OOM
fs.inotify.max_user_instances = 8192
fs.inotify.max_user_watches = 1048576
fs.file-max = 52706963
fs.nr_open = 52706963
net.ipv6.conf.all.disable_ipv6 = 1
net.netfilter.nf_conntrack_max = 2310720

## 关闭系统不需要服务
[root@master ~]# systemctl stop postfix && systemctl disable postfix
Removed symlink /etc/systemd/system/multi-user.target.wants/postfix.service.

##设置 rsyslogd 和 systemd journald
[root@master ~]# mkdir /var/log/journal # 持久化保存日志的目录
[root@master ~]# mkdir /etc/systemd/journald.conf.d
[root@master ~]# cat > /etc/systemd/journald.conf.d/99-prophet.conf <<EOF
> [Journal]
> # 持久化保存到磁盘
> Storage=persistent
> # 压缩历史日志
> Compress=yes
> SyncIntervalSec=5m
> RateLimitInterval=30s
> RateLimitBurst=1000
> # 最大占用空间 10G
> SystemMaxUse=10G
> # 单日志文件最大 200M
> SystemMaxFileSize=200M
> # 日志保存时间 2 周
> MaxRetentionSec=2week
> # 不将日志转发到 syslog
> ForwardToSyslog=no
> EOF
[root@master ~]# systemctl restart systemd-journald

##升级系统内核为 4.44
[root@master ~]# rpm -Uvh http://www.elrepo.org/elrepo-release-7.0-3.el7.elrepo.noarch.rpm
获取http://www.elrepo.org/elrepo-release-7.0-3.el7.elrepo.noarch.rpm
警告:/var/tmp/rpm-tmp.KLFoFh: 头V4 DSA/SHA1 Signature, 密钥 ID baadae52: NOKEY
准备中...                          ################################# [100%]
正在升级/安装...
   1:elrepo-release-7.0-3.el7.elrepo  ################################# [100%]
[root@master ~]# yum --enablerepo=elrepo-kernel install -y kernel-lt
已加载插件:fastestmirror, langpacks
Loading mirror speeds from cached hostfile
 * base: mirrors.163.com
 * elrepo: mirror.rackspace.com
 * elrepo-kernel: mirror.rackspace.com
 * extras: mirrors.163.com
 * updates: mirrors.huaweicloud.com
elrepo                                                  | 2.9 kB     00:00
elrepo-kernel                                           | 2.9 kB     00:00
(1/2): elrepo/primary_db                                  | 398 kB   00:01
(2/2): elrepo-kernel/primary_db                           | 1.8 MB   00:02
正在解决依赖关系
--> 正在检查事务
---> 软件包 kernel-lt.x86_64.0.4.4.202-1.el7.elrepo 将被 安装
--> 解决依赖关系完成

依赖关系解决

===============================================================================
 Package        架构        版本                      源                  大小
===============================================================================
正在安装:
 kernel-lt      x86_64      4.4.202-1.el7.elrepo      elrepo-kernel       39 M

事务概要
===============================================================================
安装  1 软件包

总下载量:39 M
安装大小:180 M
Downloading packages:
警告:/var/cache/yum/x86_64/7/elrepo-kernel/packages/kernel-lt-4.4.202-1.el7.elrepo.x86_64.rpm: 头V4 DSA/SHA1 Signature, 密钥 ID baadae52: NOKEY
kernel-lt-4.4.202-1.el7.elrepo.x86_64.rpm 的公钥尚未安装
kernel-lt-4.4.202-1.el7.elrepo.x86_64.rpm                 |  39 MB   00:22
从 file:///etc/pki/rpm-gpg/RPM-GPG-KEY-elrepo.org 检索密钥
导入 GPG key 0xBAADAE52:
 用户ID     : "elrepo.org (RPM Signing Key for elrepo.org) <secure@elrepo.org>"
 指纹       : 96c0 104f 6315 4731 1e0b b1ae 309b c305 baad ae52
 软件包     : elrepo-release-7.0-3.el7.elrepo.noarch (installed)
 来自       : /etc/pki/rpm-gpg/RPM-GPG-KEY-elrepo.org
Running transaction check
Running transaction test
Transaction test succeeded
Running transaction
警告:RPM 数据库已被非 yum 程序修改。
  正在安装    : kernel-lt-4.4.202-1.el7.elrepo.x86_64                      1/1
  验证中      : kernel-lt-4.4.202-1.el7.elrepo.x86_64                      1/1

已安装:
  kernel-lt.x86_64 0:4.4.202-1.el7.elrepo

完毕!
[root@master ~]# grub2-set-default 'CentOS Linux (4.4.189-1.el7.elrepo.x86_64) 7 (Core)'
[root@master ~]# uname -r
3.10.0-957.el7.x86_64
[root@master ~]# reboot
# 重启
[root@k8s-master ~]# uname -r
4.4.202-1.el7.elrepo.x86_64
###########下面步骤也要执行,只是忘记做记录了
# kube-proxy开启ipvs的前置条件
modprobe br_netfilter
cat > /etc/sysconfig/modules/ipvs.modules <<EOF
#!/bin/bash
modprobe -- ip_vs
modprobe -- ip_vs_rr
modprobe -- ip_vs_wrr
modprobe -- ip_vs_sh
modprobe -- nf_conntrack_ipv4
EOF
chmod 755 /etc/sysconfig/modules/ipvs.modules && bash /etc/sysconfig/modules/ipvs.modules &&
lsmod | grep -e ip_vs -e nf_conntrack_ipv4
yum install -y yum-utils device-mapper-persistent-data lvm2
yum-config-manager
--add-repo
http://mirrors.aliyun.com/docker-ce/linux/centos/docker-ce.repo
yum update -y && yum install -y docker-ce
## 创建 /etc/docker 目录
mkdir /etc/docker
# 配置 daemon.
cat > /etc/docker/daemon.json <<EOF
{
"exec-opts": ["native.cgroupdriver=systemd"],
"log-driver": "json-file",
"log-opts": {
"max-size": "100m"
}
} EOF
mkdir -p /etc/systemd/system/docker.service.d
# 重启docker服务
systemctl daemon-reload && systemctl restart docker && systemctl enable docker
然后进行克隆
设置系统主机名以及 Host 文件的相互解析
hostnamectl set-hostname k8s-master
三台机器都要执行
[root@k8s-node02 ~]# cat <<EOF > /etc/yum.repos.d/kubernetes.repo
> [kubernetes]
> name=Kubernetes
> baseurl=http://mirrors.aliyun.com/kubernetes/yum/repos/kubernetes-el7-x86_64
> enabled=1
> gpgcheck=0
> repo_gpgcheck=0
> gpgkey=http://mirrors.aliyun.com/kubernetes/yum/doc/yum-key.gpg
> http://mirrors.aliyun.com/kubernetes/yum/doc/rpm-package-key.gpg
> EOF
[root@k8s-node02 ~]# yum -y install kubeadm-1.15.1 kubectl-1.15.1 kubelet-1.15.1
已加载插件:fastestmirror, langpacks
Loading mirror speeds from cached hostfile
 * base: mirrors.tuna.tsinghua.edu.cn
 * elrepo: mirrors.tuna.tsinghua.edu.cn
 * extras: mirrors.tuna.tsinghua.edu.cn
 * updates: mirrors.tuna.tsinghua.edu.cn
kubernetes                                                                                                                                  | 1.4 kB  00:00:00
kubernetes/primary                                                                                                                          |  59 kB  00:00:00
kubernetes                                                                                                                                                 430/430
正在解决依赖关系
--> 正在检查事务
---> 软件包 kubeadm.x86_64.0.1.15.1-0 将被 安装
--> 正在处理依赖关系 kubernetes-cni >= 0.7.5,它被软件包 kubeadm-1.15.1-0.x86_64 需要
--> 正在处理依赖关系 cri-tools >= 1.13.0,它被软件包 kubeadm-1.15.1-0.x86_64 需要
---> 软件包 kubectl.x86_64.0.1.15.1-0 将被 安装
---> 软件包 kubelet.x86_64.0.1.15.1-0 将被 安装
--> 正在处理依赖关系 socat,它被软件包 kubelet-1.15.1-0.x86_64 需要
--> 正在检查事务
---> 软件包 cri-tools.x86_64.0.1.13.0-0 将被 安装
---> 软件包 kubernetes-cni.x86_64.0.0.7.5-0 将被 安装
---> 软件包 socat.x86_64.0.1.7.3.2-2.el7 将被 安装
--> 解决依赖关系完成

依赖关系解决

===================================================================================================================================================================
 Package                                   架构                              版本                                      源                                     大小
===================================================================================================================================================================
正在安装:
 kubeadm                                   x86_64                            1.15.1-0                                  kubernetes                            8.9 M
 kubectl                                   x86_64                            1.15.1-0                                  kubernetes                            9.5 M
 kubelet                                   x86_64                            1.15.1-0                                  kubernetes                             22 M
为依赖而安装:
 cri-tools                                 x86_64                            1.13.0-0                                  kubernetes                            5.1 M
 kubernetes-cni                            x86_64                            0.7.5-0                                   kubernetes                             10 M
 socat                                     x86_64                            1.7.3.2-2.el7                             base                                  290 k

事务概要
===================================================================================================================================================================
安装  3 软件包 (+3 依赖软件包)

总下载量:55 M
安装大小:251 M
Downloading packages:
(1/6): 14bfe6e75a9efc8eca3f638eb22c7e2ce759c67f95b43b16fae4ebabde1549f3-cri-tools-1.13.0-0.x86_64.rpm                                       | 5.1 MB  00:00:04
(2/6): aa386b8f2cac67415283227ccb01dc043d718aec142e32e1a2ba6dbd5173317b-kubeadm-1.15.1-0.x86_64.rpm                                         | 8.9 MB  00:00:04
(3/6): f27b0d7e1770ae83c9fce9ab30a5a7eba4453727cdc53ee96dc4542c8577a464-kubectl-1.15.1-0.x86_64.rpm                                         | 9.5 MB  00:00:07
(4/6): socat-1.7.3.2-2.el7.x86_64.rpm                                                                                                       | 290 kB  00:00:00
(5/6): f5edc025972c2d092ac41b05877c89b50cedaa7177978d9e5e49b5a2979dbc85-kubelet-1.15.1-0.x86_64.rpm                                         |  22 MB  00:00:08
(6/6): 548a0dcd865c16a50980420ddfa5fbccb8b59621179798e6dc905c9bf8af3b34-kubernetes-cni-0.7.5-0.x86_64.rpm                                   |  10 MB  00:00:04
-------------------------------------------------------------------------------------------------------------------------------------------------------------------
总计                                                                                                                               3.3 MB/s |  55 MB  00:00:16
Running transaction check
Running transaction test
Transaction test succeeded
Running transaction
  正在安装    : socat-1.7.3.2-2.el7.x86_64                                                                                                                     1/6
  正在安装    : kubernetes-cni-0.7.5-0.x86_64                                                                                                                  2/6
  正在安装    : kubelet-1.15.1-0.x86_64                                                                                                                        3/6
  正在安装    : cri-tools-1.13.0-0.x86_64                                                                                                                      4/6
  正在安装    : kubectl-1.15.1-0.x86_64                                                                                                                        5/6
  正在安装    : kubeadm-1.15.1-0.x86_64                                                                                                                        6/6
  验证中      : kubectl-1.15.1-0.x86_64                                                                                                                        1/6
  验证中      : cri-tools-1.13.0-0.x86_64                                                                                                                      2/6
  验证中      : kubelet-1.15.1-0.x86_64                                                                                                                        3/6
  验证中      : kubeadm-1.15.1-0.x86_64                                                                                                                        4/6
  验证中      : kubernetes-cni-0.7.5-0.x86_64                                                                                                                  5/6
  验证中
下面是主节点要执行的
[root@k8s-master kubeadm-basic.images]# cd /opt
[root@k8s-master opt]# ll
总用量 235624
drwxr-xr-x  3 root root        17 11月 26 16:43 cni
drwx--x--x. 4 root root        28 11月 26 13:23 containerd
drwxr-xr-x  2 root root       142 8月   5 10:25 kubeadm-basic.images
-rw-r--r--  1 root root 241260752 11月 26 16:44 kubeadm-basic.images.tar.gz
-rw-r--r--  1 root root     14416 11月 26 16:57 kube-flannel.yml
drwxr-xr-x. 2 root root         6 10月 31 2018 rh
[root@k8s-master opt]# kubectl create -f kube-flannel.yml
The connection to the server localhost:8080 was refused - did you specify the right host or port?
[root@k8s-master opt]# kubeadm init --config=kubeadm-config.yaml --experimental-upload-certs | tee kubeadm-init.log
Flag --experimental-upload-certs has been deprecated, use --upload-certs instead
unable to read config from "kubeadm-config.yaml" : open kubeadm-config.yaml: no such file or directory
[root@k8s-master opt]# cd
[root@k8s-master ~]# kubeadm init --config=kubeadm-config.yaml --experimental-upload-certs | tee kubeadm-init.log
Flag --experimental-upload-certs has been deprecated, use --upload-certs instead
unable to read config from "kubeadm-config.yaml" : open kubeadm-config.yaml: no such file or directory
[root@k8s-master ~]# ll
总用量 12
-rw-------. 1 root root 1731 11月 26 12:32 anaconda-ks.cfg
-rw-r--r--. 1 root root 1779 11月 26 13:00 initial-setup-ks.cfg
-rw-r--r--  1 root root    0 11月 26 16:58 kubeadm-init.log
-rw-r--r--. 1 root root  484 11月 26 13:15 kubernetes.conf
[root@k8s-master ~]# kubeadm config print init-defaults > kubeadm-config.yaml
[root@k8s-master ~]# vim kubeadm-config.yaml
[root@k8s-master ~]# kubeadm init --config=kubeadm-config.yaml --experimental-upload-certs | tee kubeadm-init.log
Flag --experimental-upload-certs has been deprecated, use --upload-certs instead
[init] Using Kubernetes version: v1.15.1
[preflight] Running pre-flight checks
        [WARNING SystemVerification]: this Docker version is not on the list of validated versions: 19.03.5. Latest validated version: 18.09
[preflight] Pulling images required for setting up a Kubernetes cluster
[preflight] This might take a minute or two, depending on the speed of your internet connection
[preflight] You can also perform this action in beforehand using 'kubeadm config images pull'
[kubelet-start] Writing kubelet environment file with flags to file "/var/lib/kubelet/kubeadm-flags.env"
[kubelet-start] Writing kubelet configuration to file "/var/lib/kubelet/config.yaml"
[kubelet-start] Activating the kubelet service
[certs] Using certificateDir folder "/etc/kubernetes/pki"
[certs] Generating "front-proxy-ca" certificate and key
[certs] Generating "front-proxy-client" certificate and key
[certs] Generating "etcd/ca" certificate and key
[certs] Generating "etcd/server" certificate and key
[certs] etcd/server serving cert is signed for DNS names [k8s-master localhost] and IPs [192.168.180.110 127.0.0.1 ::1]
[certs] Generating "etcd/peer" certificate and key
[certs] etcd/peer serving cert is signed for DNS names [k8s-master localhost] and IPs [192.168.180.110 127.0.0.1 ::1]
[certs] Generating "etcd/healthcheck-client" certificate and key
[certs] Generating "apiserver-etcd-client" certificate and key
[certs] Generating "ca" certificate and key
[certs] Generating "apiserver" certificate and key
[certs] apiserver serving cert is signed for DNS names [k8s-master kubernetes kubernetes.default kubernetes.default.svc kubernetes.default.svc.cluster.local] and IPs [10.96.0.1 192.168.180.110]
[certs] Generating "apiserver-kubelet-client" certificate and key
[certs] Generating "sa" key and public key
[kubeconfig] Using kubeconfig folder "/etc/kubernetes"
[kubeconfig] Writing "admin.conf" kubeconfig file
[kubeconfig] Writing "kubelet.conf" kubeconfig file
[kubeconfig] Writing "controller-manager.conf" kubeconfig file
[kubeconfig] Writing "scheduler.conf" kubeconfig file
[control-plane] Using manifest folder "/etc/kubernetes/manifests"
[control-plane] Creating static Pod manifest for "kube-apiserver"
[control-plane] Creating static Pod manifest for "kube-controller-manager"
[control-plane] Creating static Pod manifest for "kube-scheduler"
[etcd] Creating static Pod manifest for local etcd in "/etc/kubernetes/manifests"
[wait-control-plane] Waiting for the kubelet to boot up the control plane as static Pods from directory "/etc/kubernetes/manifests". This can take up to 4m0s
[apiclient] All control plane components are healthy after 32.505263 seconds
[upload-config] Storing the configuration used in ConfigMap "kubeadm-config" in the "kube-system" Namespace
[kubelet] Creating a ConfigMap "kubelet-config-1.15" in namespace kube-system with the configuration for the kubelets in the cluster
[upload-certs] Storing the certificates in Secret "kubeadm-certs" in the "kube-system" Namespace
[upload-certs] Using certificate key:
9053253c4952c112c996e6246a95f90c7d5bc20e418580f3dab17f3d37e30ac4
[mark-control-plane] Marking the node k8s-master as control-plane by adding the label "node-role.kubernetes.io/master=''"
[mark-control-plane] Marking the node k8s-master as control-plane by adding the taints [node-role.kubernetes.io/master:NoSchedule]
[bootstrap-token] Using token: abcdef.0123456789abcdef
[bootstrap-token] Configuring bootstrap tokens, cluster-info ConfigMap, RBAC Roles
[bootstrap-token] configured RBAC rules to allow Node Bootstrap tokens to post CSRs in order for nodes to get long term certificate credentials
[bootstrap-token] configured RBAC rules to allow the csrapprover controller automatically approve CSRs from a Node Bootstrap Token
[bootstrap-token] configured RBAC rules to allow certificate rotation for all node client certificates in the cluster
[bootstrap-token] Creating the "cluster-info" ConfigMap in the "kube-public" namespace
[addons] Applied essential addon: CoreDNS
[addons] Applied essential addon: kube-proxy

Your Kubernetes control-plane has initialized successfully!

To start using your cluster, you need to run the following as a regular user:

  mkdir -p $HOME/.kube
  sudo cp -i /etc/kubernetes/admin.conf $HOME/.kube/config
  sudo chown $(id -u):$(id -g) $HOME/.kube/config

You should now deploy a pod network to the cluster.
Run "kubectl apply -f [podnetwork].yaml" with one of the options listed at:
  https://kubernetes.io/docs/concepts/cluster-administration/addons/

Then you can join any number of worker nodes by running the following on each as root:

kubeadm join 192.168.180.110:6443 --token abcdef.0123456789abcdef
    --discovery-token-ca-cert-hash sha256:2ada0e2827669c2b9c9432c9a099787a47d85fca9389576e5d2ec15d83a806dd
[root@k8s-master ~]# kubectl get note
The connection to the server localhost:8080 was refused - did you specify the right host or port?
[root@k8s-master ~]# kubectl get pod
The connection to the server localhost:8080 was refused - did you specify the right host or port?
[root@k8s-master ~]# ll
总用量 24
-rw-------. 1 root root 1731 11月 26 12:32 anaconda-ks.cfg
-rw-r--r--. 1 root root 1779 11月 26 13:00 initial-setup-ks.cfg
-rw-r--r--  1 root root  999 11月 26 17:00 kubeadm-config.yaml
-rw-r--r--  1 root root 4668 11月 26 17:01 kubeadm-init.log
-rw-r--r--. 1 root root  484 11月 26 13:15 kubernetes.conf
[root@k8s-master ~]# cat  kubeadm-init.log
[init] Using Kubernetes version: v1.15.1
[preflight] Running pre-flight checks
[preflight] Pulling images required for setting up a Kubernetes cluster
[preflight] This might take a minute or two, depending on the speed of your internet connection
[preflight] You can also perform this action in beforehand using 'kubeadm config images pull'
[kubelet-start] Writing kubelet environment file with flags to file "/var/lib/kubelet/kubeadm-flags.env"
[kubelet-start] Writing kubelet configuration to file "/var/lib/kubelet/config.yaml"
[kubelet-start] Activating the kubelet service
[certs] Using certificateDir folder "/etc/kubernetes/pki"
[certs] Generating "front-proxy-ca" certificate and key
[certs] Generating "front-proxy-client" certificate and key
[certs] Generating "etcd/ca" certificate and key
[certs] Generating "etcd/server" certificate and key
[certs] etcd/server serving cert is signed for DNS names [k8s-master localhost] and IPs [192.168.180.110 127.0.0.1 ::1]
[certs] Generating "etcd/peer" certificate and key
[certs] etcd/peer serving cert is signed for DNS names [k8s-master localhost] and IPs [192.168.180.110 127.0.0.1 ::1]
[certs] Generating "etcd/healthcheck-client" certificate and key
[certs] Generating "apiserver-etcd-client" certificate and key
[certs] Generating "ca" certificate and key
[certs] Generating "apiserver" certificate and key
[certs] apiserver serving cert is signed for DNS names [k8s-master kubernetes kubernetes.default kubernetes.default.svc kubernetes.default.svc.cluster.local] and IPs [10.96.0.1 192.168.180.110]
[certs] Generating "apiserver-kubelet-client" certificate and key
[certs] Generating "sa" key and public key
[kubeconfig] Using kubeconfig folder "/etc/kubernetes"
[kubeconfig] Writing "admin.conf" kubeconfig file
[kubeconfig] Writing "kubelet.conf" kubeconfig file
[kubeconfig] Writing "controller-manager.conf" kubeconfig file
[kubeconfig] Writing "scheduler.conf" kubeconfig file
[control-plane] Using manifest folder "/etc/kubernetes/manifests"
[control-plane] Creating static Pod manifest for "kube-apiserver"
[control-plane] Creating static Pod manifest for "kube-controller-manager"
[control-plane] Creating static Pod manifest for "kube-scheduler"
[etcd] Creating static Pod manifest for local etcd in "/etc/kubernetes/manifests"
[wait-control-plane] Waiting for the kubelet to boot up the control plane as static Pods from directory "/etc/kubernetes/manifests". This can take up to 4m0s
[apiclient] All control plane components are healthy after 32.505263 seconds
[upload-config] Storing the configuration used in ConfigMap "kubeadm-config" in the "kube-system" Namespace
[kubelet] Creating a ConfigMap "kubelet-config-1.15" in namespace kube-system with the configuration for the kubelets in the cluster
[upload-certs] Storing the certificates in Secret "kubeadm-certs" in the "kube-system" Namespace
[upload-certs] Using certificate key:
9053253c4952c112c996e6246a95f90c7d5bc20e418580f3dab17f3d37e30ac4
[mark-control-plane] Marking the node k8s-master as control-plane by adding the label "node-role.kubernetes.io/master=''"
[mark-control-plane] Marking the node k8s-master as control-plane by adding the taints [node-role.kubernetes.io/master:NoSchedule]
[bootstrap-token] Using token: abcdef.0123456789abcdef
[bootstrap-token] Configuring bootstrap tokens, cluster-info ConfigMap, RBAC Roles
[bootstrap-token] configured RBAC rules to allow Node Bootstrap tokens to post CSRs in order for nodes to get long term certificate credentials
[bootstrap-token] configured RBAC rules to allow the csrapprover controller automatically approve CSRs from a Node Bootstrap Token
[bootstrap-token] configured RBAC rules to allow certificate rotation for all node client certificates in the cluster
[bootstrap-token] Creating the "cluster-info" ConfigMap in the "kube-public" namespace
[addons] Applied essential addon: CoreDNS
[addons] Applied essential addon: kube-proxy

Your Kubernetes control-plane has initialized successfully!

To start using your cluster, you need to run the following as a regular user:

  mkdir -p $HOME/.kube
  sudo cp -i /etc/kubernetes/admin.conf $HOME/.kube/config
  sudo chown $(id -u):$(id -g) $HOME/.kube/config

You should now deploy a pod network to the cluster.
Run "kubectl apply -f [podnetwork].yaml" with one of the options listed at:
  https://kubernetes.io/docs/concepts/cluster-administration/addons/

Then you can join any number of worker nodes by running the following on each as root:

kubeadm join 192.168.180.110:6443 --token abcdef.0123456789abcdef
    --discovery-token-ca-cert-hash sha256:2ada0e2827669c2b9c9432c9a099787a47d85fca9389576e5d2ec15d83a806dd
[root@k8s-master ~]#  mkdir -p $HOME/.kube
[root@k8s-master ~]#  sudo cp -i /etc/kubernetes/admin.conf $HOME/.kube/config
[root@k8s-master ~]# sudo chown $(id -u):$(id -g) $HOME/.kube/config
[root@k8s-master ~]# kubectl get node
NAME         STATUS     ROLES    AGE     VERSION
k8s-master   NotReady   master   5m11s   v1.15.1
[root@k8s-master ~]# cd /opt
[root@k8s-master opt]# ll
总用量 235624
drwxr-xr-x  3 root root        17 11月 26 16:43 cni
drwx--x--x. 4 root root        28 11月 26 13:23 containerd
drwxr-xr-x  2 root root       142 8月   5 10:25 kubeadm-basic.images
-rw-r--r--  1 root root 241260752 11月 26 16:44 kubeadm-basic.images.tar.gz
-rw-r--r--  1 root root         0 11月 26 16:58 kubeadm-init.log
-rw-r--r--  1 root root     14416 11月 26 16:57 kube-flannel.yml
drwxr-xr-x. 2 root root         6 10月 31 2018 rh
[root@k8s-master opt]# kubectl create -f kube-flannel.yml
podsecuritypolicy.policy/psp.flannel.unprivileged created
clusterrole.rbac.authorization.k8s.io/flannel created
clusterrolebinding.rbac.authorization.k8s.io/flannel created
serviceaccount/flannel created
configmap/kube-flannel-cfg created
daemonset.apps/kube-flannel-ds-amd64 created
daemonset.apps/kube-flannel-ds-arm64 created
daemonset.apps/kube-flannel-ds-arm created
daemonset.apps/kube-flannel-ds-ppc64le created
daemonset.apps/kube-flannel-ds-s390x created
[root@k8s-master opt]# kubectl get pod -n kube-system
NAME                                 READY   STATUS    RESTARTS   AGE
coredns-5c98db65d4-9dtqc             1/1     Running   0          7m34s
coredns-5c98db65d4-t299k             1/1     Running   0          7m34s
etcd-k8s-master                      1/1     Running   0          6m45s
kube-apiserver-k8s-master            1/1     Running   0          7m52s
kube-controller-manager-k8s-master   1/1     Running   0          7m52s
kube-flannel-ds-amd64-6p77z          1/1     Running   0          117s
kube-proxy-c9dbj                     1/1     Running   0          7m33s
kube-scheduler-k8s-master            1/1     Running   0          7m52s
[root@k8s-master opt]# kubectl get node
NAME         STATUS   ROLES    AGE     VERSION
k8s-master   Ready    master   9m17s   v1.15.1
[root@k8s-master opt]# kubectl get node
NAME         STATUS   ROLES    AGE     VERSION
k8s-master   Ready    master   16m     v1.15.1
k8s-node01   Ready    <none>   108s    v1.15.1
k8s-node02   Ready    <none>   2m45s   v1.15.1
[root@k8s-master opt]# kubectl get pod -n kube-system -o wide
NAME                                 READY   STATUS    RESTARTS   AGE     IP                NODE         NOMINATED NODE   READINESS GATES
coredns-5c98db65d4-9dtqc             1/1     Running   0          16m     10.244.0.3        k8s-master   <none>           <none>
coredns-5c98db65d4-t299k             1/1     Running   0          16m     10.244.0.2        k8s-master   <none>           <none>
etcd-k8s-master                      1/1     Running   0          15m     192.168.180.110   k8s-master   <none>           <none>
kube-apiserver-k8s-master            1/1     Running   0          16m     192.168.180.110   k8s-master   <none>           <none>
kube-controller-manager-k8s-master   1/1     Running   0          16m     192.168.180.110   k8s-master   <none>           <none>
kube-flannel-ds-amd64-4k54t          1/1     Running   0          3m27s   192.168.180.103   k8s-node02   <none>           <none>
kube-flannel-ds-amd64-6p77z          1/1     Running   0          11m     192.168.180.110   k8s-master   <none>           <none>
kube-flannel-ds-amd64-f6v2v          1/1     Running   0          2m30s   192.168.180.108   k8s-node01   <none>           <none>
kube-proxy-c9dbj                     1/1     Running   0          16m     192.168.180.110   k8s-master   <none>           <none>
kube-proxy-pcjck                     1/1     Running   0          3m27s   192.168.180.103   k8s-node02   <none>           <none>
kube-proxy-xjhfb                     1/1     Running   0          2m30s   192.168.180.108   k8s-node01   <none>           <none>
kube-scheduler-k8s-master            1/1     Running   0          16m     192.168.180.110   k8s-master   <none>           <none>
kubeadm-config.yaml
[root@k8s-master ~]# cat kubeadm-config.yaml
apiVersion: kubeadm.k8s.io/v1beta2
bootstrapTokens:
- groups:
  - system:bootstrappers:kubeadm:default-node-token
  token: abcdef.0123456789abcdef
  ttl: 24h0m0s
  usages:
  - signing
  - authentication
kind: InitConfiguration
localAPIEndpoint:
  advertiseAddress: 192.168.180.110
  bindPort: 6443
nodeRegistration:
  criSocket: /var/run/dockershim.sock
  name: k8s-master
  taints:
  - effect: NoSchedule
    key: node-role.kubernetes.io/master
---
apiServer:
  timeoutForControlPlane: 4m0s
apiVersion: kubeadm.k8s.io/v1beta2
certificatesDir: /etc/kubernetes/pki
clusterName: kubernetes
controllerManager: {}
dns:
  type: CoreDNS
etcd:
  local:
    dataDir: /var/lib/etcd
imageRepository: k8s.gcr.io
kind: ClusterConfiguration
kubernetesVersion: v1.15.1
networking:
  dnsDomain: cluster.local
  podSubnet: "10.244.0.0/16"
  serviceSubnet: 10.96.0.0/12
scheduler: {}
---
apiVersion: kubeproxy.config.k8s.io/v1alpha1
kind: KubeProxyConfiguration
featureGates:
  SupportIPVSProxyMode: true
mode: ipvs
2个从节点加入主节点即可
[root@k8s-node01 kubeadm-basic.images]# kubeadm join 192.168.180.110:6443 --token abcdef.0123456789abcdef
>     --discovery-token-ca-cert-hash sha256:2ada0e2827669c2b9c9432c9a099787a47d85fca9389576e5d2ec15d83a806dd
[preflight] Running pre-flight checks
        [WARNING SystemVerification]: this Docker version is not on the list of validated versions: 19.03.5. Latest validated version: 18.09
        [WARNING Hostname]: hostname "k8s-node01" could not be reached
        [WARNING Hostname]: hostname "k8s-node01": lookup k8s-node01 on 192.168.180.2:53: no such host
[preflight] Reading configuration from the cluster...
[preflight] FYI: You can look at this config file with 'kubectl -n kube-system get cm kubeadm-config -oyaml'
[kubelet-start] Downloading configuration for the kubelet from the "kubelet-config-1.15" ConfigMap in the kube-system namespace
[kubelet-start] Writing kubelet configuration to file "/var/lib/kubelet/config.yaml"
[kubelet-start] Writing kubelet environment file with flags to file "/var/lib/kubelet/kubeadm-flags.env"
[kubelet-start] Activating the kubelet service
[kubelet-start] Waiting for the kubelet to perform the TLS Bootstrap...

This node has joined the cluster:
* Certificate signing request was sent to apiserver and a response was received.
* The Kubelet was informed of the new secure connection details.

Run 'kubectl get nodes' on the control-plane to see this node join the cluster.
主节点会有
[root@k8s-master opt]# kubectl get node
NAME         STATUS   ROLES    AGE     VERSION
k8s-master   Ready    master   18m     v1.15.1
k8s-node01   Ready    <none>   4m15s   v1.15.1
k8s-node02   Ready    <none>   5m12s   v1.15.1
[root@k8s-master opt]#
到此就安装成功了。需要安装用到的资源留言即可。