在上一篇随笔中,我们给Products的创建页面添加了输入验证,今次的内容非常简单,来稍稍美化下Products的列表页面。
1. 打开app\views\admin\list.rhtml文件,可以看到下面的代码
<h1>Listing products</h1>
<table>
<tr>
<% for column in Product.content_columns %>
<th><%= column.human_name %></th>
<% end %>
</tr>
<% for product in @products %>
<tr>
<% for column in Product.content_columns %>
<td><%=h product.send(column.name) %></td>
<% end %>
<td><%= link_to 'Show', :action => 'show', :id => product %></td>
<td><%= link_to 'Edit', :action => 'edit', :id => product %></td>
<td><%= link_to 'Destroy', { :action => 'destroy', :id => product }, :confirm => 'Are you sure?', :method => :post %></td>
</tr>
<% end %>
</table>
<%= link_to 'Previous page', { :page => @product_pages.current.previous } if @product_pages.current.previous %>
<%= link_to 'Next page', { :page => @product_pages.current.next } if @product_pages.current.next %>
<br />
<%= link_to 'New product', :action => 'new' %>
可以看到,list页面实际上是对Products做循环,然后对每行,每列逐个输出到一个Table中,而link_to函数,我们在前面的内容中也使用过。
2. 修改app\views\admin\list.rhtml的内容,如下:
<h1>Product Listing</h1>
<table cellpadding="5" cellspacing="0">
<%
odd_or_even = 0
for product in @products
odd_or_even = 1 - odd_or_even
%>
<tr valign="top" class="ListLine<%= odd_or_even %>">
<td>
<img width="60" height="70" src="<%= product.image_url %>"/>
</td>
<td width="60%">
<span class="ListTitle"><%= h(product.title) %></span><br />
<%= h(truncate(product.description, 80)) %>
</td>
<td align="right">
<%= product.date_available.strftime("%y-%m-%d") %><br/>
<strong>$<%= sprintf("%0.2f", product.price) %></strong>
</td>
<td class="ListActions">
<%= link_to 'Show', :action => 'show', :id => product %><br/>
<%= link_to 'Edit', :action => 'edit', :id => product %><br/>
<%= link_to 'Destroy', { :action => 'destroy', :id => product },
:confirm => "Are you sure?" %>
</td>
</tr>
<% end %>
</table>
<%= if @product_pages.current.previous
link_to("Previous page", { :page => @product_pages.current.previous })
end
%>
<%= if @product_pages.current.next
link_to("Next page", { :page => @product_pages.current.next })
end
%>
<br />
<%= link_to 'New product', :action => 'new' %>
3. 在上面的代码里,我们可以看到td class="ListActions"这样的代码,下来我们添加这些css样式的内容:
将下面的内容添加到public\stylesheets\ scaffold.css文件中:
.ListTitle {
color: #244;
font-weight: bold;
font-size: larger;
}
.ListActions {
font-size: x-small;
text-align: right;
padding-left: 1em;
}
.ListLine0 {
background: #e0f8f8;
}
.ListLine1 {
background: #f8b0f8;
}
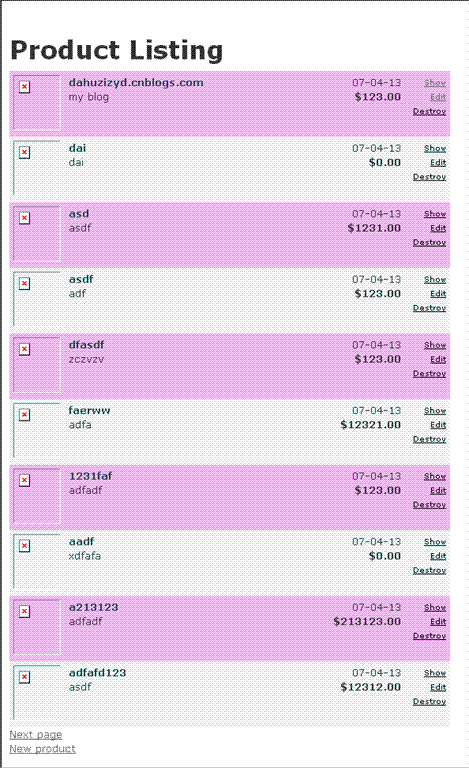
4. 再次运行Products的list页面,可以看到效果,如图:
