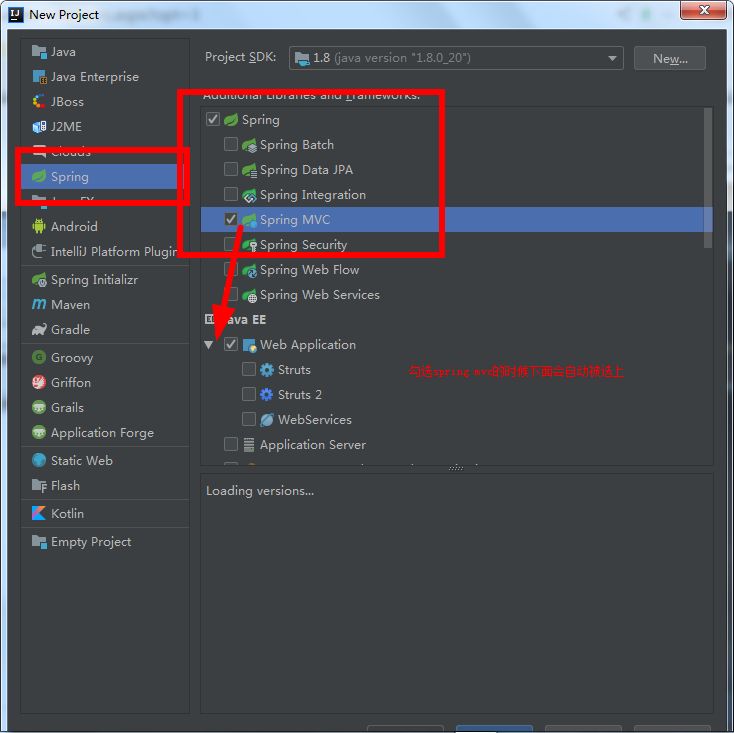
安装idea,下一步下一步!

之后就等待它下载spring包,时间有点久。。。
在src下面创建包名,然后创建一个controller,controller是操作数据用的,也是访问地址映射用的 HelloController
package com.tutorialspoint;
import org.springframework.stereotype.Controller;
import org.springframework.ui.Model;
import org.springframework.web.bind.annotation.GetMapping;

@Controller
public class HelloController {
    @GetMapping("/")
    public String index(Model m) {
        m.addAttribute("someAttribute", "someValue");
        return "index";
    }
}
在web/web-INF文件夹下新建一个views文件夹放jsp文件使用
index.jsp
<%@ page contentType="text/html;charset=UTF-8" language="java" %>
<html>
<head>
  <title>$Title$</title>
</head>
<body>
<p>${someAttribute}</p>
</body>
</html>
有一个配置文件dispatcher-servlet.xml
<?xml version="1.0" encoding="UTF-8"?>

<beans xmlns="http://www.springframework.org/schema/beans"
       xmlns:xsi="http://www.w3.org/2001/XMLSchema-instance"
       xmlns:context="http://www.springframework.org/schema/context"
       xmlns:mvc="http://www.springframework.org/schema/mvc"
       xsi:schemaLocation="http://www.springframework.org/schema/beans http://www.springframework.org/schema/beans/spring-beans.xsd http://www.springframework.org/schema/context http://www.springframework.org/schema/context/spring-context.xsd http://www.springframework.org/schema/mvc http://www.springframework.org/schema/mvc/spring-mvc.xsd">

    <mvc:annotation-driven/>
    <context:component-scan base-package="com.tutorialspoint"/>

    <bean class="org.springframework.web.servlet.view.InternalResourceViewResolver">
        <property name="prefix" value="/WEB-INF/views/"/>
        <property name="suffix" value=".jsp"/>
    </bean>
</beans>
还有一个web.xml 文件
<?xml version="1.0" encoding="UTF-8"?>
<web-app xmlns="http://xmlns.jcp.org/xml/ns/javaee"
         xmlns:xsi="http://www.w3.org/2001/XMLSchema-instance"
         xsi:schemaLocation="http://xmlns.jcp.org/xml/ns/javaee http://xmlns.jcp.org/xml/ns/javaee/web-app_3_1.xsd"
         version="3.1">
    <context-param>
        <param-name>contextConfigLocation</param-name>
        <param-value>/WEB-INF/applicationContext.xml</param-value>
    </context-param>
    <listener>
        <listener-class>
            org.springframework.web.context.ContextLoaderListener
        </listener-class>
    </listener>
    <servlet>
        <servlet-name>dispatcher</servlet-name>
        <servlet-class>
            org.springframework.web.servlet.DispatcherServlet
        </servlet-class>
        <load-on-startup>1</load-on-startup>
    </servlet>
    <servlet-mapping>
        <servlet-name>dispatcher</servlet-name>
        <url-pattern>/</url-pattern>
    </servlet-mapping>
</web-app>
完成上面步骤之后
点击run------configure------加号--------选择tomcat,他会自动帮你读取tomcat的位置,还有记得选sdk,将java的jdk选好
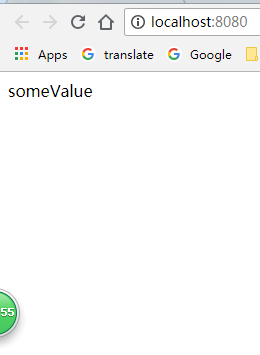
点击运行,运行的速度比eclipse好得多多了,O(∩_∩)O哈哈~

大功告成!!!虽然很简单,可是却花了一晚上配置,哎~~~
注意点:
- dispatcher-servlet.xml 的里面的有一个配置关联包名的,不要乱写
2.dispatcher-servlet.xml的文件目录配置和文件类型也是要注意的
3.web.xml的dispatcher
dispatcher
/