简介:
Spring Boot针对Spring Security提供了自动化配置方案,因此可以使Spring Security非常容易地整合进Spring Boot项目中,这也是在Spring Boot项目中使用Spring Security的优势。
1.添加依赖
pom.xml
     <dependency>
            <groupId>org.springframework.boot</groupId>
            <artifactId>spring-boot-starter-security</artifactId>
        </dependency>

        <dependency>
            <groupId>org.springframework.boot</groupId>
            <artifactId>spring-boot-starter-web</artifactId>
        </dependency>
spring-boot-starter-security添加依赖后项目中所有资源都被保护起来了
2/添加hello接口
@RestController
public class HelloController {
@GetMapping("/hello")
    public String hello() {
        String user = methodService.user();
        return user;
    }
}
3.启动项目
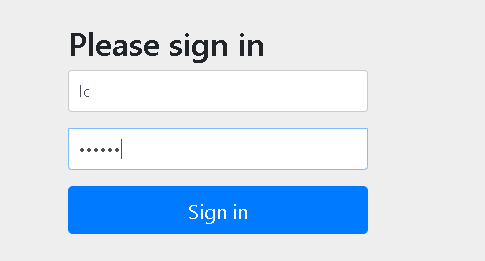
访问:http://localhost:8080/hello
项目自动跳转到这个由spring security提供的页面

默认用户名user,密码:控制台随机字符串

登陆后:

4.更多:
也可以配置默认的用户名和密码还有用户角色
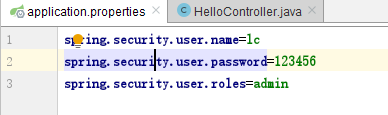
重启-登陆,可以看到用户名密码等已经被更改

基于内存的认证:
当然,开发者也可以自定义类继承自WebSecurityConfigurerAdapter,进而实现对Spring Security更多的自定义配置,例如基于内存的认证,配置方式如下:

自定义类继承WebSecurityConfigurerAdapter类,重写configure方法,在其中增加了两个用户,配置用户名,密码,角色。
至于加密,使用了NoOpPasswordEncoder即不加密
HttpSecurity
虽然现在可以实现认证功能,但是受保护的资源都是默认的,而且也不能根据实际情况进行角色管理,如果要实现这些功能,就需要重写WebSecurityConfigurerAdapter 中的另一个方法configure,参数可以看到是HttpSecurity.
在第一个configure方法中添加3个角色,root拥有admin和dba,admin拥有admin,user,cc拥有user
在第二个configure方法中,调用authorizeRequests方法开启HttpSecurity配置,
.antMatchers("/admin/**")
               .hasRole("ADMIN")

表示访问/admin/路径的必须要admin角色,后面两个也一样道理。
          .anyRequest()
                .authenticated()
表示除了前面定义的url,后面的都得认证后访问(登陆后访问)
          .formLogin()
                .loginProcessingUrl("/url")
                .permitAll()
表示开启表单登陆,就是一开始看到的登陆界面,登陆url为/login,permitAll表示和登陆相关的接口不需要认证
          .csrf()
                .disable();
表示关闭csrf(Cross-site request forgery)
@Configuration
public class MyWebSecurityConfig extends WebSecurityConfigurerAdapter {
    @Bean
    PasswordEncoder passwordEncoder(){
        return NoOpPasswordEncoder.getInstance();
    }

    @Override
    protected void configure(AuthenticationManagerBuilder auth) throws Exception {
       auth.inMemoryAuthentication()
               .withUser("root").password("123").roles("ADMIN","DBA")
               .and()
               .withUser("admin").password("123").roles("ADMIN","USER")
               .and()
               .withUser("cc").password("123").roles("USER");
    }

    @Override
    protected void configure(HttpSecurity http) throws Exception {
        http.authorizeRequests()
                .antMatchers("/admin/**")
                .hasRole("ADMIN")

          .antMatchers("/user/**")
                .access("hasAnyRole('ADMIN','USER')")

          .antMatchers("/db/**")
                .access("hasAnyRole('ADMIN') and  hasRole('DBA')")

          .anyRequest()
                .authenticated()
                .and()

          .formLogin()
                .loginProcessingUrl("/url")
                .permitAll()
                .and()

          .csrf()
                .disable();
    }

}
在controller:上面的配置,url为/admin/的需要由admin角色,/user/的需要admin或者user都可,/db/的需要admin和dba角色才可以
  @GetMapping("/admin/hello")
    public String hello2(){
        return "admin";
    }
   @GetMapping("/db/hello")
    public String hello3(){
        return "db";
    }
   @GetMapping("/user/hello")
    public String hello4(){
        return "user";
    }
登陆表单详细配置:
迄今为止,登录表单一直使用Spring Security提供的页面,登录成功后也是默认的页面跳转,但是,前后端分离正在成为企业级应用开发的主流,在前后端分离的开发方式中,前后端的数据交互通过JSON进行,这时,登录成功后就不是页面跳转了,而是一段JSON提示。要实现这些功能,只需要继续完善上文的配置,代码如下:
@Configuration
public class MyWebSecurityConfig extends WebSecurityConfigurerAdapter {
    @Bean
    PasswordEncoder passwordEncoder() {
        return NoOpPasswordEncoder.getInstance();
    }

    @Override
    protected void configure(AuthenticationManagerBuilder auth) throws Exception {
        auth.inMemoryAuthentication()
                .withUser("root").password("123").roles("ADMIN", "DBA")
                .and()
                .withUser("admin").password("123").roles("ADMIN", "USER")
                .and()
                .withUser("sang").password("123").roles("USER");
    }

    @Override
    protected void configure(HttpSecurity http) throws Exception {
        http.authorizeRequests()
                .antMatchers("/admin/**")
                .hasRole("ADMIN")
                .antMatchers("/user/**")
                .access("hasAnyRole('ADMIN','USER')")
                .antMatchers("/db/**")
                .access("hasRole('ADMIN') and hasRole('DBA')")
                .anyRequest()
                .authenticated()

         .and()
                .formLogin()
                .loginPage("/login_page")                      //登陆页面
                .loginProcessingUrl("/login")          //登陆请求处理接口
                .usernameParameter("name")             //默认用户名,密码
                .passwordParameter("passwd")

                .successHandler(new AuthenticationSuccessHandler() {            //登陆成功后
                    @Override
                    public void onAuthenticationSuccess(HttpServletRequest req,
                                                        HttpServletResponse resp,
                                                        Authentication auth)    //当前用户登陆信息
                            throws IOException {
                        Object principal = auth.getPrincipal();
                        resp.setContentType("application/json;charset=utf-8");
                        PrintWriter out = resp.getWriter();
                        resp.setStatus(200);
                        Map<String, Object> map = new HashMap<>();
                        map.put("status", 200);
                        map.put("msg", principal);
                        ObjectMapper om = new ObjectMapper();
                        out.write(om.writeValueAsString(map));
                        out.flush();
                        out.close();
                    }
                })

                .failureHandler(new AuthenticationFailureHandler() {         //登陆失败后
                    @Override
                    public void onAuthenticationFailure(HttpServletRequest req,
                                                        HttpServletResponse resp,
                                                        AuthenticationException e)  //获取登陆失败原因
                            throws IOException {
                        resp.setContentType("application/json;charset=utf-8");
                        PrintWriter out = resp.getWriter();
                        resp.setStatus(401);
                        Map<String, Object> map = new HashMap<>();
                        map.put("status", 401);
                        if (e instanceof LockedException) {
                            map.put("msg", "账户被锁定,登录失败!");
                        } else if (e instanceof BadCredentialsException) {
                            map.put("msg", "账户名或密码输入错误,登录失败!");
                        } else if (e instanceof DisabledException) {
                            map.put("msg", "账户被禁用,登录失败!");
                        } else if (e instanceof AccountExpiredException) {
                            map.put("msg", "账户已过期,登录失败!");
                        } else if (e instanceof CredentialsExpiredException) {
                            map.put("msg", "密码已过期,登录失败!");
                        } else {
                            map.put("msg", "登录失败!");
                        }
                        ObjectMapper om = new ObjectMapper();
                        out.write(om.writeValueAsString(map));
                        out.flush();
                        out.close();
                    }
                })
                .permitAll()
                .and()

                .logout()                      //开启注销登陆
                .logoutUrl("/logout")           //注销登陆请求url
                .clearAuthentication(true)      //清除身份信息
                .invalidateHttpSession(true)     //session失效
                .addLogoutHandler(new LogoutHandler() {  //注销处理
                    @Override
                    public void logout(HttpServletRequest req,
                                       HttpServletResponse resp,
                                       Authentication auth) {

                    }
                })
                .logoutSuccessHandler(new LogoutSuccessHandler() {     //注销成功处理
                    @Override
                    public void onLogoutSuccess(HttpServletRequest req,
                                                HttpServletResponse resp,
                                                Authentication auth)
                            throws IOException {
                        resp.sendRedirect("/login_page");              //跳转到自定义登陆页面
                    }
                })
                .and()

                .csrf()
                .disable();
    }
}
多个HttpSecurity,并且加密,方法安全
配置多个httpSecurity不需要继承WebSecurityConfigurerAdapter,内部类去继承即可,使用@Configuration和@Order注解优先配置
@Configuration
@EnableGlobalMethodSecurity(prePostEnabled = true,securedEnabled = true)
//prePostEnabled=true会解锁@PreAuthorize和@PostAuthorize两个注解,顾名思义,@PreAuthorize注解会在方法执行前进行验证,而@PostAuthorize 注解在方法执行后进行验证。
//securedEnabled=true会解锁@Secured注解。
public class MultiHttpSecurityConfig{ @Bean PasswordEncoder passwordEncoder() { return new BCryptPasswordEncoder(); } @Autowired protected void configure(AuthenticationManagerBuilder auth) throws Exception { auth.inMemoryAuthentication() .withUser("root") .password("$2a$10$RMuFXGQ5AtH4wOvkUqyvuecpqUSeoxZYqilXzbz50dceRsga.WYiq")  //密码已经加密 .roles("ADMIN", "DBA") .and() .withUser("admin") .password("$2a$10$RMuFXGQ5AtH4wOvkUqyvuecpqUSeoxZYqilXzbz50dceRsga.WYiq") .roles("ADMIN", "USER") .and() .withUser("sang") .password("$2a$10$eUHbAOMq4bpxTvOVz33LIehLe3fu6NwqC9tdOcxJXEhyZ4simqXTC") .roles("USER"); }

    @Configuration
    @Order(1)
    public static class AdminSecurityConfig
            extends WebSecurityConfigurerAdapter{
        @Override
        protected void configure(HttpSecurity http) throws Exception {
            http.antMatcher("/admin/**").authorizeRequests()           //该类配置url为/admin/
                    .anyRequest().hasRole("ADMIN");
        }
    }

    @Configuration
    public static class OtherSecurityConfig
            extends WebSecurityConfigurerAdapter{
        @Override
        protected void configure(HttpSecurity http) throws Exception {
            http.authorizeRequests()
                    .anyRequest().authenticated()
                    .and()
                    .formLogin()
                    .loginProcessingUrl("/login")
                    .permitAll()
                    .and()
                    .csrf()
                    .disable();
        }
    }
}
@Service
public class MethodService {
    @Secured("ROLE_ADMIN")       //访问此方法需要ADMIN角色
    public String admin() {
        return "hello admin";
    }
    @PreAuthorize("hasRole('ADMIN') and hasRole('DBA')")  //访问此方法需要ADMIN且DBA
    public String dba() {
        return "hello dba";
    }
    @PreAuthorize("hasAnyRole('ADMIN','DBA','USER')")    //三个都行
    public String user() {
        return "user";
    }
}