文档地址:https://github.com/opensagres/xdocreport/wiki/DocxReportingQuickStart
本文采用XDocReport集合Freemaiker进行处理
1. 引入Maven依赖:
<dependency>
    <groupId>fr.opensagres.xdocreport</groupId>
    <artifactId>xdocreport</artifactId>
    <version>2.0.1</version>
</dependency>
<dependency>
    <groupId>org.apache.velocity</groupId>
    <artifactId>velocity-engine-core</artifactId>
    <version>2.0</version>
</dependency>
<dependency>
    <groupId>org.freemarker</groupId>
    <artifactId>freemarker</artifactId>
    <version>2.3.23</version>
</dependency>
2. 创建Word模版
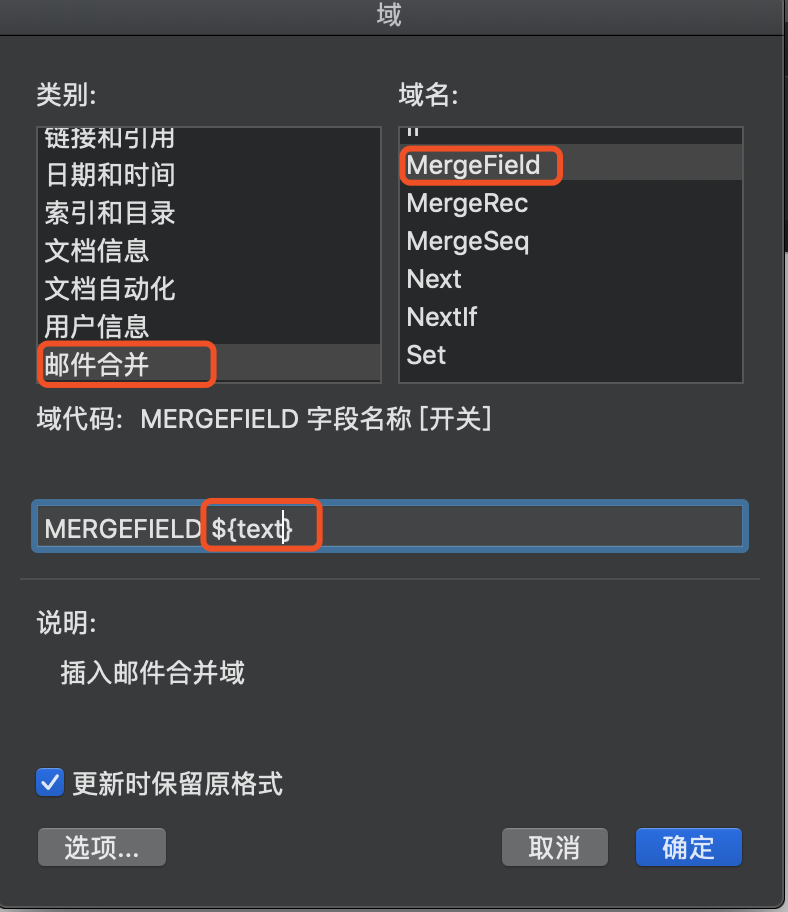
新建Word,在光标处通过快捷键Ctrl+F9 或 工具栏“插入”->“文档部件或文本”->“域”
根据电脑系统不同出现的界面不同,但内容都差不多,${text} 这个text就是后期要替换的变量了。
3. Java代码处理逻辑
 1 String templateFilePath = request.getSession().getServletContext().getRealPath("/WEB-INF/templates/freemarkerTest.docx");
 2 File file = new File(templateFilePath);
 3 InputStream in = new FileInputStream(file);
 4 IXDocReport report;
 5 String targetPath = basePath + lawDownDto.getLawsName() + ".docx";
 6 try {
 7     report = XDocReportRegistry.getRegistry().loadReport(in, TemplateEngineKind.Freemarker);
 8     // 设置内容为HTML格式
 9     FieldsMetadata metadata = report.createFieldsMetadata();
10     metadata.addFieldAsTextStyling("text", SyntaxKind.Html);
11
12     // 创建内容-text为模版中对应都变量名称
13     IContext context = report.createContext();
14     context.put("text", content);
15
16     // 生成文件
17     OutputStream out = new FileOutputStream(targetPath);
18     report.process(context, out);
19 } catch (XDocReportException e) {
20     e.printStackTrace();
21 }
文件下载:在生成文件逻辑后创建读取流返回即可。
=============================================================
如果文件中有图片需要处理:
图片方案一:单个图片且位置固定,可通过XDocReport配置模版处理
图片方案二:多个图片且位置不固定,可通过POI结合Freemarker进行处理
图片方案一:
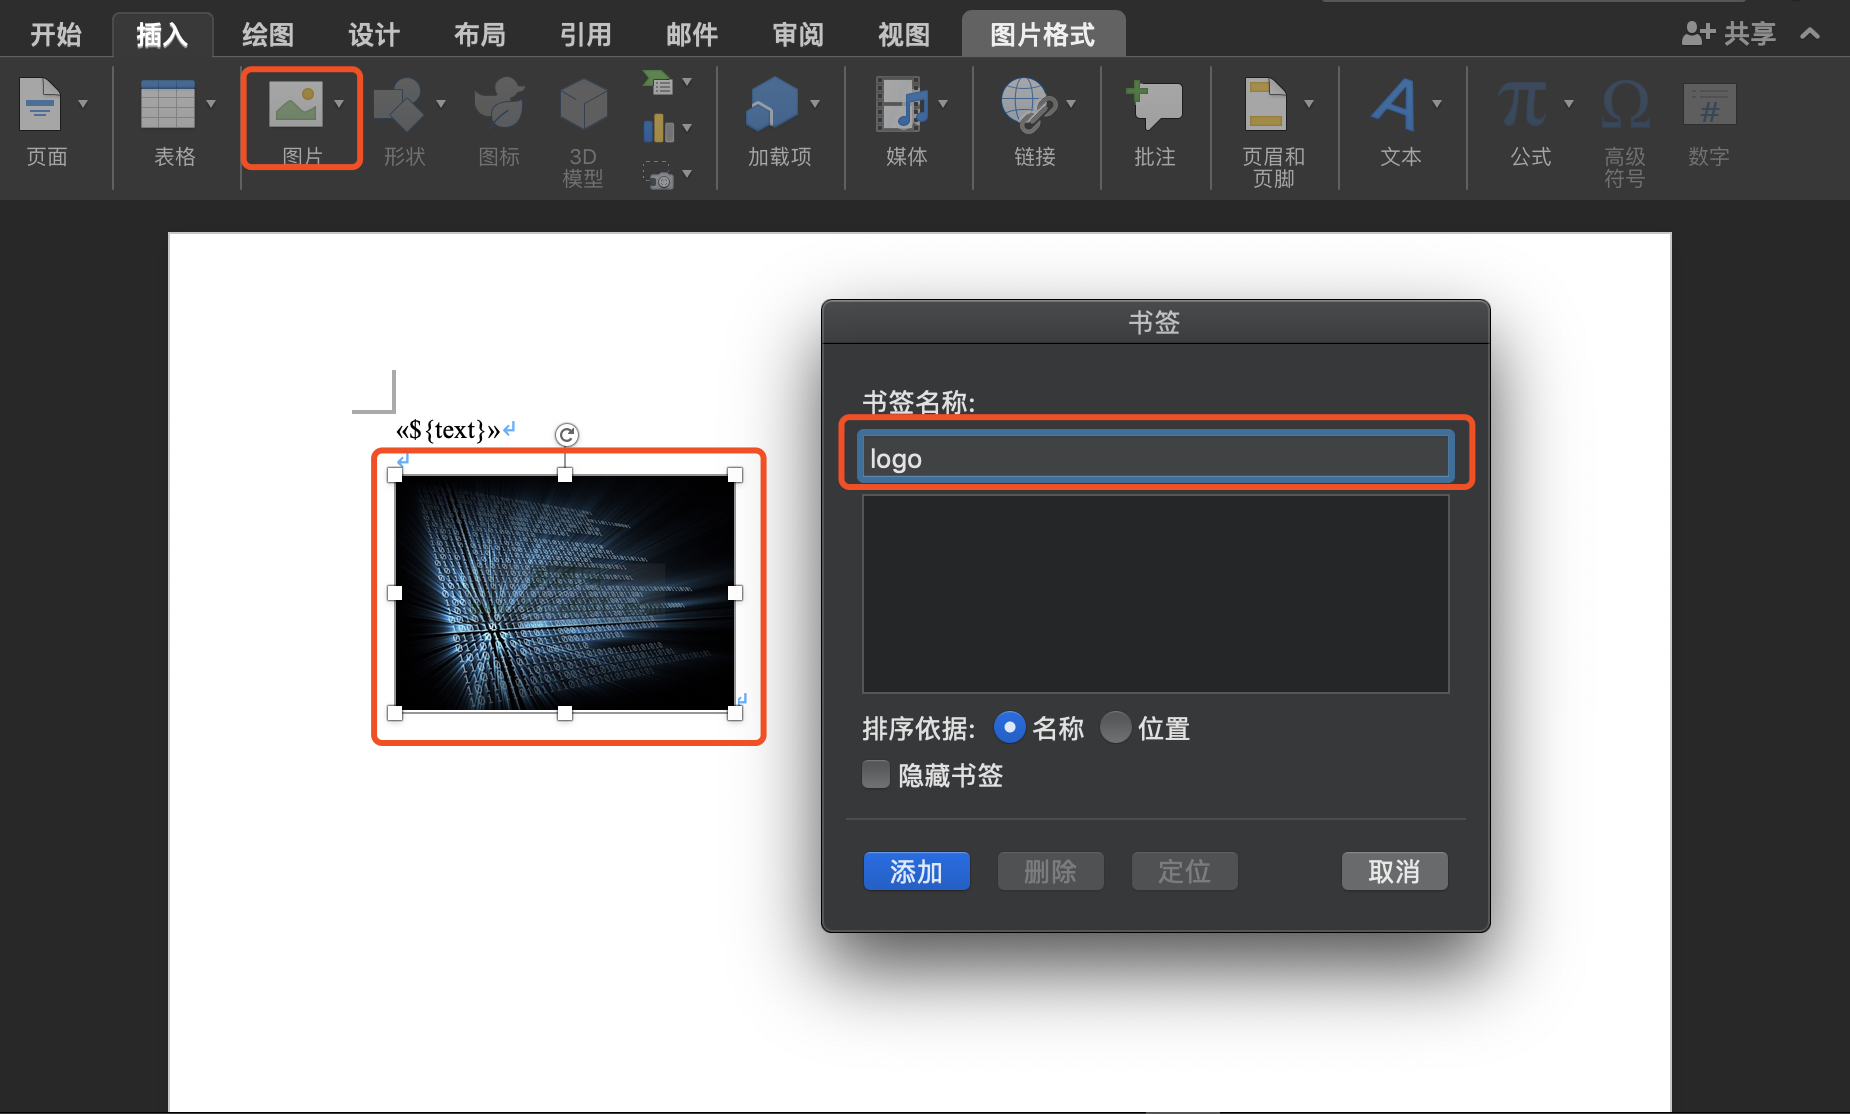
1. 在模版中插入临时图片,选中图片并添加“书签”,书签名称是后续作为替换的变量
2. 代码中追加逻辑
在上面代码10后追加
// logo为模版中标签名称
metadata.addFieldAsImage("logo");
report.setFieldsMetadata(metadata);
在上面代码14行后追加
// IImageProvider可通过3种方式创建(File/IO流/ClassPath下文件)具体可参考顶部文档-Dynamic Image
IImageProvider logo = new FileImageProvider(new File("1950737_195902644.png"));
context.put("logo", logo);
图片方案二:
1. 在上面读取模版之前进行数据替换
// 处理文本中的图片,使用imgReplace变量替换
Map<String, Object> param = new HashMap<String, Object>();
if (StringUtils.isNotBlank(content)) {
    content = HtmlUtils.htmlUnescape(content);
    List<HashMap<String, String>> imgs = getImgStrContent(content);
    int count = 0;
    for (HashMap<String, String> img : imgs) {
        count++;
        //处理替换以“/>”结尾的img标签
        content = content.replace(img.get("img"), "${imgReplace" + count + "}");
        //处理替换以“>”结尾的img标签
        content = content.replace(img.get("img1"), "${imgReplace" + count + "}");
        Map<String, Object> header = new HashMap<String, Object>();
        String result = "";
        result = img.get("src");
        //如果没有宽高属性,默认设置为
        if(img.get("width") == null || img.get("height") == null) {
            header.put("width", 150);
            header.put("height", 150);
        }else {
            header.put("width", (int)(Double.parseDouble(img.get("width"))));
            header.put("height", (int) (Double.parseDouble(img.get("height"))));
        }
        if( StringUtils.isNotBlank(result) ){
            String type1 = result.substring(result.lastIndexOf(".") , result.length());
            header.put("type", type1);
            header.put("content",this.imageToInputStream(result));
        }
        param.put("${imgReplace" + count + "}", header);
    }
}
//获取html中的图片元素信息
private  List<HashMap<String, String>> getImgStrContent(String htmlStr) {
    List<HashMap<String, String>> pics = new ArrayList<HashMap<String, String>>();
    Document doc = Jsoup.parse(htmlStr);
    if( doc != null ){
        Elements imgs = doc.select("img");
        if( imgs != null && imgs.size() > 0 ){
            for (Element img : imgs) {
                HashMap<String, String> map = new HashMap<String, String>();
                if(!"".equals(img.attr("width"))) {
                    map.put("width", img.attr("width"));
                }
                if(!"".equals(img.attr("height"))) {
                    map.put("height", img.attr("height"));
                }
                map.put("img", img.toString().substring(0, img.toString().length() - 1) + "/>");
                map.put("img1", img.toString());
                map.put("src", img.attr("src"));
                pics.add(map);
            }
        }
    }
    return pics;
}
// 读取生成的文件
readStream = new FileInputStream(targetPath);
ByteArrayOutputStream docxOs = new ByteArrayOutputStream();
int b = 0;
byte[] buf = new byte[1024];
while ((b = readStream.read(buf)) != -1) {
    docxOs.write(buf, 0, b);
}
docxResponseStream = new ByteArrayInputStream(docxOs.toByteArray());
// 创建word 对象
XWPFDocument document = new XWPFDocument(docxResponseStream);
newOS = new ByteArrayOutputStream();
if (document != null && param != null) {
    // 生成带图片的word(如需工具类请给我发邮件)
    XWPFDocument customXWPFDocument = WordUtil.getWord(param, document);
    // 设置表格边框样式(另外一片文章会介绍)
    // List<XWPFTable> list = formatTableBorder(customXWPFDocument);
    // 处理合并单元格(另外一片文章会介绍)
    // mergeCell(content, list);
    // 写入输出流返回
    customXWPFDocument.write(newOS);
    document.close();
    customXWPFDocument.close();
    resultInpu = new ByteArrayInputStream(newOS.toByteArray());
}else{
    resultInpu = docxResponseStream;
}
以上内容即可完成Word中多图片的动态展示。
后续会写处理表格边框、单元格合并及段落都相关内容。