注:本文由Colin撰写,版权所有!转载请注明原文地址,谢谢合作!
在Android开发中,跟据需要我们有时候需要自定义应用程序的标题栏或者取消程序的标题栏,下面本菜鸟在此记录与分享一下自己使用的方法。
一、取消标题栏的方法:
第一种:(推荐)
在AndroidManifest.xml文件中定义为不带标题栏的主题:
< application android:icon="@drawable/icon"
android:label="@string/app_name"
android:theme="@android:style/Theme.NoTitleBar">
可以看出,这样写的话,整个应用都会去掉标题栏,如果只想去掉某一个Activity的标题栏的话,可以把这个属性加到activity标签里面
第二种:这种在一般的应用中不常用,就是在res/values目录下面新建一个style.xml的文件。
< ?xml version="1.0" encoding="UTF-8" ?>
< resources>
< style name="notitle">
< item name="android:windowNoTitle">true< /item>
< /style>
< /resources>
这样,我们就自定义了一个style,就相当于一个主题,然后在AndroidManifest.xml文件中定义,定义方法同第一种。
< application android:icon="@drawable/icon"
android:label="@string/app_name"
android:theme="@style/notitle">
—————————————————————–
二、自定义Title_Bar
添加Title_Bar的 Style样式表。
<style name="CustomizedWindowTitleBackground">
<item name="android:background">#505050</item>
</style>


<style name="title_bar" parent="android:Theme">
<item name="android:windowTitleSize">48dp</item>
<item name="android:windowTitleBackgroundStyle">@style/CustomizedWindowTitleBackground</item>
</style>
AndroidManifest.xml文件中将主题定义刚刚创建的Style样式表。
<android:theme="@style/title_bar" >
<activity android:name="com.itcolin"
android:label="@string/app_name">
</activity>
将MainActivity.java设定为指定的Title_Bar配置文件,方法如下:
publicvoid onCreate(Bundle savedInstanceState) {
super.onCreate(savedInstanceState);
requestWindowFeature(Window.FEATURE_CUSTOM_TITLE);
setContentView(R.layout.activity_main);
//加载Title_Bar的配置文件
getWindow().setFeatureInt(Window.FEATURE_CUSTOM_TITLE, R.layout.title_bar);
在Layout中定义好title_bar的配置文件,例如:
<?xml version="1.0" encoding="utf-8"?>
<RelativeLayout xmlns:android="http://schemas.android.com/apk/res/android"
android:layout_width="match_parent"
android:layout_height="48dp"
android:orientation="horizontal" >

<TextView
android:layout_width="wrap_content"
android:layout_height="wrap_content"
android:text="@string/app_title"
android:textColor="#ffffff"
android:textSize="20sp"
android:layout_centerVertical="true"
android:layout_centerHorizontal="true" />

<Button
android:id="@+id/settings"
android:layout_width="30dp"
android:layout_height="30dp"
android:background="@drawable/settings"
android:layout_marginRight="5dp"
android:layout_centerVertical="true"
android:layout_alignParentRight="true"/>
</RelativeLayout>
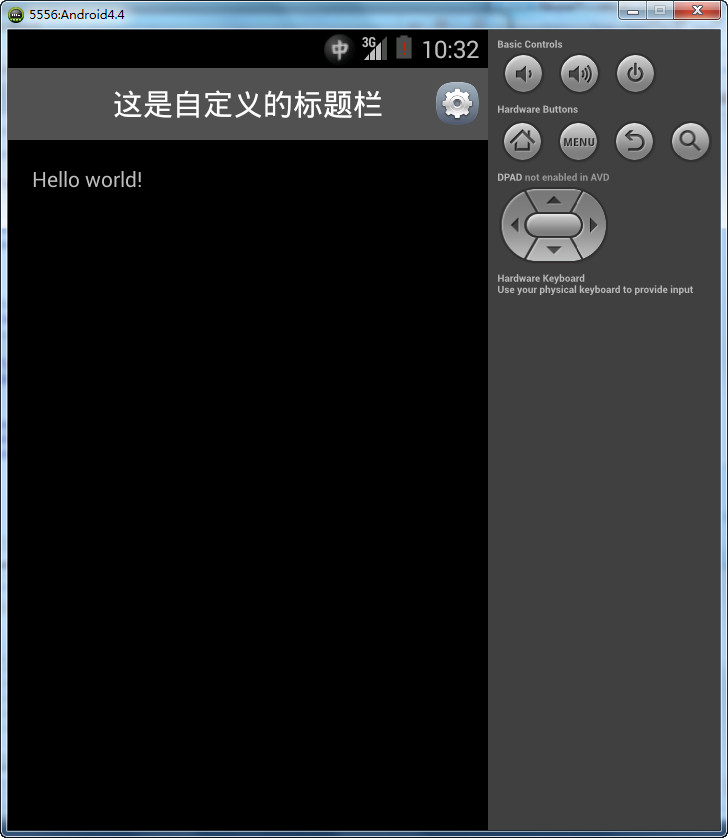
运行演式如下图:

下载自定义标题栏Demo:自定义标题栏Demo
-全文完-