http://www.lifelinux.com/how-to-install-nginx-and-php-fpm-on-centos-6-via-yum/
http://blog.csdn.net/seanchan/article/details/7680354
Today, I’m going to show you how to install Nginx with PHP-FPM via yum.
Before starting to install Nginx and PHP-FPM, you must uninstall all previous Apache and PHP related RPMs installed on your system. Login as root and type the following command
# yum remove httpd* php*
Enabling Additional Repositories
By default, php-fpm is not available from the official CentOS repositories, but from the Remi RPM repository which itself depends on the EPEL repository; we can enable both repositories as follows:
# yum install yum-priorities -y
# rpm -Uvh http://rpms.famillecollet.com/enterprise/remi-release-6.rpm
# rpm -Uvh http://download.fedoraproject.org/pub/epel/6/i386/epel-release-6-8.noarch.rpm
Sample outputs
Retrieving http://download.fedora.redhat.com/pub/epel/6/x86_64/epel-release-6-5.noarch.rpm
warning: /var/tmp/rpm-tmp.00kiDx: Header V3 RSA/SHA256 Signature, key ID 0608b895: NOKEY
Preparing...                ########################################### [100%]
   1:epel-release           ########################################### [100%]
Installing Nginx
Type the following command
# yum install nginx
Sample outputs
Dependencies Resolved

================================================================================
 Package                  Arch      Version                    Repository  Size
================================================================================
Installing:
 nginx                    x86_64    0.8.54-1.el6               epel       358 k
Installing for dependencies:
 GeoIP                    x86_64    1.4.8-1.el6                epel       620 k
 fontconfig               x86_64    2.8.0-3.el6                base       186 k
 freetype                 x86_64    2.3.11-6.el6_1.8           updates    358 k
 gd                       x86_64    2.0.35-10.el6              base       142 k
 libX11                   x86_64    1.3-2.el6                  base       582 k
 libX11-common            noarch    1.3-2.el6                  base       188 k
 libXau                   x86_64    1.0.5-1.el6                base        22 k
 libXpm                   x86_64    3.5.8-2.el6                base        59 k
 libjpeg                  x86_64    6b-46.el6                  base       134 k
 libpng                   x86_64    2:1.2.46-1.el6_1           base       180 k
 libxcb                   x86_64    1.5-1.el6                  base       100 k
 libxslt                  x86_64    1.1.26-2.el6               base       450 k
 perl                     x86_64    4:5.10.1-119.el6_1.1       base        10 M
 perl-Module-Pluggable    x86_64    1:3.90-119.el6_1.1         base        37 k
 perl-Pod-Escapes         x86_64    1:1.04-119.el6_1.1         base        30 k
 perl-Pod-Simple          x86_64    1:3.13-119.el6_1.1         base       209 k
 perl-libs                x86_64    4:5.10.1-119.el6_1.1       base       575 k
 perl-version             x86_64    3:0.77-119.el6_1.1         base        49 k

Transaction Summary
================================================================================
Install      19 Package(s)
Upgrade       0 Package(s)

Total download size: 14 M
Installed size: 47 M
Is this ok [y/N]: y
If you want to run nginx by default when the system boots, type the following command
# chkconfig --level 345 nginx on
To start Nginx for the first time, type the following command
# /etc/init.d/nginx start
Sample output
Starting nginx: [ OK ]
Installing PHP-FPM
Type the following command
# yum --enablerepo=remi install php php-fpm
Sample outputs
Dependencies Resolved

====================================================================================
 Package            Arch        Version                          Repository    Size
====================================================================================
Installing:
 php                x86_64      5.3.10-2.el6.remi                remi         2.3 M
 php-fpm            x86_64      5.3.10-2.el6.remi                remi         1.1 M
Installing for dependencies:
 apr                x86_64      1.3.9-3.el6_1.2                  base         123 k
 apr-util           x86_64      1.3.9-3.el6_0.1                  base          87 k
 apr-util-ldap      x86_64      1.3.9-3.el6_0.1                  base          15 k
 httpd              x86_64      2.2.15-15.el6.centos.1           updates      813 k
 httpd-tools        x86_64      2.2.15-15.el6.centos.1           updates       70 k
 libedit            x86_64      2.11-4.20080712cvs.1.el6         base          74 k
 mailcap            noarch      2.1.31-2.el6                     base          27 k
 php-cli            x86_64      5.3.10-2.el6.remi                remi         2.2 M

Transaction Summary
====================================================================================
Install      10 Package(s)
Upgrade       0 Package(s)

Total download size: 6.8 M
Installed size: 21 M
Is this ok [y/N]: y
If you want to run php-fpm by default when the system boots, type the following command
# chkconfig --level 345 php-fpm on
PHP was installed with only core modules. It’s very likely that additional modules will be desired, such as MySQL, XML, GD, etc. Type the following command
# yum --enablerepo=remi install php-gd php-mysql php-mbstring php-xml php-mcrypt
To start PHP-FPM for the first time, type the following command
# /etc/init.d/php-fpm restart
Sample output
Starting php-fpm: [ OK ]
Configure PHP-FPM and Nginx working together
The configuration file for Nginx is located at /etc/nginx/nginx.conf. To edit nginx.conf type the following command
# vi /etc/nginx/nginx.conf
Uncomment and edit as follows
        ...
	location / {
            root   /usr/share/nginx/html;
            index  index.html index.htm index.php;
        }
        ...
	location ~ .php$ {
            root           html;
            fastcgi_pass   127.0.0.1:9000;
            fastcgi_index  index.php;
            fastcgi_param  SCRIPT_FILENAME  $document_root$fastcgi_script_name;
            include        fastcgi_params;
        }
        ...
Restart Nginx to reload new configuration, enter
# /etc/init.d/nginx reload
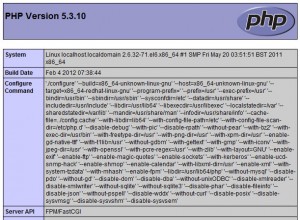
Now create the following PHP file in the document root
# vi /usr/share/nginx/html/info.php
Append content as follows:
<?php
phpinfo();
?>
Access it http://YOUR-SERVER-IP
Nginx Virtual Hosting Configuration
Your sample setup
IP: 192.168.1.113
Domain: domain.local
Hosted at: /home/www/domain.local
Type the following command to create user called www
# useradd www
Create necessary directories
# mkdir -p /home/www/domain.local/public_html
# mkdir -p /home/www/domain.local/log
# chown -R www.www /home/www/
# chmod 755 /home/www/
Creating virtual host config file
# cd /etc/nginx/conf.d/
# cp virtual.conf www.conf
Open www.conf, enter
# vi /etc/nginx/conf.d/www.conf
Append configuration as follows:
server {
        server_name  domain.local;
        root /home/www/domain.local/public_html;
        access_log /home/www/domain.local/log/domain.local-access.log;
        error_log /home/www/domain.local/log/domain.local-error.log;

        location / {
                index  index.html index.htm index.php;
        }
        location ~ .php$ {
                include /etc/nginx/fastcgi_params;
                fastcgi_pass  127.0.0.1:9000;
                fastcgi_index index.php;
                fastcgi_param SCRIPT_FILENAME $document_root$fastcgi_script_name;
        }
}
You can also check the current status as well as the configuration syntax:
# /etc/init.d/nginx configtest
Sample outputs
the configuration file /etc/nginx/nginx.conf syntax is ok
configuration file /etc/nginx/nginx.conf test is successful
Now edit /etc/php-fpm.d/www.conf to change the users who own the php-fpm processes to www, enter
# vi /etc/php-fpm.d/www.conf
Find “group of processes” and edit as follows:
; Unix user/group of processes
; Note: The user is mandatory. If the group is not set, the default user's group
;       will be used.
; RPM: apache Choosed to be able to access some dir as httpd
user = www
; RPM: Keep a group allowed to write in log dir.
group = www
Finally restart nginx
# /etc/init.d/nginx restart
# /etc/init.d/php-fpm restart
