1 State——状态:

2 Action——事件
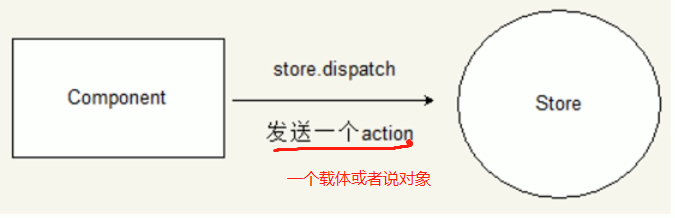
Action是把数据从组件传递到Store的载体,它是store数据的唯一来源,一般来说,我们可以通过store.despach()将action传递给store
action的特点:
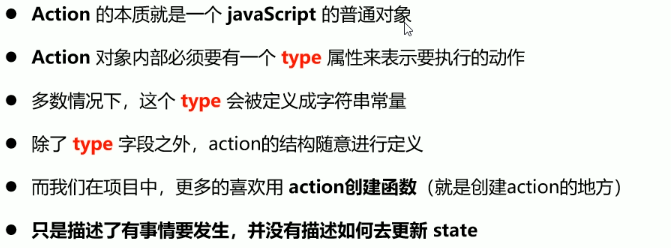
创建action,通过创建一个函数,然后再返回一个对象,注意需要携带type属性:
action/index.js
const sendAction = () => {
  return {
    type: "SEND_ACTION",
    value: "我是一个action"
  }
}

module.exports = { sendAction }
3 Reducer
本质就是一个函数,它用来响应发送过来的actions,然后经过处理,把state发送给Store
在Reducer函数中,必须要有return返回值,这样Store才能接收到数据
函数会接收到两个参数,第一个参数是初始化state,第二个参数是action:
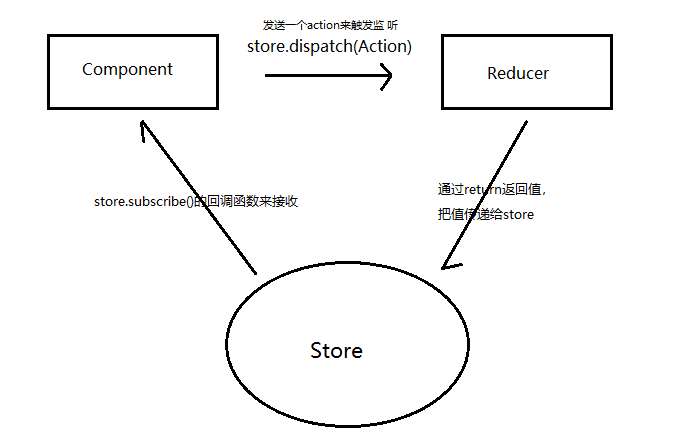
三者之间的关系:

reducer/index.js
// 创建reducer函数,专门用来处理发送过来的action
// 初始化state,如果没有传过来state,就用这个
const initState = {
  value: "默认值"
}

const reducer = (state = initState, action) => {switch (action.type) {
    case "SEND_ACTION":
      return Object.assign({}, state, action);
    default:
      return state;
  }
}

module.exports = { reducer }
4 Store:
就是把action和reducer联系到一起的对象
主要职责:
- 维持应用的state
- 提供getState()方法获取state
- 提供dispatch()方法发送action
- 通过subscribe()来注册监听
- 通过subscribe()的返回值来注销监听
store/index.js
import { createStore } from 'redux'

// 导入我们创建好的reducer

import { reducer } from '../reducer'

// 构建store,把reducer注入到store中
const store = createStore(reducer)

export default store;
接下来,在哪个页面如果要监听数据的话,就可以用store.subscribe()注册监听,当用store.dispatch()发送一个action的时候,就能触发我们的监听了,在里面利用store.getState()就能拿到值
import React, { Component } from 'react'
// 导入store
import store from '../../store/index'
// 导入action构建函数
import { sendAction } from '../../action/index';

export default class index extends Component {
  constructor(props) {
    super(props)
  }

  handleClick = () => {
    // 拿到action对象
    const action = sendAction();
    // 发送一个action,用来②触发监听
    store.dispatch(action);
    // 给state传空对象来刷新页面
  }

  // 当组件一加载完毕的时候,来①注册监听
  componentDidMount() {
    store.subscribe(() => {
      console.log(store.getState());
      this.setState({});
    })
  }

  render() {
    return (
      // 如果不想页面多一个层级的话,可以用一对空组件来占位
      <>
        <button onClick={this.handleClick}>点击发送一个action</button>
        {/* 通过store.getState()③拿到值 */}
        <div>{store.getState().value}</div>
      </>
    )
  }
}
大致流程图如下: