public static void main(String[] args) throws IOException {
	// 加载类路径下配置好的dubbo provider配置文件
	ClassPathXmlApplicationContext ioc = new ClassPathXmlApplicationContext("provider.xml");
	ioc.start();

	System.in.read();
}
解析到xml配置文件中的dubbo命名空间,回去找dubbo.jar/META-INF/spring.handlers中配置好的命名空间处理器(DubboNamespaceHandler),如下所示:
http://dubbo.apache.org/schema/dubbo=com.alibaba.dubbo.config.spring.schema.DubboNamespaceHandler
http://code.alibabatech.com/schema/dubbo=com.alibaba.dubbo.config.spring.schema.DubboNamespaceHandler
该处理器在初始化方法 init() 中注册dubbo命名空间中各标签以及对应的 DubboBeanDefinitionParser,DubboBeanDefinitionParser构造器中传入各标签对应的解析后参数存放类,即ApplicationConfig、RegistryConfig、ProviderConfig、ConsumerConfig、ProtocolConfig、ServiceBean、ReferenceBean等。如下所示:
@Override
public void init() {
    registerBeanDefinitionParser("application", new DubboBeanDefinitionParser(ApplicationConfig.class, true));
    registerBeanDefinitionParser("module", new DubboBeanDefinitionParser(ModuleConfig.class, true));
    registerBeanDefinitionParser("registry", new DubboBeanDefinitionParser(RegistryConfig.class, true));
    registerBeanDefinitionParser("monitor", new DubboBeanDefinitionParser(MonitorConfig.class, true));
    registerBeanDefinitionParser("provider", new DubboBeanDefinitionParser(ProviderConfig.class, true));
    registerBeanDefinitionParser("consumer", new DubboBeanDefinitionParser(ConsumerConfig.class, true));
    registerBeanDefinitionParser("protocol", new DubboBeanDefinitionParser(ProtocolConfig.class, true));
    registerBeanDefinitionParser("service", new DubboBeanDefinitionParser(ServiceBean.class, true));
    registerBeanDefinitionParser("reference", new DubboBeanDefinitionParser(ReferenceBean.class, false));
    registerBeanDefinitionParser("annotation", new AnnotationBeanDefinitionParser());
}
解析完对应的标签,并把标签对应的属性值存放到对应的 ***Config中后,就完成了由xml配置信息到javabean的转化,那么服务暴露在哪一步进行呢,细想一下便可得知:由于这是provider端的配置,没有消费端consumer、reverence相关配置,所以核心的配置就是一个ServiceBean,打开该类定义:
public class ServiceBean<T> extends ServiceConfig<T> implements InitializingBean, DisposableBean, ApplicationContextAware, ApplicationListener<ContextRefreshedEvent>, BeanNameAware {可以看到继承了两个核心的spring生命周期管理接口:InitializingBean和ApplicationListener<ContextRefreshedEvent>
先来看前者定义:
public interface InitializingBean {
	/**
	 * Invoked by a BeanFactory after it has set all bean properties supplied
	 */
	void afterPropertiesSet() throws Exception;
}
可以看到实现这个接口后 ,可以得到一个在bean属性设置完成后进行某些操作的入口:afterPropertiesSet()
再来看ServiceBean的具体实现:
public void afterPropertiesSet() throws Exception {
    if (getProvider() == null) {
        Map<String, ProviderConfig> providerConfigMap = applicationContext == null ? null : BeanFactoryUtils.beansOfTypeIncludingAncestors(applicationContext, ProviderConfig.class, false, false);
        if (providerConfigMap != null && providerConfigMap.size() > 0) {
            ProviderConfig providerConfig = null;
            ...
            if (providerConfig != null) {
                setProvider(providerConfig);
            }
        }
    }
    if (getApplication() == null
            && (getProvider() == null || getProvider().getApplication() == null)) {
        Map<String, ApplicationConfig> applicationConfigMap = applicationContext == null ? null : BeanFactoryUtils.beansOfTypeIncludingAncestors(applicationContext, ApplicationConfig.class, false, false);
        if (applicationConfigMap != null && applicationConfigMap.size() > 0) {
            ApplicationConfig applicationConfig = null;
            ...
            if (applicationConfig != null) {
                setApplication(applicationConfig);
            }
        }
    }
    if (getModule() == null
            && (getProvider() == null || getProvider().getModule() == null)) {
        Map<String, ModuleConfig> moduleConfigMap = applicationContext == null ? null : BeanFactoryUtils.beansOfTypeIncludingAncestors(applicationContext, ModuleConfig.class, false, false);
        if (moduleConfigMap != null && moduleConfigMap.size() > 0) {
            ModuleConfig moduleConfig = null;
            ...
            if (moduleConfig != null) {
                setModule(moduleConfig);
            }
        }
    }
    if ((getRegistries() == null || getRegistries().isEmpty())
            && (getProvider() == null || getProvider().getRegistries() == null || getProvider().getRegistries().isEmpty())
            && (getApplication() == null || getApplication().getRegistries() == null || getApplication().getRegistries().isEmpty())) {
        Map<String, RegistryConfig> registryConfigMap = applicationContext == null ? null : BeanFactoryUtils.beansOfTypeIncludingAncestors(applicationContext, RegistryConfig.class, false, false);
        if (registryConfigMap != null && registryConfigMap.size() > 0) {
            List<RegistryConfig> registryConfigs = new ArrayList<RegistryConfig>();
            ...
            if (registryConfigs != null && !registryConfigs.isEmpty()) {
                super.setRegistries(registryConfigs);
            }
        }
    }
    if (getMonitor() == null
            && (getProvider() == null || getProvider().getMonitor() == null)
            && (getApplication() == null || getApplication().getMonitor() == null)) {
        Map<String, MonitorConfig> monitorConfigMap = applicationContext == null ? null : BeanFactoryUtils.beansOfTypeIncludingAncestors(applicationContext, MonitorConfig.class, false, false);
        if (monitorConfigMap != null && monitorConfigMap.size() > 0) {
            MonitorConfig monitorConfig = null;
            ...
            if (monitorConfig != null) {
                setMonitor(monitorConfig);
            }
        }
    }
    if ((getProtocols() == null || getProtocols().isEmpty())
            && (getProvider() == null || getProvider().getProtocols() == null || getProvider().getProtocols().isEmpty())) {
        Map<String, ProtocolConfig> protocolConfigMap = applicationContext == null ? null : BeanFactoryUtils.beansOfTypeIncludingAncestors(applicationContext, ProtocolConfig.class, false, false);
        if (protocolConfigMap != null && protocolConfigMap.size() > 0) {
            List<ProtocolConfig> protocolConfigs = new ArrayList<ProtocolConfig>();
            ...
            if (protocolConfigs != null && !protocolConfigs.isEmpty()) {
                super.setProtocols(protocolConfigs);
            }
        }
    }
    if (getPath() == null || getPath().length() == 0) {
        if (beanName != null && beanName.length() > 0
                && getInterface() != null && getInterface().length() > 0
                && beanName.startsWith(getInterface())) {
            setPath(beanName);
        }
    }
    if (!isDelay()) {
        export();
    }
}
可以看到这一步就是把之前解析xml配置文件完成并且封装到对应**Config bean中的数据从spring IOC容器中拿出来封装到serviceBean中,以便稍后的服务暴露使用!
接下来再来看另一个接口ApplicationListener<ContextRefreshedEvent>:这是一个监听器接口,意为当容器启动或者刷新时(对应ContextRefreshedEvent事件)监听器触发并执行对应onApplicationEvent方法,如下所示:
public interface ApplicationListener<E extends ApplicationEvent> extends EventListener {
	/**
	 * Handle an application event.
	 * @param event the event to respond to
	 */
	void onApplicationEvent(E event);
}
再来看serviceBean的具体实现:
@Override
public void onApplicationEvent(ContextRefreshedEvent event) {
    if (isDelay() && !isExported() && !isUnexported()) {
        if (logger.isInfoEnabled()) {
            logger.info("The service ready on spring started. service: " + getInterface());
        }
        export();
    }
一堆判断后(什么是否是延迟暴露?是否已经暴露?是否不暴露?)进行具体的暴露逻辑,即export()方法。
继续往下执行,真正的重点来了!
进入到serviceBean的继承接口ServiceConfig的export方法中,也是进行一堆判断,最后执行doExport()方法:
public synchronized void export() {
   ...
   doExport();
}
没什么营养,继续往下执行,进入到ServiceConfig类中的doExport()方法,前面也是进行一堆外围application、registry、protocol等的校验,没有配置的属性加上默认值等处理,最后也是来到一个明显的暴露方法 doExportUrls() 中。
private void doExportUrls() {
    List<URL> registryURLs = loadRegistries(true);
    for (ProtocolConfig protocolConfig : protocols) {
        doExportUrlsFor1Protocol(protocolConfig, registryURLs);
    }
}
可以看到首先通过 loadRegistries 方法获取到注册URL信息,接着下面根据配置的protocol信息进行暴露,因为dubbo允许多协议暴露 ,这里循环对每一种协议进行暴露。
进入到 doExportUrlsFor1Protocol 方法中,前面构造了一个map,用来封装待会生成暴露URL的一些信息,如下所示:

封装完成后生成暴露URL信息:
URL url = new URL(name, host, port, (contextPath == null || contextPath.length() == 0 ? "" : contextPath + "/") + path, map);具体形式如下:
dubbo://172.18.81.141:20882/com.atguigu.gmall.service.UserService?anyhost=true&application=user-service-provider&bind.ip=172.18.81.141&bind.port=20882&default.timeout=1000&dubbo=2.6.2&generic=false&getUserAddressList.timeout=1000&interface=com.atguigu.gmall.service.UserService&methods=getUserAddressList&pid=15260&revision=0.0.1-SNAPSHOT&side=provider&timeout=1000×tamp=1542335525849&version=1.0.0
接下来根据暴露范围,即url中scope字段进行不同范围(local or remote)的暴露逻辑!
由于这里scope字段没有配置,满足下列条件:
if (!Constants.SCOPE_REMOTE.toString().equalsIgnoreCase(scope)) {
    exportLocal(url);
}
所以接下来进行服务的本地暴露。具体如下所示:
private void exportLocal(URL url) {
    if (!Constants.LOCAL_PROTOCOL.equalsIgnoreCase(url.getProtocol())) {
        URL local = URL.valueOf(url.toFullString())
                .setProtocol(Constants.LOCAL_PROTOCOL)
                .setHost(LOCALHOST)
                .setPort(0);
        ServiceClassHolder.getInstance().pushServiceClass(getServiceClass(ref));
        Exporter<?> exporter = protocol.export(
                proxyFactory.getInvoker(ref, (Class) interfaceClass, local));
        exporters.add(exporter);
        logger.info("Export dubbo service " + interfaceClass.getName() + " to local registry");
    }
}
传进来的封装好的URL参数如下:
dubbo://172.18.81.141:20882/com.atguigu.gmall.service.UserService2?anyhost=true&application=user-service-provider&bind.ip=172.18.81.141&bind.port=20882&default.timeout=1000&dubbo=2.6.2&generic=false&getUserAddressList.timeout=1000&interface=com.atguigu.gmall.service.UserService&methods=getUserAddressList&pid=10788&revision=0.0.1-SNAPSHOT&side=provider&timeout=1000×tamp=1542347624247&version=2.0.0
第一步首先替换url中的protocol和host,替换成本地的,以便稍后再本地暴露服务。
替换后的local(url)如下所示:
injvm://127.0.0.1/com.atguigu.gmall.service.UserService2?anyhost=true&application=user-service-provider&bind.ip=172.18.81.141&bind.port=20882&default.timeout=1000&dubbo=2.6.2&generic=false&getUserAddressList.timeout=1000&interface=com.atguigu.gmall.service.UserService&methods=getUserAddressList&pid=10788&revision=0.0.1-SNAPSHOT&side=provider&timeout=1000×tamp=1542347624247&version=2.0.0
接着本地服务暴露的关键部分,首先通过proxyFactory(具体实现类 JavassistProxyFactory )生成Invoker对象:
proxyFactory.getInvoker(ref, (Class) interfaceClass, local)
传入实现类Class,接口Class,以及封装好的url参数,得到生成后的Invoker对象。
好吧,直接来看下JavassistProxyFactory 是怎么生成Invoker 的:
@Override
public <T> Invoker<T> getInvoker(T proxy, Class<T> type, URL url) {
    // TODO Wrapper cannot handle this scenario correctly: the classname contains '$'
    final Wrapper wrapper = Wrapper.getWrapper(proxy.getClass().getName().indexOf('$') < 0 ? proxy.getClass() : type);
    return new AbstractProxyInvoker<T>(proxy, type, url) {
        @Override
        protected Object doInvoke(T proxy, String methodName,
                                  Class<?>[] parameterTypes,
                                  Object[] arguments) throws Throwable {
            return wrapper.invokeMethod(proxy, methodName, parameterTypes, arguments);
        }
    };
}
可以看到这里构造了一个 AbstractProxyInvoker,在其构造器中保存传进来的生成代理的基础信息(proxy, type, url)到它的相应成员变量中:
public abstract class AbstractProxyInvoker<T> implements Invoker<T> {
    private final T proxy;
    private final Class<T> type;
    private final URL url;
    public AbstractProxyInvoker(T proxy, Class<T> type, URL url) {
        if (proxy == null) {
            throw new IllegalArgumentException("proxy == null");
        }
        if (type == null) {
            throw new IllegalArgumentException("interface == null");
        }
        if (!type.isInstance(proxy)) {
            throw new IllegalArgumentException(proxy.getClass().getName() + " not implement interface " + type);
        }
        this.proxy = proxy;
        this.type = type;
        this.url = url;
    }
最后通过protocol(实际执行类为本地protocol—> InjvmProtocol)把上面生成的invoker暴露出去:
@Override
public <T> Exporter<T> export(Invoker<T> invoker) throws RpcException {
    return new InjvmExporter<T>(invoker, invoker.getUrl().getServiceKey(), exporterMap);
}
class InjvmExporter<T> extends AbstractExporter<T> {
private final String key;
private final Map<String, Exporter<?>> exporterMap;
// key:com.atguigu.gmall.service.UserService:2.0.0
InjvmExporter(Invoker<T> invoker, String key, Map<String, Exporter<?>> exporterMap) {
super(invoker);
this.key = key;
this.exporterMap = exporterMap;
exporterMap.put(key, this);
}可以看到实际最终是把接口(包含版本号)和 InjvmExporter 的关联关系维护到一个本地Map中了。
至此,本地暴露就分析完了!
华丽的分割线!
接下来进行远程服务暴露部分(ServiceBean 的 doExportUrlsFor1Protocol方法中,大概line 500左右):
if (!Constants.SCOPE_LOCAL.toString().equalsIgnoreCase(scope)) {
    if (logger.isInfoEnabled()) {
        logger.info("Export dubbo service " + interfaceClass.getName() + " to url " + url);
    }
    if (registryURLs != null && !registryURLs.isEmpty()) {
        for (URL registryURL : registryURLs) {
            ...
            Invoker<?> invoker = proxyFactory.getInvoker(ref, (Class) interfaceClass, registryURL.addParameterAndEncoded(Constants.EXPORT_KEY, url.toFullString()));
            DelegateProviderMetaDataInvoker wrapperInvoker = new DelegateProviderMetaDataInvoker(invoker, this);
            Exporter<?> exporter = protocol.export(wrapperInvoker);
            exporters.add(exporter);
        }
    }
}
可以看到根据注册中心是一个List,这就是dubbo支持的多注册中心了,分别暴露就好了!
建立也是先处理下注册中心相关信息组装好的url(前期准备工作先做好嘛!)
完了也是根据实现类,继承接口,注册URL生成对应的远程调用Invoker。
Invoker中的url内容如下:
registry://127.0.0.1:2181/com.alibaba.dubbo.registry.RegistryService?application=user-service-provider&dubbo=2.6.2&export=dubbo%3A%2F%2F172.18.81.141%3A20882%2Fcom.atguigu.gmall.service.UserService2%3Fanyhost%3Dtrue%26application%3Duser-service-provider%26bind.ip%3D172.18.81.141%26bind.port%3D20882%26default.timeout%3D1000%26dubbo%3D2.6.2%26generic%3Dfalse%26getUserAddressList.timeout%3D1000%26interface%3Dcom.atguigu.gmall.service.UserService%26methods%3DgetUserAddressList%26monitor%3Ddubbo%253A%252F%252F127.0.0.1%253A2181%252Fcom.alibaba.dubbo.registry.RegistryService%253Fapplication%253Duser-service-provider%2526dubbo%253D2.6.2%2526pid%253D10788%2526protocol%253Dregistry%2526refer%253Ddubbo%25253D2.6.2%252526interface%25253Dcom.alibaba.dubbo.monitor.MonitorService%252526pid%25253D10788%252526timestamp%25253D1542354537440%2526registry%253Dzookeeper%2526timestamp%253D1542347624247%26pid%3D10788%26revision%3D0.0.1-SNAPSHOT%26side%3Dprovider%26timeout%3D1000%26timestamp%3D1542347624247%26version%3D2.0.0&pid=10788®istry=zookeeper×tamp=1542347624247
拿到Invoker后利用protocol (实现类 RegistryProtocol)进行实际远程暴露!
温馨提示:在RegistryProtocol的export方法中打好断点,待会直接跳进去直接执行!
@Override
public <T> Exporter<T> export(final Invoker<T> originInvoker) throws RpcException {
    //export invoker
    final ExporterChangeableWrapper<T> exporter = doLocalExport(originInvoker);
    URL registryUrl = getRegistryUrl(originInvoker);
    //registry provider
    final Registry registry = getRegistry(originInvoker);
    final URL registedProviderUrl = getRegistedProviderUrl(originInvoker);
    //to judge to delay publish whether or not
    boolean register = registedProviderUrl.getParameter("register", true);
    ProviderConsumerRegTable.registerProvider(originInvoker, registryUrl, registedProviderUrl);
    if (register) {
        register(registryUrl, registedProviderUrl);
        ProviderConsumerRegTable.getProviderWrapper(originInvoker).setReg(true);
    }
    // Subscribe the override data
    // FIXME When the provider subscribes, it will affect the scene : a certain JVM exposes the service and call the same service. Because the subscribed is cached key with the name of the service, it causes the subscription information to cover.
    final URL overrideSubscribeUrl = getSubscribedOverrideUrl(registedProviderUrl);
    final OverrideListener overrideSubscribeListener = new OverrideListener(overrideSubscribeUrl, originInvoker);
    overrideListeners.put(overrideSubscribeUrl, overrideSubscribeListener);
    registry.subscribe(overrideSubscribeUrl, overrideSubscribeListener);
    //Ensure that a new exporter instance is returned every time export
    return new DestroyableExporter<T>(exporter, originInvoker, overrideSubscribeUrl, registedProviderUrl);
进来以后第一步又是一个貌似本地暴露的 doLocalExport 方法,之前不是已经暴露过了么,别急,进去看看到底干什么了。
在 RegistryProtocol 的 doLocalExport方法中,核心的就一句话,如下:
final Invoker<?> invokerDelegete = new InvokerDelegete<T>(originInvoker, getProviderUrl(originInvoker));
exporter = new ExporterChangeableWrapper<T>((Exporter<T>) protocol.export(invokerDelegete), originInvoker);
也是先生成 Invoker ,完了利用protocol(这里实际执行为DubboProtocol)的export方法把生成的Invoker 暴露出去。
提前在DubboProtocol的export方法中打上断点。
进去后也是一对乱七八糟处理,我们看关键,方法最后面有一个简洁明了的方法名:
openServer(url);
有点意思了,开启服务,莫非是建立socket连接的,进去瞧瞧!
我们找关键链路执行流程
- openServer(URL url) --> {serverMap.put(key, createServer(url));}
- createServer(URL url) -->{server = Exchangers.bind(url, requestHandler)}
- 进入到 Exchangers (信息交换层了,这一层封装了传输层数据的request、response语义)
- bind(URL url, ExchangeHandler handler) --> { getExchanger(url).bind(url, handler)}
- HeaderExchanger: bind(URL url, ExchangeHandler handler) -- > {new HeaderExchangeServer(Transporters.bind(url, new DecodeHandler(new HeaderExchangeHandler(handler))))}
- 可以看到已经进入到 Transporters 层了(传输层)
- Transporters:bind(URL url, ChannelHandler... handlers) --> {getTransporter().bind(url, handler)}
- 继续执行,可以看到这里已经进入到Transporter的具体实现层了
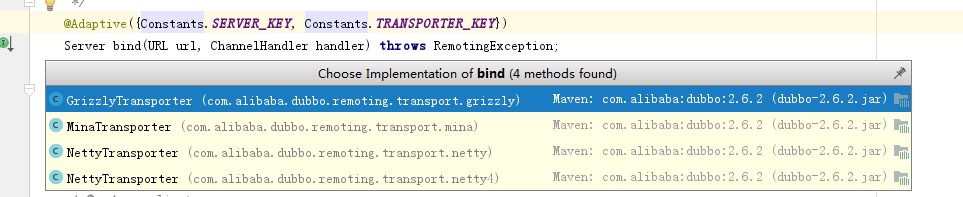
到这里本地的服务开启并且暴露完成了!
再来一条华丽的分割线
回到RegistryProtocol 的 export 方法,在执行完本地暴露后,接下来还有那些工作需要做呢,对了, 就是把服务URL暴露到zookeeper中,我们来找下这部分逻辑。
在这之前有一个有意思的地方,如下:
ProviderConsumerRegTable.registerProvider(originInvoker, registryUrl, registedProviderUrl);public class ProviderConsumerRegTable {
public static ConcurrentHashMap<String, Set<ProviderInvokerWrapper>> providerInvokers = new ConcurrentHashMap<String, Set<ProviderInvokerWrapper>>();
public static ConcurrentHashMap<String, Set<ConsumerInvokerWrapper>> consumerInvokers = new ConcurrentHashMap<String, Set<ConsumerInvokerWrapper>>();把接口和接口对应的Invoker维护到一个注册表(RegTable)中
接下来即进行zk注册了,即下面这行代码,接下来就很easy了,我们只抽取关键链路代码,分析就好了!
register(registryUrl, registedProviderUrl)public void register(URL registryUrl, URL registedProviderUrl) {
...
registry.register(registedProviderUrl);
}接下来进去到 FailbackRegistry 的 register 方法中
@Override
public void register(URL url) {
    ...
    try {
        // Sending a registration request to the server side
        doRegister(url);
    }
    ...
}
再执行doRegister(url)方法跳进去的时候就已经来到了 ZookeeperRegistry 的 doRegister 方法中:
@Override
protected void doRegister(URL url) {
    try {
        zkClient.create(toUrlPath(url), url.getParameter(Constants.DYNAMIC_KEY, true));
    } catch (Throwable e) {
        throw new RpcException("Failed to register " + url + " to zookeeper " + getUrl() + ", cause: " + e.getMessage(), e);
    }
}
可以看到确实是已经在zk节点保存服务暴露信息了。
最后一点,回到 RegistryProtocol 的export方法中看最后一点逻辑
可以看到服务端对已经创建的zk节点进行了订阅(watch),watch节点如下:
provider://172.18.81.141:20882/com.atguigu.gmall.service.UserService?anyhost=true&application=user-service-provider&category=configurators&check=false&default.timeout=1000&dubbo=2.6.2&generic=false&getUserAddressList.timeout=1000&interface=com.atguigu.gmall.service.UserService&methods=getUserAddressList&pid=10304&revision=0.0.1-SNAPSHOT&side=provider&timeout=1000×tamp=1542357694867&version=1.0.0
至此,服务端的整个暴露过程就算分析完了
下一章,将分析服务发现的过程分析!