今天添加端口探测功能,主要实现方式是通过nmap模块调用,扫描1-65535端口。上一篇中已经将UP的PC机全部获取到,这里直接从已知在线的PC中进行端口扫描就可以了,会节省很多时间。
代码如下,还是非常简单的:
 1 import nmap
 2 import time
 3 import csv
 4 import os
 5
 6
 7 class Port_Scan(object):
 8     def __init__(self):
 9         self.rootpath = 'C:/cunhuo/'
10         self.dirpath = 'C:/portScan/'
11         self.savepath = 'C:/portScan/result.csv'
12         self.csv_write = []
13
14     def get_ip(self, file):
15         ipList = []
16         with open(file, 'r') as f:
17             for ip in f.readlines()[1:]:
18                 ipList.append(ip.strip()[:-3])
19         return ipList
20
21     def scan(self, ip):
22         if not os.path.exists(self.dirpath):
23             os.mkdir(self.dirpath)
24         nm = nmap.PortScanner()
25         try:
26             nm.scan(ip, arguments='1-65535')
27             print '[*]Host:%s' % ip
28             for proto in nm[ip].all_protocols():
29                 lport = nm[ip][proto].keys()
30                 lport.sort()
31                 for port in lport:
32                     self.csv_write.append([ip, port, nm[ip][proto][port]['state']])
33                     print 'port : %s\tstate : %s' % (port, nm[ip][proto][port]['state'])
34         except:
35             self.csv_write.append([ip, 'unknown', 'unknown'])
36             print 'port : unknown\tstate : unknown'
37
38     def run(self):
39         print '[+]Scanning...'
40         startTime = time.time()
41         files = os.listdir(self.rootpath)
42         for file in files:
43             ips = self.get_ip(self.rootpath + file)
44
45             for ip in ips:
46                 self.scan(ip)
47         with open(self.savepath,'w') as f:
48             fieldnames = ['ip', 'port', 'state']
49             w = csv.writer(f, dialect='excel')
50             w.writerow(fieldnames)
51             w.writerows(self.csv_write)
52         endTime = time.time()
53         print '------------------------------------------------------'
54         print '[+]Scanning cost %ss, result have saved %s' % (endTime - startTime, self.savepath)
55         print '[+]Done.'
56
57 if __name__ == '__main__':
58     myScan = Port_Scan()
59     myScan.run()
这里对于错误捕获的实现有点偷懒了,我们之前扫描出的存活主机可能在端口探测这个脚本执行时离线了,所以如果不加try...except判断的话会跑出keyerror的错误,说结果中的port、state不在字典中。但是这样加判断也有失偏颇...除了离线主机无法探测到,其他情况导致的也一并将port和state设置为unknown了,不知道以后的实验中会不会发生误报,到时候会进行修改调整。
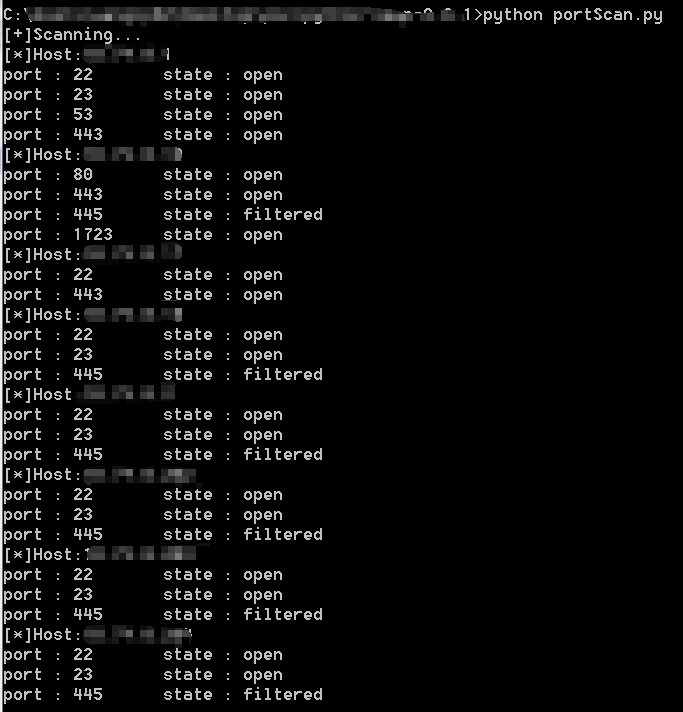
扫描用时比较长,我就展示一下运行中的截图了:
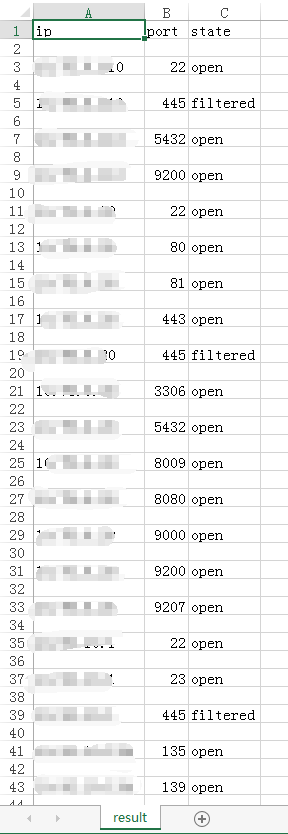
result.csv,为什么中间会有空格呢,奇怪,慢慢改吧