改造appium-android-driver
这个driver是UIAutomator1的driver,负责UIAutomator1的服务启动、停止、命令接收和执行。
工程结构
- appium-android-driver(NodeJS工程)
- bootstrap(Maven工程)
本身appium-android-driver是一个nodejs工程,它还套着一个bootstrap的maven工程,这个maven工程就是用来打包UIAutomator1的,会再bootstrap/bin的目录下构建生成一个叫AppiumBootstrap.jar的供外层的NodeJS工程使用。代码在appium-android-driver/lib/bootstrap.js的start函数中
      const rootDir = path.resolve(__dirname, '..', '..');
      const startDetector = (s) => { return /Appium Socket Server Ready/.test(s); };
      const bootstrapJar = path.resolve(rootDir, 'bootstrap', 'bin', 'AppiumBootstrap.jar');

      await this.init();
      await this.adb.forwardPort(this.systemPort, 4724);
      this.process = await this.uiAutomator.start(
                       bootstrapJar, 'io.appium.android.bootstrap.Bootstrap',
                       startDetector, '-e', 'pkg', appPackage,
                       '-e', 'disableAndroidWatchers', disableAndroidWatchers,
                       '-e', 'acceptSslCerts', acceptSslCerts);
修改pom.xml,编译bootstrap,输出AppiumBootstrap.jar
bootstrap工程是一个maven工程,用idea直接open这个文件夹即可,找到pom.xml,右键Maven->Reimport,我们会发现有两个maven依赖无法导入,报找不到对应的jar包:
<dependency>
  <groupId>android</groupId>
  <artifactId>android</artifactId>
  <version>4.4.2_r4</version>
</dependency>

<dependency>
  <groupId>android.test.uiautomator</groupId>
  <artifactId>uiautomator</artifactId>
  <version>4.4.2_r4</version>
</dependency>
原因是默认的仓库是从https://repo.maven.appache.org/maven2中找的,而这个仓库根本没有这两个库。
后来我发现Boundless的仓库http://repo.boundlessgeo.com/main/中是有的,在这个pom.xml中配置这个仓库就可以下载了,但是下载需要科学上网,不懂科学上网联系我qq 1204833748。
<project>
...
    <repositories>
        <repository>
            <id>Boundless</id>
            <url>http://repo.boundlessgeo.com/main/</url>
        </repository>
    </repositories>
</project>
依赖库搞定后,cmd切换到bootstrap文件夹目录下,执行mvn clean package构建maven工程,我们会发现,并没有在bin目录下生成AndroidBootstrap.jar,此时要修改pom.xml中的maven-jar-plugin:
<plugin>
  <artifactId>maven-jar-plugin</artifactId>
  <configuration>
    <!--jar输出目录-->
    <outputDirectory>./bin</outputDirectory>
    <!--输出的jar包名称-->
    <finalName>AppiumBootstrap</finalName>
  </configuration>
</plugin>
重新执行mvn clean package,AppiumBootstrap.jar就完成了正常构建,也就是说UIAutomator1构建好了。
自定义appium-android-driver,并发布
找到appium-android-driver/package.json,修改name,比如修改为appium-android-driver2,然后顺便修改下version,然后再appium-android-driver根目录下执行
npm install  # 重新安装依赖
npm publish  # 发布
npm publish是发布nodejs包的命令,需要你在npmjs.com上注册自己的账号,发布的时候需要验证你的账号。
自定义Appium
跟自定义appium-android-driver一样,我们找到package.json,修改name和version,比如分别是appium2和1.12.1-20190401a,顺便我们修改一下lib/main.js中的一条语句,以验证我们的修改是否生效:
async function logStartupInfo (parser, args) {
  let welcome = `Welcome to Appium2 v${APPIUM_VER}, modified by chengming`; // 我修改了此处
  let appiumRev = await getGitRev();
  if (appiumRev) {
    welcome += ` (REV ${appiumRev})`;
  }
  logger.info(welcome);

  let showArgs = getNonDefaultArgs(parser, args);
  if (_.size(showArgs)) {
    logNonDefaultArgsWarning(showArgs);
  }
  let deprecatedArgs = getDeprecatedArgs(parser, args);
  if (_.size(deprecatedArgs)) {
    logDeprecationWarning(deprecatedArgs);
  }
  if (!_.isEmpty(args.defaultCapabilities)) {
    logDefaultCapabilitiesWarning(args.defaultCapabilities);
  }
  // TODO: bring back loglevel reporting below once logger is flushed out
  // logger.info('Console LogLevel: ' + logger.transports.console.level);
  // if (logger.transports.file) {
  //   logger.info('File LogLevel: ' + logger.transports.file.level);
  // }
}
还有要在package.json中,找到dependencies,把我们的appium的UIAutomator1的依赖改为"appium-android-driver2":"latest",使我们自定义的appium能够使用我们自定义的UIAutomator1 driver
同样,重新构建和发布:
npm install
npm publish
在npmjs.com网站中,我的项目下就会看到appium2的工程:

使用自定义的appium
安装:
npm i -g appium2
启动
appium
效果

TODO:验证自定义appium-android-driver是否生效
这个要修改bootstrap的java代码,在启动server的时候加上你的日志即可验证,后续再补充吧。
补充:2019-04-02 17:20
纠正AppiumBootstrap.jar的打包方式
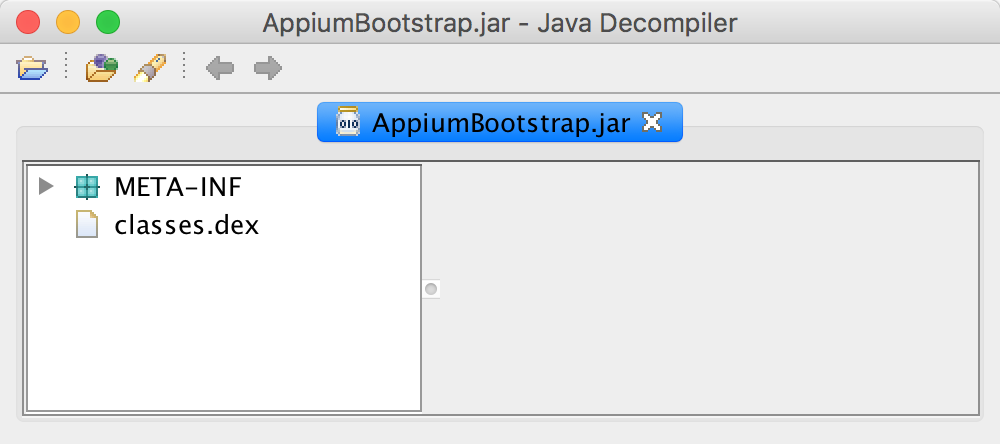
官方readme.md没有说怎么打包这个jar包的事情,我按照如上述的打包方式生成的jar是不可用的,格式不正确。jar中的内容应该是一个classes.dex文件,而不是编译好的classes。
我们需要先把class文件打包成dex,然后再把dex打包成jar,shell代码如下:
dx --dex --output=./classes.dex target/classes
jar -cvf AppiumBootstrap.jar -C ./ ./classes.dex
你需要配置好android的环境变量,使你的dx能够全局调用。
既然打包方式知道了,并且appium是要求在appium-android-driver/bootstrap/bin下有个AppiumBootstrap.jar的,那么我们去掉此前给maven-jar-plugin设置的configuration,重新编写一个shell脚本bootstrap.sh:
#!/bin/sh
mvn clean package # 清理环境,编译class文件
dx --dex --output=./target/classes.dex target/classes # 将class文件打包,生成dex文件
jar -cvf bin/AppiumBootstrap.jar -C ./ ./target/classes.dex # 将dex文件打包,生成jar
测试AppiumBootstrap.jar
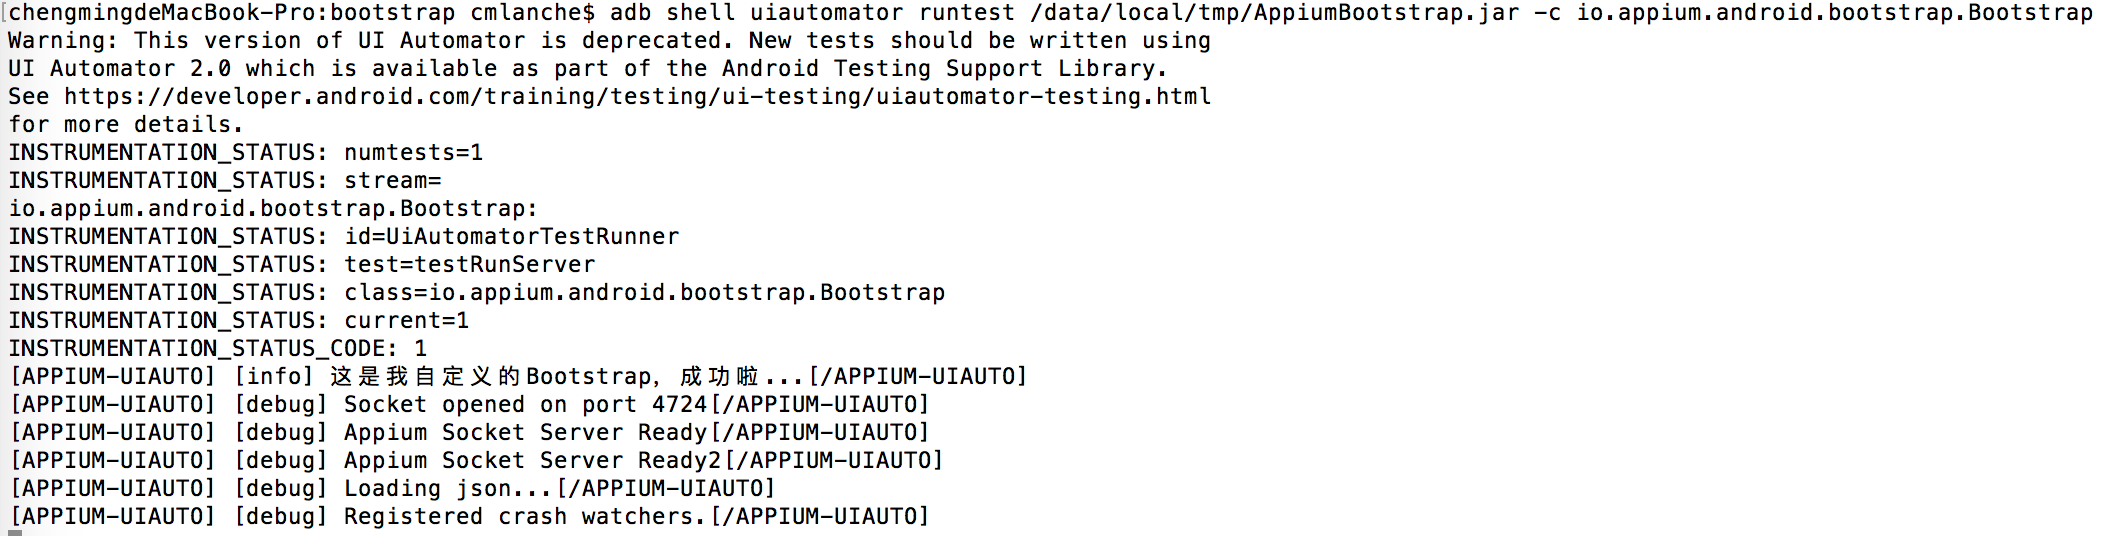
我们找到bootstrap工程中的io.appium.android.bootstrap.Bootstrap.java,在testRunServer方法的第一句,添加一段注释:
public class Bootstrap extends UiAutomatorTestCase {

  public void testRunServer() {
    Logger.info("这是我自定义的Bootstrap,成功啦...");
    Find.params = getParams();
    boolean disableAndroidWatchers = Boolean.parseBoolean(getParams().getString("disableAndroidWatchers"));
    boolean acceptSSLCerts = Boolean.parseBoolean(getParams().getString("acceptSslCerts"));

    SocketServer server;
    try {
      server = new SocketServer(4724);
      server.listenForever(disableAndroidWatchers, acceptSSLCerts);
    } catch (final SocketServerException e) {
      Logger.error(e.getError());
      System.exit(1);
    }

  }
}
电脑插上手机,执行:
adb devices
输出:
chengmingdeMacBook-Pro:bootstrap cmlanche$ adb devices
List of devices attached
cf02d869	device
确保你的手机是连上电脑的。
保存,执行bootstrap.sh,在bin目录会打包好AppiumBootstrap.jar,我们把它push到手机:
adb push ./bin/AppiumBootstrap.jar /data/local/tmp/AppiumBootstrap.jar
完成后,我们启动UIAutomator1的测试:
adb shell uiautomator runtest /data/local/tmp/AppiumBootstrap.jar -c io.appium.android.bootstrap.Bootstrap
自定义AppiumBootstrap至此流程已通,接下来就是自定义权限框处理,让Appium自主识别权限框。