1. 概述
在《Seata 极简入门》文章中,我们对 Seata 进行了简单的了解,并完成了 Seata 的部署。而本文,我们将 Dubbo 服务接入 Seata 来实现分布式事务。
注意,考虑到 Nacos 作为注册中心在国内越来越流行,本文将采用 Nacos 作为 Dubbo 的注册中心。
友情提示:如果对 Nacos 不了解的胖友,可以参考《Nacos 极简入门》文章。
2. AT 模式
示例代码对应仓库:
本小节,我们将使用 Seata 的 AT 模式,解决多个 Dubbo 服务下的分布式事务的问题。
友情提示:对 Seata 的 AT 模式不了解的胖友,可以阅读《Seata 文档 —— AT 模式》文档。
Seata 提供了 seata-dubbo 项目,对 Dubbo 进行集成。实现原理是:
- 服务消费者,使用 Seata 封装的 ApacheDubboTransactionPropagationFilter 过滤器,在发起 Dubbo 远程调用时,将 Seata 全局事务 XID 通过隐式参数传递。
- 服务提供者,使用 Seata 封装的 ApacheDubboTransactionPropagationFilter 过滤器,在收到 Dubbo 远程调用时,从隐式参数中解析出 Seata 全局事务 XID。
如此,我们便实现了多个 Dubbo 应用的 Seata 全局事务的传播。
我们以用户购买商品的业务逻辑,来作为具体示例,一共会有三个 Dubbo 服务,分别对应自己的数据库。整体如下图所示:
下面,我们来新建 lab-53-seata-at-dubbo-demo 模块,包含三个 Dubbo 服务。最终结构如下图:

2.1 初始化数据库
使用 data.sql 脚本,创建 seata_order、seata_storage、seata_amount 三个库。脚本内容如下:
-
# Order
-
DROP DATABASE IF EXISTS seata_order;
-
CREATE DATABASE seata_order;
-
-
CREATE TABLE seata_order.orders
-
(
-
id INT(11) NOT NULL AUTO_INCREMENT,
-
user_id INT(11) DEFAULT NULL,
-
product_id INT(11) DEFAULT NULL,
-
pay_amount DECIMAL(10, 0) DEFAULT NULL,
-
add_time DATETIME DEFAULT CURRENT_TIMESTAMP,
-
last_update_time DATETIME DEFAULT CURRENT_TIMESTAMP ON UPDATE CURRENT_TIMESTAMP,
-
PRIMARY KEY (id)
-
) ENGINE = InnoDB AUTO_INCREMENT = 1 DEFAULT CHARSET = utf8;
-
-
CREATE TABLE seata_order.undo_log
-
(
-
id BIGINT(20) NOT NULL AUTO_INCREMENT,
-
branch_id BIGINT(20) NOT NULL,
-
xid VARCHAR(100) NOT NULL,
-
context VARCHAR(128) NOT NULL,
-
rollback_info LONGBLOB NOT NULL,
-
log_status INT(11) NOT NULL,
-
log_created DATETIME NOT NULL,
-
log_modified DATETIME NOT NULL,
-
PRIMARY KEY (id),
-
UNIQUE KEY ux_undo_log (xid, branch_id)
-
) ENGINE = InnoDB AUTO_INCREMENT = 1 DEFAULT CHARSET = utf8;
-
-
# Storage
-
DROP DATABASE IF EXISTS seata_storage;
-
CREATE DATABASE seata_storage;
-
-
CREATE TABLE seata_storage.product
-
(
-
id INT(11) NOT NULL AUTO_INCREMENT,
-
stock INT(11) DEFAULT NULL,
-
last_update_time DATETIME DEFAULT CURRENT_TIMESTAMP ON UPDATE CURRENT_TIMESTAMP,
-
PRIMARY KEY (id)
-
) ENGINE = InnoDB AUTO_INCREMENT = 1 DEFAULT CHARSET = utf8;
-
INSERT INTO seata_storage.product (id, stock) VALUES (1, 10); # 插入一条产品的库存
-
-
CREATE TABLE seata_storage.undo_log
-
(
-
id BIGINT(20) NOT NULL AUTO_INCREMENT,
-
branch_id BIGINT(20) NOT NULL,
-
xid VARCHAR(100) NOT NULL,
-
context VARCHAR(128) NOT NULL,
-
rollback_info LONGBLOB NOT NULL,
-
log_status INT(11) NOT NULL,
-
log_created DATETIME NOT NULL,
-
log_modified DATETIME NOT NULL,
-
PRIMARY KEY (id),
-
UNIQUE KEY ux_undo_log (xid, branch_id)
-
) ENGINE = InnoDB AUTO_INCREMENT = 1 DEFAULT CHARSET = utf8;
-
-
# Amount
-
DROP DATABASE IF EXISTS seata_amount;
-
CREATE DATABASE seata_amount;
-
-
CREATE TABLE seata_amount.account
-
(
-
id INT(11) NOT NULL AUTO_INCREMENT,
-
balance DOUBLE DEFAULT NULL,
-
last_update_time DATETIME DEFAULT CURRENT_TIMESTAMP ON UPDATE CURRENT_TIMESTAMP,
-
PRIMARY KEY (id)
-
) ENGINE = InnoDB AUTO_INCREMENT = 1 DEFAULT CHARSET = utf8;
-
-
CREATE TABLE seata_amount.undo_log
-
(
-
id BIGINT(20) NOT NULL AUTO_INCREMENT,
-
branch_id BIGINT(20) NOT NULL,
-
xid VARCHAR(100) NOT NULL,
-
context VARCHAR(128) NOT NULL,
-
rollback_info LONGBLOB NOT NULL,
-
log_status INT(11) NOT NULL,
-
log_created DATETIME NOT NULL,
-
log_modified DATETIME NOT NULL,
-
PRIMARY KEY (id),
-
UNIQUE KEY ux_undo_log (xid, branch_id)
-
) ENGINE = InnoDB AUTO_INCREMENT = 1 DEFAULT CHARSET = utf8;
-
INSERT INTO seata_amount.account (id, balance) VALUES (1, 1);
其中,每个库中的 undo_log 表,是 Seata AT 模式必须创建的表,主要用于分支事务的回滚。
另外,考虑到测试方便,我们插入了一条 id = 1 的 account 记录,和一条 id = 1 的 product 记录。
2.2 订单服务
新建 lab-53-seata-at-dubbo-demo-order-service-api 和 lab-53-seata-at-dubbo-demo-order-service 项目,作为订单服务。项目如下图所示:
2.2.1 引入依赖
创建 pom.xml 文件,引入相关的依赖。内容如下:
-
-
<project xmlns="http://maven.apache.org/POM/4.0.0"
-
xmlns:xsi="http://www.w3.org/2001/XMLSchema-instance"
-
xsi:schemaLocation="http://maven.apache.org/POM/4.0.0 http://maven.apache.org/xsd/maven-4.0.0.xsd">
-
<parent>
-
<groupId>org.springframework.boot</groupId>
-
<artifactId>spring-boot-starter-parent</artifactId>
-
<version>2.2.2.RELEASE</version>
-
<relativePath/> <!-- lookup parent from repository -->
-
</parent>
-
<modelVersion>4.0.0</modelVersion>
-
-
<artifactId>lab-53-seata-at-dubbo-demo-order-service</artifactId>
-
-
<dependencies>
-
<dependency>
-
<groupId>cn.iocoder.springboot.labs</groupId>
-
<artifactId>lab-53-seata-at-dubbo-demo-order-service-api</artifactId>
-
<version>1.0-SNAPSHOT</version>
-
</dependency>
-
<dependency>
-
<groupId>cn.iocoder.springboot.labs</groupId>
-
<artifactId>lab-53-seata-at-dubbo-demo-account-service-api</artifactId>
-
<version>1.0-SNAPSHOT</version>
-
</dependency>
-
<dependency>
-
<groupId>cn.iocoder.springboot.labs</groupId>
-
<artifactId>lab-53-seata-at-dubbo-demo-product-service-api</artifactId>
-
<version>1.0-SNAPSHOT</version>
-
</dependency>
-
-
<!-- 实现对 Spring MVC 的自动化配置 -->
-
<dependency>
-
<groupId>org.springframework.boot</groupId>
-
<artifactId>spring-boot-starter-web</artifactId>
-
</dependency>
-
-
<!-- 实现对数据库连接池的自动化配置 -->
-
<dependency>
-
<groupId>org.springframework.boot</groupId>
-
<artifactId>spring-boot-starter-jdbc</artifactId>
-
</dependency>
-
<dependency> <!-- 本示例,我们使用 MySQL -->
-
<groupId>mysql</groupId>
-
<artifactId>mysql-connector-java</artifactId>
-
<version>5.1.48</version>
-
</dependency>
-
-
<!-- 实现对 MyBatis 的自动化配置 -->
-
<dependency>
-
<groupId>org.mybatis.spring.boot</groupId>
-
<artifactId>mybatis-spring-boot-starter</artifactId>
-
<version>2.1.2</version>
-
</dependency>
-
-
<!-- 实现对 Seata 的自动化配置 -->
-
<dependency>
-
<groupId>io.seata</groupId>
-
<artifactId>seata-spring-boot-starter</artifactId>
-
<version>1.1.0</version>
-
</dependency>
-
-
<!-- 引入 Dubbo 的依赖 -->
-
<dependency>
-
<groupId>org.apache.dubbo</groupId>
-
<artifactId>dubbo</artifactId>
-
<version>2.7.4.1</version>
-
</dependency>
-
<!-- 实现对 Dubbo 的自动化配置 -->
-
<dependency>
-
<groupId>org.apache.dubbo</groupId>
-
<artifactId>dubbo-spring-boot-starter</artifactId>
-
<version>2.7.4.1</version>
-
</dependency>
-
<!-- 实现 Dubbo 使用 Nacos 作为注册中心 -->
-
<dependency>
-
<groupId>com.alibaba</groupId>
-
<artifactId>dubbo-registry-nacos</artifactId>
-
<version>2.7.6</version>
-
</dependency>
-
</dependencies>
-
-
</project>
① 引入 seata-spring-boot-starter 依赖,实现对 Seata 的自动配置。
② 引入 dubbo、dubbo-spring-boot-starter、dubbo-registry-nacos 依赖,Dubbo 使用到的库。
友情提示:对 Dubbo 不是很了解的胖友,可以阅读《芋道 Spring Boot Dubbo 入门》文章。
2.2.2 配置文件
创建 application.yaml 配置文件,添加相关的配置项。内容如下:
-
server:
-
port: 8081 # 端口
-
-
spring:
-
application:
-
name: order-service
-
-
datasource:
-
url: jdbc:mysql://127.0.0.1:3306/seata_order?useSSL=false&useUnicode=true&characterEncoding=UTF-8
-
driver-class-name: com.mysql.jdbc.Driver
-
username: root
-
password:
-
-
# dubbo 配置项,对应 DubboConfigurationProperties 配置类
-
dubbo:
-
# Dubbo 应用配置
-
application:
-
name: ${spring.application.name} # 应用名
-
# Dubbo 注册中心配
-
registry:
-
address: nacos://127.0.0.1:8848 # 注册中心地址。个鞥多注册中心,可见 http://dubbo.apache.org/zh-cn/docs/user/references/registry/introduction.html 文档。
-
# Dubbo 服务提供者协议配置
-
protocol:
-
port: -1 # 协议端口。使用 -1 表示随机端口。
-
name: dubbo # 使用 `dubbo://` 协议。更多协议,可见 http://dubbo.apache.org/zh-cn/docs/user/references/protocol/introduction.html 文档
-
# 配置扫描 Dubbo 自定义的 @Service 注解,暴露成 Dubbo 服务提供者
-
scan:
-
base-packages: cn.iocoder.springboot.lab53.orderservice.service
-
-
# Seata 配置项,对应 SeataProperties 类
-
seata:
-
application-id: ${spring.application.name} # Seata 应用编号,默认为 ${spring.application.name}
-
tx-service-group: ${spring.application.name}-group # Seata 事务组编号,用于 TC 集群名
-
# Seata 服务配置项,对应 ServiceProperties 类
-
service:
-
# 虚拟组和分组的映射
-
vgroup-mapping:
-
order-service-group: default
-
# Seata 注册中心配置项,对应 RegistryProperties 类
-
registry:
-
type: nacos # 注册中心类型,默认为 file
-
nacos:
-
cluster: default # 使用的 Seata 分组
-
namespace: # Nacos 命名空间
-
serverAddr: localhost # Nacos 服务地址
① spring.datasource 配置项,设置连接 seata_order 库。
② dubbo 配置项,设置 Dubbo 相关配置。
③ seata 配置项,设置 Seata 的配置项目,对应 SeataProperties 类。
application-id配置项,对应 Seata 应用编号,默认为${spring.application.name}。实际上,可以不进行设置。tx-service-group配置项,Seata 事务组编号,用于 TC 集群名。
④ seata.service 配置项,设置 Seata 服务配置项,对应 ServiceProperties 类。它主要用于 Seata 在事务分组的特殊设计,可见《Seata 文档 —— 事务分组专题》。如果不能理解的胖友,可以见如下图:

简单来说,就是多了一层虚拟映射。这里,我们不设置 seata.service.grouplist 配置项,因为从注册中心加载 Seata TC Server 的地址。
友情提示:可能胖友对
seata.service.grouplist配置项有点懵逼,继续往下看就会明白了。
④ seata.registry 配置项,设置 Seata 注册中心配置项,对应 RegistryProperties 类。
type配置项,设置注册中心的类型,默认为false。这里,我们设置为nacos来使用 Nacos 作为注册中心。nacos配置项,设置 Nacos 注册中心的配置项。
注意!!!我们需要将 Seata TC Server 注册到 Nacos 注册中心中。不会的胖友,《芋道 Seata 极简入门》文章的「3. 部署集群 TC Server」小节。
可能胖友不想从 Nacos 注册中心来读取 Seata TC Server 的地址,可以使用艿艿额外提供的 application-file.yaml 配置文件,覆盖到 application.yaml 配置文件中即可。内容如下:
-
server:
-
port: 8081 # 端口
-
-
spring:
-
application:
-
name: order-service
-
-
datasource:
-
url: jdbc:mysql://127.0.0.1:3306/seata_order?useSSL=false&useUnicode=true&characterEncoding=UTF-8
-
driver-class-name: com.mysql.jdbc.Driver
-
username: root
-
password:
-
-
# dubbo 配置项,对应 DubboConfigurationProperties 配置类
-
dubbo:
-
# Dubbo 应用配置
-
application:
-
name: ${spring.application.name} # 应用名
-
# Dubbo 注册中心配
-
registry:
-
address: nacos://127.0.0.1:8848 # 注册中心地址。个鞥多注册中心,可见 http://dubbo.apache.org/zh-cn/docs/user/references/registry/introduction.html 文档。
-
# Dubbo 服务提供者协议配置
-
protocol:
-
port: -1 # 协议端口。使用 -1 表示随机端口。
-
name: dubbo # 使用 `dubbo://` 协议。更多协议,可见 http://dubbo.apache.org/zh-cn/docs/user/references/protocol/introduction.html 文档
-
# 配置扫描 Dubbo 自定义的 @Service 注解,暴露成 Dubbo 服务提供者
-
scan:
-
base-packages: cn.iocoder.springboot.lab53.orderservice.service
-
-
# Seata 配置项,对应 SeataProperties 类
-
seata:
-
application-id: ${spring.application.name} # Seata 应用编号,默认为 ${spring.application.name}
-
tx-service-group: ${spring.application.name}-group # Seata 事务组编号,用于 TC 集群名
-
# 服务配置项,对应 ServiceProperties 类
-
service:
-
# 虚拟组和分组的映射
-
vgroup-mapping:
-
order-service-group: default
-
# 分组和 Seata 服务的映射
-
grouplist:
-
default: 127.0.0.1:8091
差异点在于,删除了 seata.registry 配置项,增加 seata.service.grouplist 配置项来替代。原因如下图:

2.2.3 OrderController
创建 OrderController 类,提供 order/create 下单 HTTP API。代码如下:
-
-
-
public class OrderController {
-
-
private Logger logger = LoggerFactory.getLogger(OrderController.class);
-
-
-
private OrderService orderService;
-
-
-
public Integer createOrder(
-
-
-
logger.info("[createOrder] 收到下单请求,用户:{}, 商品:{}, 价格:{}", userId, productId, price);
-
return orderService.createOrder(userId, productId, price);
-
}
-
-
}
- 该 API 中,会调用 OrderService 进行下单。
友情提示:因为这个是示例项目,所以直接传入
price参数,作为订单的金额,实际肯定不是这样的,哈哈哈~
2.2.4 OrderService
创建 OrderService 接口,定义了创建订单的方法。代码如下:
-
/**
-
* 订单 Service
-
*/
-
public interface OrderService {
-
-
/**
-
* 创建订单
-
*
-
* @param userId 用户编号
-
* @param productId 产品编号
-
* @param price 价格
-
* @return 订单编号
-
* @throws Exception 创建订单失败,抛出异常
-
*/
-
Integer createOrder(Long userId, Long productId, Integer price) throws Exception;
-
-
}
2.2.5 OrderServiceImpl
创建 OrderServiceImpl 类,实现创建订单的方法。代码如下:
-
-
public class OrderServiceImpl implements OrderService {
-
-
private Logger logger = LoggerFactory.getLogger(getClass());
-
-
-
private OrderDao orderDao;
-
-
-
private AccountService accountService;
-
-
private ProductService productService;
-
-
-
-
public Integer createOrder(Long userId, Long productId, Integer price) throws Exception {
-
Integer amount = 1; // 购买数量,暂时设置为 1。
-
-
logger.info("[createOrder] 当前 XID: {}", RootContext.getXID());
-
-
// <2> 扣减库存
-
productService.reduceStock(productId, amount);
-
-
// <3> 扣减余额
-
accountService.reduceBalance(userId, price);
-
-
// <4> 保存订单
-
OrderDO order = new OrderDO().setUserId(userId).setProductId(productId).setPayAmount(amount * price);
-
orderDao.saveOrder(order);
-
logger.info("[createOrder] 保存订单: {}", order.getId());
-
-
// 返回订单编号
-
return order.getId();
-
}
-
-
}
<1> 处,在类上,添加 Seata @GlobalTransactional 注解,声明全局事务。
<2> 和 <3> 处,在该方法中,调用 ProductService 扣除商品的库存,调用 AccountService 扣除账户的余额。
<3> 处,在全部调用成功后,调用 OrderDao 保存订单。
2.2.6 OrderDao
创建 OrderDao 接口,定义保存订单的操作。代码如下:
-
-
-
public interface OrderDao {
-
-
/**
-
* 插入订单记录
-
*
-
* @param order 订单
-
* @return 影响记录数量
-
*/
-
-
-
int saveOrder(OrderDO order);
-
-
}
其中,OrderDO 实体类,对应 orders 表。代码如下:
-
/**
-
* 订单实体
-
*/
-
public class OrderDO {
-
-
/** 订单编号 **/
-
private Integer id;
-
-
/** 用户编号 **/
-
private Long userId;
-
-
/** 产品编号 **/
-
private Long productId;
-
-
/** 支付金额 **/
-
private Integer payAmount;
-
-
// ... 省略 setter/getter 方法
-
-
}
2.2.7 OrderServiceApplication
创建 OrderServiceApplication 类,用于启动订单服务。代码如下:
-
-
public class OrderServiceApplication {
-
-
public static void main(String[] args) {
-
SpringApplication.run(OrderServiceApplication.class, args);
-
}
-
-
}
2.3 商品服务
新建 lab-53-seata-at-dubbo-demo-product-service-api 和 lab-53-seata-at-dubbo-demo-product-service 项目,作为商品服务。项目如下图所示:
2.3.1 引入依赖
创建 pom.xml 文件,引入相关的依赖。和「2.2.1 引入依赖」是一致的,就不重复“贴”出来了,胖友点击 pom.xml 文件查看。
2.3.2 配置文件
创建 application.yaml 配置文件,添加相关的配置项。和「2.2.2 配置文件」是一致的,就不重复“贴”出来了,胖友点击 application.yaml 文件查看。
2.3.3 ProductService
创建 ProductService 接口,定义了扣除库存的方法。代码如下:
-
*
-
* 商品 Service
-
*/
-
public interface ProductService {
-
-
/**
-
* 扣减库存
-
*
-
* @param productId 商品 ID
-
* @param amount 扣减数量
-
* @throws Exception 扣减失败时抛出异常
-
*/
-
void reduceStock(Long productId, Integer amount) throws Exception;
-
-
}
2.3.4 ProductServiceImpl
创建 ProductServiceImpl 类,实现扣减库存的方法。代码如下:
-
-
public class ProductServiceImpl implements ProductService {
-
-
private Logger logger = LoggerFactory.getLogger(getClass());
-
-
-
private ProductDao productDao;
-
-
-
-
public void reduceStock(Long productId, Integer amount) throws Exception {
-
logger.info("[reduceStock] 当前 XID: {}", RootContext.getXID());
-
-
// <2> 检查库存
-
checkStock(productId, amount);
-
-
logger.info("[reduceStock] 开始扣减 {} 库存", productId);
-
// <3> 扣减库存
-
int updateCount = productDao.reduceStock(productId, amount);
-
// 扣除成功
-
if (updateCount == 0) {
-
logger.warn("[reduceStock] 扣除 {} 库存失败", productId);
-
throw new Exception("库存不足");
-
}
-
// 扣除失败
-
logger.info("[reduceStock] 扣除 {} 库存成功", productId);
-
}
-
-
private void checkStock(Long productId, Integer requiredAmount) throws Exception {
-
logger.info("[checkStock] 检查 {} 库存", productId);
-
Integer stock = productDao.getStock(productId);
-
if (stock < requiredAmount) {
-
logger.warn("[checkStock] {} 库存不足,当前库存: {}", productId, stock);
-
throw new Exception("库存不足");
-
}
-
}
-
-
}
<1> 处,在类上,添加了 Spring @Transactional 注解,声明本地事务。也就是说,此处会开启一个 seata_product 库的数据库事务。
<2> 处,检查库存是否足够,如果不够则抛出 Exception 异常。因为我们需要通过异常,回滚全局异常。
<3> 处,进行扣除库存,如果扣除失败则抛出 Exception 异常。
2.3.5 ProductDao
创建 ProductDao 接口,定义获取和扣除库存的操作。代码如下:
-
-
-
public interface ProductDao {
-
-
/**
-
* 获取库存
-
*
-
* @param productId 商品编号
-
* @return 库存
-
*/
-
-
Integer getStock(
-
-
/**
-
* 扣减库存
-
*
-
* @param productId 商品编号
-
* @param amount 扣减数量
-
* @return 影响记录行数
-
*/
-
-
int reduceStock(
-
-
}
2.3.6 ProductServiceApplication
创建 ProductServiceApplication 类,用于启动商品服务。代码如下:
-
-
public class ProductServiceApplication {
-
-
public static void main(String[] args) {
-
SpringApplication.run(ProductServiceApplication.class, args);
-
}
-
-
}
2.4 账户服务
新建 lab-53-seata-at-dubbo-demo-account-service-api 和 lab-53-seata-at-dubbo-demo-account-service 项目,作为账户服务。项目如下图所示:
2.4.1 引入依赖
创建 pom.xml 文件,引入相关的依赖。和「2.2.1 引入依赖」是一致的,就不重复“贴”出来了,胖友点击 pom.xml 文件查看。
2.4.2 配置文件
创建 application.yaml 配置文件,添加相关的配置项。和「2.2.2 配置文件」是一致的,就不重复“贴”出来了,胖友点击 application.yaml 文件查看。
2.4.3 AccountService
创建 AccountService 类,定义扣除余额的方法。代码如下:
-
/**
-
* 账户 Service
-
*/
-
public interface AccountService {
-
-
/**
-
* 扣除余额
-
*
-
* @param userId 用户编号
-
* @param price 扣减金额
-
* @throws Exception 失败时抛出异常
-
*/
-
void reduceBalance(Long userId, Integer price) throws Exception;
-
-
}
2.4.3 AccountServiceImpl
创建 AccountServiceImpl 类,实现扣除余额的方法。代码如下:
-
-
public class AccountServiceImpl implements AccountService {
-
-
private Logger logger = LoggerFactory.getLogger(getClass());
-
-
-
private AccountDao accountDao;
-
-
-
-
public void reduceBalance(Long userId, Integer price) throws Exception {
-
logger.info("[reduceBalance] 当前 XID: {}", RootContext.getXID());
-
-
// <2> 检查余额
-
checkBalance(userId, price);
-
-
logger.info("[reduceBalance] 开始扣减用户 {} 余额", userId);
-
// <3> 扣除余额
-
int updateCount = accountDao.reduceBalance(price);
-
// 扣除成功
-
if (updateCount == 0) {
-
logger.warn("[reduceBalance] 扣除用户 {} 余额失败", userId);
-
throw new Exception("余额不足");
-
}
-
logger.info("[reduceBalance] 扣除用户 {} 余额成功", userId);
-
}
-
-
private void checkBalance(Long userId, Integer price) throws Exception {
-
logger.info("[checkBalance] 检查用户 {} 余额", userId);
-
Integer balance = accountDao.getBalance(userId);
-
if (balance < price) {
-
logger.warn("[checkBalance] 用户 {} 余额不足,当前余额:{}", userId, balance);
-
throw new Exception("余额不足");
-
}
-
}
-
-
}
<1> 处,在类上,添加了 Spring @Transactional 注解,声明本地事务。也就是说,此处会开启一个 seata_account 库的数据库事务。
<2> 处,检查余额是否足够,如果不够则抛出 Exception 异常。因为我们需要通过异常,回滚全局异常。
<3> 处,进行扣除余额,如果扣除失败则抛出 Exception 异常。
2.4.5 AccountDao
创建 AccountDao 接口,定义获取和扣除库存的操作。代码如下:
-
-
-
public interface AccountDao {
-
-
/**
-
* 获取账户余额
-
*
-
* @param userId 用户 ID
-
* @return 账户余额
-
*/
-
-
Integer getBalance(
-
-
/**
-
* 扣减余额
-
*
-
* @param price 需要扣减的数目
-
* @return 影响记录行数
-
*/
-
-
int reduceBalance(
-
-
}
2.4.6 AccountServiceApplication
创建 AccountServiceApplication 类,用于启动账户服务。代码如下:
-
-
public class AccountServiceApplication {
-
-
public static void main(String[] args) {
-
SpringApplication.run(AccountServiceApplication.class, args);
-
}
-
-
}
2.5 简单测试
下面,我们将测试两种情况:
- 分布式事务正常提交
- 分布式事务异常回滚
执行 ProductServiceApplication 启动商品服务。相关的日志,胖友自己瞅瞅。
执行 AccountServiceApplication 启动账户服务。相关的日志,胖友自己瞅瞅。
Debug 执行 OrderServiceApplication 启动订单服务。此时,我们可以看到 Seata 相关日志如下:
友情提示:日志的顺序,艿艿做了简单的整理,为了更容易阅读。
-
-
-
-
2020-04-05 21:31:37.818 INFO 64204 --- [ main] s.s.a.d.SeataDataSourceBeanPostProcessor : Auto proxy of [dataSource]
-
2020-04-05 21:31:37.820 INFO 64204 --- [ main] com.zaxxer.hikari.HikariDataSource : HikariPool-1 - Starting...
-
2020-04-05 21:31:38.016 INFO 64204 --- [ main] com.zaxxer.hikari.HikariDataSource : HikariPool-1 - Start completed.
-
-
2020-04-05 21:31:38.059 INFO 64204 --- [ main] i.s.common.loader.EnhancedServiceLoader : load DbTypeParser[druid] extension by class[io.seata.sqlparser.druid.DruidDelegatingDbTypeParser]
-
-
2020-04-05 21:31:38.071 INFO 64204 --- [ main] i.s.common.loader.EnhancedServiceLoader : load RegistryProvider[Nacos] extension by class[io.seata.discovery.registry.nacos.NacosRegistryProvider]
-
-
2020-04-05 21:31:38.315 INFO 64204 --- [ main] i.s.c.r.netty.NettyClientChannelManager : will connect to 10.37.129.2:28091
-
2020-04-05 21:31:38.318 INFO 64204 --- [ main] i.s.core.rpc.netty.NettyPoolableFactory : NettyPool create channel to transactionRole:RMROLE,address:10.37.129.2:28091,msg:< RegisterRMRequest{resourceIds='jdbc:mysql://127.0.0.1:3306/seata_order', applicationId='order-service', transactionServiceGroup='order-service-group'} >
-
-
2020-04-05 21:31:38.441 INFO 64204 --- [lector_RMROLE_1] i.s.common.loader.EnhancedServiceLoader : load Serializer[SEATA] extension by class[io.seata.serializer.seata.SeataSerializer]
-
-
2020-04-05 21:31:38.474 INFO 64204 --- [ main] i.s.c.r.netty.NettyClientChannelManager : will connect to 10.37.129.2:18091
-
2020-04-05 21:31:38.474 INFO 64204 --- [ main] i.s.core.rpc.netty.NettyPoolableFactory : NettyPool create channel to transactionRole:RMROLE,address:10.37.129.2:18091,msg:< RegisterRMRequest{resourceIds='jdbc:mysql://127.0.0.1:3306/seata_order', applicationId='order-service', transactionServiceGroup='order-service-group'} >
-
-
2020-04-05 21:31:38.315 INFO 64204 --- [ main] io.seata.core.rpc.netty.RmRpcClient : RM will register :jdbc:mysql://127.0.0.1:3306/seata_order
-
2020-04-05 21:31:38.463 INFO 64204 --- [ main] io.seata.core.rpc.netty.RmRpcClient : register RM success. server version:1.1.0,channel:[id: 0x5a7a3adb, L:/10.37.129.2:61910 - R:/10.37.129.2:28091]
-
2020-04-05 21:31:38.474 INFO 64204 --- [ main] i.s.core.rpc.netty.NettyPoolableFactory : register success, cost 64 ms, version:1.1.0,role:RMROLE,channel:[id: 0x5a7a3adb, L:/10.37.129.2:61910 - R:/10.37.129.2:28091]
-
-
2020-04-05 21:31:38.474 INFO 64204 --- [ main] io.seata.core.rpc.netty.RmRpcClient : RM will register :jdbc:mysql://127.0.0.1:3306/seata_order
-
2020-04-05 21:31:38.478 INFO 64204 --- [ main] io.seata.core.rpc.netty.RmRpcClient : register RM success. server version:1.1.0,channel:[id: 0x84e2337c, L:/10.37.129.2:61911 - R:/10.37.129.2:18091]
-
2020-04-05 21:31:38.478 INFO 64204 --- [ main] i.s.core.rpc.netty.NettyPoolableFactory : register success, cost 3 ms, version:1.1.0,role:RMROLE,channel:[id: 0x84e2337c, L:/10.37.129.2:61911 - R:/10.37.129.2:18091]
-
-
2020-04-05 21:31:39.107 INFO 64204 --- [ main] i.s.s.a.GlobalTransactionScanner : Bean[cn.iocoder.springboot.lab53.orderservice.service.OrderServiceImpl] with name [orderServiceImpl] would use interceptor [io.seata.spring.annotation.GlobalTransactionalInterceptor]
2.5.1 正常流程
① 先查询下目前数据库的数据情况。如下图所示:

② 使用 Postman 模拟调用 http://127.0.0.1:8081/order/create 创建订单的接口,如下图所示:
此时,在控制台打印日志如下图所示:
- 订单服务:
- 商品服务:
- 账户服务:
再查询下目前数据库的数据情况。如下图所示:
2.5.2 异常流程
① 先查询下目前数据库的数据情况。如下图所示:
② 在 OrderServiceImpl 的 #createOrder(...) 方法上,打上断点如下图,方便我们看到 product 表的 balance 被减少:
友情提示:这里忘记截图了,稍后 IDEA 停留在该断点时,胖友可以去查询
product表,会发现balance已经减少。
③ 使用 Postman 模拟调用 http://127.0.0.1:8081/order/create 创建订单的接口,如下图所示:
此时,在控制台打印日志如下图所示:
- 订单服务:
- 商品服务:
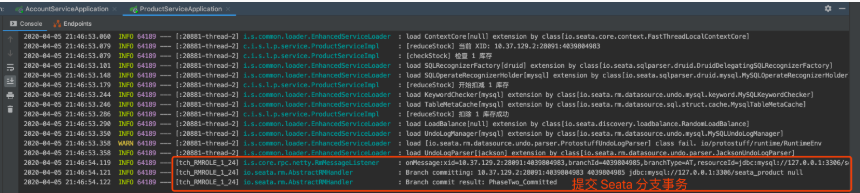
- 账户服务:
再查询下目前数据库的数据情况。如下图所示:
</div><div data-report-view="{"mod":"1585297308_001","spm":"1001.2101.3001.6548","dest":"https://blog.csdn.net/weixin_42073629/article/details/106749277","extend1":"pc","ab":"new"}"><div></div></div>
</div>
</article>