1、新建项目
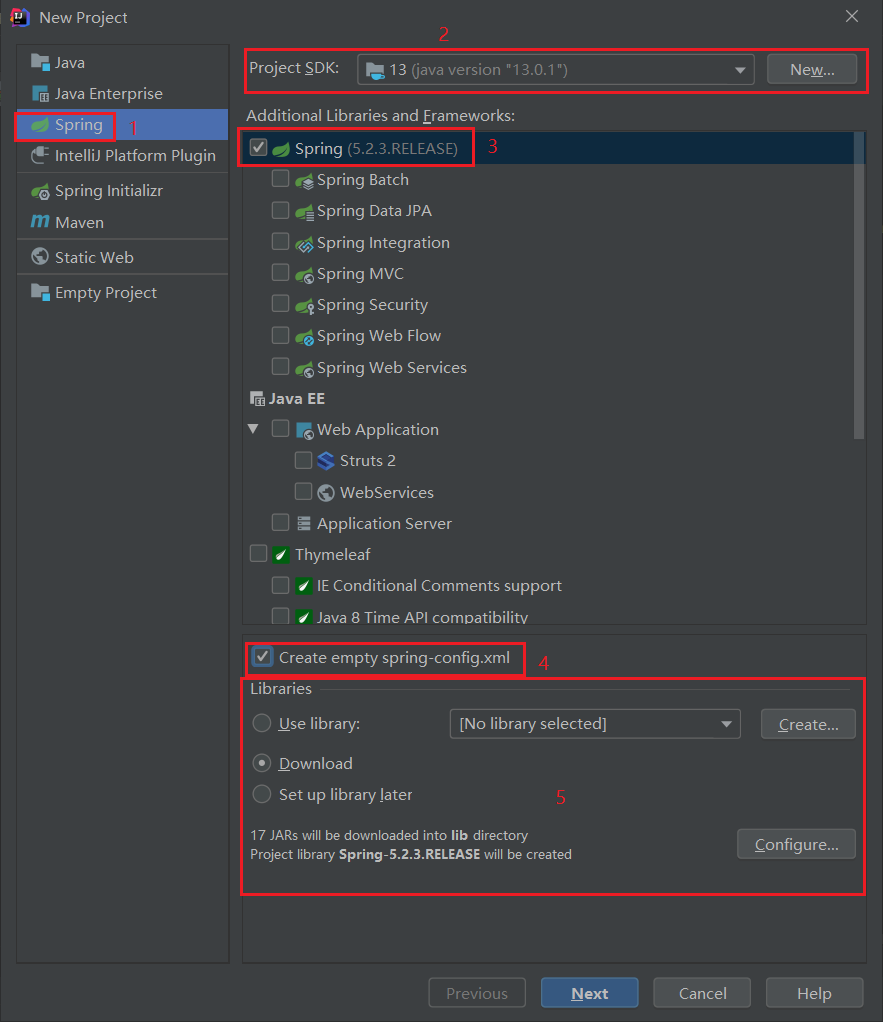
如果手动引入lib,需要引入spring的4个核心包:
- spring-core.RELEASE.jar
- spring-context.RELEASE.jar
- spring-beans.RELEASE.jar
- spring-expression.RELEASE.jar
嫌麻烦的可以直接引入spring所有的jar包(21个)。
还需引入第三方依赖:
- commons-logging.jar。
也可以选择Download,IDEA会自动下载引入:
- spring常用的15个jar包
- commons-logging.jar
- aopalliance.jar
2、在src下新建包com.chy.bean,包下新建接口Animal、实现类Dog
package com.chy.bean;

public interface Animal {
    public void shout();
}
package com.chy.bean;

public class Dog  {
    public void shout() {
        System.out.println("汪汪汪");
    }
}
3、在spring-config.xml中配置bean
<?xml version="1.0" encoding="UTF-8"?>
<beans xmlns="http://www.springframework.org/schema/beans"
       xmlns:xsi="http://www.w3.org/2001/XMLSchema-instance"
       xsi:schemaLocation="http://www.springframework.org/schema/beans http://www.springframework.org/schema/beans/spring-beans.xsd">

    <bean name="dog" class="com.chy.bean.Dog" />
</beans>
如果创建项目时忘记勾选创建spring-config.xml:

4、新建测试类com.chy.test.Test
package com.chy.test;

import com.chy.bean.Dog;
import org.springframework.context.ApplicationContext;
import org.springframework.context.support.ClassPathXmlApplicationContext;

public class Test {
    public static void main(String[] args) {
        ApplicationContext applicationContext=new ClassPathXmlApplicationContext("spring-config.xml");

        // 通过xml中Bean的name来获取该Bean的一个实例,返回的是Object,需要强转
        // Dog dog = (Dog) applicationContext.getBean("dog");

        //也可以使用class类型的参数直接指定类型
        Dog dog = applicationContext.getBean("dog", Dog.class);

        dog.shout();
    }
}
传统的对象创建方式:Dog dog=new Dog();
spring则是由容器创建、管理对象(Bean的实例),要使用对象时,从容器中通过bean的name来获取一个实例。
使用spring的时候,尽量不要使用new,把对象的创建都交给spring容器。