一、区域管理器
首先看一下官方给的模型图

现在我们可以知道的是,大致一个区域管理器RegionMannager对一个控件创建区域的要点:
- 创建Region的控件必须包含一个RegionAdapter适配器
- region是依赖在具有RegionAdapter控件身上的
其实后来我去看了下官方的介绍和源码,默认RegionAdapter是有三个,且还支持自定义RegionAdapter,因此在官方的模型图之间我做了点补充:
二、区域创建与视图的注入
1、创建前端页面,放置3个按钮用于向区域中注入不同的视图
<Grid>
        <Grid.ColumnDefinitions>
            <ColumnDefinition Width="150" />
            <ColumnDefinition />
        </Grid.ColumnDefinitions>
        <StackPanel>
            <Button
                Margin="5"
                Command="{Binding OpenCommand}"
                CommandParameter="ViewA"
                Content="模块A" />
            <Button
                Margin="5"
                Command="{Binding OpenCommand}"
                CommandParameter="ViewB"
                Content="模块B" />
            <Button
                Margin="5"
                Command="{Binding OpenCommand}"
                CommandParameter="ViewC"
                Content="模块C" />
        </StackPanel>

        <ContentControl Grid.Column="1" prism:RegionManager.RegionName="ModuleContent" />
    </Grid>
通过Prism框架的区域管理器RegionManager的RegionName注册一个区域,方便后续向里面填充视图页面等。
2、再创建几个用户控件,这里要注意一下,只能是只能具有Window或Frame父级才可以。
<UserControl
    x:Class="BlankCoreApp1.Views.ViewA"
    xmlns="http://schemas.microsoft.com/winfx/2006/xaml/presentation"
    xmlns:x="http://schemas.microsoft.com/winfx/2006/xaml"
    xmlns:d="http://schemas.microsoft.com/expression/blend/2008"
    xmlns:local="clr-namespace:BlankCoreApp1.Views"
    xmlns:mc="http://schemas.openxmlformats.org/markup-compatibility/2006"
    d:DesignHeight="450"
    d:DesignWidth="800"
    mc:Ignorable="d">
    <Grid Background="Red">
        <TextBlock
            HorizontalAlignment="Center"
            VerticalAlignment="Center"
            FontSize="60"
            Foreground="White"
            Text="我是模块A" />
    </Grid>
</UserControl>
另外两个一样的省略代码...
3、接着则定义一个Command以及Command最终执行的方法,并绑定到前端的按钮中
//CS:
public DelegateCommand<string> OpenCommand { get; private set; }

//XAML:
<Button
                Margin="5"
                Command="{Binding OpenCommand}"
                CommandParameter="ViewA"
                Content="模块A" />
另外,如果我们想使用区域管理器向其ContentControl注入视图则还需在VM的构造函数中获取区域管理器
public MainWindowViewModel(IRegionManager regionManager)
        {
            _regionManage = regionManager;
            OpenCommand = new DelegateCommand<string>(OpenMethod);
        }
在Command的执行方法中使用区域管理器查找全局已定义的可用区域,通过注册的区域名称找到区域动态的去设置内容
private void OpenMethod(string obj)
        {
        _regionManage.Regions["ModuleContent"].RequestNavigate(obj);
        }
4、还有一个重要的点,需要在App.cs中通过重写RegisterTypes方法注册区域视图
protected override void RegisterTypes(IContainerRegistry containerRegistry)
        {
            containerRegistry.RegisterForNavigation<ViewA>();
            containerRegistry.RegisterForNavigation<ViewB>();
            containerRegistry.RegisterForNavigation<ViewC>();
        }
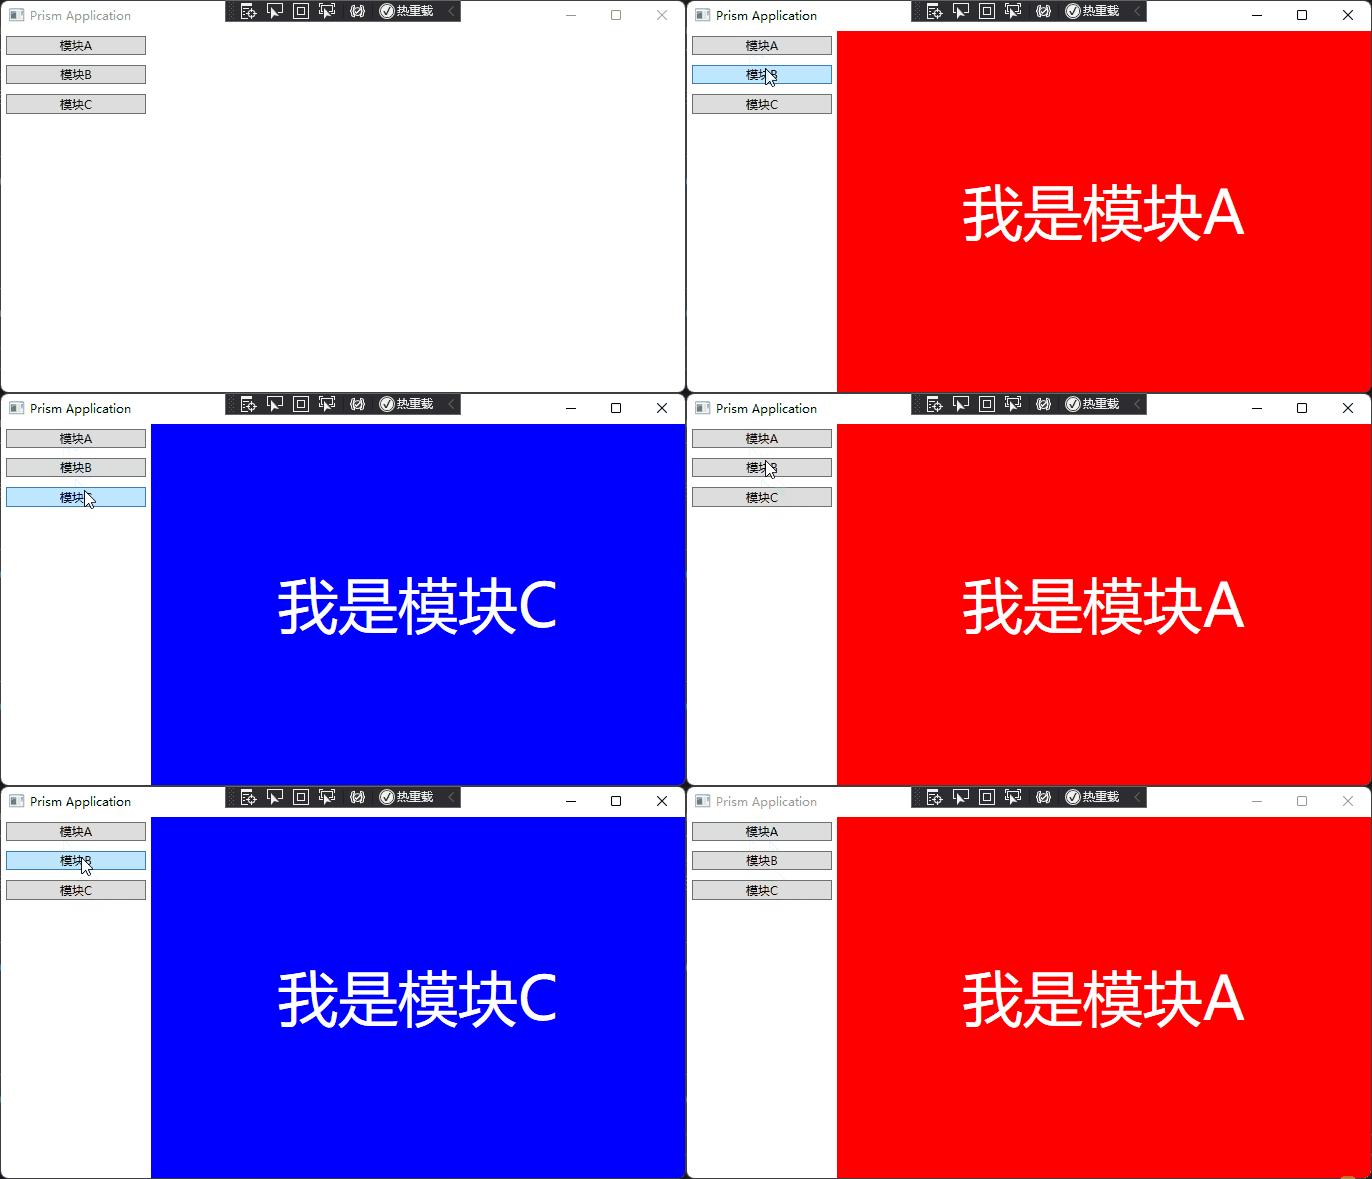
最终运行效果:

