一、Node.js创建第一个应用
如果我们使用 PHP 来编写后端的代码时,需要 Apache 或者 Nginx 的 HTTP 服务器, 来处理客户端的请求相应。不过对 Node.js 来说,概念完全不一样了。使用 Node.js 时,我们不仅仅在实现一个应用,同时还实现了整个 HTTP 服务器。
1、引入 http 模块
var http = require("http");
2、创建服务器
接下来我们使用 http.createServer() 方法创建服务器,并使用 listen 方法绑定 8888 端口。函数通过 request, response 参数来接收和响应数据。
/*
 如果我们使用PHP来编写后端的代码时,需要Apache 或者 Nginx 的HTTP 服务器,并配上 mod_php5 模块和php-cgi,来处理客户端的请求相应。
 不过对 Node.js 来说,概念完全不一样了。使用 Node.js 时,我们不仅仅 在实现一个应用,同时还实现了整个 HTTP 服务器。
 */

//1.引入http模块
var http=require('http');
//2.用http模块创建服务
    /*
     * request 获取url信息
     * response 浏览器返回响应信息
     */
http.createServer(function(request,response){
// 发送 HTTP 头部
// HTTP 状态值: 200 : OK
//设置 HTTP 头部,状态码是 200,文件类型是 html,字符集是 UTF-8
response.writeHead(200,{"Content-Type":"text/html;charset=UTF-8"});
// 发送响应数据
response.end('你好 nodejs');
}).listen(8001);
// 终端打印如下信息
console.log('Server running at http://127.0.0.1:8001/');
3.运行程序
用命令行切换到程序对应目录。通过 node 命令运行程序。

浏览器运行

你会发现,我们本地写一个 js,打死都不能直接拖入浏览器运行,但是有了 node,我们任何一个 js 文件,都可以通过 node 来运行。也就是说,node 就是一个 js 的执行环境。
二、HTTP 模块、URL 模块
Node.js 中,将很多的功能,划分为了一个个 module(模块)。 Node.js 中的很多功能都是通过模块实现。
2.1 、HTTP 模块的使用
//引用模块
var http = require("http");
//创建一个服务器,回调函数表示接收到请求之后做的事情
var server = http.createServer(function(req,res){
//req 参数表示请求, res 表示响应
console.log("服务器接收到了请求" + req.url);
res.end(); // End 方法使 Web 服务器停止处理脚本并返回当前结果
});
//监听端口
server.listen(3000,"127.0.0.1");
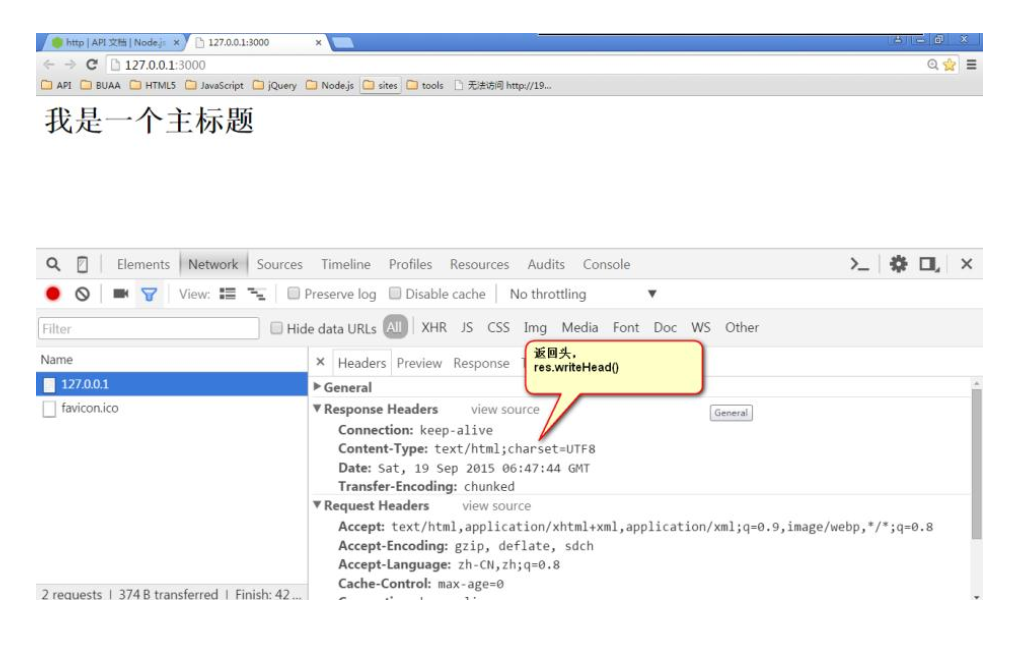
设置一个响应头:
res.writeHead(200,{"Content-Type":"text/html;charset=UTF8"});
我们现在来看一下 req 里面能够使用的东西。
最关键的就是 req.url 属性,表示用户的请求 URL 地址。所有的路由设计,都是通过 req.url
来实现的。
我们比较关心的不是拿到 URL,而是识别这个 URL。
识别 URL,用到了下面的 url 模块
2.2、 URL 模块的使用
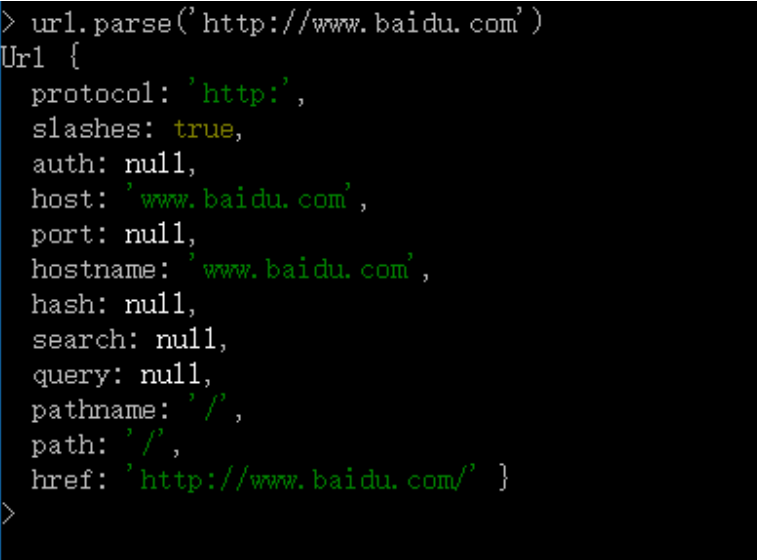
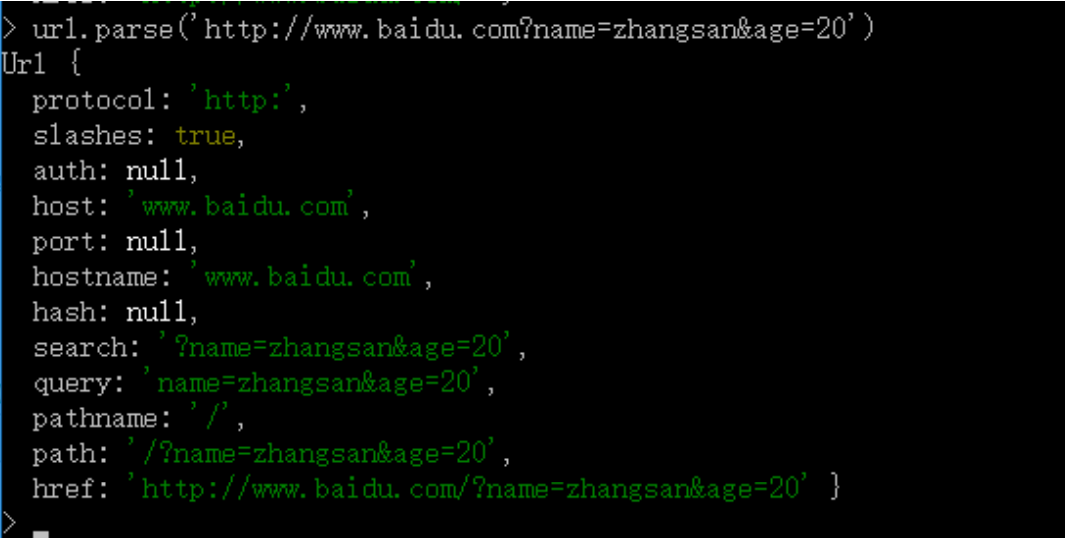
url.parse() 解析 URL
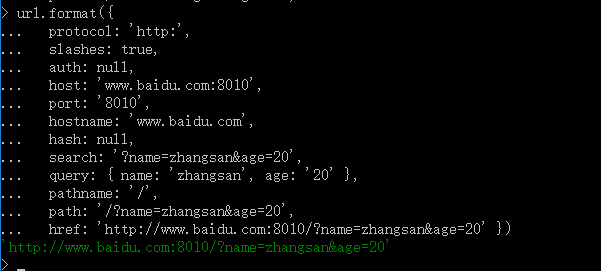
url.format(urlObject) //是上面 url.parse() 操作的逆向操作
url.resolve(from, to) 添加或者替换地址
var http = require('http');
var url = require('url');
// 2.用http模块创建服务
/*
 req获取url信息   (request)
 res 浏览器返回响应信息 (response)
 */
http.createServer(function(req, res) {
    // 输入http://localhost:8001/news?aid=123   拿到aid
    // 输入http://localhost:8001/news?aid=123&cid=3   拿到aid和cid
    // req.url  获取浏览器url输入的信息
    // var query=url.parse(req.url,true);
    // console.log(query);
    res.writeHead(200,{"Content-Type":"text/html;charset=UTF-8"});
    if (req.url != '/favicon.ico') {
        //http://localhost:8001/news?aid=123
        console.log(req.url);  //返回  /news?aid=123
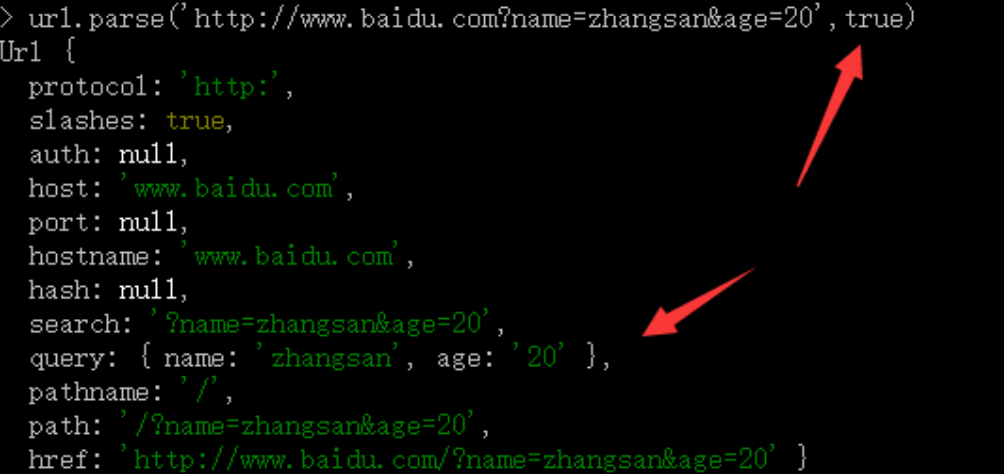
        var result = url.parse(req.url, true); //第一个参数是地址    第二个参数是true的话表示把get传值转换成对象
        console.log('aid=' + result.query.aid);
        /*获取url的get传值*/
        console.log('cid=' + result.query.cid);
    }
    res.write('你好 nodejs');
    res.end();
    /*结束响应*/
}).listen(8001);
1、url.parse()

2、url.format()
3、url.resolve()

三、Nodejs 自启动工具 supervisor
supervisor 会不停的 watch 你应用下面的所有文件,发现有文件被修改,就重新载入程序文件这样就实现了部署,修
改了程序文件后马上就能看到变更后的结果。麻麻再也不用担心我的重启 nodejs 了!
1. 首先安装 supervisor
npm install -g supervisor
2. 使用 supervisor 代替 node 命令启动应用
supervisor js文件
