本文我将结合一个实例,一步一步地演示,然后在RIA Service中启用身份验证。包括在服务端的设计,和客户端的设计。
本文实例源代码,可以通过下面地址下载
https://files.cnblogs.com/chenxizhang/SilverlightRIAAuthenticationSample.rar
1. 创建项目,并添加一个业务用的Domain Service
作为演示,我们这里写了一个简单的方法
namespace SilverlightRIAAuthenticationSample.Web
{
    using System;
    using System.Collections.Generic;
    using System.ComponentModel;
    using System.ComponentModel.DataAnnotations;
    using System.Linq;
    using System.ServiceModel.DomainServices.Hosting;
    using System.ServiceModel.DomainServices.Server;
    using System.Runtime.Serialization;

    // TODO: Create methods containing your application logic.
    [EnableClientAccess()]
    public class HomeDomainService : DomainService
    {
        [Query]
        /// <summary>
        /// 这个方法返回一些客户名称
        /// </summary>
        /// <returns></returns>
        public IQueryable<Customer> GetCustomers()
        {
            return new[]{
                new Customer(){ID=1,Name="Microsoft"},
                new Customer(){ID=2,Name="Google"},
                new Customer(){ID=3,Name="Apple"},
                new Customer(){ID=4,Name="Facebook"},
                new Customer(){ID=5,Name="Yahoo"},
                new Customer(){ID=16,Name="AOL"}
            }.AsQueryable();
        }
    }

    [DataContract]
    public class Customer
    {
        [Key][DataMember]
        public int ID { get; set; }
        [DataMember]
        public string Name { get; set; }
    }


}
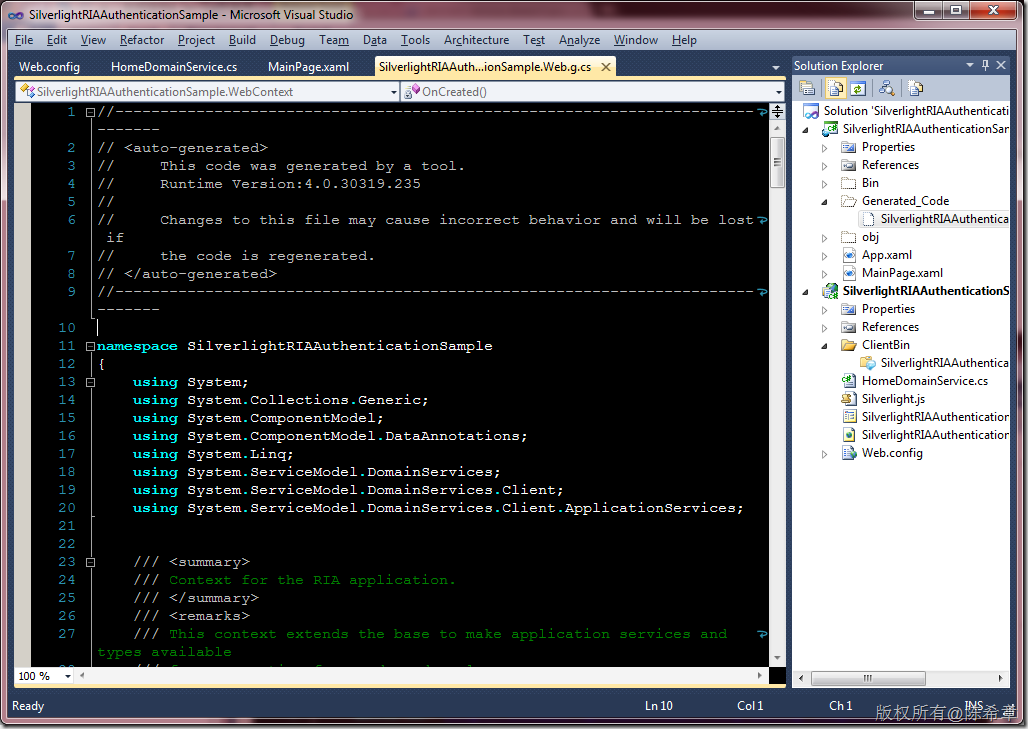
写好之后,分别编译网站项目和Silverlight项目。在Silverlight中应该可以看到一个自动生成的类型
2. 编写客户端代码
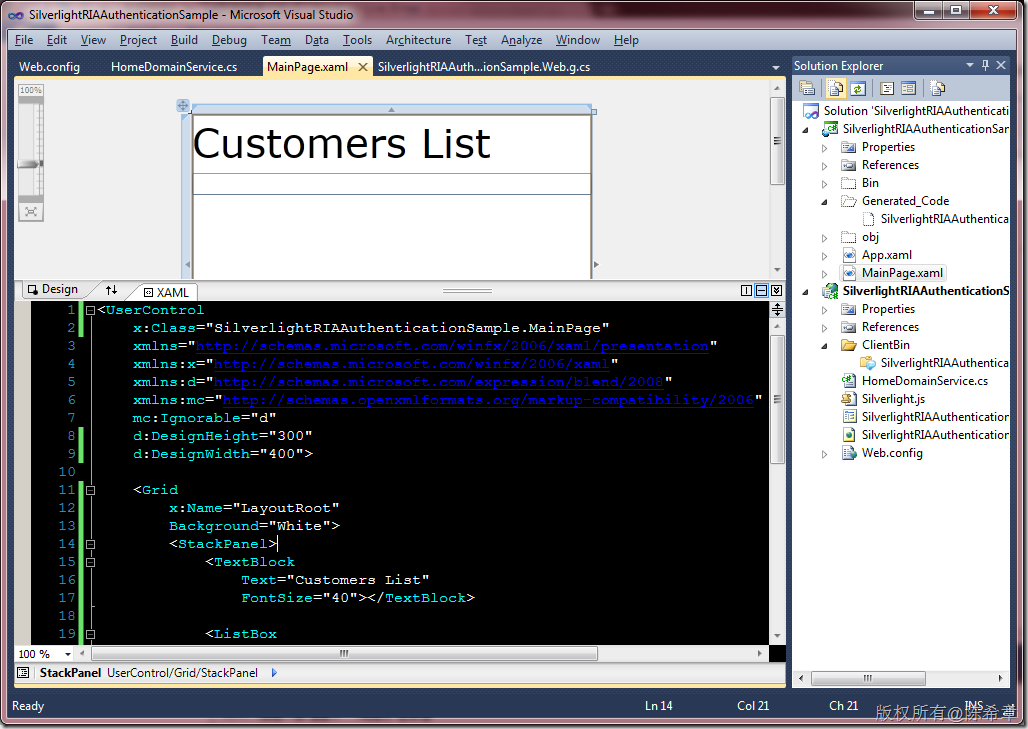
我简单地做了一个界面,用来显示由服务器返回的客户列表
<UserControl
    x:Class="SilverlightRIAAuthenticationSample.MainPage"
    xmlns="http://schemas.microsoft.com/winfx/2006/xaml/presentation"
    xmlns:x="http://schemas.microsoft.com/winfx/2006/xaml"
    xmlns:d="http://schemas.microsoft.com/expression/blend/2008"
    xmlns:mc="http://schemas.openxmlformats.org/markup-compatibility/2006"
    mc:Ignorable="d"
    d:DesignHeight="300"
    d:DesignWidth="400">

    <Grid
        x:Name="LayoutRoot"
        Background="White">
        <StackPanel>
            <TextBlock
                Text="Customers List"
                FontSize="40"></TextBlock>

            <ListBox
                ItemsSource="{Binding}"
                Padding="10" Margin="10">
                <ListBox.ItemTemplate>
                    <DataTemplate>
                        <TextBlock
                            Text="{Binding Name}"
                            FontSize="16"></TextBlock>
                    </DataTemplate>
                </ListBox.ItemTemplate>
            </ListBox>
        </StackPanel>
    </Grid>
</UserControl>
同时,编写一些简单的后台代码(直接写在xaml.cs中)
using System.Windows;
using System.Windows.Controls;
using SilverlightRIAAuthenticationSample.Web;

namespace SilverlightRIAAuthenticationSample
{
    public partial class MainPage : UserControl
    {
        public MainPage()
        {
            InitializeComponent();
            Loaded += new RoutedEventHandler(MainPage_Loaded);
        }

        void MainPage_Loaded(object sender, RoutedEventArgs e)
        {
            var ctx = new HomeDomainContext();
            var op=ctx.Load<Customer>(ctx.GetCustomersQuery());
            this.DataContext = op.Entities;
        }
    }
}
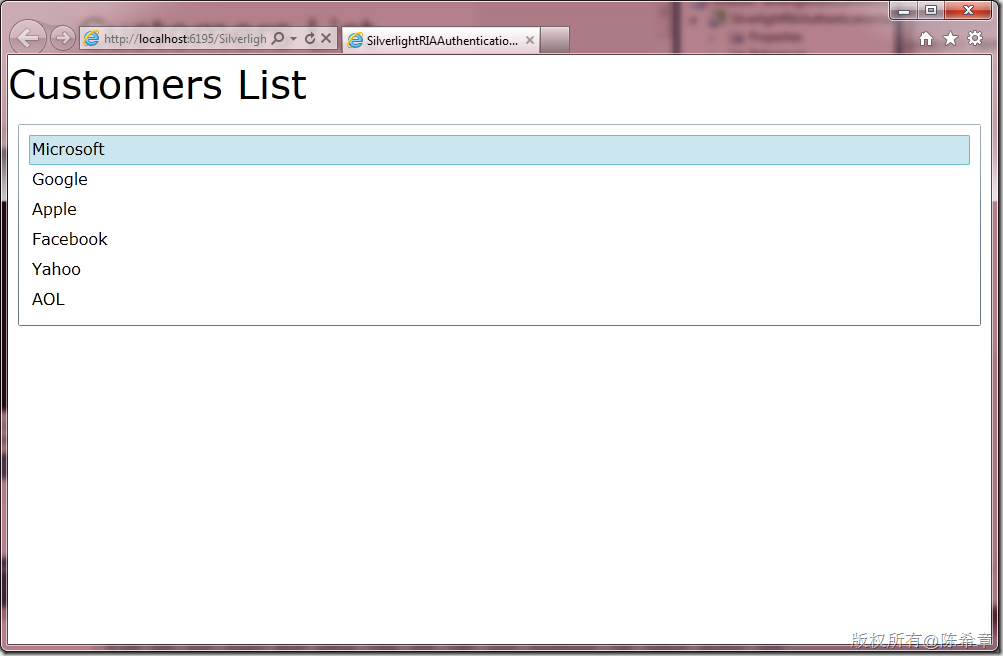
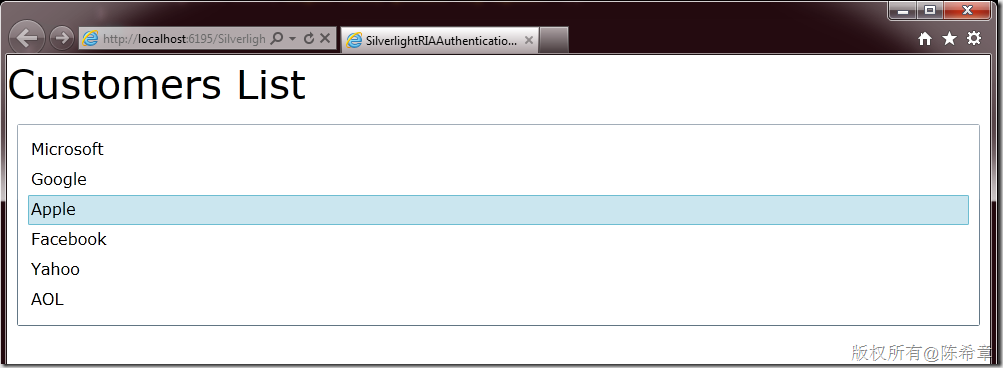
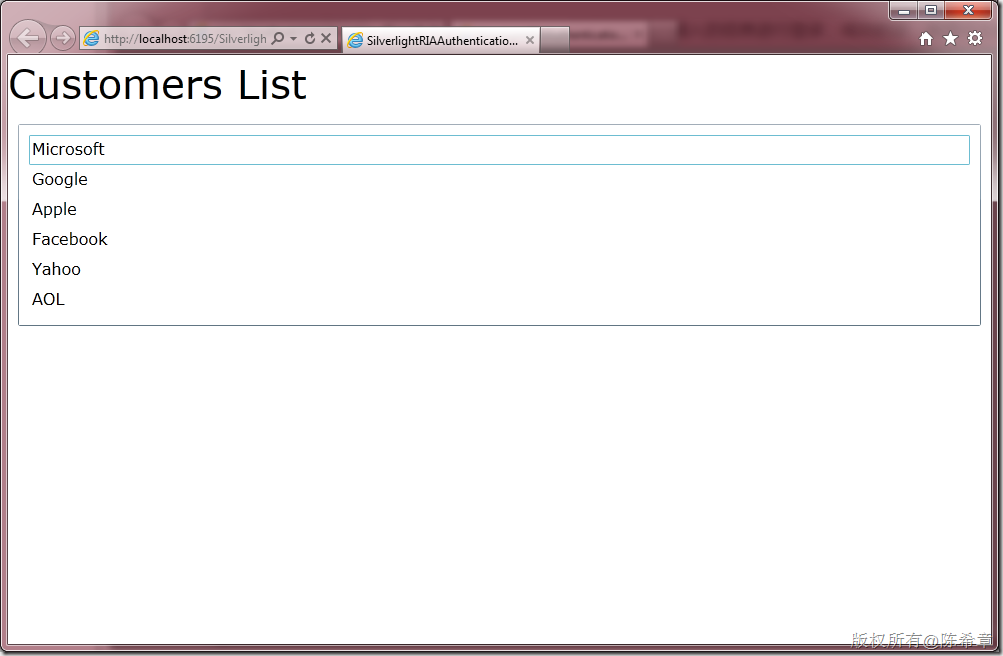
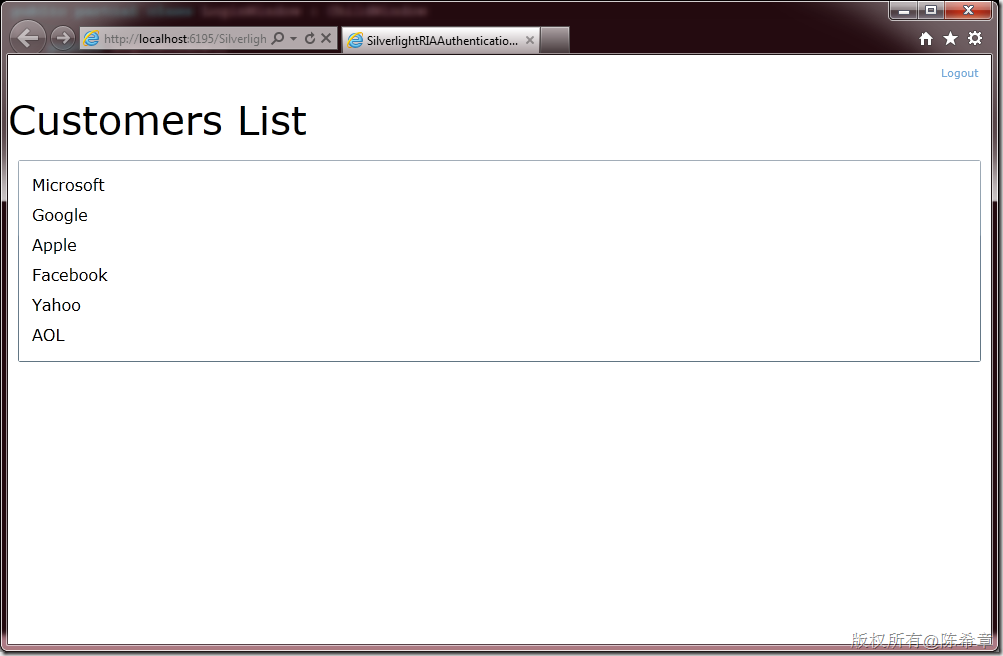
运行起来,我们可以看到如下的一个效果
到这里为止,我们就已经实现了一个简单的Silverlight+RIA Service的场景。这不是本文的重点,我们下面要实现的是,在这个设计的基础上添加身份验证的功能。
例如你可以假设一下:假如这个GetCustomers方法,并不是给所有用户都可以调用的,而是需要经过身份验证的用户才可以调用的
3. 修改Web.config
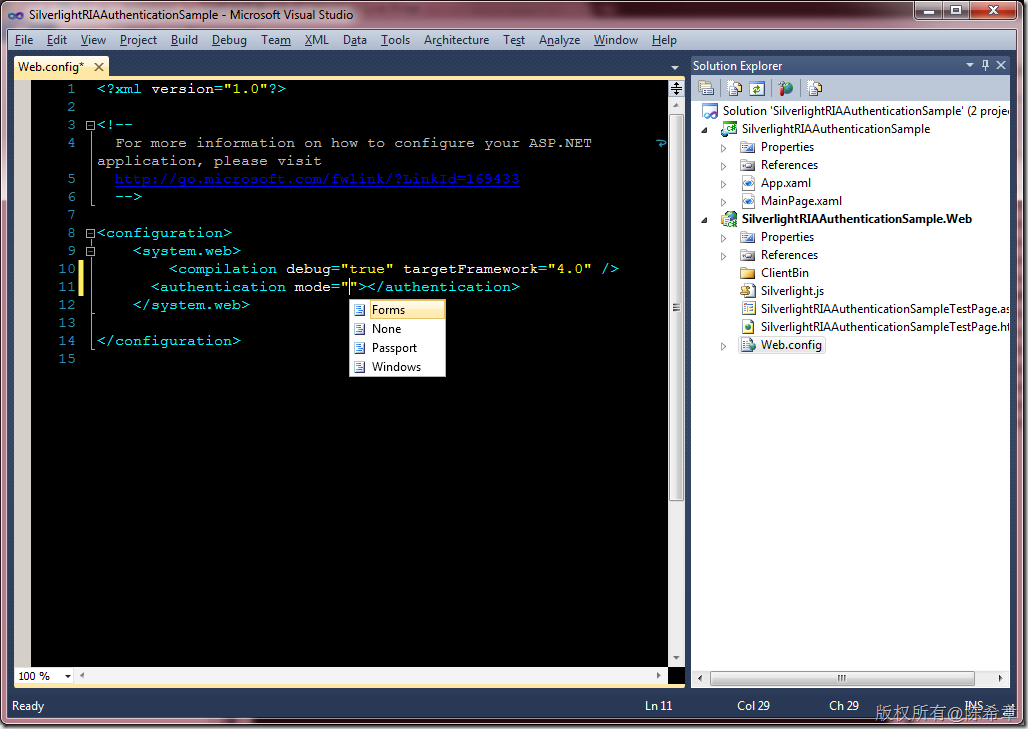
我们需要修改宿主网站的web.config,设置身份验证提供程序,可以选择Forms或者Windows,我们这里选择Forms,就是所谓的表单验证,客户端需要提供一个用户名和密码来进行验证
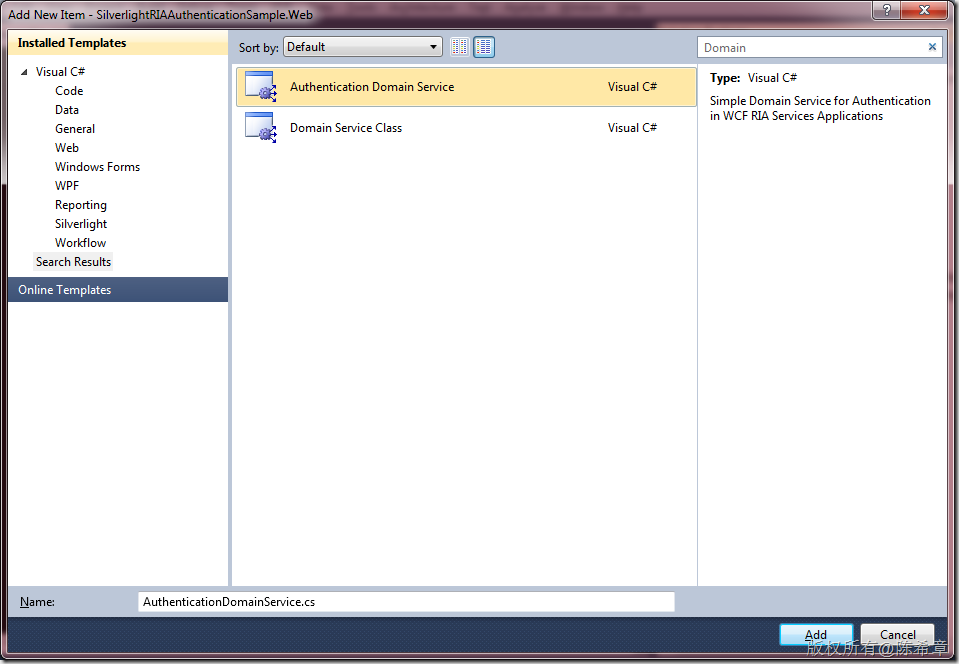
4. 添加一个AuthenticationDomainService
在网站项目中
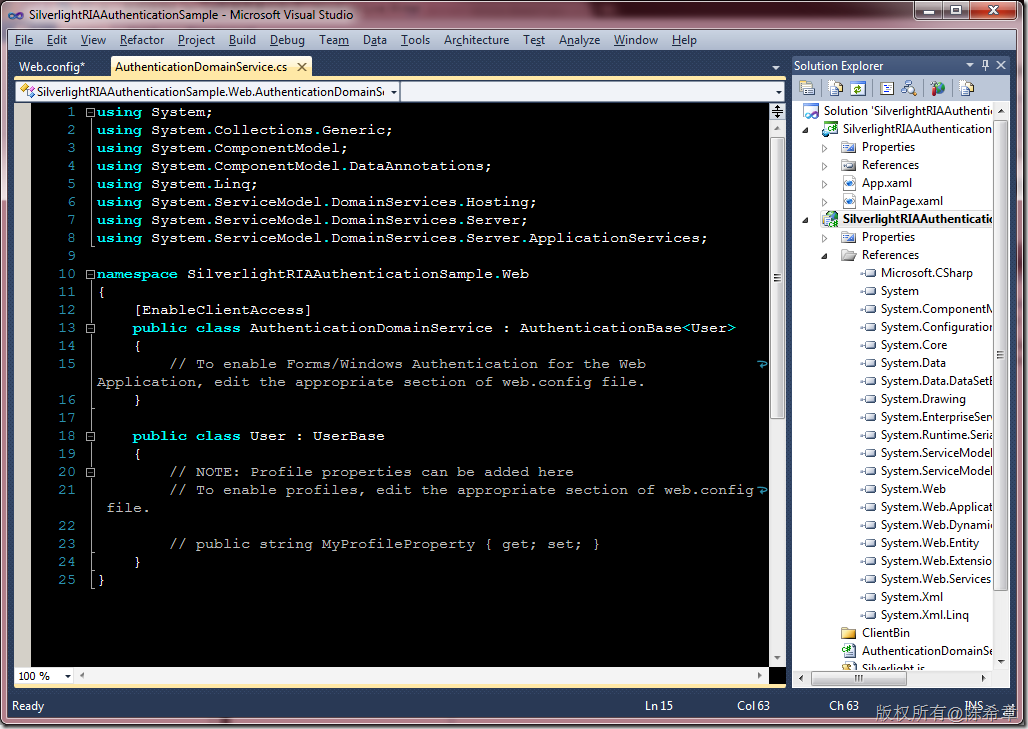
这个Domain Service不需要做任何修改。但也可以为User类型添加一些特殊的属性(称为Profile Property),这里先不展开了
但是,这里需要添加一个身份验证的提供程序。我写了一个最简单的MemberShipProvider
请注意,SimpleMembershipProvider,只实现一个方法:ValidateUser(请注意代码的底部,红色部分)
using System;
using System.ServiceModel.DomainServices.Hosting;
using System.ServiceModel.DomainServices.Server.ApplicationServices;

namespace SilverlightRIAAuthenticationSample.Web
{
    [EnableClientAccess]
    public class AuthenticationDomainService : AuthenticationBase<User>
    {
        // To enable Forms/Windows Authentication for the Web Application, edit the appropriate section of web.config file.
    }

    public class User : UserBase
    {
        // NOTE: Profile properties can be added here
        // To enable profiles, edit the appropriate section of web.config file.

        // public string MyProfileProperty { get; set; }
    }

    public class SimpleMembershipProvider : System.Web.Security.MembershipProvider
    {

        public override string ApplicationName
        {
            get
            {
                throw new NotImplementedException();
            }
            set
            {
                throw new NotImplementedException();
            }
        }

        public override bool ChangePassword(string username, string oldPassword, string newPassword)
        {
            throw new NotImplementedException();
        }

        public override bool ChangePasswordQuestionAndAnswer(string username, string password, string newPasswordQuestion, string newPasswordAnswer)
        {
            throw new NotImplementedException();
        }

        public override System.Web.Security.MembershipUser CreateUser(string username, string password, string email, string passwordQuestion, string passwordAnswer, bool isApproved, object providerUserKey, out System.Web.Security.MembershipCreateStatus status)
        {
            throw new NotImplementedException();
        }

        public override bool DeleteUser(string username, bool deleteAllRelatedData)
        {
            throw new NotImplementedException();
        }

        public override bool EnablePasswordReset
        {
            get { throw new NotImplementedException(); }
        }

        public override bool EnablePasswordRetrieval
        {
            get { throw new NotImplementedException(); }
        }

        public override System.Web.Security.MembershipUserCollection FindUsersByEmail(string emailToMatch, int pageIndex, int pageSize, out int totalRecords)
        {
            throw new NotImplementedException();
        }

        public override System.Web.Security.MembershipUserCollection FindUsersByName(string usernameToMatch, int pageIndex, int pageSize, out int totalRecords)
        {
            throw new NotImplementedException();
        }

        public override System.Web.Security.MembershipUserCollection GetAllUsers(int pageIndex, int pageSize, out int totalRecords)
        {
            throw new NotImplementedException();
        }

        public override int GetNumberOfUsersOnline()
        {
            throw new NotImplementedException();
        }

        public override string GetPassword(string username, string answer)
        {
            throw new NotImplementedException();
        }

        public override System.Web.Security.MembershipUser GetUser(string username, bool userIsOnline)
        {
            throw new NotImplementedException();
        }

        public override System.Web.Security.MembershipUser GetUser(object providerUserKey, bool userIsOnline)
        {
            throw new NotImplementedException();
        }

        public override string GetUserNameByEmail(string email)
        {
            throw new NotImplementedException();
        }

        public override int MaxInvalidPasswordAttempts
        {
            get { throw new NotImplementedException(); }
        }

        public override int MinRequiredNonAlphanumericCharacters
        {
            get { throw new NotImplementedException(); }
        }

        public override int MinRequiredPasswordLength
        {
            get { throw new NotImplementedException(); }
        }

        public override int PasswordAttemptWindow
        {
            get { throw new NotImplementedException(); }
        }

        public override System.Web.Security.MembershipPasswordFormat PasswordFormat
        {
            get { throw new NotImplementedException(); }
        }

        public override string PasswordStrengthRegularExpression
        {
            get { throw new NotImplementedException(); }
        }

        public override bool RequiresQuestionAndAnswer
        {
            get { throw new NotImplementedException(); }
        }

        public override bool RequiresUniqueEmail
        {
            get { throw new NotImplementedException(); }
        }

        public override string ResetPassword(string username, string answer)
        {
            throw new NotImplementedException();
        }

        public override bool UnlockUser(string userName)
        {
            throw new NotImplementedException();
        }

        public override void UpdateUser(System.Web.Security.MembershipUser user)
        {
            throw new NotImplementedException();
        }

        public override bool ValidateUser(string username, string password)
        {
            return username == "chenxizhang" && password == "password";
        }
    }
}
然后,我们还需要修改web.config,指定这个MembershipProvider,请注意下面的粗体部分
<?xml version="1.0"?>

<!--
  For more information on how to configure your ASP.NET application, please visit
  http://go.microsoft.com/fwlink/?LinkId=169433
  -->

<configuration>
  <system.webServer>
    <modules runAllManagedModulesForAllRequests="true">
      <add name="DomainServiceModule" preCondition="managedHandler"
          type="System.ServiceModel.DomainServices.Hosting.DomainServiceHttpModule, System.ServiceModel.DomainServices.Hosting, Version=4.0.0.0, Culture=neutral, PublicKeyToken=31bf3856ad364e35" />
    </modules>
    <validation validateIntegratedModeConfiguration="false" />
  </system.webServer>
  <system.web>
    <httpModules>
      <add name="DomainServiceModule" type="System.ServiceModel.DomainServices.Hosting.DomainServiceHttpModule, System.ServiceModel.DomainServices.Hosting, Version=4.0.0.0, Culture=neutral, PublicKeyToken=31bf3856ad364e35" />
    </httpModules>
    <compilation debug="true" targetFramework="4.0" />
    <authentication mode="Forms">
    </authentication>

    <membership defaultProvider="simple">
      <providers>
        <clear/>
        <add name="simple" type="SilverlightRIAAuthenticationSample.Web.SimpleMembershipProvider"/>
      </providers>
    </membership>
  </system.web>
  <system.serviceModel>
    <serviceHostingEnvironment aspNetCompatibilityEnabled="true"
        multipleSiteBindingsEnabled="true" />
  </system.serviceModel>
</configuration>
6. 如何在服务器端启用身份验证
请注意下面代码的修改,在GetCustomers方法上面,我们添加一个RequiresAuthetication的Attribute。
namespace SilverlightRIAAuthenticationSample.Web
{
    using System.ComponentModel.DataAnnotations;
    using System.Linq;
    using System.Runtime.Serialization;
    using System.ServiceModel.DomainServices.Hosting;
    using System.ServiceModel.DomainServices.Server;

    // TODO: Create methods containing your application logic.
    [EnableClientAccess()]
    public class HomeDomainService : DomainService
    {
        [Query][RequiresAuthentication]
        /// <summary>
        /// 这个方法返回一些客户名称
        /// </summary>
        /// <returns></returns>
        public IQueryable<Customer> GetCustomers()
        {
            return new[]{
                new Customer(){ID=1,Name="Microsoft"},
                new Customer(){ID=2,Name="Google"},
                new Customer(){ID=3,Name="Apple"},
                new Customer(){ID=4,Name="Facebook"},
                new Customer(){ID=5,Name="Yahoo"},
                new Customer(){ID=16,Name="AOL"}
            }.AsQueryable();
        }
    }

    [DataContract]
    public class Customer
    {
        [Key][DataMember]
        public int ID { get; set; }
        [DataMember]
        public string Name { get; set; }
    }


}
到这里为止,服务器端的设计就完成了,我们可以将两个项目都重新生成一下
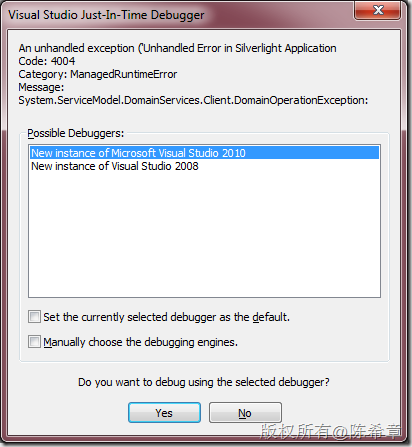
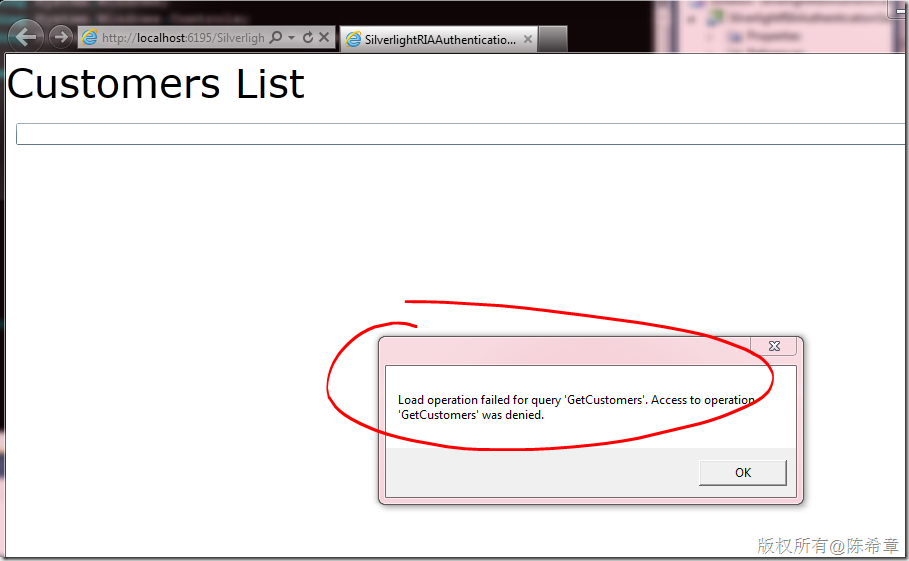
然后,按下F5,重新运行一下Silverlight程序,不出意外的话,我们会看到下面一个错误
如果想要看到错误消息,可以对代码稍作修改
using System.Windows;
using System.Windows.Controls;
using SilverlightRIAAuthenticationSample.Web;

namespace SilverlightRIAAuthenticationSample
{
    public partial class MainPage : UserControl
    {
        public MainPage()
        {
            InitializeComponent();
            Loaded += new RoutedEventHandler(MainPage_Loaded);
        }

        void MainPage_Loaded(object sender, RoutedEventArgs e)
        {
            var ctx = new HomeDomainContext();
            var op = ctx.Load<Customer>(ctx.GetCustomersQuery(), (result) => {
                if(result.HasError)
                {
                    MessageBox.Show(result.Error.Message);
                    result.MarkErrorAsHandled();
                }
            }, true);
            this.DataContext = op.Entities;
        }
    }
}
再次运行的话,就可以看到如下的消息提供
事情很清楚了,因为服务端要求要做身份验证,而客户端没有提供有关的用户信息,所以就报告了如上的错误
7. 如何在客户端中使用身份验证
有很多个做法可以实现客户端的身份验证,通常是用一个窗口让用户输入用户名和密码。
为了简单起见,我先用最简单的方法来实现。我们可以修改App.xaml.cs文件
using System;
using System.ServiceModel.DomainServices.Client.ApplicationServices;
using System.Windows;

namespace SilverlightRIAAuthenticationSample
{
    public partial class App : Application
    {

        public App()
        {
            this.Startup += this.Application_Startup;
            this.Exit += this.Application_Exit;
            this.UnhandledException += this.Application_UnhandledException;

            InitializeComponent();

            //创建一个上下文,这是在RIA Service中的一个对象
            var webcontext = new WebContext();
            webcontext.Authentication = new FormsAuthentication();
            this.ApplicationLifetimeObjects.Add(webcontext);


        }

        private void Application_Startup(object sender, StartupEventArgs e)
        {

            //直接使用硬编码的方式进行登录,注意这里是异步的
            var param = new LoginParameters("chenxizhang", "password");
            WebContext.Current.Authentication.Login(param, (op) =>
            {
                if(op.User != null
                    && op.User.Identity.IsAuthenticated)
                    this.RootVisual = new MainPage();
                else
                {
                    MessageBox.Show("Login fail, please try again. ");
                }
            }, null);
        }

        private void Application_Exit(object sender, EventArgs e)
        {

        }

        private void Application_UnhandledException(object sender, ApplicationUnhandledExceptionEventArgs e)
        {
            // If the app is running outside of the debugger then report the exception using
            // the browser's exception mechanism. On IE this will display it a yellow alert
            // icon in the status bar and Firefox will display a script error.
            if(!System.Diagnostics.Debugger.IsAttached)
            {

                // NOTE: This will allow the application to continue running after an exception has been thrown
                // but not handled.
                // For production applications this error handling should be replaced with something that will
                // report the error to the website and stop the application.
                e.Handled = true;
                Deployment.Current.Dispatcher.BeginInvoke(delegate { ReportErrorToDOM(e); });
            }
        }

        private void ReportErrorToDOM(ApplicationUnhandledExceptionEventArgs e)
        {
            try
            {
                string errorMsg = e.ExceptionObject.Message + e.ExceptionObject.StackTrace;
                errorMsg = errorMsg.Replace('"', '\'').Replace("\r\n", @"\n");

                System.Windows.Browser.HtmlPage.Window.Eval("throw new Error(\"Unhandled Error in Silverlight Application " + errorMsg + "\");");
            }
            catch(Exception)
            {
            }
        }
    }
}
然后,再运行程序,我们就可以看到查询结果了
这就表示,我们已经登录成功了,所有后续代码就生效了。
除了上面那种用代码方式在App类型的构造器实例化身份验证方式之外,还可以通过下面这样修改xaml来实现
【备注】关于ApplicationLifetimeObjects,这是WPF和Silverlight的一个特殊功能,可以将一个对象在整个应用程序生命周期里面都有效,相当于是全局的对象。有兴趣可以参考这里的说明
<Application xmlns="http://schemas.microsoft.com/winfx/2006/xaml/presentation"
             xmlns:x="http://schemas.microsoft.com/winfx/2006/xaml"
             x:Class="SilverlightRIAAuthenticationSample.App"
             xmlns:local="clr-namespace:SilverlightRIAAuthenticationSample"
             xmlns:appsvc="clr-namespace:System.ServiceModel.DomainServices.Client.ApplicationServices;assembly=System.ServiceModel.DomainServices.Client.Web"
             >
    <Application.Resources>

    </Application.Resources>
    <Application.ApplicationLifetimeObjects>
        <local:WebContext>
            <local:WebContext.Authentication>
                <appsvc:FormsAuthentication></appsvc:FormsAuthentication>
            </local:WebContext.Authentication>
        </local:WebContext>
    </Application.ApplicationLifetimeObjects>
</Application>
8. 实现用户登录窗口
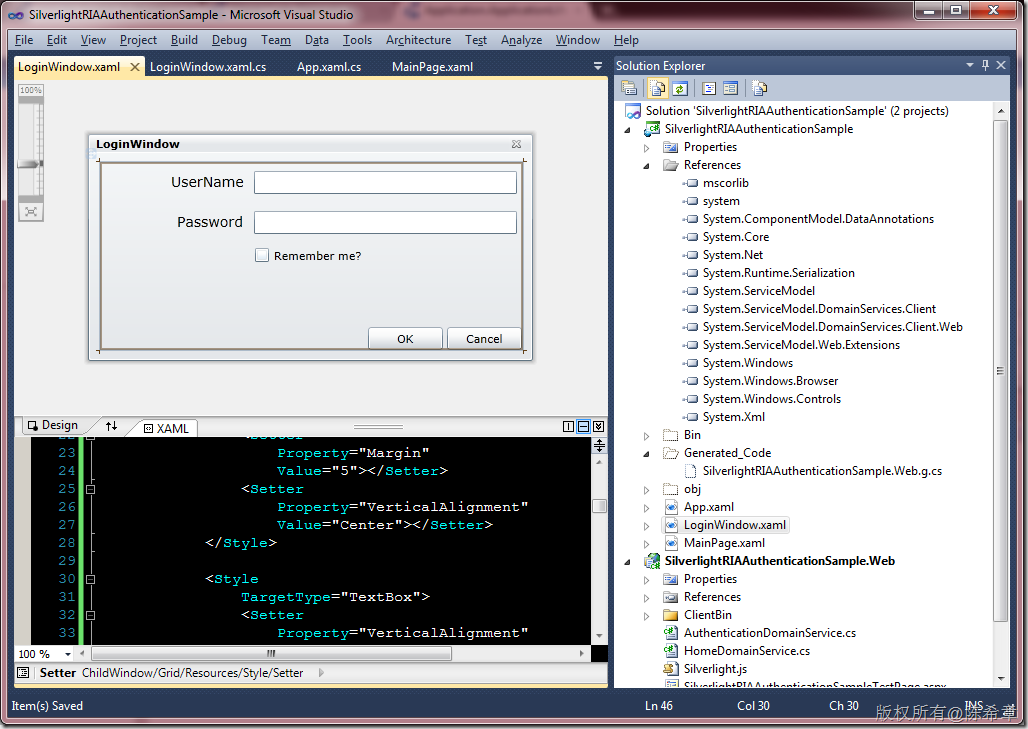
接下来,我们实现一个简单的用户登录窗口吧。假设我们希望任何用户在使用这个程序之前,必须首先要登录
<controls:ChildWindow
    x:Class="SilverlightRIAAuthenticationSample.LoginWindow"
    xmlns="http://schemas.microsoft.com/winfx/2006/xaml/presentation"
    xmlns:x="http://schemas.microsoft.com/winfx/2006/xaml"
    xmlns:controls="clr-namespace:System.Windows.Controls;assembly=System.Windows.Controls"
    Width="445"
    Height="227"
    Title="LoginWindow">
    <Grid
        x:Name="LayoutRoot"
        Margin="2">

        <Grid.Resources>
            <Style
                TargetType="TextBlock">
                <Setter
                    Property="FontSize"
                    Value="14"></Setter>
                <Setter
                    Property="HorizontalAlignment"
                    Value="Right"></Setter>
                <Setter
                    Property="Margin"
                    Value="5"></Setter>
                <Setter
                    Property="VerticalAlignment"
                    Value="Center"></Setter>
            </Style>

            <Style
                TargetType="TextBox">
                <Setter
                    Property="VerticalAlignment"
                    Value="Center"></Setter>
                <Setter
                    Property="Margin"
                    Value="5"></Setter>
                <Setter
                    Property="Height"
                    Value="23"></Setter>
            </Style>
            <Style
                TargetType="CheckBox">
                <Setter
                    Property="Margin"
                    Value="5"></Setter>
            </Style>
        </Grid.Resources>

        <Grid.ColumnDefinitions>
            <ColumnDefinition
                Width="150*" />
            <ColumnDefinition
                Width="273*" />
        </Grid.ColumnDefinitions>
        <Grid.RowDefinitions>
            <RowDefinition
                Height="40" />
            <RowDefinition
                Height="40" />
            <RowDefinition
                Height="*" />
            <RowDefinition
                Height="Auto" />
        </Grid.RowDefinitions>

        <TextBlock
            Text="UserName"></TextBlock>
        <TextBlock
            Text="Password"
            Grid.Row="1"></TextBlock>

        <TextBox
            Grid.Column="1"
            x:Name="txtUserName"></TextBox>

        <TextBox
            Grid.Row="1"
            Grid.Column="1"
            x:Name="txtPassword"></TextBox>

        <CheckBox
            Grid.Row="2"
            Grid.Column="1"
            Content="Remember me?"
            x:Name="chkRemember"></CheckBox>


        <Button
            x:Name="CancelButton"
            Content="Cancel"
            Click="CancelButton_Click"
            Width="75"
            Height="23"
            HorizontalAlignment="Right"
            Margin="0,12,0,0"
            Grid.Row="3"
            Grid.Column="1" />
        <Button
            x:Name="OKButton"
            Content="OK"
            Click="OKButton_Click"
            Width="75"
            Height="23"
            HorizontalAlignment="Right"
            Margin="0,12,79,0"
            Grid.Row="3"
            Grid.Column="1" />
    </Grid>
</controls:ChildWindow>
后台代码如下
using System.ServiceModel.DomainServices.Client.ApplicationServices;
using System.Windows;
using System.Windows.Controls;

namespace SilverlightRIAAuthenticationSample
{
    public partial class LoginWindow : ChildWindow
    {
        public LoginWindow()
        {
            InitializeComponent();
        }

        private void OKButton_Click(object sender, RoutedEventArgs e)
        {

            //直接使用硬编码的方式进行登录,注意这里是异步的
            var param = new LoginParameters(txtUserName.Text,txtPassword.Text);
            WebContext.Current.Authentication.Login(param, (op) =>
            {
                if(op.User != null
                    && op.User.Identity.IsAuthenticated)
                {
                    (App.Current.RootVisual as ContentControl).Content = new MainPage();
                    this.DialogResult = true;
                }
                else
                {
                    MessageBox.Show("Login fail, please try again. ");
                    this.DialogResult = null;
                }
            }, null);


        }

        private void CancelButton_Click(object sender, RoutedEventArgs e)
        {
            this.DialogResult = false;
        }
    }
}
接下来,我们需要对App.xaml.cs做点修改
using System;
using System.ServiceModel.DomainServices.Client.ApplicationServices;
using System.Windows;
using System.Windows.Controls;

namespace SilverlightRIAAuthenticationSample
{
    public partial class App : Application
    {

        public App()
        {
            this.Startup += this.Application_Startup;
            this.Exit += this.Application_Exit;
            this.UnhandledException += this.Application_UnhandledException;

            InitializeComponent();

        }

        private void Application_Startup(object sender, StartupEventArgs e)
        {

            //使用用户登录对话框进行登录
            var content = new ContentControl()
            {
                VerticalContentAlignment = System.Windows.VerticalAlignment.Stretch,
                HorizontalContentAlignment = System.Windows.HorizontalAlignment.Stretch
            };

            content.Content = new TextBlock()
            {
                Text = "Please login first",
                FontSize = 50
            };
            this.RootVisual = content;

            var form = new LoginWindow();
            form.Show();


        }

        private void Application_Exit(object sender, EventArgs e)
        {

        }

        private void Application_UnhandledException(object sender, ApplicationUnhandledExceptionEventArgs e)
        {
            // If the app is running outside of the debugger then report the exception using
            // the browser's exception mechanism. On IE this will display it a yellow alert
            // icon in the status bar and Firefox will display a script error.
            if(!System.Diagnostics.Debugger.IsAttached)
            {

                // NOTE: This will allow the application to continue running after an exception has been thrown
                // but not handled.
                // For production applications this error handling should be replaced with something that will
                // report the error to the website and stop the application.
                e.Handled = true;
                Deployment.Current.Dispatcher.BeginInvoke(delegate { ReportErrorToDOM(e); });
            }
        }

        private void ReportErrorToDOM(ApplicationUnhandledExceptionEventArgs e)
        {
            try
            {
                string errorMsg = e.ExceptionObject.Message + e.ExceptionObject.StackTrace;
                errorMsg = errorMsg.Replace('"', '\'').Replace("\r\n", @"\n");

                System.Windows.Browser.HtmlPage.Window.Eval("throw new Error(\"Unhandled Error in Silverlight Application " + errorMsg + "\");");
            }
            catch(Exception)
            {
            }
        }
    }
}
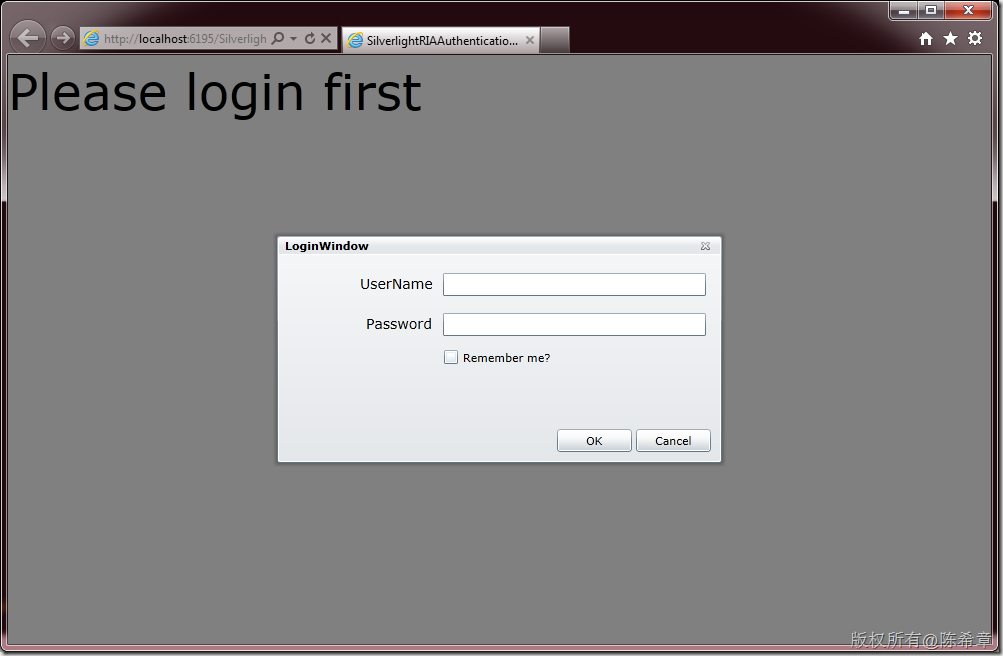
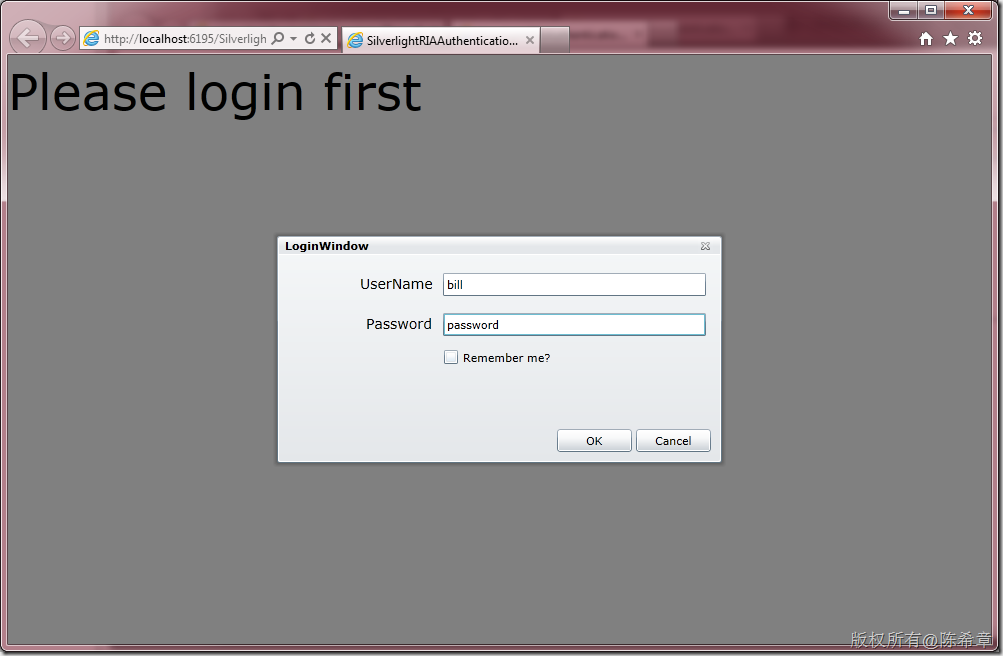
这两段代码的意思是,先启动LoginWindow,然后根据用户输入的信息进行登录,成功的话,就显示主窗口,调试起来看的效果如下
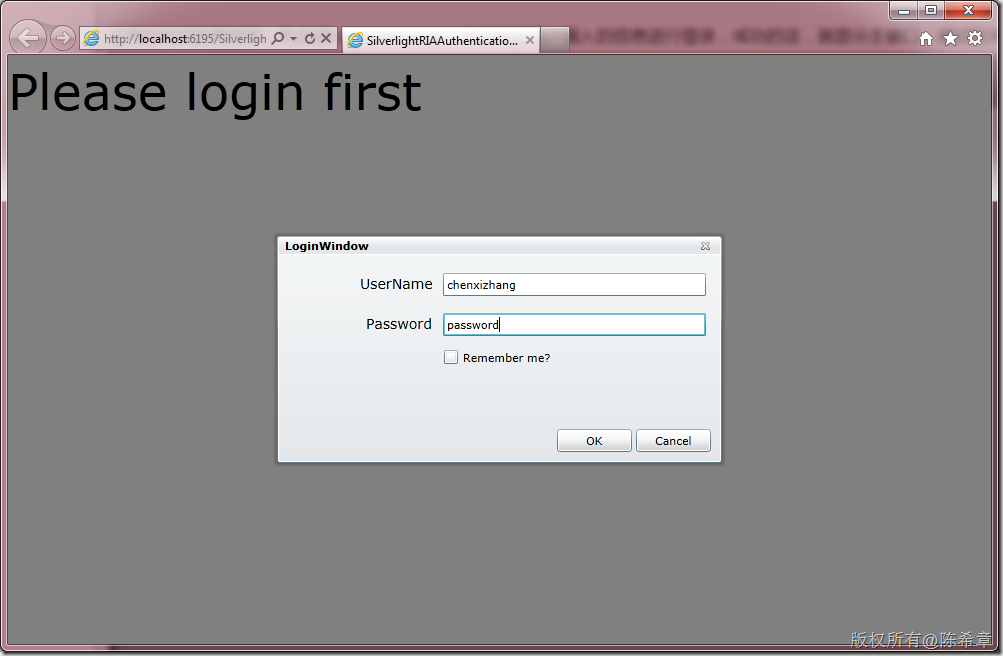
输入用户名和密码,例如
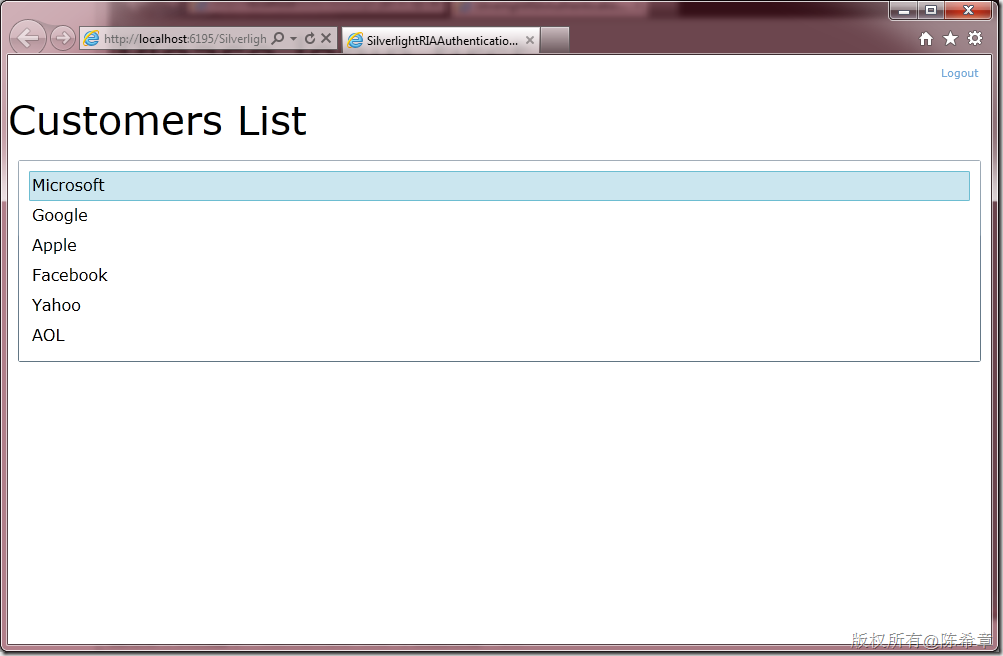
然后点击“Ok”,因为我提供的用户是合法的,所以会显示MainPage
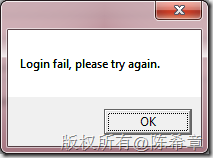
如果我提供的用户信息不合法呢?
一点都不意外,我们将收到一个提示
9.实现用户自动登录
假设我们希望这个程序能够实现用户的自动登录,也就是说不要每次都输入用户名和密码,该怎么办呢?
        private void Application_Startup(object sender, StartupEventArgs e)
        {
            ///用LoadUser方法可以自动将保存在本地的用户凭据去做身份验证
            WebContext.Current.Authentication.LoadUser((result) => {

                if(result.User != null && result.User.Identity.IsAuthenticated)
                {//如果成功的话,就直接显示MainPage
                    this.RootVisual = new MainPage();
                }
                else
                {
                    //使用用户登录对话框进行登录
                    var content = new ContentControl()
                    {
                        VerticalContentAlignment = System.Windows.VerticalAlignment.Stretch,
                        HorizontalContentAlignment = System.Windows.HorizontalAlignment.Stretch
                    };

                    content.Content = new TextBlock()
                    {
                        Text = "Please login first",
                        FontSize = 50
                    };
                    this.RootVisual = content;

                    var form = new LoginWindow();
                    form.Show();

                }
            }, null);
        }
同时,我们还需要修改LoginWindow,让他可以保存用户凭据(你是否记得我们在那个窗口上有一个复选框呢?),请注意下面红色的部分
       private void OKButton_Click(object sender, RoutedEventArgs e)
        {

            //直接使用硬编码的方式进行登录,注意这里是异步的
            var param = new LoginParameters(
                txtUserName.Text,
                txtPassword.Text,
                (bool)chkRemember.IsChecked,
                string.Empty);

            WebContext.Current.Authentication.Login(param, (op) =>
            {
                if(op.User != null
                    && op.User.Identity.IsAuthenticated)
                {
                    (App.Current.RootVisual as ContentControl).Content = new MainPage();
                    this.DialogResult = true;
                }
                else
                {
                    MessageBox.Show("Login fail, please try again. ");
                    this.DialogResult = null;
                }
            }, null);


        }
这样修改完之后,重新运行项目,第一次的时候,因为本地没有保存凭据,所以我们会被要求进行登录
请注意,我们选中“Remember me”,然后点击“Ok”
然后,我们可以关掉浏览器,重新启动程序。因为之前保存了用户凭据,所以你将直接可以看到MainPage,而无需登录
很不错,对吧?最后遗留了一个问题,就是如果我想用其他用户登录的话,怎么办呢?我肯定希望将原先保存好的用户凭据删除掉。如何实现这样的功能呢?
10. 实现用户注销
            <HyperlinkButton
                Content="Logout"
                HorizontalAlignment="Right" Margin="10" x:Name="btLogout" Click="btLogout_Click"></HyperlinkButton>

                <TextBlock
                Text="Customers List"
                FontSize="40"></TextBlock>
为了实现注销,我们一般在主窗口上面,添加一个HyperLinkButton,如上所示。它的代码也很简单
        private void btLogout_Click(object sender, RoutedEventArgs e)
        {
            WebContext.Current.Authentication.Logout(true);
        }
11.总结
本文,我用一个实例讲解了如何在RIA Service中启用身份验证。这是很实用的技术,我们使用到了Authentication Domain Service,和自定义的MembershipProvider,在客户端我们还实现了登录窗口以及自动登录。
本文实例源代码,可以通过下面地址下载
https://files.cnblogs.com/chenxizhang/SilverlightRIAAuthenticationSample.rar
