要让摄像头工作,还需要重新编译和安装OpenCV组件,因为Nvidia Jetpack自带安装了一个名为OpenCV4Tegra的OpenCV的特殊闭源版本,该版本针对Jetson进行了优化,并且比开源版本略快。虽然OpenCV4Tegra运行速度比普通OpenCV 2好,但其版本都不支持视频捕获gstreamer,因此我们无法轻松从中获取视频。
您可以使用正确的选项从源代码编译OpenCV3.x支持视频抓取。
我们将使用自编译的OpenCV 3替换OpenCV4Tegra。
推荐使用自动安装脚本,包括所有删除,安装基础框架,下载,编译,导入python的所有内容。
4.1.1
https://github.com/AastaNV/JEP/blob/master/script/install_opencv4.1.1_Jetson.sh
#!/bin/bash
#
# Copyright (c) 2018, NVIDIA CORPORATION.  All rights reserved.
#
# NVIDIA Corporation and its licensors retain all intellectual property
# and proprietary rights in and to this software, related documentation
# and any modifications thereto.  Any use, reproduction, disclosure or
# distribution of this software and related documentation without an express
# license agreement from NVIDIA Corporation is strictly prohibited.
#


folder=${HOME}/src
user="nvidia"
passwd="nvidia"

echo "** Remove other OpenCV first"
sudo apt-get purge *libopencv*

echo "** Install requirement"
#sudo apt-get update
sudo apt-get install -y build-essential cmake git libgtk2.0-dev pkg-config libavcodec-dev libavformat-dev libswscale-dev
sudo apt-get install -y libgstreamer1.0-dev libgstreamer-plugins-base1.0-dev
sudo apt-get install -y python2.7-dev python3.6-dev python-dev python-numpy python3-numpy
sudo apt-get install -y libtbb2 libtbb-dev libjpeg-dev libpng-dev libtiff-dev libdc1394-22-dev
sudo apt-get install -y libv4l-dev v4l-utils qv4l2 v4l2ucp
sudo apt-get install -y curl
sudo apt-get update

echo "** Download opencv-4.1.1"
cd $folder
curl -L https://github.com/opencv/opencv/archive/4.1.1.zip -o opencv-4.1.1.zip
curl -L https://github.com/opencv/opencv_contrib/archive/4.1.1.zip -o opencv_contrib-4.1.1.zip
unzip opencv-4.1.1.zip
unzip opencv_contrib-4.1.1.zip
cd opencv-4.1.1/

echo "** Apply patch"
sed -i 's/include <Eigen/Core>/include <eigen3/Eigen/Core>/g' modules/core/include/opencv2/core/private.hpp

echo "** Building..."
mkdir release
cd release/
cmake -D WITH_CUDA=ON -D CUDA_ARCH_BIN="5.3,6.2,7.2" -D CUDA_ARCH_PTX="" -D OPENCV_EXTRA_MODULES_PATH=../../opencv_contrib-4.1.1/modules -D WITH_GSTREAMER=ON -D WITH_LIBV4L=ON -D BUILD_opencv_python2=ON -D BUILD_opencv_python3=ON -D BUILD_TESTS=OFF -D BUILD_PERF_TESTS=OFF -D BUILD_EXAMPLES=OFF -D CMAKE_BUILD_TYPE=RELEASE -D CMAKE_INSTALL_PREFIX=/usr/local ..
make -j3
sudo make install
echo 'export PYTHONPATH=$PYTHONPATH:'$PWD'/python_loader/' >> ~/.bashrc
source ~/.bashrc

echo "** Install opencv-4.1.1 successfully"
echo "** Bye :)"
3.x
https://github.com/jkjung-avt/jetson_nano
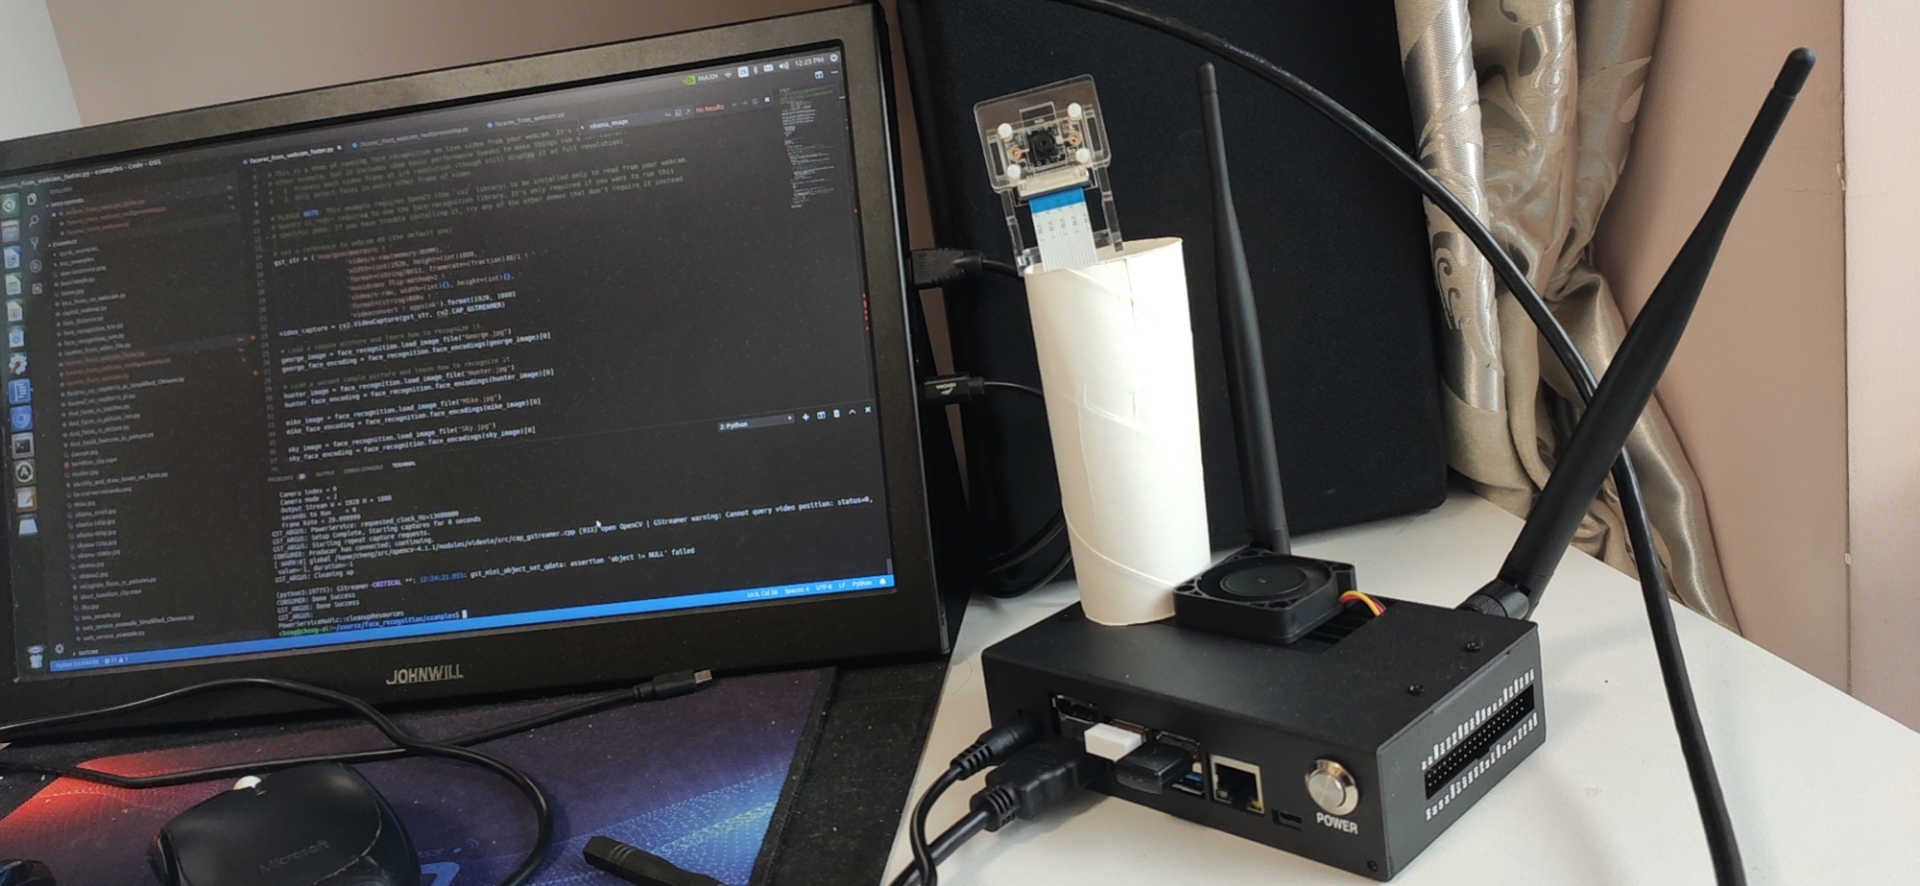
人脸识别的代码如下,可以用vscode打开代码,然后直接运行example中的例子。
https://github.com/ageitgey/face_recognition
如果要实时识别人脸,可以参考代码:
examples/facerec_from_webcam_faster.py
获取摄像头是代码可能需要修改,这个主要取决于你使用什么样的摄像头类型。比如下面地方修改:
我以后会在github上新建一个项目来特别处理不同的摄像头问题。
# Get a reference to webcam #0 (the default one)
gst_str = ('nvarguscamerasrc ! '
                   'video/x-raw(memory:NVMM), '
                   'width=(int)1920, height=(int)1080, '
                   'format=(string)NV12, framerate=(fraction)30/1 ! '
                   'nvvidconv flip-method=2 ! '
                   'video/x-raw, width=(int){}, height=(int){}, '
                   'format=(string)BGRx ! '
                   'videoconvert ! appsink').format(1920, 1080)
video_capture = cv2.VideoCapture(gst_str, cv2.CAP_GSTREAMER)
用一个卫生纸的卷纸芯就可以把摄像头稳定的立起来。