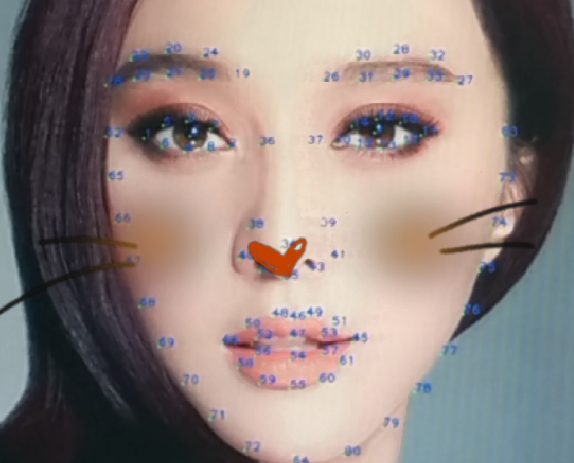
1. 问题
在进行 OpenGL 纹理混合的过程中,遇到一个诡异的现象,两个纹理混合的效果出人所料: 将一个ALPHA渐变的【胡须】加在另一张图片上,这个 【胡须】是由外向里逐渐增加透明度的,也就是最外围的透明度为0,而中心的透明度接近 1,也就是完全不透明,实心。那么预期的效果希望是在底图上加一个朦胧的效果,然而实际得到的效果很让人意外,出现一片淡淡的黑色!(如下图中的胡须旁边的黑色。)

2. 原因
shader:
vec4 main_color = texture(rgbTexture, v_TexCoord);
vec4 huxu_color = texture(huxu_texture, v_TexCoord);
vec4 color_out = mix(main_color, huxu_color, huxu_color.a);
因为【胡须】图片是带有透明度,根据其透明度与原图进行混合,理应能够得到我们想要的结果。在 debug 过程中我尝试不进行混合,直接将【胡须】绘制在图片上,发现【胡须】还是有渐变效果,发现:
【胡须】的 RGB 数据和原始图片的 RGB 不同 此处存在 pre-multiplying.
pre-multiplying:Android 平台在加载一张位图的时候,会自动做一个操作,将 RGB 的值乘上 alpha 值,重新保存。用公式表示如下:
If you use OpenGL ES 2.0, pre-multiplying the output of your fragment shader is extremely simple:
color.rgb *= color.a
回头再看我的混合的方式,在 RGB 数据已经被做过一次 pre-multiplying 的情况下,再乘一个 alpha: RGB_new = RGB * alpha * alpha 然后再和底图的颜色加起来,自然就出错了。比如在白色的透明度为0.5的地方,原来的 RGB 为255,这种奇怪的算法得到的结果就是 63.75,接近黑色。这就是出现黑色的原因。
3. 解决方案
解决思路有2个
不做 pre-multiplying
混合時考虑到前面的情况,不再乘上 alpha
第一种方案:
android 加载方法:加载图片时 设置 BitmapFactory.Options.inPremultiplied = false;
inPremultiplied
added in API level 19
boolean inPremultiplied

If true (which is the default), the resulting bitmap will have its color channels pre-multipled by the alpha channel.
This should NOT be set to false for images to be directly drawn by the view system or through a Canvas. The view system and Canvas assume all drawn images are pre-multiplied to simplify draw-time blending, and will throw a RuntimeException when un-premultiplied are drawn.
This is likely only useful if you want to manipulate raw encoded image data, e.g. with RenderScript or custom OpenGL.
This does not affect bitmaps without an alpha channel.
Setting this flag to false while setting inScaled to true may result in incorrect colors.


See also:
hasAlpha()
isPremultiplied()
inScaled
IOS 上木有这种接口。
第二种方案:
vec4 main_color = texture(rgbTexture, v_TexCoord);
vec4 huxu_color = texture(huxu_texture, v_TexCoord);
vec4 color_out = main_color * (1.0 - huxu_color.a) + huxu_color;
和原来的相比,用OpenGL 的表述方式,原来做法是:(SRC_ALPHA, ONE_MINUS_SRC_ALPHA) 考虑pre-multiplying的话:(ONE, ONE_MINUS_SRC_ALPHA)
参考资料: