原文地址:Getting Started with Headless Chrome By Eric Bidelman Engineer @ Google working on web tooling: Headless Chrome, Puppeteer, Lighthouse
Headless Chrome在Chrome59中发布,用于在headless环境中运行Chrome浏览器,也就是在非Chrome环境中运行Chrome。它将Chromium和Blink渲染引擎提供的所有现代Web平台功能引入命令行。
它有什么用处呢?
headless浏览器是自动测试和服务器环境的绝佳工具,您不需要可见的UI shell。例如,针对真实的网页进行测试,创建网页的PDF,或者只是检查浏览器如何呈现URL。
0. 开始
最简单的开始使用headless模式的方法是从命令行打开Chrome。如果你已经安装了Chrome59+的版本,可以使用 --headless 标签:
chrome
  --headless                    # 在headless模式运行Chrome
  --disable-gpu                 # 在Windows上运行时需要--remote-debugging-port=9222
  https://www.chromestatus.com   # 打开URL. 默认为about:blank
注意:若在Windows中运行,则需要在命令行添加 --disable-gpu 。
chrome 命令需要指向Chrome的安装路径。(即在Chrome的安装路径下运行)
1. 命令行功能
在某些情况下,您可能不需要以编程方式编写Headless Chrome脚本。下面是一些有用的命令行标志来执行常见任务。
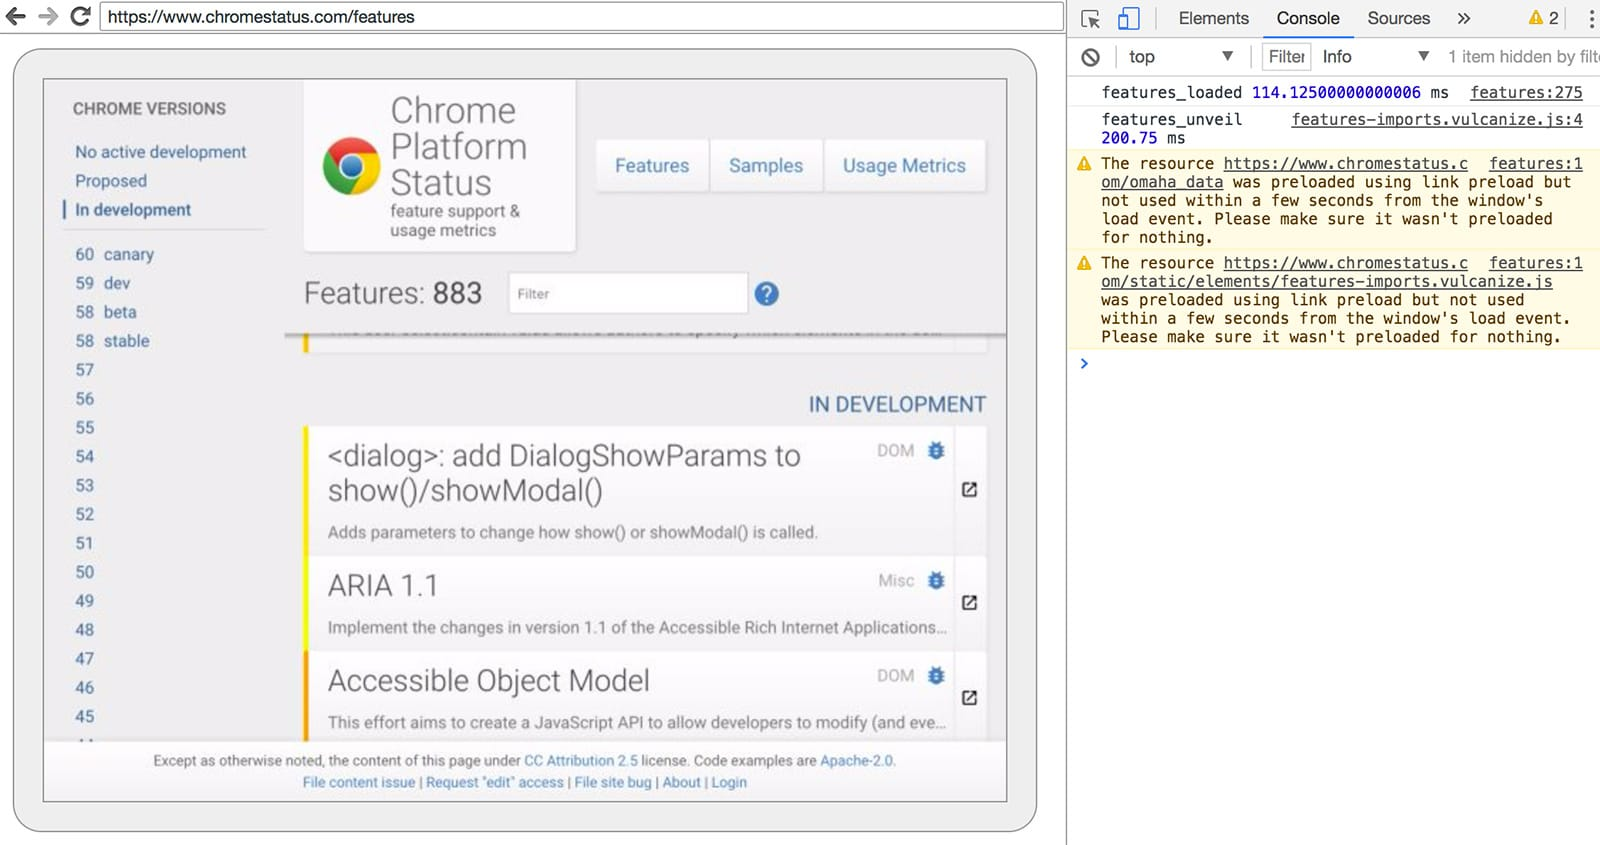
1.1 打印DOM --dump-dom
将 document.body.innerHTML 在stdout打印出来:
chrome --headless --disable-gpu --dump-dom https://www.chromestatus.com/
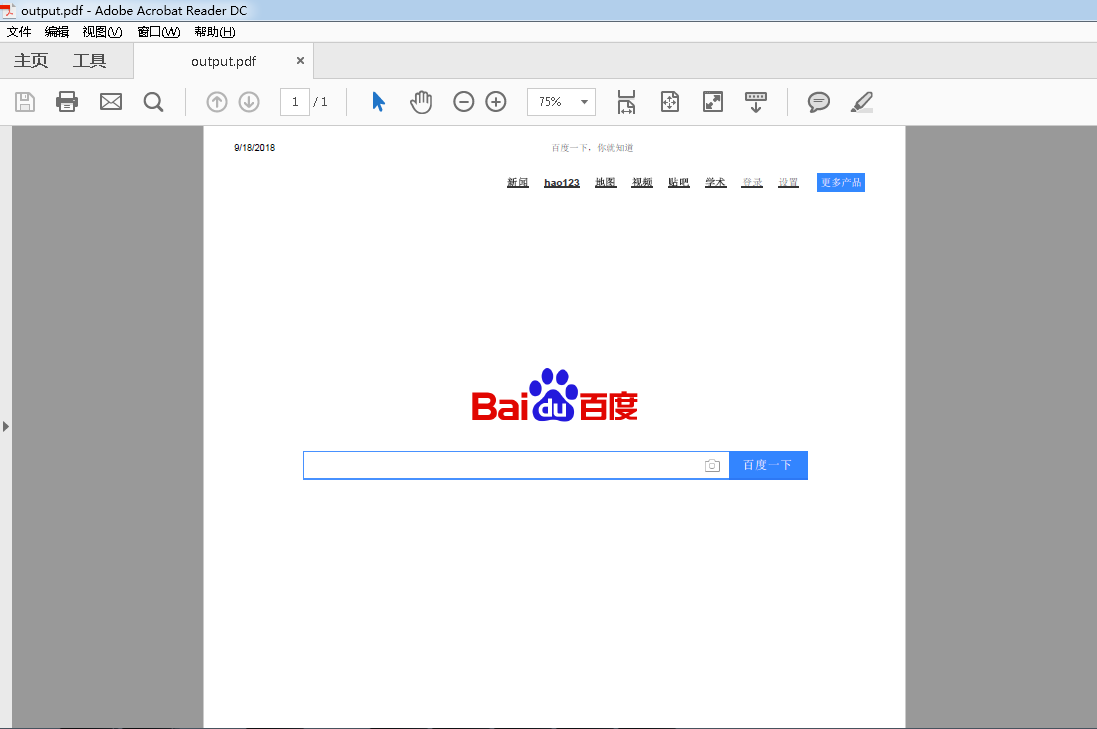
1.2 创建PDF --print-to-pdf :
chrome --headless --disable-gpu --print-to-pdf https://www.chromestatus.com/
演示:在chrome安装目录下运行 chrome --headless --disable-gpu --print-to-pdf https://www.baidu.com/

生成PDF文件:C:Program Files (x86)GoogleChromeApplication69.0.3497.81output.pdf
1.3 截屏 --screenshot
chrome --headless --disable-gpu --screenshot https://www.chromestatus.com/

# 标准屏幕大小
chrome --headless --disable-gpu --screenshot --window-size=1280,1696 https://www.chromestatus.com/

# Nexus 5x
chrome --headless --disable-gpu --screenshot --window-size=412,732 https://www.chromestatus.com/
运行 --screenshot将会在当前运行目录下生成一个 screenshot.png 文件。若想给整个页面的截图,那么会比较复杂。来自 David Schnurr 的一篇很棒的博文介绍了这一内容。请查看 使用 headless Chrome 作为自动截屏工具。
1.4 REPL模式(read-eval-print loop) --repl
在REPL模式运行Headless,该模式允许通过命令行在浏览器中评估JS表达式:
$ chrome --headless --disable-gpu --repl --crash-dumps-dir=./tmp https://www.chromestatus.com/
[0608/112805.245285:INFO:headless_shell.cc(278)] Type a Javascript expression to evaluate or "quit" to exit.
>>> location.href
{"result":{"type":"string","value":"https://www.chromestatus.com/features"}}
>>> quit
$
注意:使用repl模式时需要添加 --crash-dumps-dir 命令。
2. 在没有浏览器界面情况下调试Chrome
当使用 --remote-debugging-port=9222 运行Chrome时,会启用DevTools协议的实例。该协议用于与Chrome通信并且驱动headless浏览器实例。除此之外,它还是一个类似于 Sublime, VS Code, 和Node的工具,可用于远程调试一个应用。
由于没有浏览器UI来查看页面,因此需要在另一个浏览器中导航到http:// localhost:9222以检查一切是否正常。这将看到一个可查看页面的列表,可以在其中单击并查看Headless正在呈现的内容:
DevTools远程调试界面
在这里,你可以使用熟悉的DecTools功能来查看、调试、修改页面。若以编程方式(programmatically)使用Headless,该页面的功能更强大,可以用于查看所有的DecTools协议的命令,并与浏览器进行通信。
3. 使用编程模式(Node)
3.1 Puppeteer
Puppeteer 由Chrome团队开发的Node库。它提供了控制headless Chrome的高阶API。类似于 Phantom 和 NightmareJS这样的自动测试库,但它只用于最新版本的Chrome。
除此之外,Puppeteer还可用于截屏,创建PDF,页面导航,以及获取有关这些页面的信息。如果需要快速进行浏览器的自动化测试,建议使用该库。它隐藏了DevTools协议的复杂性,并负责启动Chrome的调试实例等冗余任务。
安装:
npm i --save puppeteer
例子-打印用户代理信息:
const puppeteer = require('puppeteer');

(async() => {
  const browser = await puppeteer.launch();
  console.log(await browser.version());
  await browser.close();
})();
例子-截屏
const puppeteer = require('puppeteer');

(async() => {
const browser = await puppeteer.launch();
const page = await browser.newPage();
await page.goto('https://www.chromestatus.com', {waitUntil: 'networkidle2'});
await page.pdf({path: 'page.pdf', format: 'A4'});

await browser.close();
})();
查看 Puppeteer's 文档 学习Puppeteer的更多用法。
3.2 CRI库
相对于Puppeteer's API来说,chrome-remote-interface 是一个低阶的库,推荐使用它更接近底层地直接使用DevTools协议。
打开Chrome
chrome-remote-interface不能打开Chrome,因此需要自己打开Chrome。
在CLI部分,我们使用--headless --remote-debugging-port = 9222手动打开Chrome。但是,要实现完全自动化测试,您可能希望从应用程序中生成Chrome。
使用 child——process 的一种方式:
const execFile = require('child_process').execFile;

function launchHeadlessChrome(url, callback) {
  // Assuming MacOSx.
  const CHROME = '/Applications/Google Chrome.app/Contents/MacOS/Google Chrome';
  execFile(CHROME, ['--headless', '--disable-gpu', '--remote-debugging-port=9222', url], callback);
}

launchHeadlessChrome('https://www.chromestatus.com', (err, stdout, stderr) => {
  ...
});
但是如果你想要一个适用于多个平台的可移植解决方案,那么事情会变得棘手。看看Chrome的硬编码路径吧:(
使用ChromeLaucher
Lighthouse 是测试web应用质量绝佳工具。用于启动Chrome的强大的模块就是在Lighthouse中开发的,现在可以单独使用。 chrome-launcher NPM module 可以找到Chrome的安装路径,设置调试实例,打开浏览器,并且当程序运行完成时关掉它。最棒的是,由于Node,它可以跨平台工作!
默认情况下,chrome-launcher会尝试启动Chrome Canary(如果已安装),但可以更改它以手动选择要使用的Chrome。要使用它,首先从npm安装:
npm i --save chrome-launcher
例子-使用 chrome-launcher 启动Headless模式
const chromeLauncher = require('chrome-launcher');

// 可选: 设置launcher的日志记录级别以查看其输出
// 安装:: npm i --save lighthouse-logger
// const log = require('lighthouse-logger');
// log.setLevel('info');

/**
 * 启动Chrome的调试实例
 * @param {boolean=} headless True (default) 启动headless模式的Chrome.
 *     False 启动Chrome的完成版本.
 * @return {Promise<ChromeLauncher>}
 */
function launchChrome(headless=true) {
  return chromeLauncher.launch({
    // port: 9222, // Uncomment to force a specific port of your choice.
    chromeFlags: [
      '--window-size=412,732',
      '--disable-gpu',
      headless ? '--headless' : ''
    ]
  });
}

launchChrome().then(chrome => {
  console.log(`Chrome debuggable on port: ${chrome.port}`);
  ...
  // chrome.kill();
});
运行此脚本并没有太大作用,但在任务管理器中应该可以看到Chrome实例已启动,内容为 about:blank 。但是没有浏览器界面。因为是headless模式。
要控制浏览器,我们需要DevTools协议!
检索有关页面的信息
安装:
npm i --save chrome-remote-interface
例子-打印用户代理
const CDP = require('chrome-remote-interface');

...

launchChrome().then(async chrome => {
  const version = await CDP.Version({port: chrome.port});
  console.log(version['User-Agent']);
});
结果类似于: HeadlessChrome/60.0.3082.0
例子-检查网站是否有应用列表
const CDP = require('chrome-remote-interface');

...

(async function() {

const chrome = await launchChrome();
const protocol = await CDP({port: chrome.port});

// Extract the DevTools protocol domains we need and enable them.
// See API docs: https://chromedevtools.github.io/devtools-protocol/
const {Page} = protocol;
await Page.enable();

Page.navigate({url: 'https://www.chromestatus.com/'});

// Wait for window.onload before doing stuff.
Page.loadEventFired(async () => {
  const manifest = await Page.getAppManifest();

  if (manifest.url) {
    console.log('Manifest: ' + manifest.url);
    console.log(manifest.data);
  } else {
    console.log('Site has no app manifest');
  }

  protocol.close();
  chrome.kill(); // Kill Chrome.
});

})();
例子-使用DOM API提取页面的<title>
const CDP = require('chrome-remote-interface');

...

(async function() {

const chrome = await launchChrome();
const protocol = await CDP({port: chrome.port});

// Extract the DevTools protocol domains we need and enable them.
// See API docs: https://chromedevtools.github.io/devtools-protocol/
const {Page, Runtime} = protocol;
await Promise.all([Page.enable(), Runtime.enable()]);

Page.navigate({url: 'https://www.chromestatus.com/'});

// Wait for window.onload before doing stuff.
Page.loadEventFired(async () => {
  const js = "document.querySelector('title').textContent";
  // Evaluate the JS expression in the page.
  const result = await Runtime.evaluate({expression: js});

  console.log('Title of page: ' + result.result.value);

  protocol.close();
  chrome.kill(); // Kill Chrome.
});

})();
4. 使用Selenium,WebDriver和ChromeDriver
现在,Selenium打开了一个完整地Chrome的实例,也就是说,换句话说,它是一种自动化解决方案,但并非完全headless。但是,Selenium可以通过一些配置来运行headless Chrome。我建议使用headless Chrome运行Selenium,若你还是想要如何自己设置的完整说明,我已经在下面的一些例子中展示了如何让你放弃。
使用ChromeDriver
ChromeDriver 2.32使用了Chrome61,并且在headless Chrome运行的更好。
安装:
npm i --save-dev selenium-webdriver chromedriver
例子
const fs = require('fs');
const webdriver = require('selenium-webdriver');
const chromedriver = require('chromedriver');

const chromeCapabilities = webdriver.Capabilities.chrome();
chromeCapabilities.set('chromeOptions', {args: ['--headless']});

const driver = new webdriver.Builder()
  .forBrowser('chrome')
  .withCapabilities(chromeCapabilities)
  .build();

// Navigate to google.com, enter a search.
driver.get('https://www.google.com/');
driver.findElement({name: 'q'}).sendKeys('webdriver');
driver.findElement({name: 'btnG'}).click();
driver.wait(webdriver.until.titleIs('webdriver - Google Search'), 1000);

// Take screenshot of results page. Save to disk.
driver.takeScreenshot().then(base64png => {
  fs.writeFileSync('screenshot.png', new Buffer(base64png, 'base64'));
});

driver.quit();
使用WebDriverIO
WebDriverIO 是Selenium WebDriver之上的更高阶的API。
安装:
npm i --save-dev webdriverio chromedriver
例子-chromestatus.com上的CSS filter功能
const webdriverio = require('webdriverio');
const chromedriver = require('chromedriver');

const PORT = 9515;

chromedriver.start([
  '--url-base=wd/hub',
  `--port=${PORT}`,
  '--verbose'
]);

(async () => {

const opts = {
  port: PORT,
  desiredCapabilities: {
    browserName: 'chrome',
    chromeOptions: {args: ['--headless']}
  }
};

const browser = webdriverio.remote(opts).init();

await browser.url('https://www.chromestatus.com/features');

const title = await browser.getTitle();
console.log(`Title: ${title}`);

await browser.waitForText('.num-features', 3000);
let numFeatures = await browser.getText('.num-features');
console.log(`Chrome has ${numFeatures} total features`);

await browser.setValue('input[type="search"]', 'CSS');
console.log('Filtering features...');
await browser.pause(1000);

numFeatures = await browser.getText('.num-features');
console.log(`Chrome has ${numFeatures} CSS features`);

const buffer = await browser.saveScreenshot('screenshot.png');
console.log('Saved screenshot...');

chromedriver.stop();
browser.end();

})();
5. 更多资源
以下是一些有用的资源,可帮助您入门:
文档:
- DevTools Protocol Viewer - API参考文档
工具:
- chrome-remote-interface - 包装DevTools协议的节点模块
- Lighthouse - 用于测试Web应用质量的自动化工具;大量使用协议
- chrome-launcher - 节点模块,用于启动Chrome,为自动化做好准备
演示:
- "The Headless Web" - Paul Kinlan关于使用Headless和api.ai的博客文章
6. FAQ
6.1 是否需要 --disable-gpu 命令?
仅Windows平台需要。其他平台不需要。--disable-gpu命令是一个临时解决一些错误的方案。在将来的Chrome版本中,不再需要此命令。有关更多信息,请参阅 crbug.com/737678。
6.2 是否需要 Xvfb?
不需要。Headless Chrome不使用窗口,因此不再需要像Xvfb这样的显示服务器。没有它,也可以愉快地运行自动化测试。
什么是Xvfb?Xvfb是一种用于类Unix系统的内存显示服务器,它使您能够运行图形应用程序(如Chrome)而无需附加物理显示设备。许多人使用Xvfb运行早期版本的Chrome进行“headless”测试。
6.3 如何创建运行Headless Chrome的Docker容器?
看看lighthouse-ci。它有一个示例 Dockerfile ,它使用node:8-slim作为基本映像,在App Engine Flex上安装+ 运行Lighthouse 。
6.4 Headless Chrome与PhantomJS有什么关系?
Headless Chrome与PhantomJS等工具类似。两者都可用于headless环境中的自动化测试。两者之间的主要区别在于Phantom使用较旧版本的WebKit作为其渲染引擎,而Headless Chrome使用最新版本的Blink。
目前,Phantom还提供了比DevTools 协议更高级别的API。
6.5 在哪里提交bugs?
对于Headless Chrome的bugs,请在crbug.com上提交。
对于DevTools协议中的错误,请将它们发送到github.com/ChromeDevTools/devtools-protocol。