1、OAuth2协议中的角色流程概要介绍
OAuth2协议主要使用来认证和授权的,我们先来看一下OAuth2协议中的角色

1.1、用户:真正的人,大家都有可能是某一个服务的用户。
1.2、客户端应用:Web或手机App,直接跟用户打交道的。通过客户端应用发http请求,访问服务。
1.3、认证服务器:作用就是认证,验证用户身份发出令牌。
1.4、资源服务器:在这里代表各个微服务。一个认证服务器可以对应多个资源服务器。
大概的流程是:用户直接访问客户端应用,客户端首先要去认证服务器认证,验证要访问微服务用户的真实性,认证服务器确认用户身份后,会发出一个代表用户身份的令牌给客户端应用,客户端应用就会拿着令牌去访问资源服务器(我们的微服务),资源服务器会去认证服务器验证这个令牌是谁。
2、部分角色准备
2.1、用户,就是我们自己。
2.2、客户端应用:http请求工具,可以是Restlet Client、Postman等。
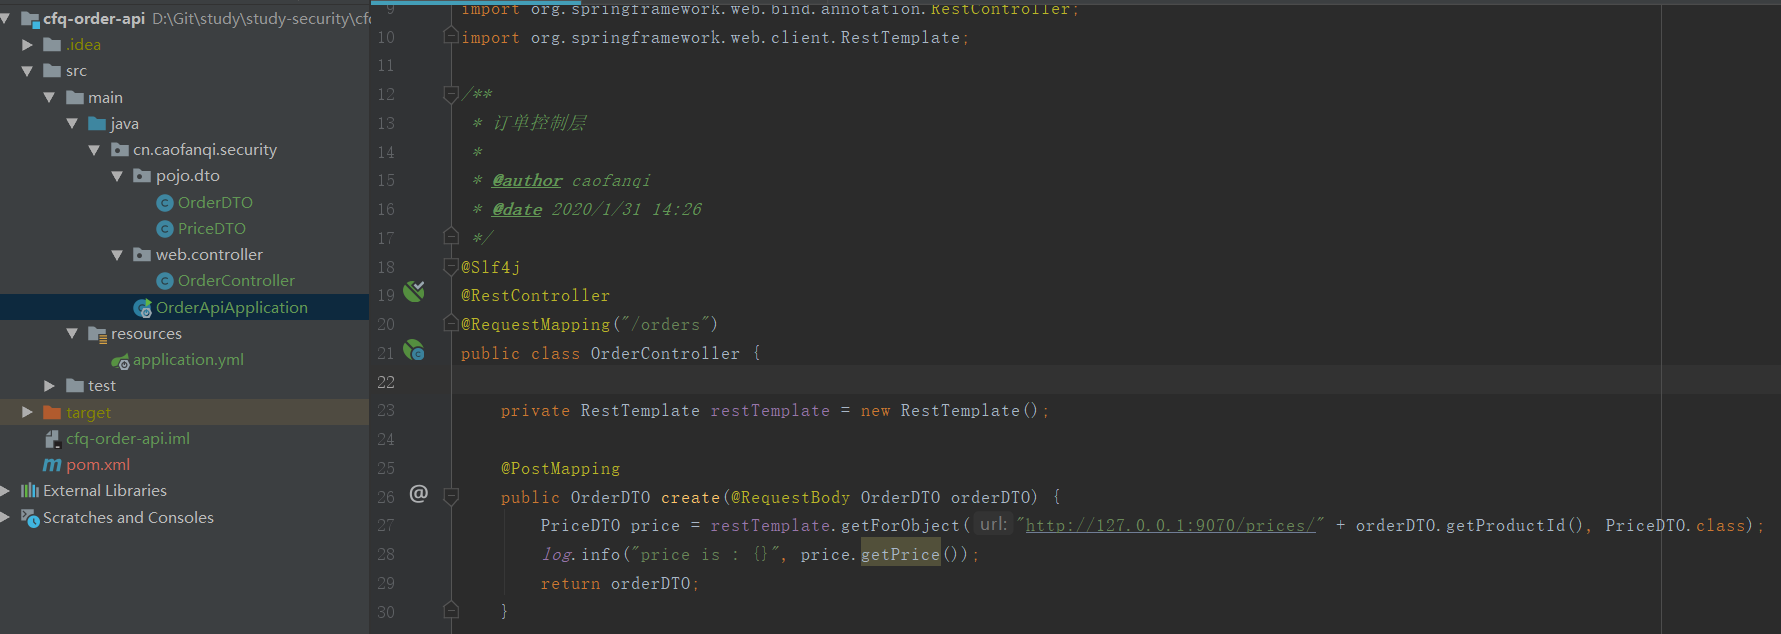
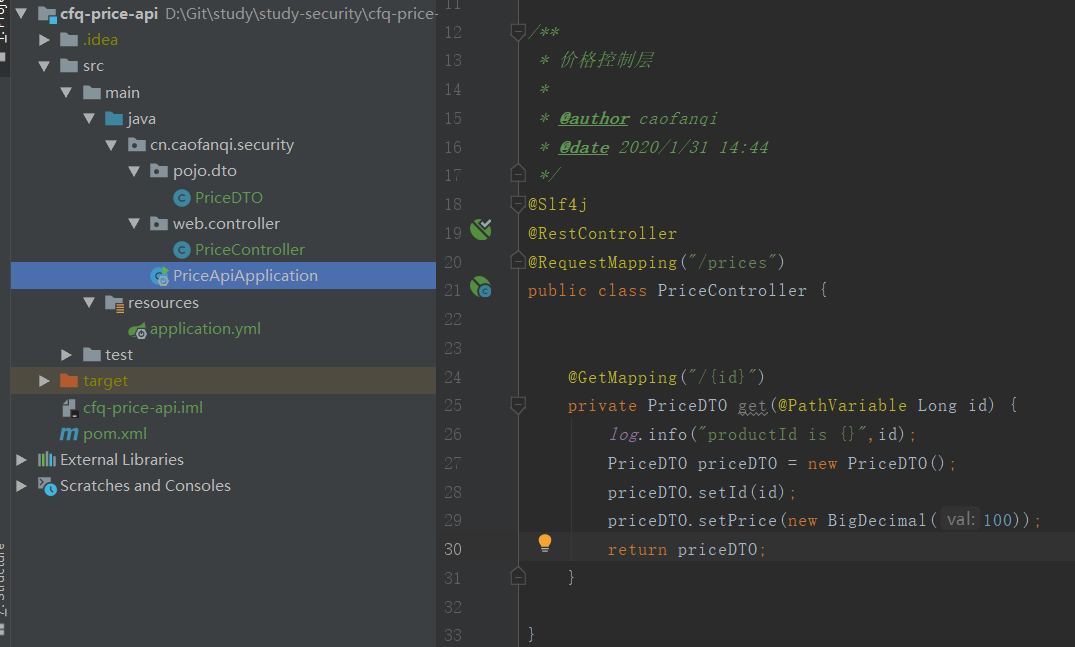
2.3、资源服务器,我们准备两个简单的微服务,一个订单服务,一个价格服务,订单服务调用价格服务获取价格。
2.3.1、订单服务,端口9080
2.3.2、价格服务,端口9070
3.2、pom.xml导入spring-cloud-starter-oauth2依赖
    <dependencyManagement>
        <dependencies>
            <dependency>
                <groupId>org.springframework.boot</groupId>
                <artifactId>spring-boot-dependencies</artifactId>
                <version>2.2.0.RELEASE</version>
                <type>pom</type>
                <scope>import</scope>
            </dependency>
            <dependency>
                <groupId>org.springframework.cloud</groupId>
                <artifactId>spring-cloud-dependencies</artifactId>
                <version>Greenwich.SR2</version>
                <type>pom</type>
                <scope>import</scope>
            </dependency>
        </dependencies>
    </dependencyManagement>


    <properties>
        <java.version>1.8</java.version>
        <maven.compiler.source>${java.version}</maven.compiler.source>
        <maven.compiler.target>${java.version}</maven.compiler.target>
    </properties>


    <dependencies>
        <dependency>
            <groupId>org.springframework.boot</groupId>
            <artifactId>spring-boot-starter-web</artifactId>
        </dependency>

        <dependency>
            <groupId>org.springframework.cloud</groupId>
            <artifactId>spring-cloud-starter-oauth2</artifactId>
        </dependency>
    </dependencies>
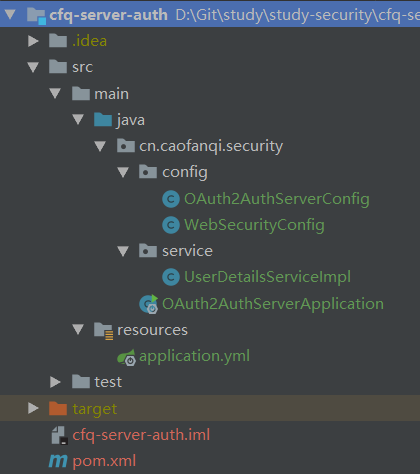
3.3、OAuth2AuthServerConfig,认证服务器配置
/**
 * OAuth2认证服务器配置类
 * 需要继承AuthorizationServerConfigurerAdapter类,覆盖里面三个configure方法
 * 并添加@EnableAuthorizationServer注解,指定当前应用做为认证服务器
 *
 * @author caofanqi
 * @date 2020/1/31 18:04
 */
@Configuration
@EnableAuthorizationServer
public class OAuth2AuthServerConfig extends AuthorizationServerConfigurerAdapter {


    @Resource
    private AuthenticationManager authenticationManager;


    /**
     * 配置授权服务器的安全性
     * checkTokenAccess:验证令牌需要什么条件,isAuthenticated():需要经过身份认证。
     * 此处的passwordEncoders是为client secrets配置的。
     */
    @Override
    public void configure(AuthorizationServerSecurityConfigurer security) throws Exception {
        security.checkTokenAccess("isAuthenticated()").passwordEncoder(new BCryptPasswordEncoder());
    }

    /**
     * 配置客户端服务
     */
    @Override
    public void configure(ClientDetailsServiceConfigurer clients) throws Exception {
        clients
                //配置在内存中
                .inMemory()
                //客户端应用的用户名
                .withClient("webApp")
                //客户端应用加密过的密码
                .secret(new BCryptPasswordEncoder().encode("123456"))
                //orderApp可以获取所有的权限集合,用于做ACL的权限控制
                .scopes("read", "write")
                //发出去令牌的有效期,单位秒
                .accessTokenValiditySeconds(3600)
                //可以访问哪些资源服务器
                .resourceIds("order-server")
                //授权的方式
                .authorizedGrantTypes("password")
                .and()
                //订单服务要访问资源服务器验证令牌,所以也需要配置相关信息
                .withClient("orderService")
                .secret(new BCryptPasswordEncoder().encode("123456"))
                .scopes("read", "write")
                .accessTokenValiditySeconds(3600)
                .resourceIds("order-server")
                .authorizedGrantTypes("password");

    }

    /**
     * 配置授权服务器终端的非安全特征
     * authenticationManager 校验用户信息是否合法
     */
    @Override
    public void configure(AuthorizationServerEndpointsConfigurer endpoints) throws Exception {
        endpoints.authenticationManager(authenticationManager);
    }

}
3.4、WebSecurityConfig,安全配置
/**
 * WebSecurity安全配置
 *
 * @author caofanqi
 * @date 2020/1/31 22:48
 */
@Configuration
@EnableWebSecurity
public class WebSecurityConfig extends WebSecurityConfigurerAdapter {


    @Resource
    private UserDetailsService userDetailsService;

    @Bean
    public BCryptPasswordEncoder passwordEncoder() {
        return new BCryptPasswordEncoder();
    }


    /**
     * AuthenticationManagerBuilder可以帮助我们构建出一个AuthenticationManager,需要UserDetailsService和PasswordEncoder
     */
    @Override
    protected void configure(AuthenticationManagerBuilder auth) throws Exception {
        auth.userDetailsService(userDetailsService).passwordEncoder(passwordEncoder());
    }


    /**
     * 将AuthenticationManager暴露成Bean
     */
    @Bean
    @Override
    public AuthenticationManager authenticationManagerBean() throws Exception {
        return super.authenticationManagerBean();
    }

}
3.5、UserDetailsService
/**
 * 查询用户信息
 * @author caofanqi
 * @date 2020/2/1 3:41
 */
@Component
public class UserDetailsServiceImpl implements UserDetailsService {


    /**
     *  此处为了简便,没有连接数据库,不管什么用户名,只要密码是123456就会通过验证
     */
    @Override
    public UserDetails loadUserByUsername(String username) throws UsernameNotFoundException {
        return User.withUsername(username)
                .password(new BCryptPasswordEncoder().encode("123456"))
                .authorities("ROLE_ADMIN").build();
    }

}
3.6、启动项目,端口9020,看控制台有三个路径,/oauth/token获取token,/oauth/token_key,/oauth/check_token用于校验token

3.7、测试密码模式获取令牌
3.7.1、请求路径:http://127.0.0.1:9020/oauth/token
3.7.2、使用httpBasic添加客户端认证信息
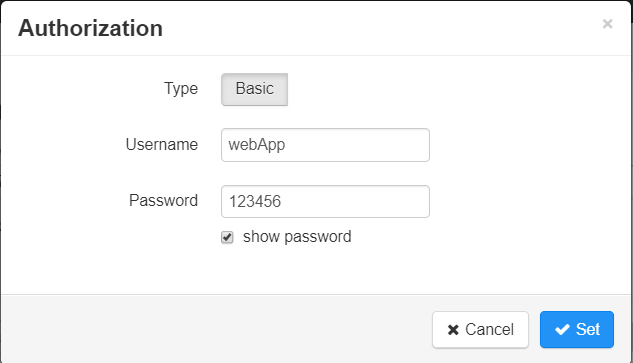
3.7.3、表单添加用户信息,username(用户名)、password(密码)、grant_type(授权模式)、scope(权限范围)
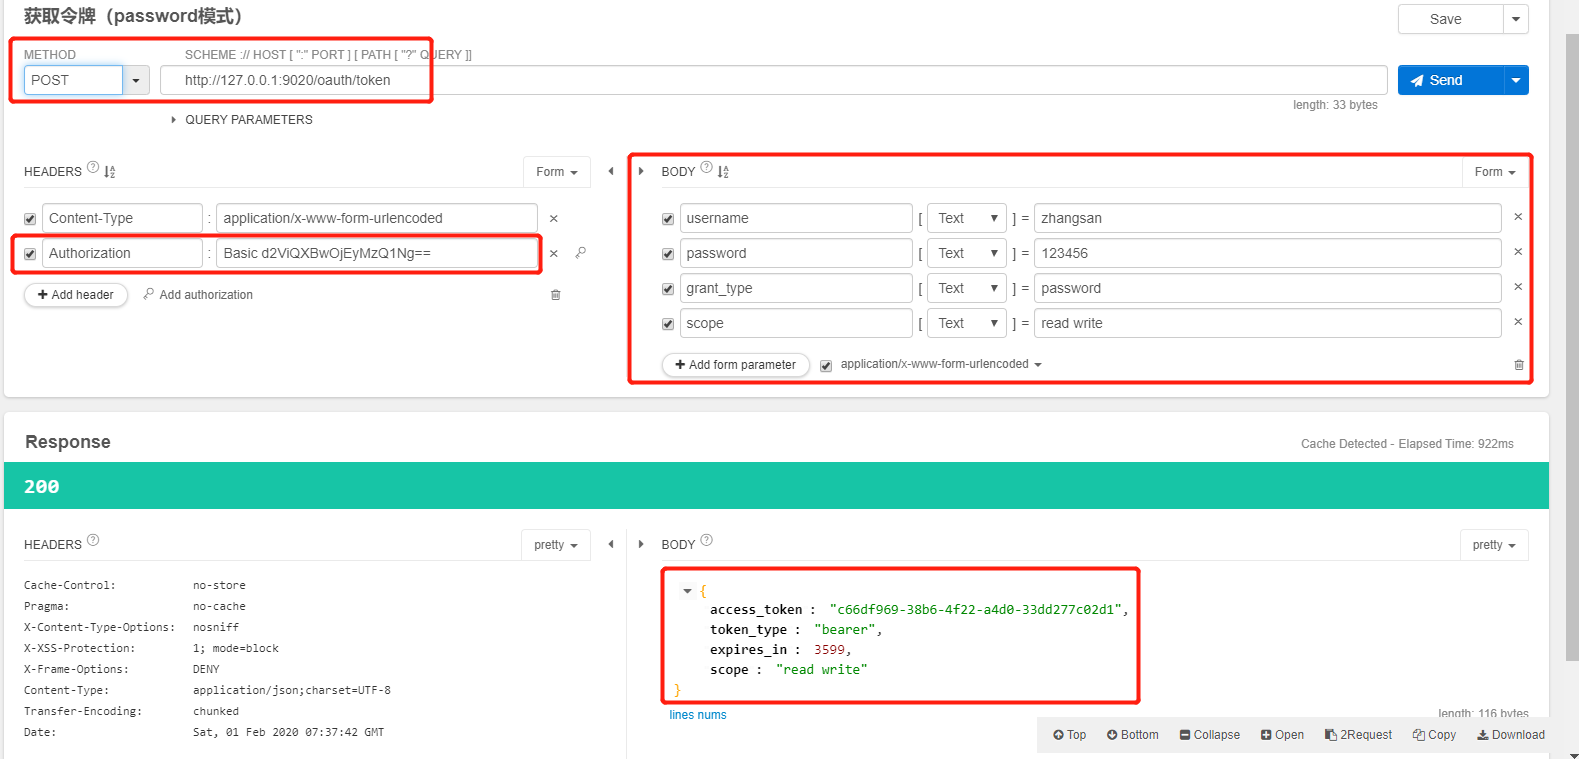
3.7.4、返回值,access_token(令牌)、token_type(令牌类型)、expires_in(有效期剩余时间)、scope(权限范围)。
项目源码:https://github.com/caofanqi/study-security/tree/dev-AuthorizationServer