一、安全
1.Spring Security是针对Spring项目的安全框架,也是Spring Boot底层安全模块默认的技术选型。他可以实现强大的web安全控制。对于安全控制,我们仅需引入spring-boot-starter-security模块,进行少量的配置,即可实现强大的安全管理。几个类:
WebSecurityConfigurerAdapter:自定义Security策略
AuthenticationManagerBuilder:自定义认证策略
@EnableWebSecurity:开启WebSecurity模式
2.应用程序的两个主要区域是“认证”和“授权”(或者访问控制)。这两个主要区域是Spring Security 的两个目标。
3.“认证”(Authentication),是建立一个他声明执行流程的主体的过程(一个“主体”一般是指用户,设备或一些可以在你的应用程序中执行动作的其他系统)。
4.“授权”(Authorization)指确定一个主体是否允许在你的应用程序执行一个动作的过程。为了抵达需要授权的店,主体的身份已经有认证过程建立。
5.这个概念是通用的而不只在Spring Security中。
二、Web&安全
- 登陆/注销
HttpSecurity配置登陆、注销功能 - Thymeleaf提供的SpringSecurity标签支持
需要引入thymeleaf-extras-springsecurity4
sec:authentication=“name”获得当前用户的用户名
sec:authorize=“hasRole(‘ADMIN’)”当前用户必须拥有ADMIN权限时才会显示标签内容 - remember me
表单添加remember-me的checkbox
配置启用remember-me功能 - CSRF(Cross-site request forgery)跨站请求伪造
HttpSecurity启用csrf功能,会为表单添加_csrf的值,提交携带来预防CSRF;
执行流程
1、引入SpringSecurity;
2、编写SpringSecurity的配置类;
 @EnableWebSecurity
 extends WebSecurityConfigurerAdapter
3、控制请求的访问权限:
 configure(HttpSecurity http) {
 http.authorizeRequests().antMatchers("/").permitAll()		 		.antMatchers("/level1/**").hasRole("VIP1")
 }
 4、定义认证规则:
 configure(AuthenticationManagerBuilder auth){
 auth.inMemoryAuthentication().withUser("zhangsan").password("123456").roles("VIP1","VIP2")
 }
 5、开启自动配置的登陆功能:
 configure(HttpSecurity http){
 http.formLogin();
 }
 6、注销:http.logout();
 7、记住我:Remeberme();
下面进入正题
1.引入相应的pom依赖
<dependency>
			<groupId>org.thymeleaf.extras</groupId>
			<artifactId>thymeleaf-extras-springsecurity4</artifactId>
		</dependency>
		<dependency>
			<groupId>org.springframework.boot</groupId>
			<artifactId>spring-boot-starter-thymeleaf</artifactId>
		</dependency>
		<dependency>
			<groupId>org.springframework.boot</groupId>
			<artifactId>spring-boot-starter-security</artifactId>
		</dependency>
2.自己配置MySecurityConfig类
package com.atguigu.security.config;

import org.springframework.security.config.annotation.authentication.builders.AuthenticationManagerBuilder;
import org.springframework.security.config.annotation.web.builders.HttpSecurity;
import org.springframework.security.config.annotation.web.configuration.EnableWebSecurity;
import org.springframework.security.config.annotation.web.configuration.WebSecurityConfigurerAdapter;

@EnableWebSecurity
public class MySecurityConfig extends WebSecurityConfigurerAdapter {

    @Override
    protected void configure(HttpSecurity http) throws Exception {
        //super.configure(http);
        //定制请求的授权规则
        http.authorizeRequests().antMatchers("/").permitAll()
                .antMatchers("/level1/**").hasRole("VIP1")
                .antMatchers("/level2/**").hasRole("VIP2")
                .antMatchers("/level3/**").hasRole("VIP3");

        //开启自动配置的登陆功能,效果,如果没有登陆,没有权限就会来到登陆页面
        http.formLogin().usernameParameter("user").passwordParameter("pwd")
                .loginPage("/userlogin");
        //1、/login来到登陆页
        //2、重定向到/login?error表示登陆失败
        //3、更多详细规定
        //4、默认post形式的 /login代表处理登陆
        //5、一但定制loginPage;那么 loginPage的post请求就是登陆


        //开启自动配置的注销功能。
        http.logout().logoutSuccessUrl("/");//注销成功以后来到首页
        //1、访问 /logout 表示用户注销,清空session
        //2、注销成功会返回 /login?logout 页面;

        //开启记住我功能
        http.rememberMe().rememberMeParameter("remeber");
        //登陆成功以后,将cookie发给浏览器保存,以后访问页面带上这个cookie,只要通过检查就可以免登录
        //点击注销会删除cookie

    }

    //定义认证规则
    @Override
    protected void configure(AuthenticationManagerBuilder auth) throws Exception {
        //super.configure(auth);
        auth.inMemoryAuthentication()
                .withUser("zhangsan").password("123456").roles("VIP1","VIP2")
                .and()
                .withUser("lisi").password("123456").roles("VIP2","VIP3")
                .and()
                .withUser("wangwu").password("123456").roles("VIP1","VIP3");

    }
}
3、自己写一个控制器controller类
@Controller
public class KungfuController {
private final String PREFIX = "pages/";
/**
* 欢迎页
* @return
*/
@GetMapping("/")
public String index() {
return "welcome";
}
/**
* 登陆页
* @return
*/
@GetMapping("/userlogin")
public String loginPage() {
return PREFIX+"login";
}
/**
* level1页面映射
* @param path
* @return
*/
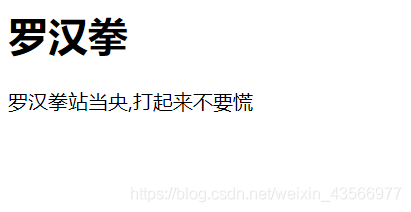
@GetMapping("/level1/{path}")
public String level1(@PathVariable("path")String path) {
return PREFIX+"level1/"+path;
}
/**
* level2页面映射
* @param path
* @return
*/
@GetMapping("/level2/{path}")
public String level2(@PathVariable("path")String path) {
return PREFIX+"level2/"+path;
}
/**
* level3页面映射
* @param path
* @return
*/
@GetMapping("/level3/{path}")
public String level3(@PathVariable("path")String path) {
return PREFIX+"level3/"+path;
}
}
测试即可:
登录:


2.相应的账号,只有响应的权限
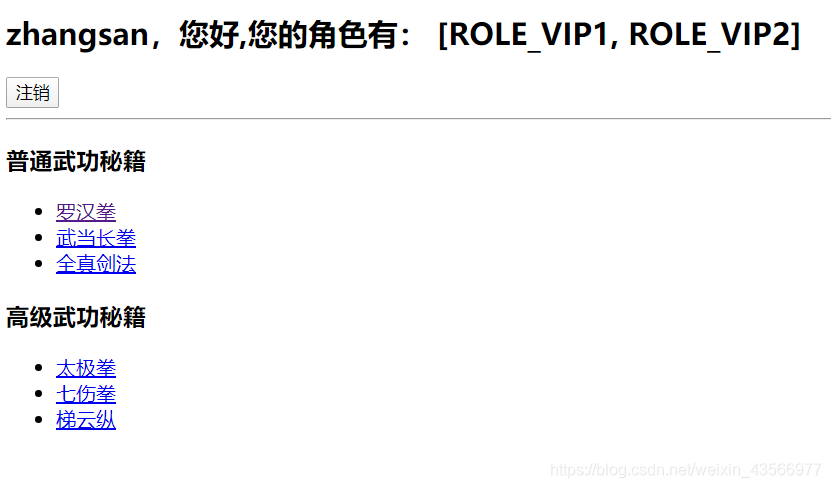
3.点击退出,又回到了登陆界面
4.点击记住我,关闭浏览器,当再次运行时,不用登陆,可以直接进入上一次登陆的账号里
暂时就先说到这里,以后慢慢更新有关内容,谢谢!
希望大家可以多多关注一下我的个人博客,谢谢!