一、
QT 透明设置
背景,标题栏透明,下级Widget,painter绘出来的(比如,drawtext,drawline)不透明
QWidget window;
window.setWindowFlags(Qt::FramelessWindowHint);
window.setAttribute(Qt::WA_TranslucentBackground,true);
全部透明,具体包括标题栏,背景,下级Widget
QWidget window;
window.setWindowOpacity(0.7); //设置透明度,范围0 至 1.0
二、
1. QPalette的方法
#include < QtGui >
int main( int argc, char * argv[])
{
QApplication app(argc,argv);
QFrame * frame = new QFrame;
frame -> resize( 400 , 700 );
QPixmap pixmap("images/frame.png");
QPalette palette;
palette.setBrush(frame -> backgroundRole(),QBrush( pixmap ));
frame -> setPalette(palette);
frame->setMask(pixmap.mask()); //可以将图片中透明部分显示为透明的
frame -> setAutoFillBackground( true );
frame -> show();
return app.exec();
}
注意图片路径怎么表示,我的图片放在该工程下的images文件夹中。
存在问题:图片可以显示出来,但是图片大小不能和frame大小一致,显示效果不好,具体怎样调整大小,以后再补充,效果如下(设置了透明的,好像很漂亮~透明部分将我的桌面显示出来了~_~):
2.setStyleSheet方法(非常好用的方法)
#include < QtGui >
int main( int argc, char * argv[])
{
QApplication app(argc,argv);
QFrame * frame = new QFrame;
frame ->setObjectName("myframe" );
frame -> resize( 400 , 700 );
frame -> setStyleSheet( " QFrame#myframe{border-image:url(images/frame.png)} " );
frame -> show();
return app.exec();
}
效果如下:
注意:很漂亮的效果吧~~注意代码中红线的部分噢,设置ObjectName后,才能保证set StyleSheet 只作用在我们的frame上,不影响其子控件的背景设置。之所以用border-image而不用background-image,还是上面的问题,用 background-image不能保证图片大小和控件大小一致,图片不能完全显示,这个以后再补充了,现在还没有找到方法。
3.paintEvent事件方法
#ifndef MYFRAME_H
#define MYFRAME_H
#include < QWidget >
#include < QtGui >
class MyFrame : public QWidget
{
public :
MyFrame();
void paintEvent(QPaintEvent * event );
};
#endif // MYFRAME_H
// myframe.cpp文件
#include " myframe.h "
MyFrame::MyFrame()
{
}
void MyFrame::paintEvent(QPaintEvent * event )
{
QPainter painter( this );
painter.drawPixmap( 0 , 0 , 400 , 700 ,QPixmap( " images/frame.png " ));
}
// main.cpp文件
#include < QApplication >
#include < QtGui >
#include " myframe.h "
int main( int argc, char * argv[])
{
QApplication app(argc,argv);
MyFrame * frame = new MyFrame;
frame -> resize( 400 , 700 );
frame -> show();
return app.exec();
}
效果如下:
注:跟前面一样的效果吧,与前面的差别就是这个背景图片不随着窗口的大小而变化,因为它的固定大小被设置成(400,700)了。重写QWidget的paintEvent事件,当控件发生重绘事件,比如show()时,系统就会自动调用paintEvent函数。
好了,上面是三种设置背景图片的方法,下面我要说一个设置QPushButton的背景图片的方法,用的是setIcon方法(其实QPushButton设置背景图片也可以用前面三种方法的,不过现在这种Icon方法的看起来也不错)
#include < QtGui >
int main( int argc, char * argv[])
{
QApplication app(argc,argv);
QFrame * frame = new QFrame;
QPushButton * button0 = new QPushButton(frame);
QPushButton * button1 = new QPushButton(frame);
QPushButton * button2 = new QPushButton(frame);
QPushButton * button3 = new QPushButton(frame);
QPushButton * button4 = new QPushButton(frame);
QPushButton * button5 = new QPushButton(frame);
frame -> setObjectName( " myframe " );
frame -> resize( 400 , 700 );
frame -> setStyleSheet( " QFrame#myframe{border-image:url(images/frame.png)} " );
button0 -> setGeometry( 60 , 150 , 68 , 68 );
button1 -> setGeometry( 160 , 150 , 68 , 68 );
button2 -> setGeometry( 260 , 150 , 68 , 68 );
button3 -> setGeometry( 60 , 280 , 68 , 68 );
button4 -> setGeometry( 160 , 280 , 68 , 68 );
button5 -> setGeometry( 260 , 280 , 68 , 68 );
QIcon icon;
QPixmap pixmap0( " images/SMS.png " );
icon.addPixmap(pixmap0);
button0 -> setIcon(icon);
button0 -> setIconSize(QSize( 68 , 68 ));
button0 -> setFixedSize(pixmap0.size());
button0 -> setMask(pixmap0.mask());
QPixmap pixmap1( " images/EMail.png " );
icon.addPixmap(pixmap1);
button1 -> setIcon(icon);
button1 -> setIconSize(QSize( 68 , 68 ));
button1 -> setFixedSize(pixmap1.size());
button1 -> setMask(pixmap1.mask());
QPixmap pixmap2( " images/Contacts.png " );
icon.addPixmap(pixmap2);
button2 -> setIcon(icon);
button2 -> setIconSize(QSize( 68 , 68 ));
button2 -> setFixedSize(pixmap2.size());
button2 -> setMask(pixmap2.mask());
QPixmap pixmap3( " images/Calendar.png " );
icon.addPixmap(pixmap3);
button3 -> setIcon(icon);
button3 -> setIconSize(QSize( 68 , 68 ));
button3 -> setFixedSize(pixmap3.size());
button3 -> setMask(pixmap3.mask());
QPixmap pixmap4( " images/GoogleVoice.png " );
icon.addPixmap(pixmap4);
button4 -> setIcon(icon);
button4 -> setIconSize(QSize( 68 , 68 ));
button4 -> setFixedSize(pixmap4.size());
button4 -> setMask(pixmap4.mask());
QPixmap pixmap5( " images/AndroidMarket.png " );
icon.addPixmap(pixmap5);
button5 -> setIcon(icon);
button5 -> setIconSize(QSize( 68 , 68 ));
button5 -> setFixedSize(pixmap5.size());
button5 -> setMask(pixmap5.mask());
frame -> show();
return app.exec();
}

注:图标效果不错吧~_~
好了,今天就写到这里,以后有新的内容再补充。
补充,这样就可以让图片跟窗口一样大小了。
{
QApplication app(argc,argv);
QFrame * frame = new QFrame;
frame -> resize( 400 , 700 );
QImage image1;
image1.load( " images/frame1.jpg " );
QImage image2 = image1.scaled( 400 , 700 );
QPalette palette;
palette.setBrush(frame -> backgroundRole(),QBrush(image2));
frame -> setPalette(palette);
frame -> setMask(pixmap.mask()); // 可以将图片中透明部分显示为透明的
frame -> setAutoFillBackground( true );
frame -> show();
return app.exec();
}
三、
四、
【如果其父窗口为空的话,透明的地方会成为黑块。】
很多朋友都问透明的效果怎么做,为什么自己做的无边框窗体不可移动,一个个回答的很累,干脆写出来分享下好了,我只用代码说话。
- //main.cpp
- int main(int argc, char *argv[])
- {
- QApplication::setStyle("cleanlooks");
- QApplication a(argc, argv);
- login w;
- w.setWindowTitle("ClientLogin");
- w.setWindowOpacity(1);
- w.setWindowFlags(Qt::FramelessWindowHint);
- w.setAttribute(Qt::WA_TranslucentBackground);
- w.show();
- w.move(200,100);
- return a.exec();
- }
关键的语句,就是其中的
- w.setWindowOpacity(1);
- w.setWindowFlags(Qt::FramelessWindowHint);
- w.setAttribute(Qt::WA_TranslucentBackground);
这些语句,不知道什么意思就摁下F1,或者直接查阅帮助文档……
对窗体无边框的设置要写在main里面,这样所有派生的子窗口,QDialog,QWidget都可继承, 很好规划和管理,方便统一美化设计。以工程中一个聊天窗口为例,先用PS制作一个窗体的背景图片,注意存为png格式,这是透明的关键。不会使PS,可以找些PNG资源图片。 我的PNG透明背景图为:
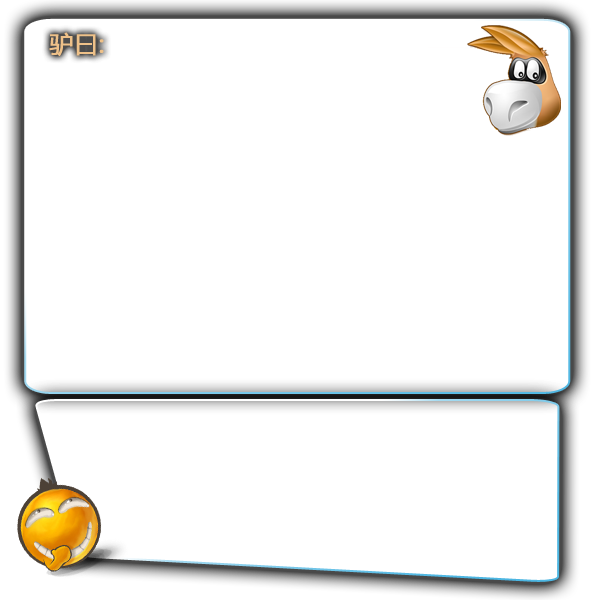
将它添加到你的资源包中,然后设置为窗体的背景。
下图是我的工程,其中的场景设置其实也是更换组建的背景图片喽~~ 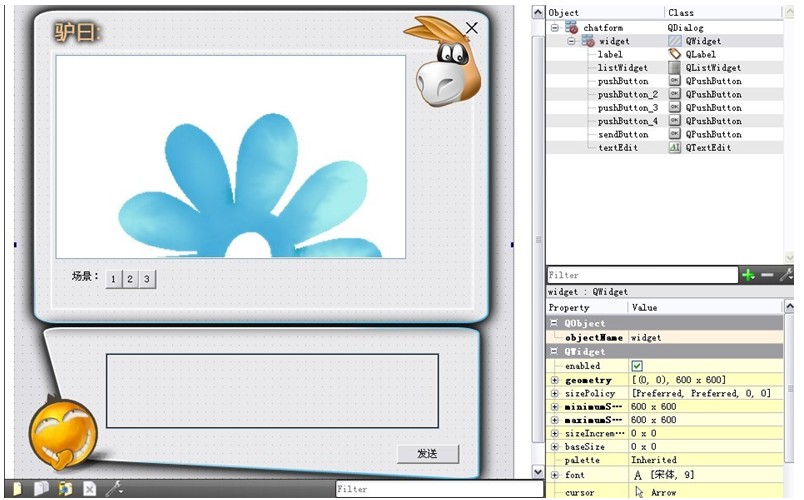
这个你就可以预览到透明的无边框窗体了,但是还有一个重要的问题,窗口竟然无法移动。
这也是无边框导致的……具体原因我不细说,搜一下很清晰,我只说解决方案。
在每个子窗口中,都添加:
- void yourwindow::mousePressEvent(QMouseEvent *event){
- this->windowPos = this->pos();
- this->mousePos = event->globalPos();
- this->dPos = mousePos - windowPos;
- }
- void yourwindow::mouseMoveEvent(QMouseEvent *event){
- this->move(event->globalPos() - this->dPos);
- }
- void yourwindow::changeEvent(QEvent *e){
- QMainWindow::changeEvent(e);
- switch (e->type()) {
- case QEvent::LanguageChange: ui->retranslateUi(this);
- break;
- default:
- break;
- }
- }
这样就大功告成了,运行一下看看效果,绿森林是俺滴桌面,可以忽略之。
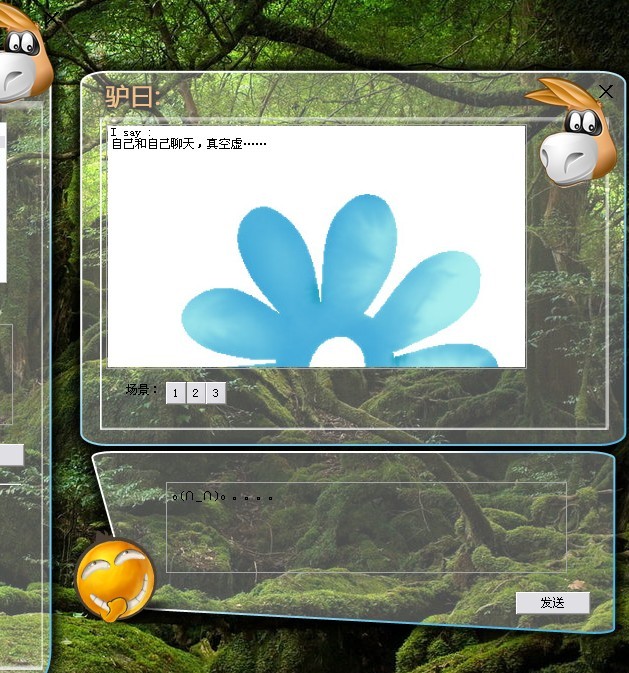
欢迎交流
一、将Qt窗口嵌入到桌面中。
声明一个最简单的类:
 class Dialog : public QDialog{ Q_OBJECT
public:
Dialog(QWidget *parent = 0); ~Dialog();}函数实现:
Dialog::Dialog(QWidget *parent) : QDialog(parent){ //创建个LineEdit用来测试焦点 QLineEdit* le = new QLineEdit(this);}Dialog::~Dialog()
{}主函数:
int main(int argc, char *argv[]){ QApplication a(argc, argv); Dialog w;HWND desktopHwnd = findDesktopIconWnd();
if(desktopHwnd) SetParent(w.winId(), desktopHwnd);w.show();
return a.exec();}
运行效果:
有个窗口嵌入了桌面。按win+D组合键可以看到此窗口在桌面上。
二、让窗口全透明:
2.1最容易想到的就是setWindowOpacity()函数了。
w.setWindowOpacity(0.5),运行:结果杯具了,此函数完全无效,因为其父窗口特殊,这个函数内部使用的系统窗口标志不被支持。
2.2
w.setAttribute(Qt::WA_TranslucentBackground, true);
运行效果:
全透明ok。如果其父窗口为空的话,透明的地方会成为黑块。
三、让窗口半透明
3.1w.setAttribute(Qt::WA_TranslucentBackground, true) + 背景调色板
运行效果仍然是全透明,因为TranslucentBackground为true,根本不画背景。
3.2单纯的背景调色板:
QPalette pal = w.palette(); pal.setColor(QPalette::Background, QColor(100,100,100,50)); w.setPalette(pal); w.setAutoFillBackground(true);
运行效果出现了半透明:
但是还没大功告成,不停点击桌面,再点击这个窗口,会发现这个窗口越来越不透明,直至完全不透明了。不知道是不是qt的bug。
ps:加一句 w.setAttribute(Qt::WA_OpaquePaintEvent,true); 窗口就能够一直保持这个效果了。即这个方案可行。
pps:此方案在XP也是黑色底块。
3.3转战paintEvent()
protected: void paintEvent(QPaintEvent *);void Dialog::paintEvent(QPaintEvent *e){ QPainter p(this); p.fillRect(rect(), QColor(0,0xff,0,30));}
用一个带有alpha值的颜色填充背景,运行效果发现颜色确实有alpha值,但是桌面的内容透不过来。
3.4setAttribute(Qt::WA_TranslucentBackground, true) + paintEvent()
运行效果:
得到了设想中的效果。
最终的主函数代码:
int main(int argc, char *argv[]){ QApplication a(argc, argv); Dialog w;HWND desktopHwnd = findDesktopIconWnd();
if(desktopHwnd) SetParent(w.winId(), desktopHwnd);w.setAttribute(Qt::WA_TranslucentBackground, true);
w.show();
return a.exec();}最终的dialog实现代码:
Dialog::Dialog(QWidget *parent) : QWidget(parent){ //创建个LineEdit用来测试焦点 QLineEdit* le = new QLineEdit(this);}Dialog::~Dialog()
{}void Dialog::paintEvent(QPaintEvent *e)
{ QPainter p(this); p.fillRect(rect(), QColor(0,0xff,0,30));}
PS:
经测试此代码在XP运行不正常。窗口成为黑色背景块。只能是颜色半透明了。
还有就是图标会被盖住。只能把w.setAttribute(Qt::WA_TranslucentBackground, true);注释掉,有半透明颜色,无法看到桌面。
五、
 QPalette pal = palette();pal.setColor(QPalette::Background, QColor(0x00,0xff,0x00,0x00));setPalette(pal);setAttribute(Qt::WA_TranslucentBackground,true);setWindowOpacity(0.7)void TestWindow::paintEvent( QPaintEvent* ){ QPainter p(this); p.setCompositionMode( QPainter::CompositionMode_Clear ); p.fillRect( 10, 10, 300, 300, Qt::SolidPattern );}
 本文出自 “悠然” 博客,请务必保留此出处http://mypyg.blog.51cto.com/820446/172661
六、
本文主要是解决Qt中QGraphicsAbstractShapeItem,QPixmap,QPainter等组件的透明化显示问题。
在Qt中定义了一个常量,用于设置透明的颜色,即Qt::transparent,表示RGBA值为(0,0,0,0)的透明色。
在QGraphicsAbstractShapeItem的集成类中,可以把某些部分画成Qt::transparent来设置透明。
在QPainter中,可以通过setBackgroundMode()选择两种不同的背景模式,一种是Qt::TransparentMode,另外一种是Qt::OpaqueMode。在Qt::TransparentMode模式下,背景本身就是透明的,此时QPainter的setBackground()函数不起作用;在Qt::OpaqueMode模式下,通过QPainter的setBackground()函数来设置QPainter类对象的背景色,在此模式下,也可以设置背景色为Qt::transparent。
有时,我们要把QPainter画到QPixmap中以防止闪烁。如果需要设置QPixmap的透明,可以先用QPixmap的fill()函数先把场景设置成透明的(fill(Qt::transparent) )。
QImage::fill ( uint pixelValue)
试试用这个填充透明色。
theImage.fill(qRgba(255,255,255,0));
七、
学习Qt编程,有时候我们很想做出好看又比较炫的画面,这时就常用到qt上的一些技巧。
这里我以一个小例子来展示qt的这些技巧,此qt编程写的,如图:(去掉标题栏和设置窗口透明后)

代码实现部分:
.h文件
- <span style="font-size:14px;">#ifndef MAINWINDOW_H
- #define MAINWINDOW_H
- #include <QMainWindow>
- #include<QLabel>
- #include <QMouseEvent>
- #include<QPalette>
- namespace Ui {
- class MainWindow;
- }
- class MainWindow : public QMainWindow
- {
- Q_OBJECT
- public:
- explicit MainWindow(QWidget *parent = 0);
- ~MainWindow();
- private:
- Ui::MainWindow *ui;
- private slots:
- void on_pushButton_Set_clicked();
- };
- #endif // MAINWINDOW_H
- </span>
mainwindow.cpp
- <span style="font-size:14px;">#include "mainwindow.h"
- #include "ui_mainwindow.h"
- MainWindow::MainWindow(QWidget *parent) :
- QMainWindow(parent),
- ui(new Ui::MainWindow)
- {
- ui->setupUi(this);
- this->setWindowTitle("QQ ");
- this->setWindowIcon(QIcon(":/images/po.jpg"));
- this->setWindowFlags(Qt::FramelessWindowHint);//去掉标题栏
- this->setGeometry(QRect(950, 55, 350, 250));//可设置窗口显示的方位与大小
- //this->setWindowOpacity(0.7);//设置透明1-全体透明
- this->setAttribute(Qt::WA_TranslucentBackground, true);//设置透明2-窗体标题栏不透明,背景透明
- this->resize(300,300);//显示大小
- }
- MainWindow::~MainWindow()
- {
- delete ui;
- }
- </span>
main.cpp文件
- <span style="font-size:14px;">#include <QtGui/QApplication>
- #include <QTextCodec>
- #include "mainwindow.h"
- int main(int argc, char *argv[])
- {
- QApplication a(argc, argv);
- QTextCodec::setCodecForCStrings(QTextCodec::codecForName("GB2312"));
- QTextCodec::setCodecForLocale(QTextCodec::codecForName("GB2312"));
- QTextCodec::setCodecForTr(QTextCodec::codecForName("GB2312"));
- MainWindow w;
- w.show();
- return a.exec();
- }
- </span>
本例中用到的透明是 : 窗体标题栏不透明,背景透明。
这里介绍几种设置透明效果的用法:
1.this->setWindowOpacity(0.7);//全体透明(指的是窗体,标题栏以及上面所有的控件都透明)里面的参数可以控制透明度。
2.窗口整体透明,但是窗体上的控件不透明。 通过设置窗体的背景色来实现,将背景色设置为全透:
代码如下:
- <span style="font-size:14px;"> pal = palette();
- pal.setColor(QPalette::background, QColor(0x00,0xff,0x00,0x00));
- setPalette(pal);</span>
3.窗体标题栏不透明,背景透明。(本例中用到的)
this->setAttribute(Qt::WA_TranslucentBackground,true);
4.窗口整体不透明,局部透明:在Paint事件中使用Clear模式绘图。
- <span style="font-size:14px;">void mainwindow::paintEvent( QPaintEvent* )
- { QPainter p(this);
- p.setCompositionMode( QPainter::CompositionMode_Clear );
- p.fillRect( 30, 30, 300, 300, Qt::SolidPattern );
- }
- </span>
绘制区域全透明,如果绘制区域有控件不会影响控件的透明。
5.这里说一下本程序中怎样去掉标题栏
this->setWindowFlags(Qt::FramelessWindowHint);//去掉标题栏
转载注明:http://blog.csdn.net/liuyang1990i/article/details/8227342