irebase 云推送
This post would give a brief idea on Firebase and the implementation of FCM in the application.
这篇文章将简要介绍Firebase和应用程序中FCM的实现。
Firebase is a platform developed by Google for creating mobile and web applications. It was originally an independent company founded in 2011. In 2014, Google acquired the platform and it is now their flagship offering for app development
Firebase是Google开发的用于创建移动和Web应用程序的平台。 它最初是一家成立于2011年的独立公司。2014年,Google收购了该平台,现已成为其应用开发的旗舰产品
Firebase is a Backend-as-a-Service that provides powerful features for building apps. It has core services such as Authentication, Cloud messaging, Crashlytics, Real time DB, performance monitoring etc,. Refer the link to know more about the firebase services.
Firebase是一种后端即服务,可为构建应用程序提供强大的功能。 它具有核心服务,例如身份验证,云消息传递,崩溃,实时数据库,性能监控等。 请参阅链接以了解有关Firebase服务的更多信息。
Let us now understand FCM, Setting up the Firebase and a sample app for better understanding. Here we go!
现在让我们了解FCM,设置Firebase和示例应用程序,以更好地理解。 开始了!
什么是FCM? ☁️ (What is FCM? ☁️)
FCM refers to Firebase Cloud messaging. This is one of the core features provided by Firebase. If you need to send a notification to your app, you don’t have to build your own server. Yes! You read it right. Firebase does it for you without any cost!
FCM是指Firebase Cloud消息传递。 这是Firebase提供的核心功能之一。 如果您需要向应用发送通知,则无需构建自己的服务器。 是! 您没看错。 Firebase无需任何费用即可为您完成!
F
F
设置Firebase: (Setting up Firebase:)
Create a project in your Android Studio and start linking it with the firebase. Here’s how to do:
在Android Studio中创建一个项目,然后开始将其与Firebase链接。 方法如下:
-
Login to your gmail and then go to Firebase console: https://console.firebase.google.com/
登录到您的gmail,然后转到Firebase控制台: https ://console.firebase.google.com/
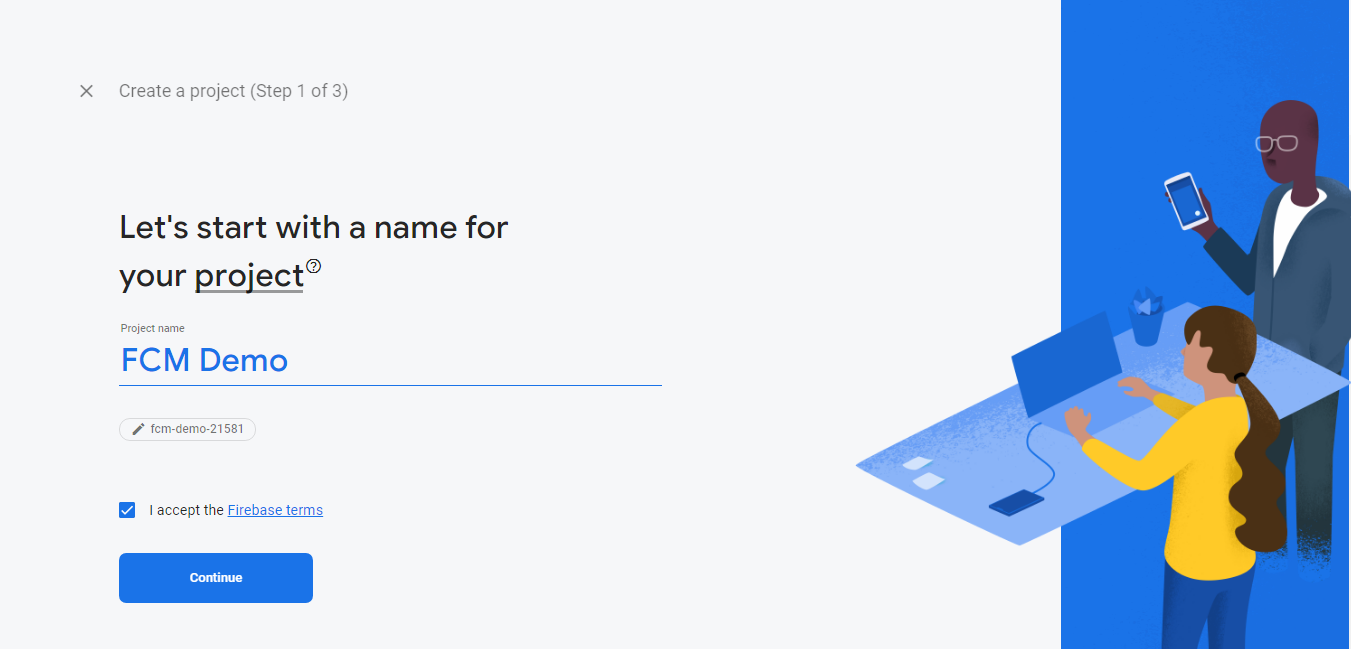
2. Click on “Create a Project” and give it a name and click on continue
2.单击“创建项目”并为其命名,然后单击继续
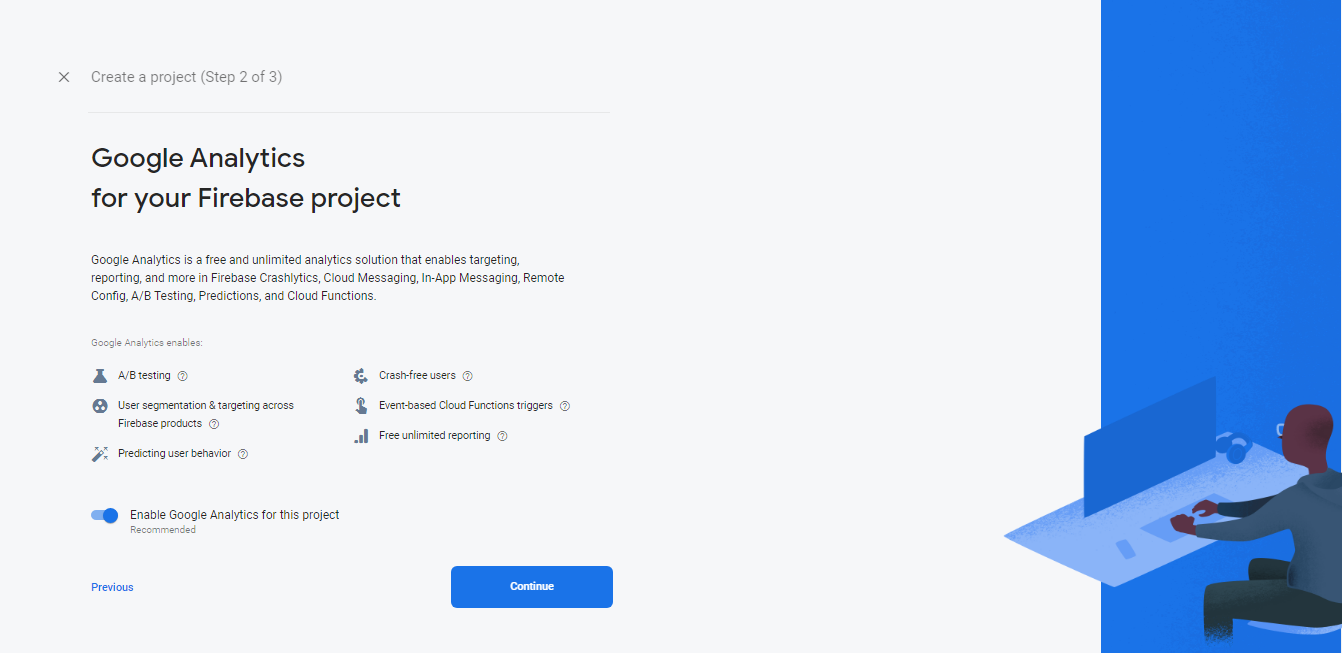
3. In the next step if you need to enable Google analytics, enable it and click on continue
3.在下一步中,如果您需要启用Google Analytics(分析),请启用它,然后单击“继续”。
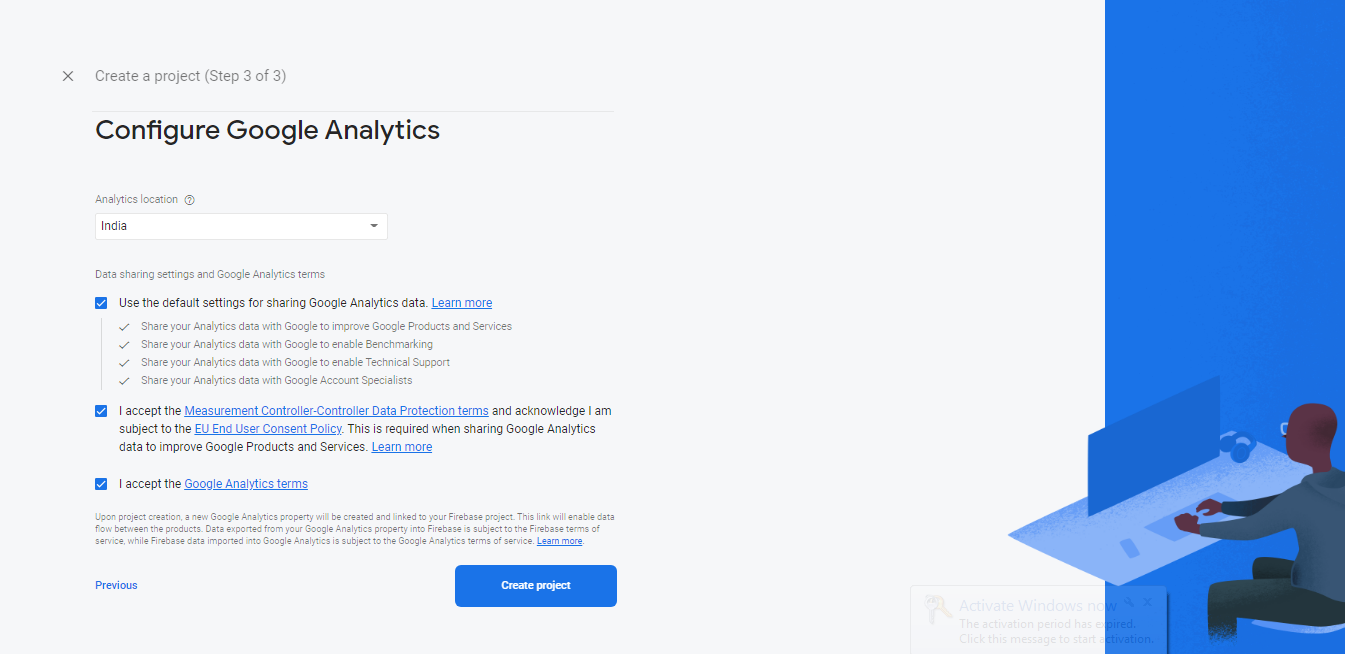
4. Accept the terms and conditions and create the project
4.接受条款和条件并创建项目
Once your project is successfully created, you will be taken to the below screen where we are allowed to add Firebase to our app based on Android, iOS or Web app
成功创建项目后,将转到以下屏幕,在该屏幕上,我们可以将Firebase添加到基于Android,iOS或Web应用程序的应用程序中
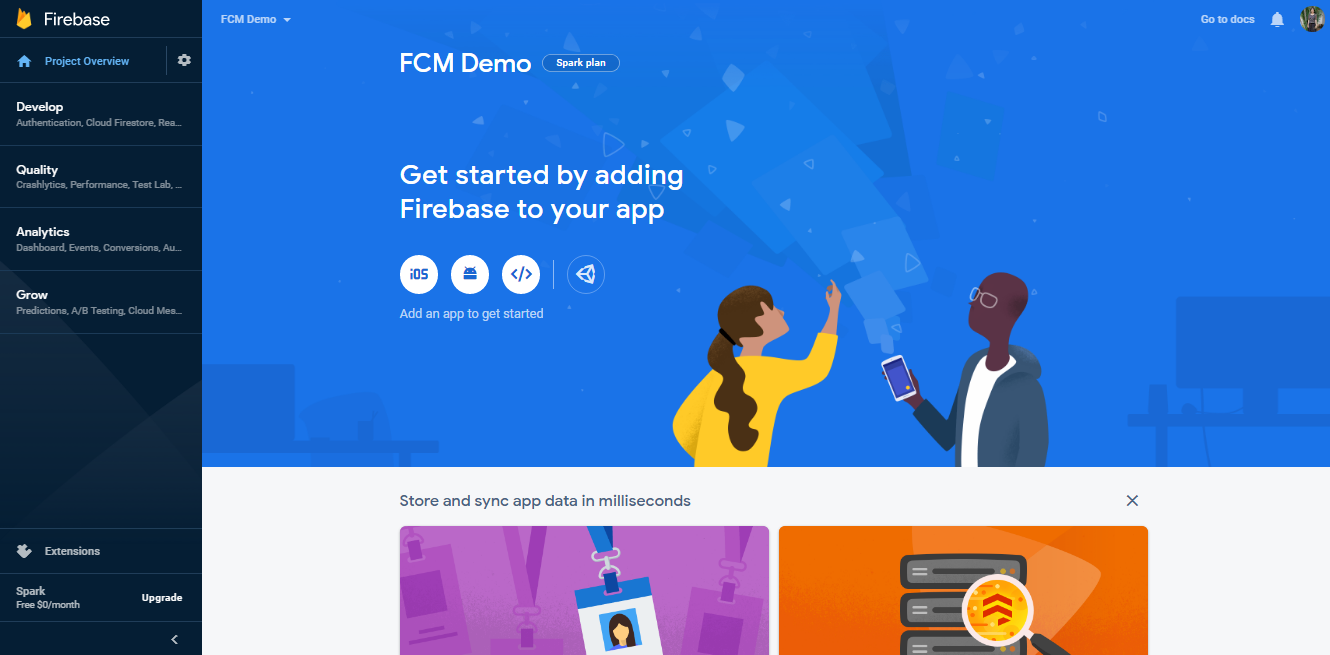
As, I will be linking the Firebase to Android app in the example, I will be choosing Android
因为,我将在示例中将Firebase链接到Android应用,所以我将选择Android
为您的应用程序设置Firebase: (Setting up Firebase to your application:)
- On creating an application in your Android studio, copy the package name and fill in the details accordingly
在Android Studio中创建应用程序时,复制包名称并相应地填写详细信息
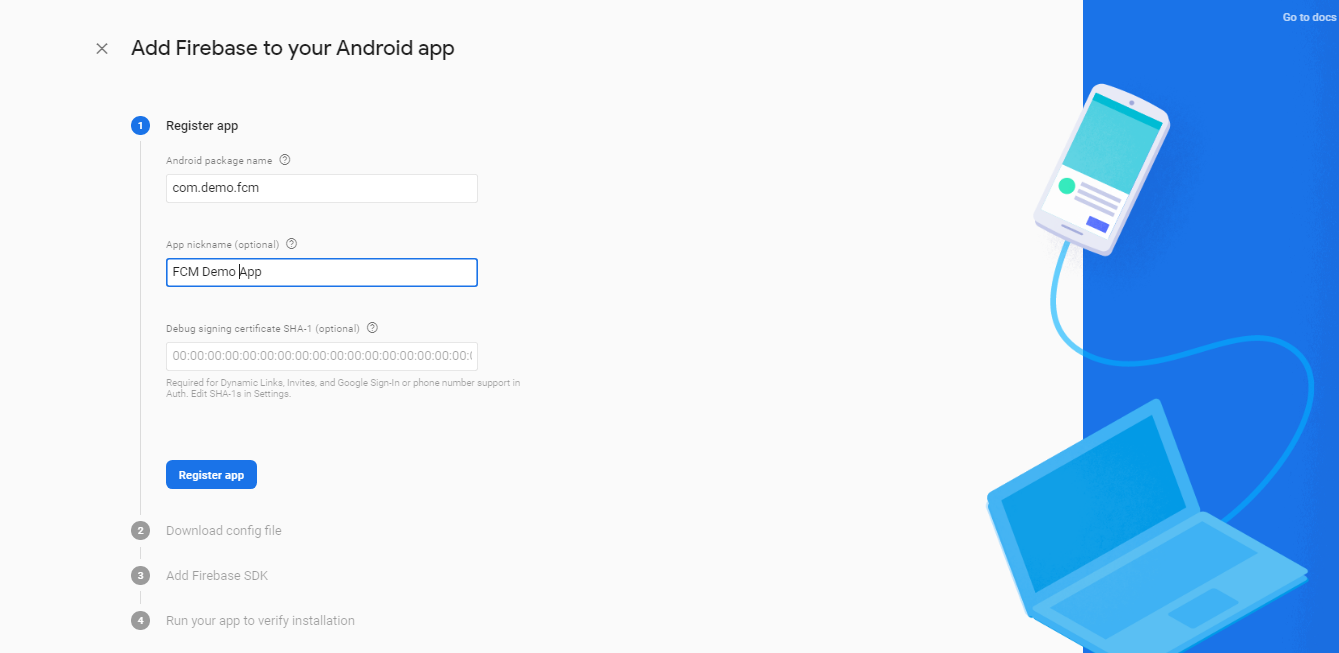
The next step is to get the SHA-1 key. To do this, follow the below steps:
下一步是获取SHA-1密钥。 为此,请按照以下步骤操作:
a) Open Android Studio and click on “Gradle” option on right hand side
a)打开Android Studio,然后点击右侧的“成绩”选项
b) Select the project and then go to Tasks -> android -> double click on signingReport. This generates debug signing certificate with SHA-1, SHA-256 and MD5 keys.
b)选择项目,然后转到任务-> android->双击signingReport。 这将使用SHA-1,SHA-256和MD5密钥生成调试签名证书。
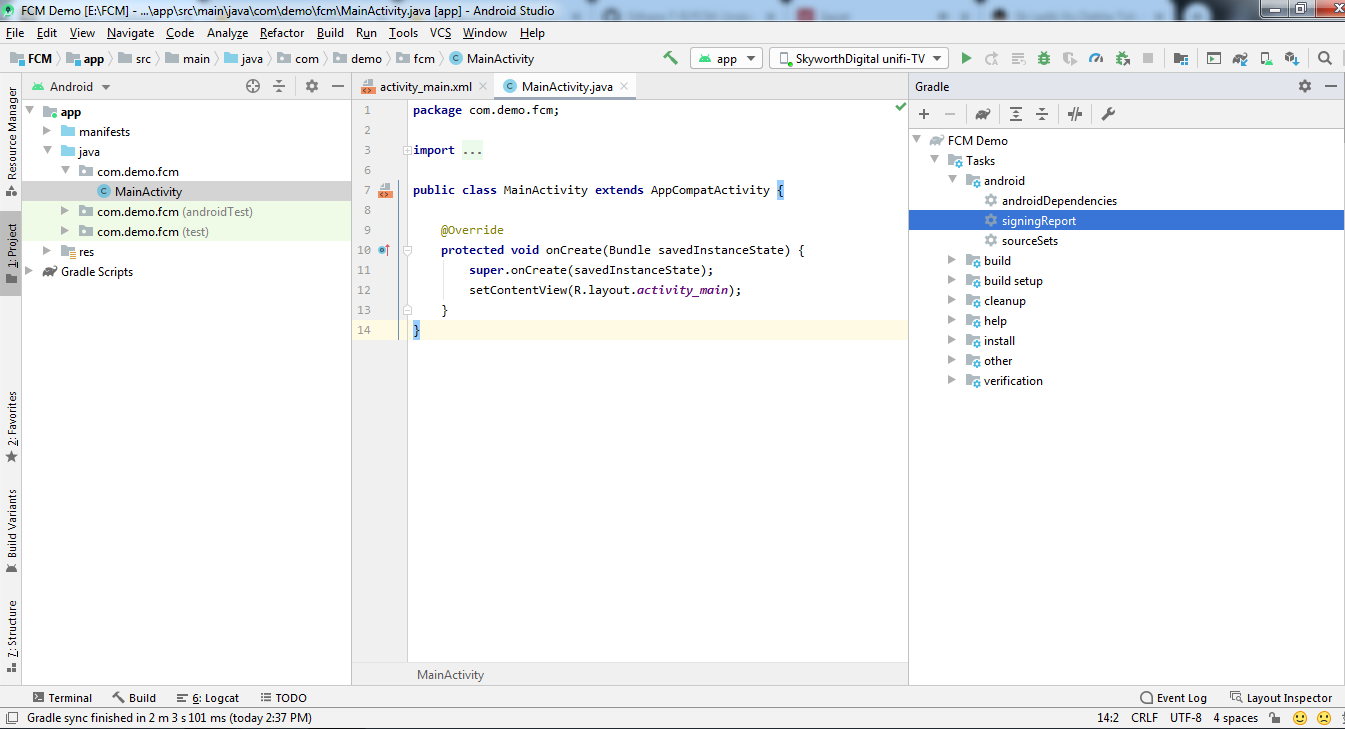
c) Go to Firebase console and paste the SHA-1. Click on “Register App” to continue.
c)转到Firebase控制台并粘贴SHA-1。 点击“注册应用”继续。
2. The next step is to download the google services configuration file.
2.下一步是下载google services配置文件。
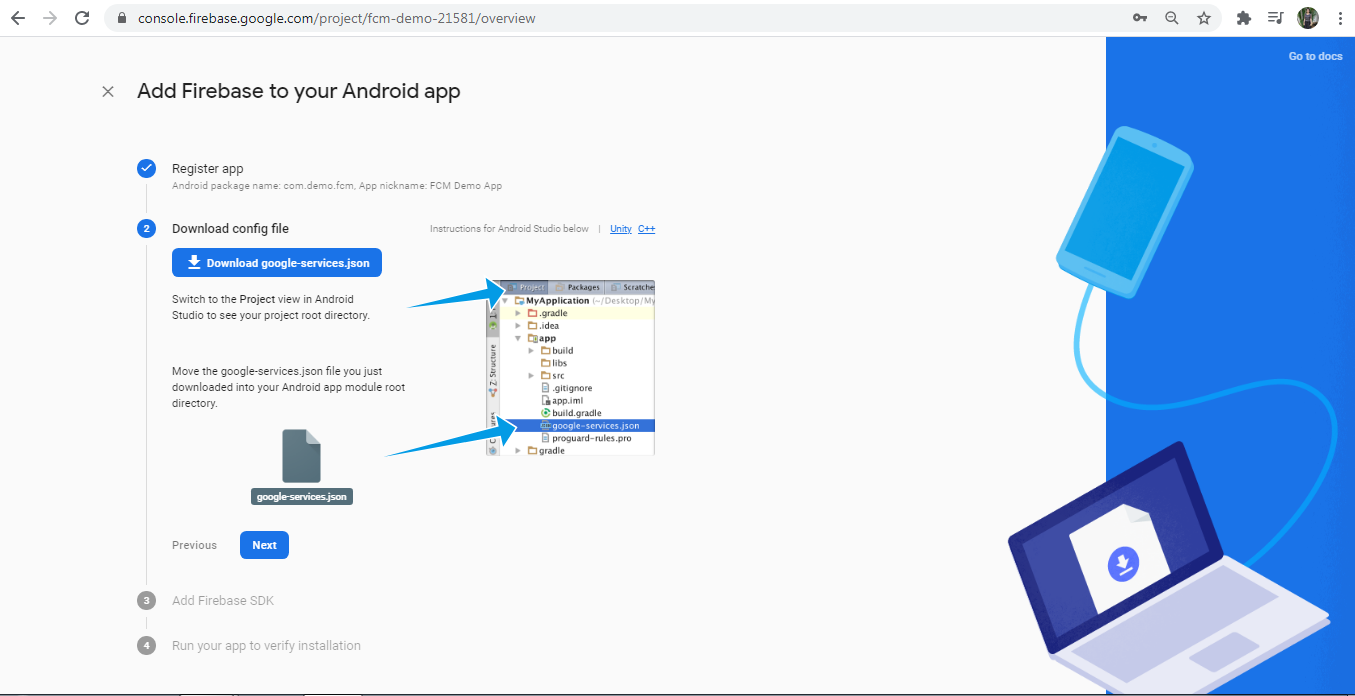
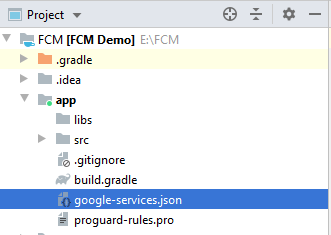
3. On successful download of “google-services.json” file, go to Android Studio and select Project view. Paste the downloaded file under app module with Project as root view. The file will have project related information that can be viewed
3.成功下载“ google-services.json”文件后,转到Android Studio并选择“项目”视图。 将下载的文件粘贴到应用程序模块下,并以项目作为根视图。 该文件将包含与项目相关的信息,可以查看
4. Set up the project-level and app-level gradle dependencies
4.设置项目级别和应用程序级别的gradle依赖项
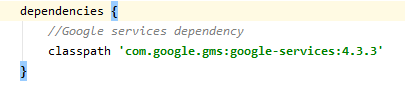
a) Project level dependency:
a)项目级别依赖性:
classpath ‘com.google.gms:google-services:4.3.3’. Choose the appropriate version based on the updates.
classpath'com.google.gms:google-services:4.3.3'。 根据更新选择适当的版本。
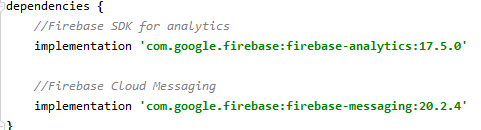
b) App level dependency:
b)应用程序级别依赖性:
apply plugin: ‘com.google.gms.google-services’
应用插件:“ com.google.gms.google-services”
implementation ‘com.google.firebase:firebase-analytics:17.5.0’
实施'com.google.firebase:firebase-analytics:17.5.0'
implementation ‘com.google.firebase:firebase-messaging:20.2.4’
实施'com.google.firebase:firebase-messaging:20.2.4'
Sync the gradle changes with the app
将Gradle更改与应用同步
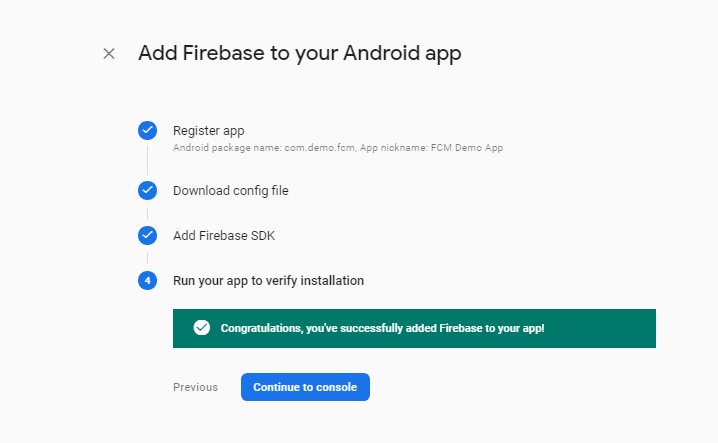
5. Run the app in-order to verify if the app has communicated with Firebase cloud servers. If the app does not get verified, try clearing the data and open the app again. Else uninstall and re-install
5.按顺序运行该应用程序,以验证该应用程序是否已与Firebase云服务器通信。 如果该应用未得到验证,请尝试清除数据并再次打开该应用。 其他卸载并重新安装
应用更改接收消息:(App changes for receiving messages:)
Step 1: Create your own service class and extend it with “FirebaseMessagingService ”
第1步:创建您自己的服务类,并使用“ FirebaseMessagingService对其进行扩展 ”
Step 2: Override onMessageReceived() and onNewToken() methods
步骤2:重写onMessageReceived()和onNewToken()方法
public class FCMDemoService extends FirebaseMessagingService { @Override public void onMessageReceived(@NonNull final RemoteMessage remoteMessage) { super.onMessageReceived(remoteMessage); if (remoteMessage.getNotification() != null) { Handler handler = new Handler(Looper.getMainLooper()); handler.post(new Runnable() { @Override public void run() { Toast.makeText(getApplicationContext(), "New Message Received! " + remoteMessage.getNotification().getTitle(), Toast.LENGTH_LONG).show(); } }); } } @Override public void onNewToken(@NonNull String s) { super.onNewToken(s); }}Step 3: onMessageReceived() is called when there is any new push notification received from FCM server. We get RemoteMessage as object. Based on the data, we can implement the action to be performed.
步骤3:当从FCM服务器收到任何新的推送通知时,将调用onMessageReceived()。 我们将RemoteMessage作为对象。 根据数据,我们可以执行要执行的操作。
onNewToken() is called when the service gets registered in the manifest and called when we first run the app. Firebase sends a new token for the app everytime.
当服务在清单中注册时,将调用onNewToken();当我们首次运行该应用程序时,将调用onNewToken()。 Firebase每次都会为该应用程序发送一个新令牌。
Step 4: To get a token, we need to add the following code in our activity:
步骤4:要获取令牌,我们需要在活动中添加以下代码:
private void getFCMToken() { FirebaseInstanceId.getInstance().getInstanceId() .addOnCompleteListener(new OnCompleteListener<InstanceIdResult>() { @Override public void onComplete(@NonNull Task<InstanceIdResult> task) { if (!task.isSuccessful()) { Log.e(TAG, "getInstanceId failed" + task.getException()); return; } String token = task.getResult() != null ? task.getResult().getToken() : "Token is null"; Toast.makeText(MainActivity.this, token, Toast.LENGTH_SHORT).show(); } });}Why Token is needed? Here’s the answer:
为什么需要令牌? 答案如下:
Every app has to be identified with a unique access key. This key is needed for sending notifications to a particular device and to know if the app is really has the Firebase enabled for receiving messages.
每个应用程序都必须使用唯一的访问密钥进行标识。 需要此密钥才能将通知发送到特定设备,并知道该应用是否确实启用了Firebase来接收消息。
Step 5: Register the service in manifest:
步骤5:在清单中注册服务:
<service android:name=".FCMDemoService" android:exported="false"> <intent-filter> <action android:name="com.google.firebase.MESSAGING_EVENT"/> </intent-filter></service>测试: (Testing:)
Step 1: Go to Firebase console
第1步:转到Firebase控制台
Step 2: Go to “Grow” option on the left side and click on Cloud Messaging
步骤2:前往左侧的[成长]选项,然后按一下[云端讯息]
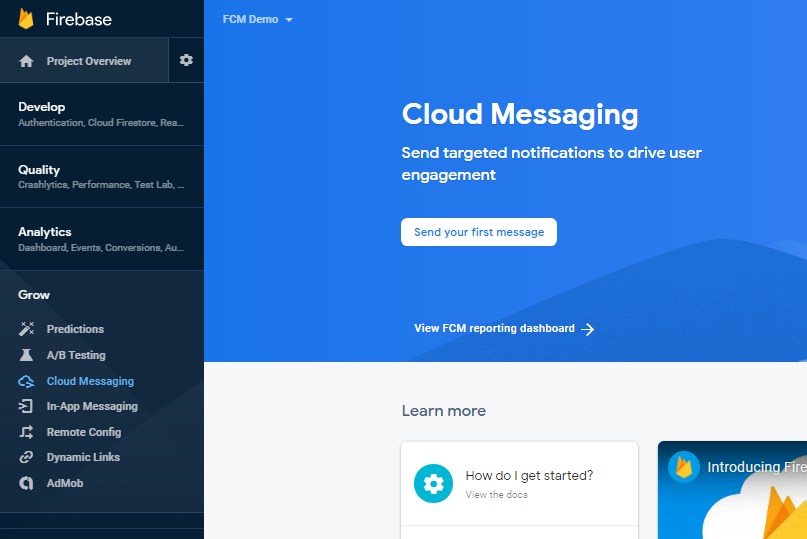
Step 3: Click on “Send your first message”
第3步:点击“发送您的第一条消息”
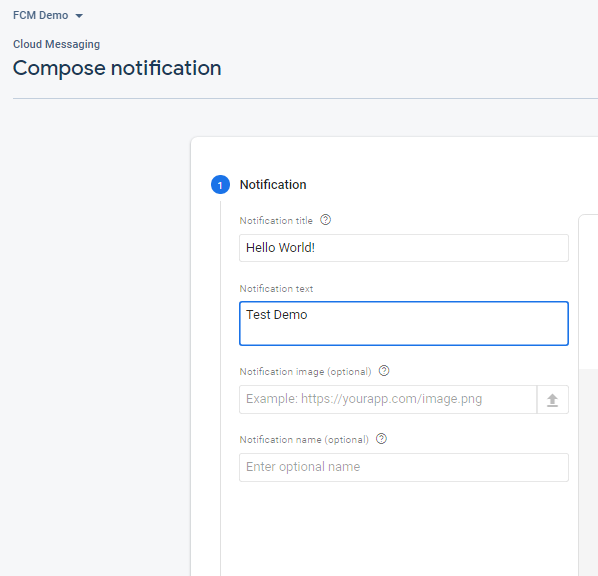
Step 4: Enter notification title and description:
步骤4:输入通知标题和说明:
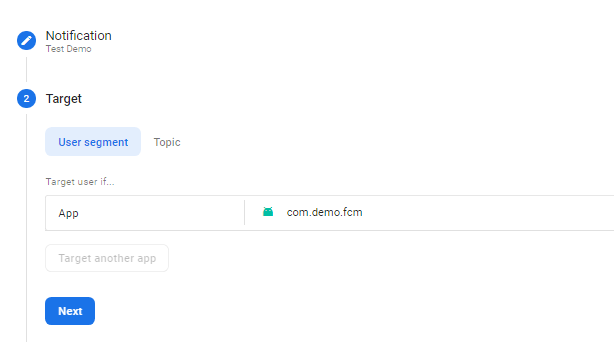
Step 5: Choose your application package
步骤5:选择您的应用程序包
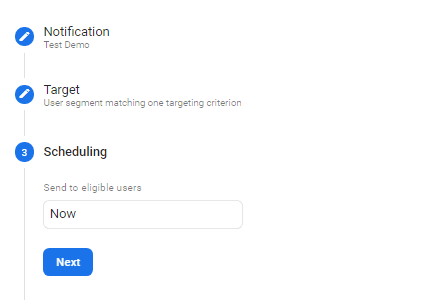
Step 6: You can schedule the notification or sent it right away
步骤6:您可以安排通知或立即发送通知
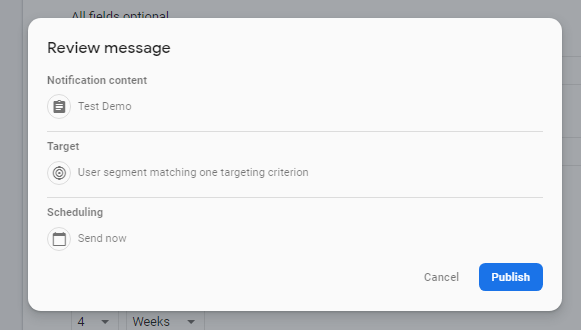
Step 7: Publish the notification :)
步骤7:发布通知:)
And its done!!
它完成了!
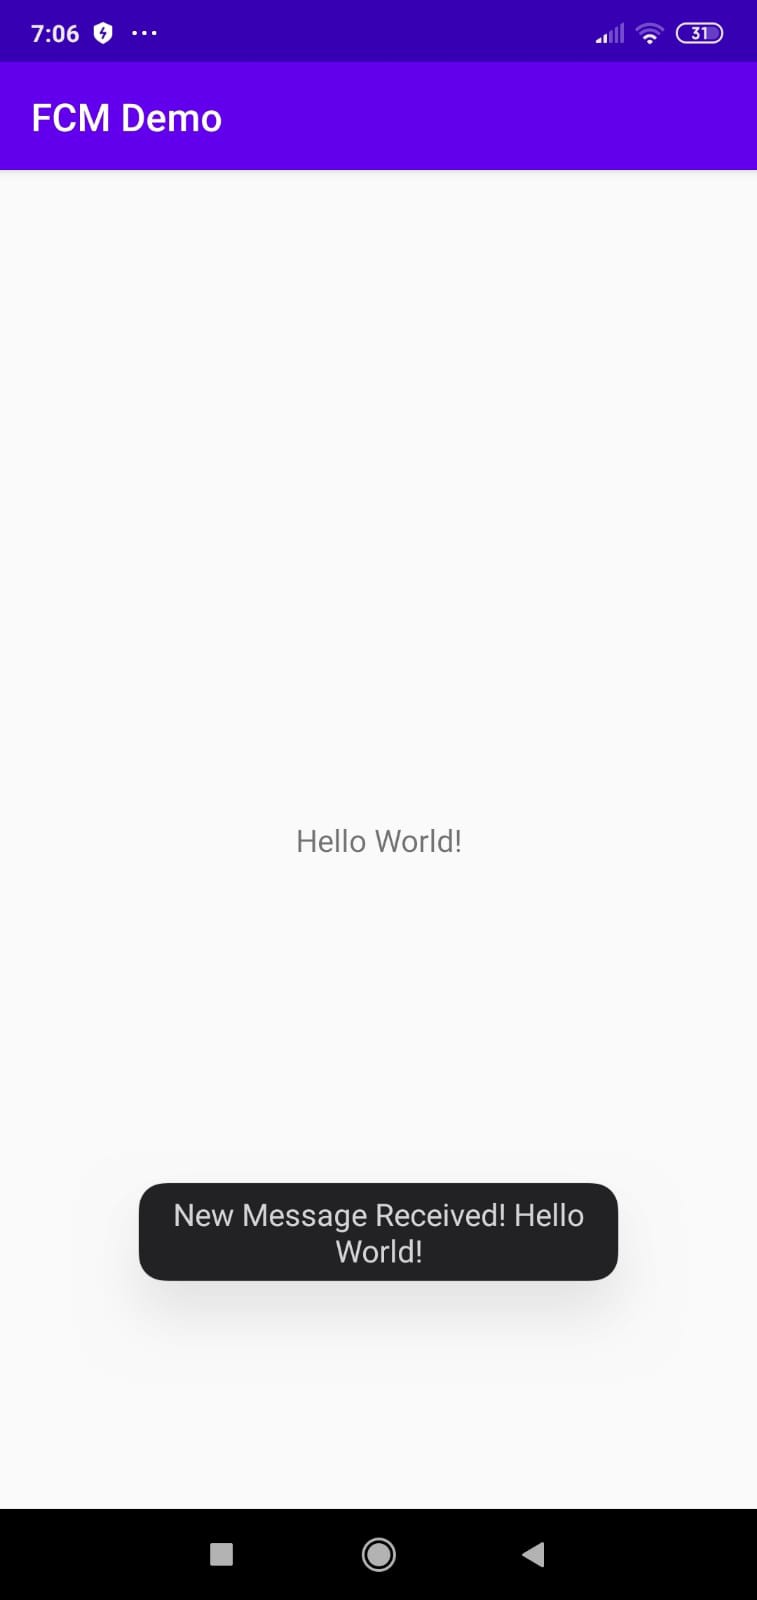
As per the code, we are showing a toast that displays the notification title. So when the notification is received, we would have something like this in our app
根据代码,我们将显示一个显示通知标题的祝酒词。 因此,当收到通知时,我们的应用程序中将出现类似这样的内容
We can even show the notification in the app if we need to engage the user with recommendations, new stock arrival, breaking news etc,. Make the whole use of FCM to bring-in features in your application
如果我们需要让用户参与推荐,新库存到来,突发新闻等,我们甚至可以在应用程序中显示通知。 充分利用FCM在您的应用程序中引入功能
Stay tuned for updates. Happy coding!
请随时关注更新。 编码愉快!
翻译自: https://medium.com/@rao.sithara/firebase-cloud-messaging-536253aeabe2