1、初始化
所有Flask程序都必须创建一个程序实例。web服务器使用一种名为Web服务器网关借口的协议,把接收自客户端的所有请求都转交给这个对象处理。
from flask import Flask
app = Flask(__name__)
Flask类的构造函数只有一个必须指定的参数,即程序主模块或包的名字。
2、路由和视图函数
客户端把请求发送给Web服务器,Web服务器再把请求发送给Flask程序实例。程序实例需要知道对每个URL请求运行哪些代码,所以保存了一个URL到Python函数的映射关系。处理URL和函数之间关系的程序称为路由。
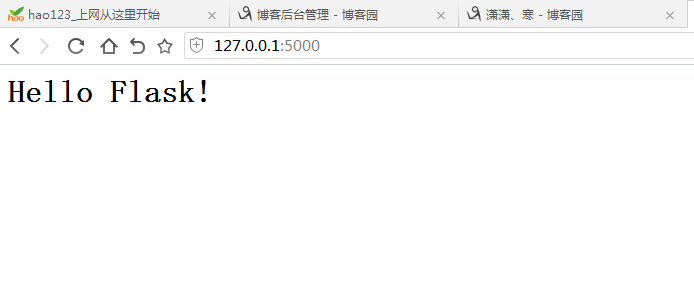
@app.route('/')
def index():
    return '<h1>Hello Flask!</h1>'
像index()这样的函数称为视图函数。视图函数返回的响应可以包含HTML的简单字符串,也可以是复杂的表单。
@app.route('/user/name')
def index(name):
    return '<h1>Hello %s!</h1>' % name
尖括号内的内容就是动态内容,任何能匹配静态部分的URL都会映射到这个路由上。
路由中的动态部分默认使用字符串,不过也可以使用类型定义。例如,/usr/<int:id>只会匹配动态片段为整数的URL。Flask支持在路由中使用int、float和path类型。
3、启动服务器
if __name__ == '__main__':
    app.run(debug=True)
有一些选项参数可被app.run()函数接受用于设置web服务器的操作模式。在开发过程中启用调试模式会带来一些便利,比如激活调试器和重载程序。要想启用调试模式,我们可以把debug参数设为True。
4、一个完整的程序
#!/usr/bin/env python

from flask import Flask
app = Flask(__name__)

@app.route('/')
def index():
    return '<h1>Hello Flask!</h1>'

if __name__ == '__main__':
    app.run(debug=True)

包含动态路由的Flask程序
#!/usr/bin/env python

from flask import Flask
app = Flask(__name__)

@app.route('/')
def index():
    return '<h1>Hello Flask!</h1>'

@app.route('/user/<name>')
def user(name):
    return '<h1>Hello,%s!</h1>' % name

if __name__ == '__main__':
    app.run(debug=True)
http://127.0.0.1:5000/user/cairui

5、请求--响应循环
下面介绍这个框架的一些设计理念。
①程序和请求上下文
为了避免大量可有可无的参数把视图函数弄得一团糟,Flask请求使用上下文临时把某些对象变为全局可访问。
from flask import request

@app.route('/')
def index():
    user_agent = request.headers.get('User-Agent')
    return '<p>Your browser is %s</p>' % user_agent
Flask使用上下文让特定的变量在一个线程中全局可访问,与此同时却不会干扰其他线程。
线程是可单独管理的最小指令集。进程经常使用多个活动线程,有时还会共享内存或文件句柄等资源。多线程web服务器会创建一个线程池,再从线程池中选择一个线程用于处理接收到的请求。
(表)Flask上下文全局变量
| 变量名 | 上下文 | 说 明 |
| current_app | 程序上下文 | 当前激活程序的程序实例 |
| g | 程序上下文 | 当前请求时用作临时存储对象。每次请求都会重设这个变量 |
| request | 请求上下文 | 请求对象,封装了客户端发出的HTTP请求中的内容 |
| session | 请求上下文 | 用户会话,用于存储请求之间需要“记住”的值得词典 |
Flask在分发请求之前激活(或推送)程序和请求上下文,请求处理完成后再将其删除。
from hello import app
from flask import current_app
current_app.name

=========================================
Traceback (most recent call last)
from hello import app
from flask import current_app
app_ctx = app.app_context()
app_ctx.push()
current_app.name
②请求调度
from hello import app
app.url_map
③请求钩子
有时在处理请求之前或之后执行代码会很有用。例如,在请求开始时,我们可能需要创建数据库连接或者认证发起请求的用户。为了避免在每个视图函数中都使用重复的代码,Flask提供了注册通用函数的功能,注册函数可在请求被分发到视图函数之前或之后调用。
Flask支持以下4种钩子:
-
- before_first_request 注册一个函数,在处理第一个请求之前运行。
- before_request 注册一个函数,在每次请求之前运行
- after_request 注册一个函数,如果没有未处理的异常抛出,在每次请求之后运行
- teardown_request 注册一个函数,即使有未处理的异常抛出,也在每次请求之后运行。
- after_request 注册一个函数,如果没有未处理的异常抛出,在每次请求之后运行
- before_request 注册一个函数,在每次请求之前运行
- before_first_request 注册一个函数,在处理第一个请求之前运行。
④响应
@app.route('/')
def index():
    return '<h1>Bad Request</h1>', 400
from flask import make_response
@app.route('/')
def index():
    response = make_response('<h1>This carries a cookie!</h1>')
    response.set_cookie('answer','42')
    return response
6、Flask扩展
使用Flask-Script支持命令行选项

#!/usr/bin/env python

from flask_script import Manager


from flask import Flask
app = Flask(__name__)
manager = Manager(app)
@app.route('/')
def index():
    return '<h1>Hello Flask!</h1>'

@app.route('/user/<name>')
def user(name):
    return '<h1>Hello,%s!</h1>' % name

if __name__ == '__main__':
    manager.run()