一、Django的用户认证组件
用户认证
auth模块
在进行用户登陆验证的时候,如果是自己写代码,就必须要先查询数据库,看用户输入的用户名是否存在于数据库中;
如果用户存在于数据库中,然后再验证用户输入的密码,这样一来就要自己编写大量的代码。
事实上,Django已经提供了内置的用户认证功能。
在使用"python manage.py makemigrationss"和"python manage.py migrate"迁移完成数据库之后
根据配置文件settings.py中的数据库段生成的数据表中已经包含了6张进行认证的数据表,分别是
- auth_user
- auth_group
- auth_group_permissions
- auth_permission
- auth_user_groups
- auth_user_user_permissions
进行用户认证的数据表为auth_user
要使用Django自带的认证功能,首先要导入auth模块
from django.contrib import auth #导入auth模块
django.contrib.auth中提供了许多方法,这里主要介绍其中的三个:
1.1 、authenticate()
提供了用户认证,即验证用户名以及密码是否正确,一般需要username password两个关键字参数
如果认证信息有效,会返回一个 User 对象。authenticate()会在User 对象上设置一个属性标识那种认证后端认证了该用户,且该信息在后面的登录过程中是需要的。当我们试图登陆一个从数据库中直接取出来不经过authenticate()的User对象会报错的!!
user = authenticate(username='someone',password='somepassword')
举例:
使用Pycharm新建项目authDemo
执行2个命令,生成django需要的表
python manage.py makemigrations
python manage.py migrate
我们只需要用到auth_user表,就可以了!
打开auth_user表,默认是空的。其中2个字段,username和password是必须要有的!

注意:添加用户,不能直接插入记录,必须使用命令行
创建超级用户
python manage.py createsuperuser
效果如下:

查看auth_user表,发现多了一条记录

注意:密码是加密的,不能直接查表验证。必须使用authenticate() 进行验证!
修改urls.py,增加路径

from app01 import views
urlpatterns = [
    path('admin/', admin.site.urls),
    path('login/', views.login),
    path('index/', views.index),
]
修改views.py,增加视图函数

from django.shortcuts import render,HttpResponse,redirect from django.contrib import auth # Create your views here. def login(request): if request.method == "POST": user = request.POST.get("user") pwd = request.POST.get("pwd") #用户验证成功,返回user对象,否则返回None ret = auth.authenticate(username=user,password=pwd) print(ret) print(ret.__dict__) if ret: return redirect("/index/")</span><span style="color: #0000ff;">return</span> render(request,<span style="color: #800000;">"</span><span style="color: #800000;">login.html</span><span style="color: #800000;">"</span><span style="color: #000000;">)def index(request):
return render(request, "index.html")
在templates新建文件login.html

<!DOCTYPE html>
<html lang="en">
<head>
    <meta charset="UTF-8">
    <title>Title</title>
</head>
<body>
<form action="" method="post">
    {% csrf_token %}
    <lable>用户名</lable><input type="text" name="user">
    <lable>密码</lable><input type="password" name="pwd">
    <input type="submit">
</form>
</body>
</html>
新建文件index.html

<!DOCTYPE html>
<html lang="en">
<head>
    <meta charset="UTF-8">
    <title>Title</title>
</head>
<body>
<h3>HI.</h3>
</body>
</html>
访问登录页面

跳转首页

查看Pycharm控制台输出

xiao
{'email': '', 'last_login': None, 'is_superuser': True, 'is_staff': True, 'date_joined': datetime.datetime(2018, 7, 9, 11, 2, 16, 775761, tzinfo=<UTC>), 'last_name': '', '_state': <django.db.models.base.ModelState object at 0x000002E6F03447B8>, 'username': 'xiao', 'password': 'pbkdf2_sha256$100000$LAp6T0YPt6Xj$37j4PuLHs3W/HRjQQyn4KYZZQog9QWrbmatAB+PC6pM=', 'id': 1, 'backend': 'django.contrib.auth.backends.ModelBackend', 'is_active': True, 'first_name': ''}
1.2 、login(HttpRequest, user)
该函数接受一个HttpRequest对象,以及一个认证了的User对象
此函数使用django的session框架给某个已认证的用户附加上session id等信息。
修改views.py

from django.shortcuts import render,HttpResponse,redirect from django.contrib import auth # Create your views here. def login(request): if request.method == "POST": user = request.POST.get("user") pwd = request.POST.get("pwd") #用户验证成功,返回user对象,否则返回None user = auth.authenticate(username=user,password=pwd) # print(user) # print(user.__dict__) if user: #登录,注册session # 全局变量 request.user=当前登陆对象(session中) auth.login(request,user) return redirect("/index/")</span><span style="color: #0000ff;">return</span> render(request,<span style="color: #800000;">"</span><span style="color: #800000;">login.html</span><span style="color: #800000;">"</span><span style="color: #000000;">)def index(request):
print(request.user) # 默认是一个匿名对象
print(request.user.id)
print(request.user.username)
return render(request, "index.html")
直接访问index

查看Pycharm控制台输出:
AnonymousUser
None
request.user 默认是一个匿名对象,auth_user表的所有字段对应的值,都是空的。
当登录成功之后,该对象才会有值。
访问登录页面 http://127.0.0.1:8000/login/
重新登录一次

查看Pycharm控制台输出:
xiao
1
xiao
request.user是全局变量,可以在任意代码中运用
它用了一个中间件,在settings.py中的MIDDLEWARE配置项里
'django.contrib.auth.middleware.AuthenticationMiddleware',
这句只要执行,那么就能注册session,产生一个全局变量
auth.login(request,user)
在上面的例子中,直接访问首页都可以,连登录的省掉了,这是不对的。
加入判断session
修改index视图函数

def index(request):
    print(request.user)  # 默认是一个匿名对象
    print(request.user.id)
    print(request.user.username)
    if not request.user.id:
        return redirect("/login/")
    name = request.user.username
    return render(request, "index.html",{"name":name})
修改index.html

<!DOCTYPE html>
<html lang="en">
<head>
    <meta charset="UTF-8">
    <title>Title</title>
</head>
<body>
<h3>HI. {{ name }}</h3>
</body>
</html>
清空浏览器缓存
直接输入url: http://127.0.0.1:8000/index/
它会跳转至登录页面,重新登录后,效果如下:

它其实也有sessionid

使用火狐浏览器访问

它会直接跳转至登录页面

1.3 、logout(request) 注销用户
首页添加注销功能
修改urls.py,增加路径logout

urlpatterns = [
    path('admin/', admin.site.urls),
    path('login/', views.login),
    path('index/', views.index),
    path('logout/', views.logout),
]
修改views.py,增加logout视图函数

def logout(request):  # 注销
    auth.logout(request)  # 清除session和cookie
    return redirect("/login/")
该函数接受一个HttpRequest对象,无返回值。当调用该函数时,当前请求的session信息会全部清除。该用户即使没有登录,使用该函数也不会报错。
修改index.html

<!DOCTYPE html>
<html lang="en">
<head>
    <meta charset="UTF-8">
    <title>Title</title>
</head>
<body>
<h3>HI. {{ name }} <a href="/logout/">注销</a></h3>
</body>
</html>
点击注销

它会跳转到登录页面

查看logout源代码

def logout(request): """ Remove the authenticated user's ID from the request and flush their session data. """ # Dispatch the signal before the user is logged out so the receivers have a # chance to find out *who* logged out. user = getattr(request, 'user', None) if hasattr(user, 'is_authenticated') and not user.is_authenticated: user = None user_logged_out.send(sender=user.__class__, request=request, user=user)</span><span style="color: #008000;">#</span><span style="color: #008000;"> remember language choice saved to session</span> language =<span style="color: #000000;"> request.session.get(LANGUAGE_SESSION_KEY) request.session.flush() </span><span style="color: #0000ff;">if</span> language <span style="color: #0000ff;">is</span> <span style="color: #0000ff;">not</span><span style="color: #000000;"> None: request.session[LANGUAGE_SESSION_KEY] </span>=<span style="color: #000000;"> language </span><span style="color: #0000ff;">if</span> hasattr(request, <span style="color: #800000;">'</span><span style="color: #800000;">user</span><span style="color: #800000;">'</span><span style="color: #000000;">): </span><span style="color: #0000ff;">from</span> django.contrib.auth.models <span style="color: #0000ff;">import</span><span style="color: #000000;"> AnonymousUser request.user </span>= AnonymousUser()</pre>
它其实和session清理类似,也是执行了命令
request.session.flush()
但是在清理之前,它做了一些条件判断!
注销之后,request.user就是匿名用户了!
注意:user是下面这行代码。变量的名字而已(等式左边的名字)
user = auth.authenticate(username=user,password=pwd)
request.user不是固定写法,根据变量名而变化!
User对象
User 对象属性:username, password(必填项)password用哈希算法保存到数据库
2.1 、user对象的 is_authenticated()
如果是真正的 User 对象,返回值恒为 True 。 用于检查用户是否已经通过了认证。
通过认证并不意味着用户拥有任何权限,甚至也不检查该用户是否处于激活状态,这只是表明用户成功的通过了认证。 这个方法很重要, 在后台用request.user.is_authenticated()判断用户是否已经登录,如果true则可以向前台展示request.user.name
修改index视图函数,更改判断方式

def index(request):
    print(request.user)  # 默认是一个匿名对象
    print(request.user.id)
    print(request.user.username)
    if not request.user.is_authenticated:
        return redirect("/login/")
    name = request.user.username
    return render(request, "index.html",{"name":name})
注意:is_authenticated后面是没有括号的,它返回一个布尔值!
清理浏览器缓存, 直接访问index

会返回登录页面

2.2 、创建用户
使用 create_user 辅助函数创建用户:
修改urls.py,增加路径adduser

urlpatterns = [
    path('admin/', admin.site.urls),
    path('login/', views.login),
    path('index/', views.index),
    path('logout/', views.logout),
    path('adduser/', views.adduser),
]
修改views.py,增加视图函数adduser
必须导入模块User
from django.contrib.auth.models import User
这里用户名和密码写死了,是为了方便测试,完整代码如下:

from django.shortcuts import render,HttpResponse,redirect from django.contrib import auth from django.contrib.auth.models import User# Create your views here.
def login(request):
if request.method == "POST":
user = request.POST.get("user")
pwd = request.POST.get("pwd")
#用户验证成功,返回user对象,否则返回None
user = auth.authenticate(username=user,password=pwd)
# print(user)
# print(user.dict)
if user:
#登录,注册session
# 全局变量 request.user=当前登陆对象(session中)
auth.login(request,user)
return redirect("/index/")</span><span style="color: #0000ff;">return</span> render(request,<span style="color: #800000;">"</span><span style="color: #800000;">login.html</span><span style="color: #800000;">"</span><span style="color: #000000;">)def index(request):
print(request.user) # 默认是一个匿名对象
print(request.user.id)
print(request.user.username)
if not request.user.is_authenticated:
return redirect("/login/")
name = request.user.username
return render(request, "index.html",{"name":name})def logout(request): # 注销
auth.logout(request) # 清除session和cookie
return redirect("/login/")def adduser(request):
User.objects.create_superuser(username="zhang",password="123")
return redirect("/login/")
直接访问url: http://127.0.0.1:8000/adduser/

它会直接跳转至登录页面
没关系,查看auth_user表记录

发现is_superuser为0,表示为普通用户
如果需要创建超级用户,使用create_superuserf方法,比如:
User.objects.create_superuser(username="lisi",password="123")
总结:5个接口

1
    #  用户验证 成功:返回user对象,否则返回None
    user=auth.authenticate(username=user, password=pwd)
2
    #  登陆,注册session
    auth.login(request,user) # 全局变量 request.user=当前登陆对象(session中)
3

# 注销

    auth.logout(request)
4

from django.contrib.auth.models import User

User.objects.create_user(username="alex",password=123)
5  request.user.is_authenticated
request.user它是全局变量,可以在模板中,直接渲染。
修改index.html

<!DOCTYPE html>
<html lang="en">
<head>
    <meta charset="UTF-8">
    <title>Title</title>
</head>
<body>
<h3>HI. {{ request.user.username }} <a href="/logout/">注销</a></h3>
</body>
</html>
重新登录,效果是一样的!

request.user它有很多属性,auth_user表中的字段,它都可以获取。username只是其中一个属性!
二、分页器
批量导入数据
要想实现分页,必须要有很多数据才行
使用Pycharm创建项目pageDemo
修改models.py,增加模型表Book

class Book(models.Model):
    title=models.CharField(max_length=32)
    price=models.DecimalField(max_digits=8,decimal_places=2)
执行2个命令,生成django需要的表
python manage.py makemigrations
python manage.py migrate
修改urls.py,增加路径index

from app01 import views
urlpatterns = [
    path('admin/', admin.site.urls),
    path('index/', views.index),
]
修改views.py,增加视图函数index
def index(request):
    for i in range(100):
        Book.objects.create(title="book_%s"%i,price=i*i)
使用上面的代码生成100条数据,会很慢!为什么呢?它每次需要找到表,插入一条记录。效率太低了!
使用bulk_create实现批量插入,效率更高!
修改index视图函数,完整代码如下:

from django.shortcuts import render,HttpResponse
from django.core.paginator import Paginator, EmptyPage, PageNotAnInteger
from app01.models import Book
# Create your views here.
def index(request):
    book_list = []  # 定义空列表
    for i in range(100):
        book = Book(title="book_%s" % i, price=i * i)
        book_list.append(book)  # 对象追加列表中

    Book.objects.bulk_create(book_list)  # 一次性批量插入100条记录
在templates目录下创建文件index.html

<!DOCTYPE html>
<html lang="en">
<head>
    <meta charset="UTF-8">
    <title>Title</title>
</head>
<body>
<h3>INDEX</h3>
</body>
</html>
访问首页

瞬间,页面加载完了
查看表记录,发现有100条记录了!

展示表数据
修改index视图函数

def index(request):
    book_list = Book.objects.all()
    return render(request,"index.html",{"book_list":book_list})
修改index.html

<!DOCTYPE html> <html lang="en"> <head> <meta charset="UTF-8"> <title>Title</title> </head> <body> <h3>INDEX</h3> <ul> {% for book in book_list %} <li>{{ book.title }}-->{{ book.price }}</li> {% endfor %}</ul>
</body>
</html>
访问首页,发现有100条数据
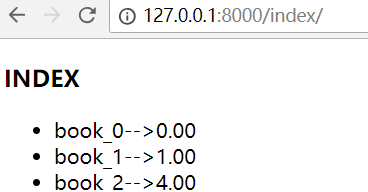
这是100条数据,如果有1000万条数据呢?浏览器打开,页面会直接卡死!
下面来讲如何使用分页。
Django的分页器(paginator)
Django提供了一个新的类来帮助你管理分页数据,这个类存放在django/core/paginator.py.它可以接收列表、元组或其它可迭代的对象。
django-pagination就像它的名字一样,它是一个Django分页器,它包含了一组翻页功能相关的utils,包括用于实现翻页的tag等。使用起来非常简单。是目前使用最多的分页APP。
要使用Django实现分页器,必须从Django中导入Paginator模块
from django.core.paginator import Paginator, EmptyPage, PageNotAnInteger
一页显示10条
修改index视图函数

from django.shortcuts import render,HttpResponse from django.core.paginator import Paginator, EmptyPage, PageNotAnInteger from app01.models import Book # Create your views here. def index(request): book_list = Book.objects.all() paginator = Paginator(book_list,10) # 每页显示10条 print(paginator.count) #数据总数 100 print(paginator.num_pages) # #总页数 10 print(paginator.page_range) #页码的列表 range(1, 11) page_01 = paginator.page(2) #第2页的所有数据对象 print(page_01.has_next()) #是否有下一页 print(page_01.has_previous()) #是否有上一页 print(page_01.next_page_number()) #下一页的页码 print(page_01.previous_page_number()) #上一页的页码<span style="color: #0000ff;">return</span> render(request,<span style="color: #800000;">"</span><span style="color: #800000;">index.html</span><span style="color: #800000;">"</span>,{<span style="color: #800000;">"</span><span style="color: #800000;">page_01</span><span style="color: #800000;">"</span>:page_01})</pre>
修改index.html

<!DOCTYPE html> <html lang="en"> <head> <meta charset="UTF-8"> <title>Title</title> </head> <body> <h3>INDEX</h3> <ul> {% for book in page_01 %} <li>{{ book.title }}-->{{ book.price }}</li> {% endfor %}</ul>
</body>
</html>
刷新网页,这里展示的是第2页的数据
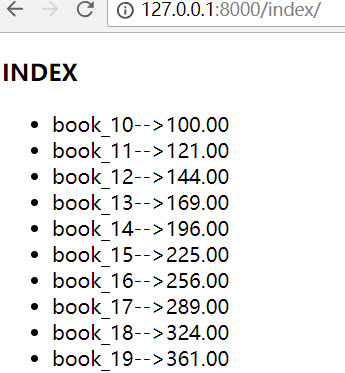
Pycharm控制台输出:
100
10
range(1, 11)
True
True
3
1
注意:paginator.page(),这里面数字,如果超过页码数,会报错!
EmptyPage at /index/
通过修改url的参数,就可以访问任意页的数据
修改index视图函数

def index(request): book_list = Book.objects.all() paginator = Paginator(book_list,10) # 每页显示10条 #当前页码,如果取不到page参数,默认为1 current_num = int(request.GET.get("page",1)) book_list = paginator.page(current_num)</span><span style="color: #0000ff;">return</span> render(request,<span style="color: #800000;">"</span><span style="color: #800000;">index.html</span><span style="color: #800000;">"</span>,{<span style="color: #800000;">"</span><span style="color: #800000;">book_list</span><span style="color: #800000;">"</span>:book_list})</pre>
手动输出url: http://127.0.0.1:8000/index/?page=3
就可以访问分页数据了
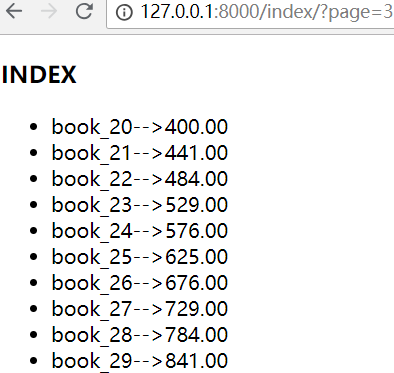
超过页码,就会报错

这样用户体验不好, 展示页面器,让用户能点击!
展示页面器
访问Bootstrap,找到分页。链接如下:
https://v3.bootcss.com/components/#pagination
copy默认分页样式
修改index视图函数

def index(request):
    book_list = Book.objects.all()
    paginator = Paginator(book_list,10)  # 每页显示10条
    # #当前页码,如果取不到page参数,默认为1
    current_num = int(request.GET.get("page",1))  # 当前页码
    book_list = paginator.page(current_num)  # 展示当前页码的10条数据
    print(paginator.page_range)  # 页码的列表
    return render(request,"index.html",{"book_list":book_list,"paginator":paginator})
修改index.html

<!DOCTYPE html> <html lang="en"> <head> <meta charset="UTF-8"> <title>Title</title> <link rel="stylesheet" href="https://cdn.bootcss.com/bootstrap/3.3.7/css/bootstrap.min.css"> </head> <body> <h3>INDEX</h3> {#数据展示#} <ul> {% for book in book_list %} <li>{{ book.title }}-->{{ book.price }}</li> {% endfor %}</ul>
{#分页展示#}
<nav aria-label="Page navigation">
<ul class="pagination">
<li>
<a href="#" aria-label="Previous">
<span aria-hidden="true">«</span>
</a>
</li>
{#遍历页码的列表#}
{% for i in paginator.page_range %}
{#href参数为简写,它会自动获取当前路径,并拼接参数#}
<li><a href="?page={{ i }}">{{ i }}</a></li>
{% endfor %}
<li>
<a href="#" aria-label="Next">
<span aria-hidden="true">»</span>
</a>
</li>
</ul>
</nav>
</body>
</html>
刷新页面,效果如下:

选中加深效果
思路:点击一个页码,它会发送一次请求,参数就是点击的数字。页面会刷新一次!
那么只需要判断url的参数等于当前页面数,加一个class=active,就可以了!
修改index视图函数,将current_num(当前页码数)传给模板

def index(request):
    book_list = Book.objects.all()
    paginator = Paginator(book_list,10)  # 每页显示10条
    # #当前页码,如果取不到page参数,默认为1
    current_num = int(request.GET.get("page",1))  # 当前页码
    book_list = paginator.page(current_num)  # 展示当前页码的10条数据
    print(paginator.page_range)  # 页码的列表
    return render(request,"index.html",{"book_list":book_list,"paginator":paginator,"current_num":current_num})
修改index.html

<!DOCTYPE html> <html lang="en"> <head> <meta charset="UTF-8"> <title>Title</title> <link rel="stylesheet" href="https://cdn.bootcss.com/bootstrap/3.3.7/css/bootstrap.min.css"> </head> <body> <h3>INDEX</h3> {#数据展示#} <ul> {% for book in book_list %} <li>{{ book.title }}-->{{ book.price }}</li> {% endfor %}</ul>
{#分页展示#}
<nav aria-label="Page navigation">
<ul class="pagination">
<li>
<a href="#" aria-label="Previous">
<span aria-hidden="true">«</span>
</a>
</li>
{#遍历页码的列表#}
{% for i in paginator.page_range %}
{#判断当前页码数等于底部页码时#}
{% if current_num == i %}
{#增加class,加深按钮#}
<li class="active"><a href="?page={{ i }}">{{ i }}</a></li>
{% else %}
{#href参数为简写,它会自动获取当前路径,并拼接参数#}
<li><a href="?page={{ i }}">{{ i }}</a></li>
{% endif %}{</span>% endfor %<span style="color: #000000;">} </span><li> <a href=<span style="color: #800000;">"</span><span style="color: #800000;">#</span><span style="color: #800000;">"</span> aria-label=<span style="color: #800000;">"</span><span style="color: #800000;">Next</span><span style="color: #800000;">"</span>> <span aria-hidden=<span style="color: #800000;">"</span><span style="color: #800000;">true</span><span style="color: #800000;">"</span>>&raquo;</span> </a> </li> </ul></nav>
</body>
</html>
刷新页面,效果如下:

注意:点击页码之后,它会发送新请求,页面会刷新,重新渲染。
上一页
思路:上一页,就是当前页码数减一就可以了!但是模板里面不能直接减一,所以使用过滤器
current_num|add:-1
就可以得到上一页了!但是paginator提供了方法previous_page_number,来获取上一页的页码
has_previous 判断是否有上一页
previous_page_number 上一页的页码
注意:如果是第一页,那么点击上一页之后,就会报错!所以需要判断,当是第一页时,增加class="disabled",不让用户点击!
修改index视图函数

def index(request): book_list = Book.objects.all() # 读取表中的所有数据 paginator = Paginator(book_list,10) # 每页显示10条data = {"book_list":book_list,"paginator":paginator,"current_num":current_num} return render(request,"index.html",data)<span style="color: #008000;">#</span><span style="color: #008000;">异常判断</span> <span style="color: #0000ff;">try</span><span style="color: #000000;">: </span><span style="color: #008000;">#</span><span style="color: #008000;"> 当前页码,如果取不到page参数,默认为1</span> current_num = int(request.GET.get(<span style="color: #800000;">"</span><span style="color: #800000;">page</span><span style="color: #800000;">"</span>, 1)) <span style="color: #008000;">#</span><span style="color: #008000;"> 当前页码</span> book_list = paginator.page(current_num) <span style="color: #008000;">#</span><span style="color: #008000;"> 获取当前页码的10条数据</span> <span style="color: #0000ff;">except</span> EmptyPage: <span style="color: #008000;">#</span><span style="color: #008000;"> 页码不存在时,报EmptyPage错误</span> book_list = paginator.page(1) <span style="color: #008000;">#</span><span style="color: #008000;"> 强制更新为第一页</span>
修改index.html

<!DOCTYPE html> <html lang="en"> <head> <meta charset="UTF-8"> <title>Title</title> <link rel="stylesheet" href="https://cdn.bootcss.com/bootstrap/3.3.7/css/bootstrap.min.css"> </head> <body> <h3>INDEX</h3> {#数据展示#} <ul> {% for book in book_list %} <li>{{ book.title }}-->{{ book.price }}</li> {% endfor %}</ul>
{#分页展示#}
<nav aria-label="Page navigation">
<ul class="pagination">
{#has_previous 判断是否有上一页#}
{% if book_list.has_previous %}
{#previous_page_number 上一页的页码#}
<li><a href="?page={{ book_list.previous_page_number }}" aria-label="Previous"><span
aria-hidden="true">上一页</span></a></li>
{% else %}
{#class="disabled" 禁止用户点击#}
<li class="disabled"><a href="" aria-label="Previous"><span aria-hidden="true">上一页</span></a></li>
{% endif %}
{#遍历页码的列表#}
{% for i in paginator.page_range %}
{#判断当前页码数等于底部页码时#}
{% if current_num == i %}
{#增加class,加深按钮#}
<li class="active"><a href="?page={{ i }}">{{ i }}</a></li>
{% else %}
{#href参数为简写,它会自动获取当前路径,并拼接参数#}
<li><a href="?page={{ i }}">{{ i }}</a></li>
{% endif %}{</span>% endfor %<span style="color: #000000;">} </span><li> <a href=<span style="color: #800000;">"</span><span style="color: #800000;">#</span><span style="color: #800000;">"</span> aria-label=<span style="color: #800000;">"</span><span style="color: #800000;">Next</span><span style="color: #800000;">"</span>> <span aria-hidden=<span style="color: #800000;">"</span><span style="color: #800000;">true</span><span style="color: #800000;">"</span>>&raquo;</span> </a> </li> </ul></nav>
</body>
</html>
刷新页面,效果如下:
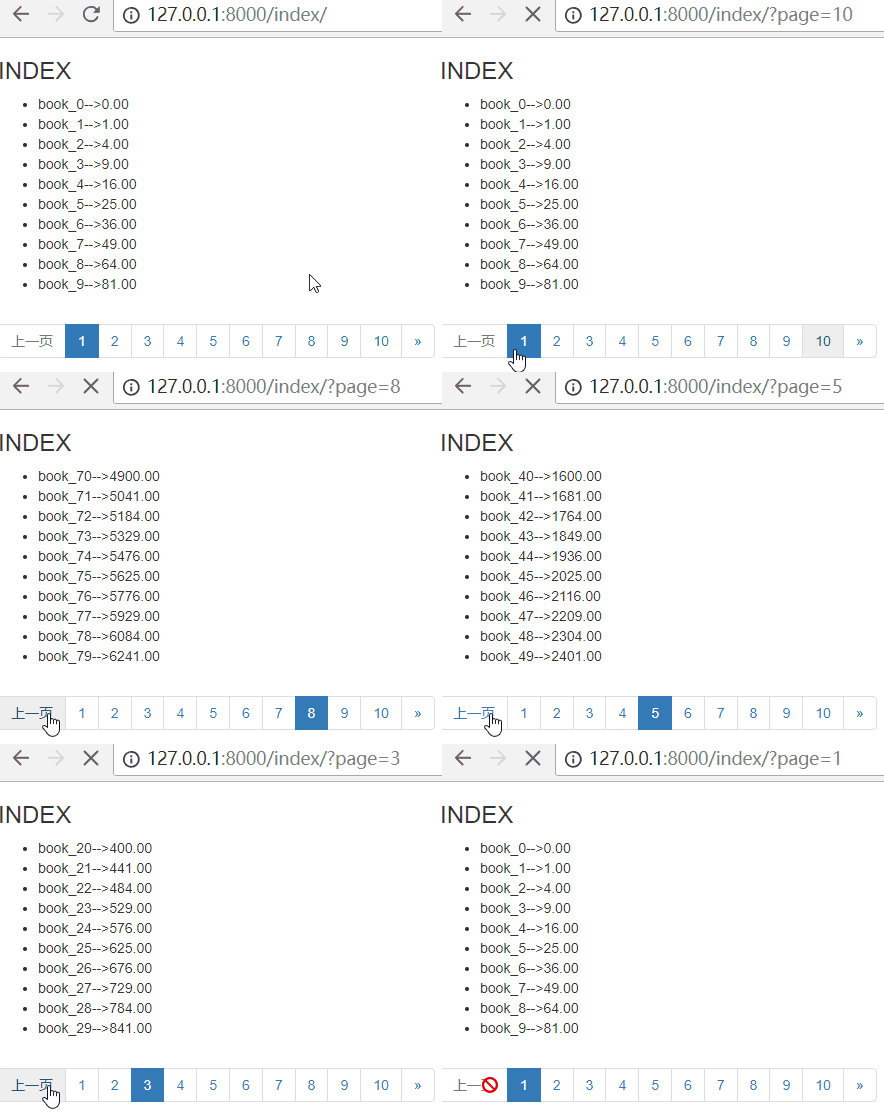
下一页
思路:使用paginator提供的方法
has_next 判断是否有下一页
next_page_number 下一页的页码
修改index.html

<!DOCTYPE html> <html lang="en"> <head> <meta charset="UTF-8"> <title>Title</title> <link rel="stylesheet" href="https://cdn.bootcss.com/bootstrap/3.3.7/css/bootstrap.min.css"> </head> <body> <h3>INDEX</h3> {#数据展示#} <ul> {% for book in book_list %} <li>{{ book.title }}-->{{ book.price }}</li> {% endfor %}</ul>
{#分页展示#}
<nav aria-label="Page navigation">
<ul class="pagination">
{#has_previous 判断是否有上一页#}
{% if book_list.has_previous %}
{#previous_page_number 上一页的页码#}
<li><a href="?page={{ book_list.previous_page_number }}" aria-label="Previous"><span
aria-hidden="true">上一页</span></a></li>
{% else %}
{#class="disabled" 禁止用户点击#}
<li class="disabled"><a href="" aria-label="Previous"><span aria-hidden="true">上一页</span></a></li>
{% endif %}{</span><span style="color: #008000;">#</span><span style="color: #008000;">遍历页码的列表#}</span> {% <span style="color: #0000ff;">for</span> i <span style="color: #0000ff;">in</span> paginator.page_range %<span style="color: #000000;">} {</span><span style="color: #008000;">#</span><span style="color: #008000;">判断当前页码数等于底部页码时#}</span> {% <span style="color: #0000ff;">if</span> current_num == i %<span style="color: #000000;">} {</span><span style="color: #008000;">#</span><span style="color: #008000;">增加class,加深按钮#}</span> <li <span style="color: #0000ff;">class</span>=<span style="color: #800000;">"</span><span style="color: #800000;">active</span><span style="color: #800000;">"</span>><a href=<span style="color: #800000;">"</span><span style="color: #800000;">?page={{ i }}</span><span style="color: #800000;">"</span>>{{ i }}</a></li><span style="color: #000000;"> {</span>% <span style="color: #0000ff;">else</span> %<span style="color: #000000;">} {</span><span style="color: #008000;">#</span><span style="color: #008000;">href参数为简写,它会自动获取当前路径,并拼接参数#}</span> <li><a href=<span style="color: #800000;">"</span><span style="color: #800000;">?page={{ i }}</span><span style="color: #800000;">"</span>>{{ i }}</a></li><span style="color: #000000;"> {</span>% endif %<span style="color: #000000;">} {</span>% endfor %<span style="color: #000000;">} {</span><span style="color: #008000;">#</span><span style="color: #008000;">has_next 判断是否有下一页#}</span> {% <span style="color: #0000ff;">if</span> book_list.has_next %<span style="color: #000000;">} {</span><span style="color: #008000;">#</span><span style="color: #008000;">next_page_number 下一页的页码#}</span> <li><a href=<span style="color: #800000;">"</span><span style="color: #800000;">?page={{ book_list.next_page_number }}</span><span style="color: #800000;">"</span> aria-label=<span style="color: #800000;">"</span><span style="color: #800000;">Next</span><span style="color: #800000;">"</span>><<span style="color: #000000;">span aria</span>-hidden=<span style="color: #800000;">"</span><span style="color: #800000;">true</span><span style="color: #800000;">"</span>>下一页</span></a></li><span style="color: #000000;"> {</span>% <span style="color: #0000ff;">else</span> %<span style="color: #000000;">} {</span><span style="color: #008000;">#</span><span style="color: #008000;">class="disabled" 禁止用户点击#}</span> <li <span style="color: #0000ff;">class</span>=<span style="color: #800000;">"</span><span style="color: #800000;">disabled</span><span style="color: #800000;">"</span>><a href=<span style="color: #800000;">""</span> aria-label=<span style="color: #800000;">"</span><span style="color: #800000;">Next</span><span style="color: #800000;">"</span>><span aria-hidden=<span style="color: #800000;">"</span><span style="color: #800000;">true</span><span style="color: #800000;">"</span>>下一页</span></a></li><span style="color: #000000;"> {</span>% endif %<span style="color: #000000;">} </span></ul></nav>
</body>
</html>
刷新页面,效果如下:
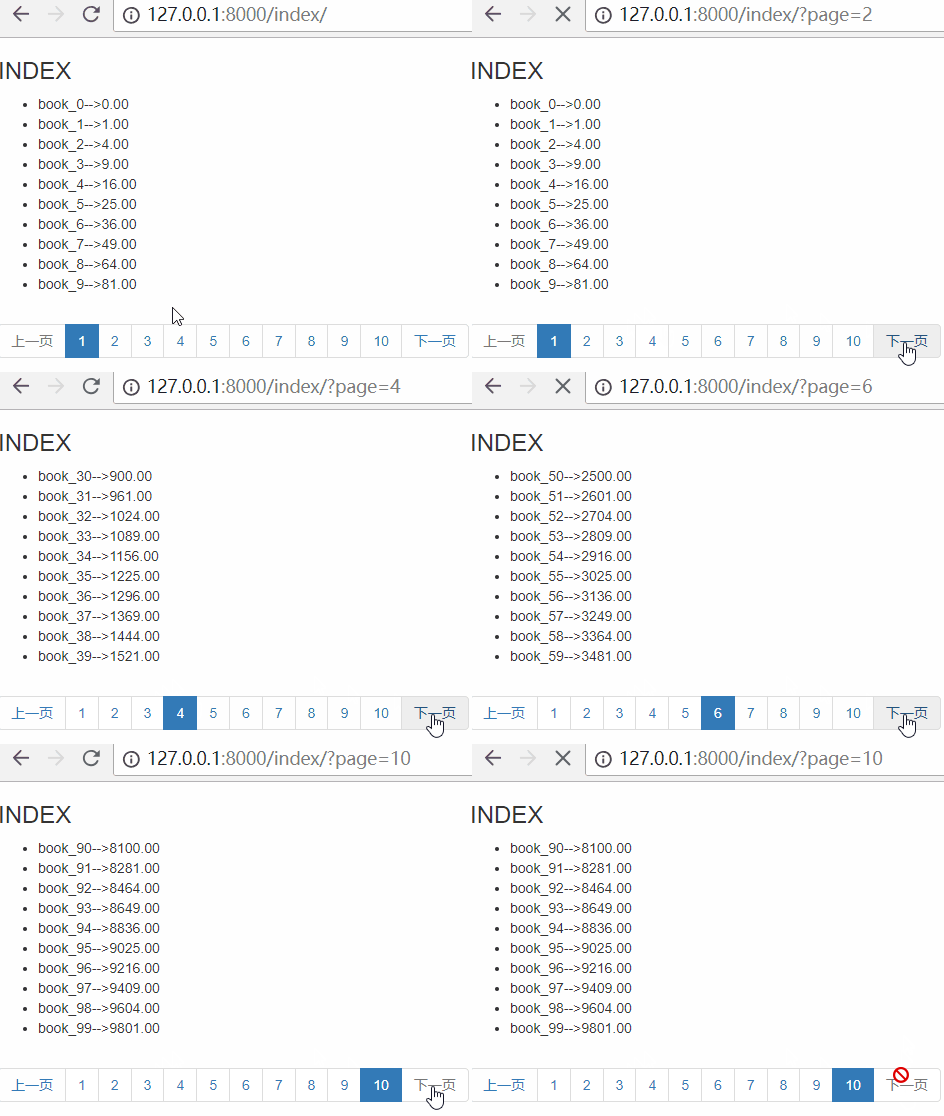
首页和最后一页
思路:首页为:page=1,最后一页为:page={{ paginator.num_pages }}
paginator.num_pages表示总页数

<!DOCTYPE html> <html lang="en"> <head> <meta charset="UTF-8"> <title>Title</title> <link rel="stylesheet" href="https://cdn.bootcss.com/bootstrap/3.3.7/css/bootstrap.min.css"> </head> <body> <h3>INDEX</h3> {#数据展示#} <ul> {% for book in book_list %} <li>{{ book.title }}-->{{ book.price }}</li> {% endfor %}</ul>
{#分页展示#}
<nav aria-label="Page navigation">
<ul class="pagination">
<li><a href="?page=1" aria-label="Previous"><span aria-hidden="true">首页</span></a></li>{</span><span style="color: #008000;">#</span><span style="color: #008000;">has_previous 判断是否有上一页#}</span> {% <span style="color: #0000ff;">if</span> book_list.has_previous %<span style="color: #000000;">} {</span><span style="color: #008000;">#</span><span style="color: #008000;">previous_page_number 上一页的页码#}</span> <li><a href=<span style="color: #800000;">"</span><span style="color: #800000;">?page={{ book_list.previous_page_number }}</span><span style="color: #800000;">"</span> aria-label=<span style="color: #800000;">"</span><span style="color: #800000;">Previous</span><span style="color: #800000;">"</span>><<span style="color: #000000;">span aria</span>-hidden=<span style="color: #800000;">"</span><span style="color: #800000;">true</span><span style="color: #800000;">"</span>>上一页</span></a></li><span style="color: #000000;"> {</span>% <span style="color: #0000ff;">else</span> %<span style="color: #000000;">} {</span><span style="color: #008000;">#</span><span style="color: #008000;">class="disabled" 禁止用户点击#}</span> <li <span style="color: #0000ff;">class</span>=<span style="color: #800000;">"</span><span style="color: #800000;">disabled</span><span style="color: #800000;">"</span>><a href=<span style="color: #800000;">""</span> aria-label=<span style="color: #800000;">"</span><span style="color: #800000;">Previous</span><span style="color: #800000;">"</span>><span aria-hidden=<span style="color: #800000;">"</span><span style="color: #800000;">true</span><span style="color: #800000;">"</span>>上一页</span></a></li><span style="color: #000000;"> {</span>% endif %<span style="color: #000000;">} {</span><span style="color: #008000;">#</span><span style="color: #008000;">遍历页码的列表#}</span> {% <span style="color: #0000ff;">for</span> i <span style="color: #0000ff;">in</span> paginator.page_range %<span style="color: #000000;">} {</span><span style="color: #008000;">#</span><span style="color: #008000;">判断当前页码数等于底部页码时#}</span> {% <span style="color: #0000ff;">if</span> current_num == i %<span style="color: #000000;">} {</span><span style="color: #008000;">#</span><span style="color: #008000;">增加class,加深按钮#}</span> <li <span style="color: #0000ff;">class</span>=<span style="color: #800000;">"</span><span style="color: #800000;">active</span><span style="color: #800000;">"</span>><a href=<span style="color: #800000;">"</span><span style="color: #800000;">?page={{ i }}</span><span style="color: #800000;">"</span>>{{ i }}</a></li><span style="color: #000000;"> {</span>% <span style="color: #0000ff;">else</span> %<span style="color: #000000;">} {</span><span style="color: #008000;">#</span><span style="color: #008000;">href参数为简写,它会自动获取当前路径,并拼接参数#}</span> <li><a href=<span style="color: #800000;">"</span><span style="color: #800000;">?page={{ i }}</span><span style="color: #800000;">"</span>>{{ i }}</a></li><span style="color: #000000;"> {</span>% endif %<span style="color: #000000;">} {</span>% endfor %<span style="color: #000000;">} {</span><span style="color: #008000;">#</span><span style="color: #008000;">has_next 判断是否有下一页#}</span> {% <span style="color: #0000ff;">if</span> book_list.has_next %<span style="color: #000000;">} {</span><span style="color: #008000;">#</span><span style="color: #008000;">next_page_number 下一页的页码#}</span> <li><a href=<span style="color: #800000;">"</span><span style="color: #800000;">?page={{ book_list.next_page_number }}</span><span style="color: #800000;">"</span> aria-label=<span style="color: #800000;">"</span><span style="color: #800000;">Next</span><span style="color: #800000;">"</span>><<span style="color: #000000;">span aria</span>-hidden=<span style="color: #800000;">"</span><span style="color: #800000;">true</span><span style="color: #800000;">"</span>>下一页</span></a></li><span style="color: #000000;"> {</span>% <span style="color: #0000ff;">else</span> %<span style="color: #000000;">} {</span><span style="color: #008000;">#</span><span style="color: #008000;">class="disabled" 禁止用户点击#}</span> <li <span style="color: #0000ff;">class</span>=<span style="color: #800000;">"</span><span style="color: #800000;">disabled</span><span style="color: #800000;">"</span>><a href=<span style="color: #800000;">""</span> aria-label=<span style="color: #800000;">"</span><span style="color: #800000;">Next</span><span style="color: #800000;">"</span>><span aria-hidden=<span style="color: #800000;">"</span><span style="color: #800000;">true</span><span style="color: #800000;">"</span>>下一页</span></a></li><span style="color: #000000;"> {</span>% endif %<span style="color: #000000;">} </span><li><a href=<span style="color: #800000;">"</span><span style="color: #800000;">?page={{ paginator.num_pages }}</span><span style="color: #800000;">"</span> aria-label=<span style="color: #800000;">"</span><span style="color: #800000;">Next</span><span style="color: #800000;">"</span>><span aria-hidden=<span style="color: #800000;">"</span><span style="color: #800000;">true</span><span style="color: #800000;">"</span>>最后一页</span></a></li> </ul></nav>
</body>
</html>
效果如下:
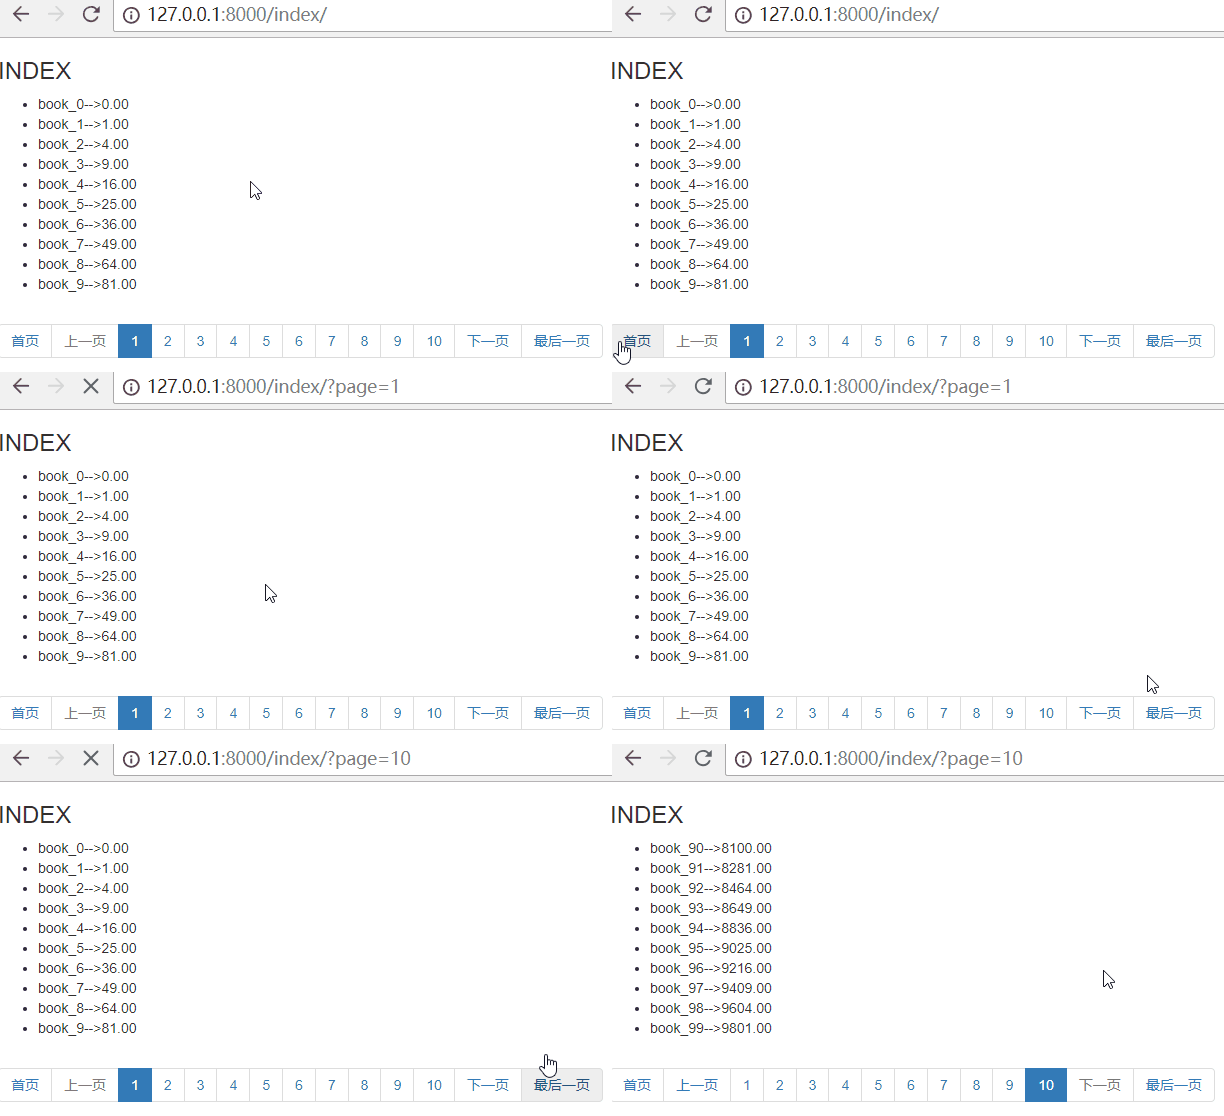
固定显示11页
修改index视图函数,改一行代码,每页显示2条数据
paginator = Paginator(book_list,2)
刷新网页,效果如下:

从页面中可以看出,展示了50页。这样非常影响页面排版,用户体验也不好!
一般网站会展示11页,比如博客园首页的分页器,效果如下:

11页怎么计算的呢?左5页,右5页,加上当前页,共11页!
修改index视图函数,完整代码如下:

from django.shortcuts import render,HttpResponse from django.core.paginator import Paginator, EmptyPage, PageNotAnInteger from app01.models import Book # Create your views here. def index(request): book_list = Book.objects.all() # 读取表中的所有数据 paginator = Paginator(book_list,2) # 每页显示2条data = {"book_list":book_list,"paginator":paginator,"current_num":current_num,"pageRange":pageRange} return render(request,"index.html",data)<span style="color: #008000;">#</span><span style="color: #008000;">异常判断</span> <span style="color: #0000ff;">try</span><span style="color: #000000;">: </span><span style="color: #008000;">#</span><span style="color: #008000;"> 当前页码,如果取不到page参数,默认为1</span> current_num = int(request.GET.get(<span style="color: #800000;">"</span><span style="color: #800000;">page</span><span style="color: #800000;">"</span>, 1)) <span style="color: #008000;">#</span><span style="color: #008000;"> 当前页码</span> book_list = paginator.page(current_num) <span style="color: #008000;">#</span><span style="color: #008000;"> 获取当前页码的数据</span> <span style="color: #0000ff;">except</span> EmptyPage: <span style="color: #008000;">#</span><span style="color: #008000;"> 页码不存在时,报EmptyPage错误</span> book_list = paginator.page(1) <span style="color: #008000;">#</span><span style="color: #008000;"> 强制更新为第一页</span> <span style="color: #008000;">#</span><span style="color: #008000;"> 如果页数十分多时,换另外一种显示方式</span> <span style="color: #0000ff;">if</span> paginator.num_pages > 11: <span style="color: #008000;">#</span><span style="color: #008000;"> 一般网页展示11页,左5页,右5页,加上当前页,共11页</span> <span style="color: #0000ff;">if</span> current_num - 5 < 1: <span style="color: #008000;">#</span><span style="color: #008000;"> 如果前5页小于1时</span> pageRange = range(1, 11) <span style="color: #008000;">#</span><span style="color: #008000;"> 页码的列表:范围是初始状态</span> <span style="color: #0000ff;">elif</span> current_num + 5 > paginator.num_pages: <span style="color: #008000;">#</span><span style="color: #008000;"> 如果后5页大于总页数时</span> <span style="color: #008000;">#</span><span style="color: #008000;"> 页码的列表:范围是(当前页-5,总页数+1)。因为range顾头不顾尾,需要加1</span> pageRange = range(current_num - 5, paginator.num_pages + 1<span style="color: #000000;">) </span><span style="color: #0000ff;">else</span><span style="color: #000000;">: </span><span style="color: #008000;">#</span><span style="color: #008000;"> 页码的列表:后5页正常时,页码范围是(当前页-5,当前页+6)。注意不是+5,因为range顾头不顾尾!</span> pageRange = range(current_num - 5, current_num + 6<span style="color: #000000;">) </span><span style="color: #0000ff;">else</span><span style="color: #000000;">: pageRange </span>= paginator.page_range <span style="color: #008000;">#</span><span style="color: #008000;"> 页码的列表</span>
修改index.html,修改for循环的变量

<!DOCTYPE html> <html lang="en"> <head> <meta charset="UTF-8"> <title>Title</title> <link rel="stylesheet" href="https://cdn.bootcss.com/bootstrap/3.3.7/css/bootstrap.min.css"> </head> <body> <h3>INDEX</h3> {#数据展示#} <ul> {% for book in book_list %} <li>{{ book.title }}-->{{ book.price }}</li> {% endfor %}</ul>
{#分页展示#}
<nav aria-label="Page navigation">
<ul class="pagination">
<li><a href="?page=1" aria-label="Previous"><span aria-hidden="true">首页</span></a></li>{</span><span style="color: #008000;">#</span><span style="color: #008000;">has_previous 判断是否有上一页#}</span> {% <span style="color: #0000ff;">if</span> book_list.has_previous %<span style="color: #000000;">} {</span><span style="color: #008000;">#</span><span style="color: #008000;">previous_page_number 上一页的页码#}</span> <li><a href=<span style="color: #800000;">"</span><span style="color: #800000;">?page={{ book_list.previous_page_number }}</span><span style="color: #800000;">"</span> aria-label=<span style="color: #800000;">"</span><span style="color: #800000;">Previous</span><span style="color: #800000;">"</span>><<span style="color: #000000;">span aria</span>-hidden=<span style="color: #800000;">"</span><span style="color: #800000;">true</span><span style="color: #800000;">"</span>>上一页</span></a></li><span style="color: #000000;"> {</span>% <span style="color: #0000ff;">else</span> %<span style="color: #000000;">} {</span><span style="color: #008000;">#</span><span style="color: #008000;">class="disabled" 禁止用户点击#}</span> <li <span style="color: #0000ff;">class</span>=<span style="color: #800000;">"</span><span style="color: #800000;">disabled</span><span style="color: #800000;">"</span>><a href=<span style="color: #800000;">""</span> aria-label=<span style="color: #800000;">"</span><span style="color: #800000;">Previous</span><span style="color: #800000;">"</span>><span aria-hidden=<span style="color: #800000;">"</span><span style="color: #800000;">true</span><span style="color: #800000;">"</span>>上一页</span></a></li><span style="color: #000000;"> {</span>% endif %<span style="color: #000000;">} {</span><span style="color: #008000;">#</span><span style="color: #008000;">遍历页码的列表#}</span> {% <span style="color: #0000ff;">for</span> i <span style="color: #0000ff;">in</span> pageRange %<span style="color: #000000;">} {</span><span style="color: #008000;">#</span><span style="color: #008000;">判断当前页码数等于底部页码时#}</span> {% <span style="color: #0000ff;">if</span> current_num == i %<span style="color: #000000;">} {</span><span style="color: #008000;">#</span><span style="color: #008000;">增加class,加深按钮#}</span> <li <span style="color: #0000ff;">class</span>=<span style="color: #800000;">"</span><span style="color: #800000;">active</span><span style="color: #800000;">"</span>><a href=<span style="color: #800000;">"</span><span style="color: #800000;">?page={{ i }}</span><span style="color: #800000;">"</span>>{{ i }}</a></li><span style="color: #000000;"> {</span>% <span style="color: #0000ff;">else</span> %<span style="color: #000000;">} {</span><span style="color: #008000;">#</span><span style="color: #008000;">href参数为简写,它会自动获取当前路径,并拼接参数#}</span> <li><a href=<span style="color: #800000;">"</span><span style="color: #800000;">?page={{ i }}</span><span style="color: #800000;">"</span>>{{ i }}</a></li><span style="color: #000000;"> {</span>% endif %<span style="color: #000000;">} {</span>% endfor %<span style="color: #000000;">} {</span><span style="color: #008000;">#</span><span style="color: #008000;">has_next 判断是否有下一页#}</span> {% <span style="color: #0000ff;">if</span> book_list.has_next %<span style="color: #000000;">} {</span><span style="color: #008000;">#</span><span style="color: #008000;">next_page_number 下一页的页码#}</span> <li><a href=<span style="color: #800000;">"</span><span style="color: #800000;">?page={{ book_list.next_page_number }}</span><span style="color: #800000;">"</span> aria-label=<span style="color: #800000;">"</span><span style="color: #800000;">Next</span><span style="color: #800000;">"</span>><<span style="color: #000000;">span aria</span>-hidden=<span style="color: #800000;">"</span><span style="color: #800000;">true</span><span style="color: #800000;">"</span>>下一页</span></a></li><span style="color: #000000;"> {</span>% <span style="color: #0000ff;">else</span> %<span style="color: #000000;">} {</span><span style="color: #008000;">#</span><span style="color: #008000;">class="disabled" 禁止用户点击#}</span> <li <span style="color: #0000ff;">class</span>=<span style="color: #800000;">"</span><span style="color: #800000;">disabled</span><span style="color: #800000;">"</span>><a href=<span style="color: #800000;">""</span> aria-label=<span style="color: #800000;">"</span><span style="color: #800000;">Next</span><span style="color: #800000;">"</span>><span aria-hidden=<span style="color: #800000;">"</span><span style="color: #800000;">true</span><span style="color: #800000;">"</span>>下一页</span></a></li><span style="color: #000000;"> {</span>% endif %<span style="color: #000000;">} </span><li><a href=<span style="color: #800000;">"</span><span style="color: #800000;">?page={{ paginator.num_pages }}</span><span style="color: #800000;">"</span> aria-label=<span style="color: #800000;">"</span><span style="color: #800000;">Next</span><span style="color: #800000;">"</span>><span aria-hidden=<span style="color: #800000;">"</span><span style="color: #800000;">true</span><span style="color: #800000;">"</span>>最后一页</span></a></li> </ul></nav>
</body>
</html>
刷新网页,效果如下:

参考资料:
转载声明:
作者:肖祥
出处: https://www.cnblogs.com/xiao987334176/
