CentOS8 yum安装Mariadb10.4
https://downloads.mariadb.org/mariadb/repositories/#distro=CentOS&distro_release=centos8-amd64--centos8&mirror=liquidtelecom&version=10.4
vim /etc/yum.repos.d/MariaDB.repo ##新建配置文件
##将一下文件复制进去
# MariaDB 10.4 CentOS repository list - created 2020-06-01 04:02 UTC
# http://downloads.mariadb.org/mariadb/repositories/
[mariadb]
name = MariaDB
baseurl = http://yum.mariadb.org/10.4/centos8-amd64
module_hotfixes=1
gpgkey=https://yum.mariadb.org/RPM-GPG-KEY-MariaDB
gpgcheck=1
##保存退出后执行dnf install
sudo dnf install MariaDB-server
sudo systemctl start mariadb
- 装完以后看一下主要的配置文件
rpm -ql MariaDB-server

- mySQL是一项重要的服务,查看一下服务文件
rpm -ql mariadb-server|grep service

- 查看服务的状态
systemctl status mariadb

- 启动服务并设定开机启动
systemctl enable --now mariadb

- 查看端口监听情况,mySQL默认使用3306端口
ss -ntl

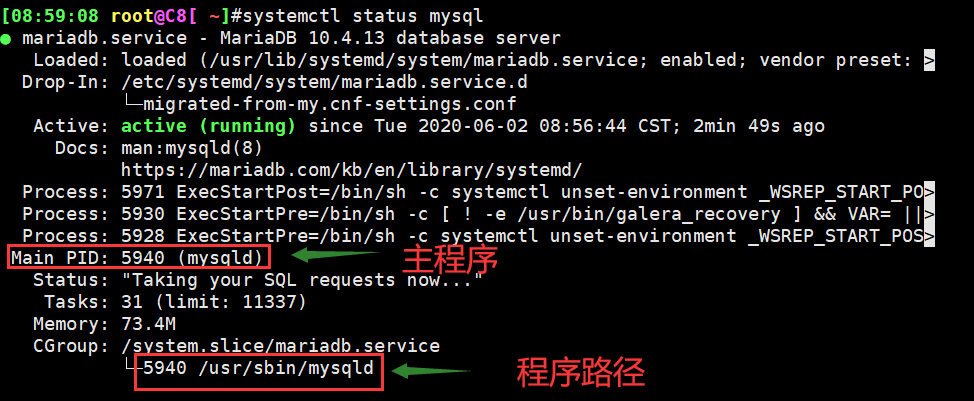
- 查看mysql程序状态
systemctl status mysql

- 查看mysql进程
mysql直接开启了,用户身份为mysql,l为多线程
[08:59:40 root@C8[ ~]#ps aux | grep mysql
mysql      5940  0.0  5.0 1298624 94116 ?       Ssl  08:56   0:00 /usr/sbin/mysqld
root       6005  0.0  0.0  12108  1076 pts/0    S+   09:04   0:00 grep --color=auto mysql

[09:04:57 root@C8[ ~]#ps auxf | grep mysql
root       6011  0.0  0.0  12108  1076 pts/0    S+   09:07   0:00              \_ grep --color=auto mysql
mysql      5940  0.0  5.0 1298624 94116 ?       Ssl  08:56   0:00 /usr/sbin/mysqld
- 使用pstree看得非常清楚
[09:07:28 root@C8[ ~]#pstree
systemd─┬─NetworkManager───2*[{NetworkManager}]
        ├─VGAuthService
        ├─agetty
        ├─atd
        ├─auditd─┬─sedispatch
        │        └─2*[{auditd}]
        ├─automount───4*[{automount}]
        ├─chronyd
        ├─crond
        ├─dbus-daemon───{dbus-daemon}
        ├─firewalld───{firewalld}
        ├─lsmd
        ├─mcelog
        ├─mysqld───29*[{mysqld}]
        ├─polkitd───5*[{polkitd}]
        ├─rngd───{rngd}
        ├─rsyslogd───2*[{rsyslogd}]
        ├─smartd
        ├─sshd───sshd───sshd───bash───pstree
        ├─sssd─┬─sssd_be
        │      └─sssd_nss
        ├─systemd───(sd-pam)
        ├─systemd-journal
        ├─systemd-logind
        ├─systemd-udevd
        ├─tuned───3*[{tuned}]
        └─vmtoolsd───{vmtoolsd}
- mysql账号就是我们在安装的时候生成的
这个账号是刚刚生成的
/var/lib/mysql 存放着真正的数据
/sbin/nologin mysql这个用户的shell类型
[09:09:40 root@C8[ ~]#cat /etc/passwd
……
mysql:x:989:985:MySQL server:/var/lib/mysql:/sbin/nologin
……
[09:12:32 root@C8[ ~]#ls /var/lib/mysql/
aria_log.00000001  ib_buffer_pool  ib_logfile1        mysql               test
aria_log_control   ibdata1         ibtmp1             mysql.sock
C8.pid             ib_logfile0     multi-master.info  performance_schema