欢迎访问我的GitHub
https://github.com/zq2599/blog_demos
内容:所有原创文章分类汇总及配套源码,涉及Java、Docker、Kubernetes、DevOPS等;
概览
- 本文是《Kubernetes官方java客户端》系列的第六篇,以下提到的java客户端都是指client-jar.jar;
- 前文《Kubernetes官方java客户端之五:proto基本操作 》已经提到,java客户端的基本功能由两个主要脉络组成,第一个是proto,主要功能是使用ProtoClient类提供的增删改查接口,这些接口用到的入参和返回对象所涉及到的java类,都是通过K8S的protobuf生成的;
- 除了使用ProtoClient对K8S资源进行增删改查,还提供了另一种更强大的方式:OpenAPI,本章咱们就来一起学习OpenAPI相关的操作;
K8S的OpenAPI
-
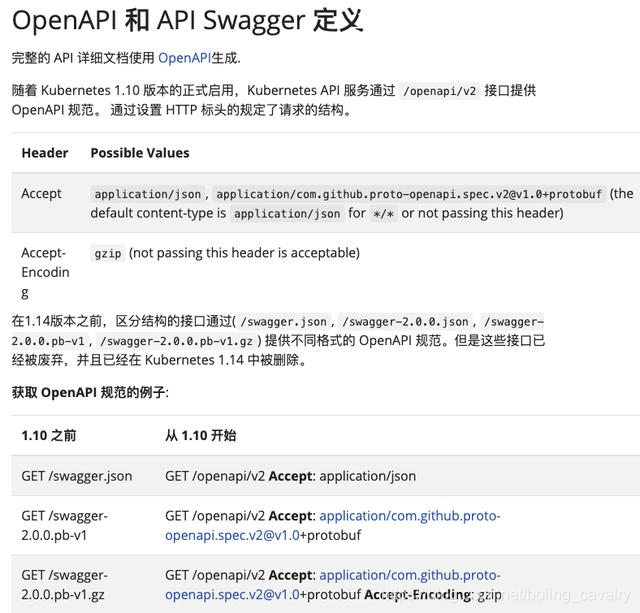
先抛开java客户端不提,咱们来看看K8S本身的OpenAPI,地址是:https://kubernetes.io/zh/docs/concepts/overview/kubernetes-api/ ,关键信息如下图所示,可见K8S提供了OpenAPI规范:
-
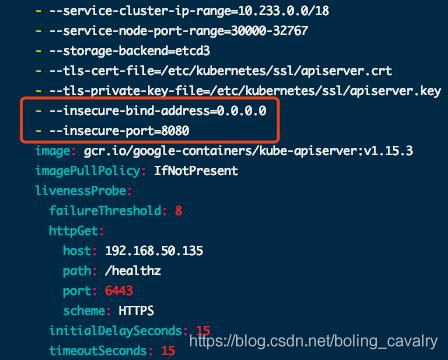
如果您想查看当前K8S环境的OpenAPI规范,请打开K8S环境的/etc/kubernetes/manifests/kube-apiserver.yaml文件,增加下图红框中的内容:
-
修改完毕后请稍候,系统会根据文件的变化自动更新(千万不要执行kubectl apply -f kube-apiserver.yaml,这会导致新建api-server的pod,由于端口占用而启动失败);
-
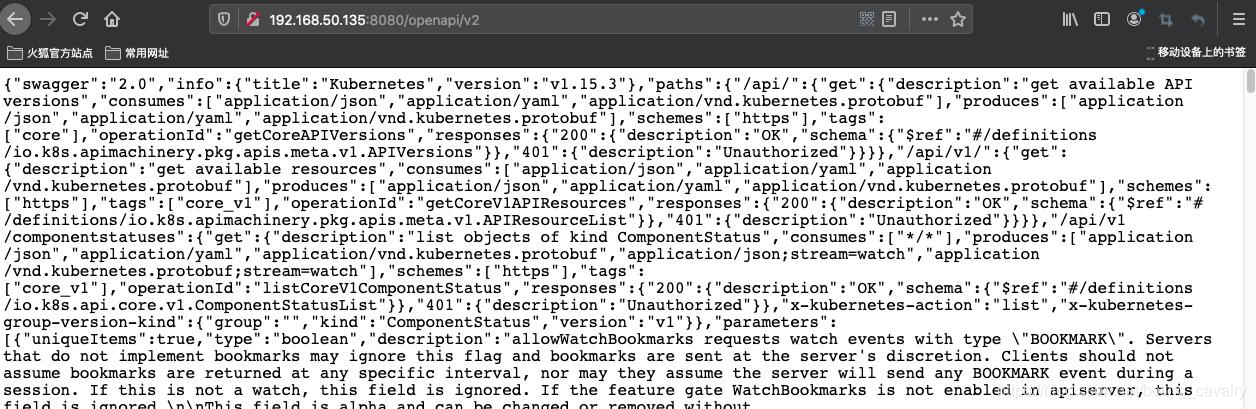
假设宿主机IP地址是192.168.50.135,那么在浏览器上访问:http://192.168.50.135:8080/openapi/v2,就能得到所有OpenAPI信息如下图:
-
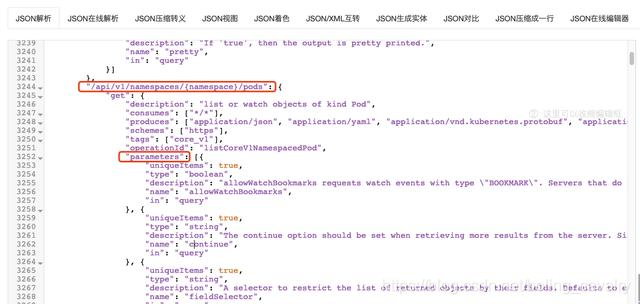
上图的原始数据没有可读性,复制到在线JSON格式化网站,得到的内容如下图,例如查询pod列表的API信息已经非常详细了:
-
以上就是对K8S的OpenAPI简介,接下来回到java客户端本身,看看它提供了哪些OpenAPI相关的能力;
java客户端的OpenAPI
-
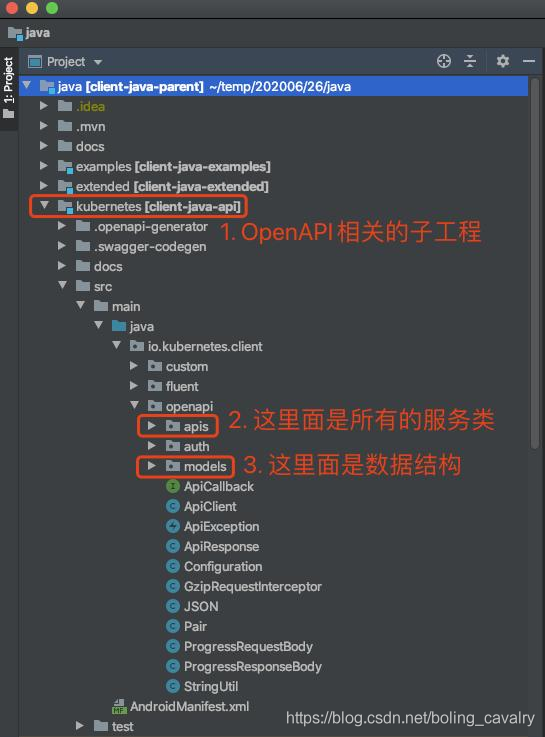
打开java客户端工程的源码如下图,红框1就是和OpenAPI相关的子工程,提供服务的功能类都在红框2的package中,也就是说,依靠红框2中的API以及红框3中的数据结构,我们可以完成大部分K8S资源控制相关的操作:
-
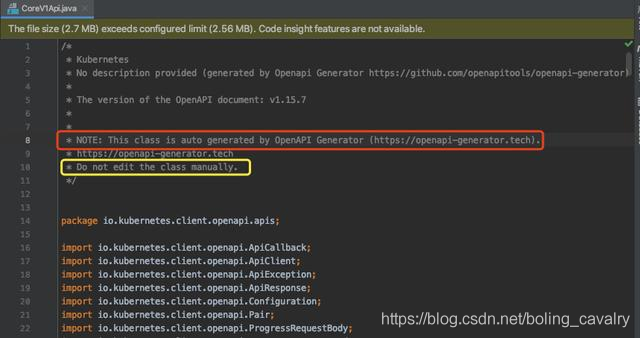
打开常用的CoreV1Api.java,如下图红框,顶部的注释已经说明了一切:这些代码都是工具生成的(至于如何生成就不在本文中讨论了):
-
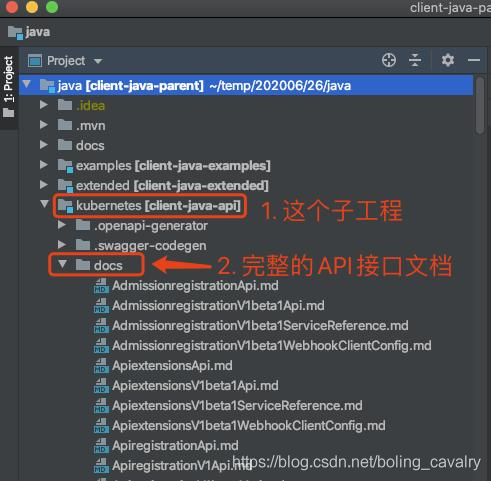
如果您下载了java客户端源码,可以在client-java-api这个子工程中看到完整的OpenAPI接口文档:
-
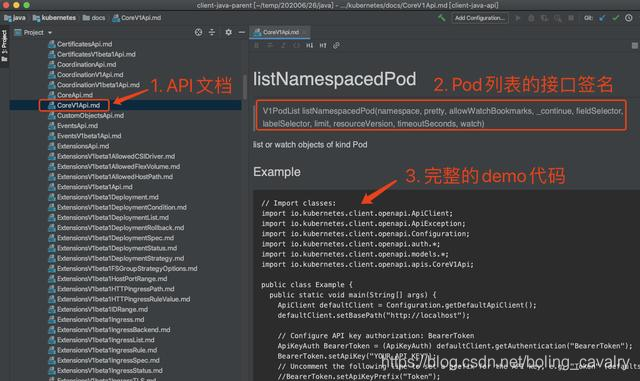
前文《Kubernetes官方java客户端之五:proto基本操作 》的代码中,咱们尝试过获取pod列表,但是ProtoClient的已有API不支持提交更详细的业务参数,此时选择OpenAPI接口即可输入详细的业务参数,接口详细信息可以在文档中查到,还带有完整的demo代码,如下图所示:
-
上图中的listNamespacedPod接口有两个重要参数:fieldSelector和labelSelector,这是过滤用的,详细的用法请参考K8S官方文档,地址是:https://kubernetes.io/docs/concepts/overview/working-with-objects/ ,如下图红框:
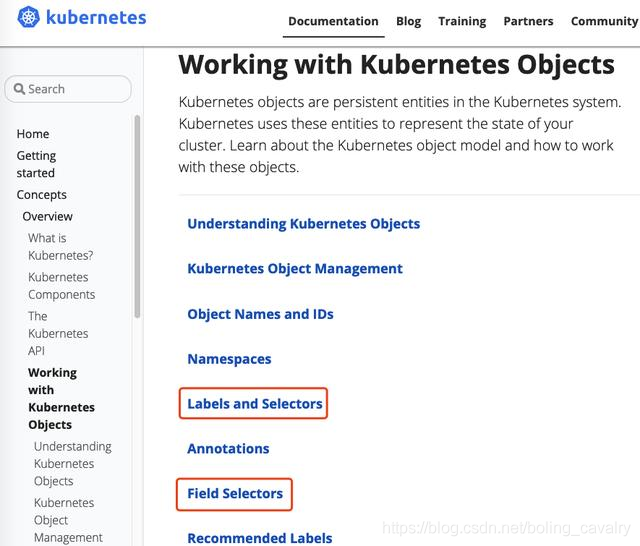
-
弄清楚了K8S的OpenAPI规范,以及java客户端依据此规范生成的API服务,还有详细的接口文档在手,可以编码实战了;
源码下载
- 如果您不想编码,可以在GitHub下载所有源码,地址和链接信息如下表所示(https://github.com/zq2599/blog_demos):
| 名称 | 链接 | 备注 |
|---|---|---|
| 项目主页 | https://github.com/zq2599/blog_demos | 该项目在GitHub上的主页 |
| git仓库地址(https) | https://github.com/zq2599/blog_demos.git | 该项目源码的仓库地址,https协议 |
| git仓库地址(ssh) | git@github.com:zq2599/blog_demos.git | 该项目源码的仓库地址,ssh协议 |
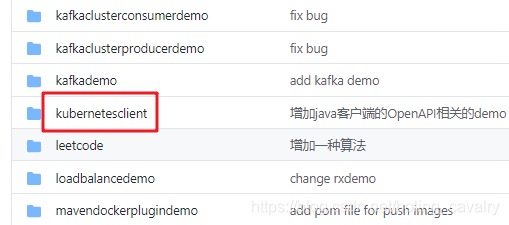
- 这个git项目中有多个文件夹,本章的应用在kubernetesclient文件夹下,如下图红框所示:
开始编码
- 打开《Kubernetes官方java客户端之一:准备 》中创建的kubernetesclient工程,在里面新建子工程openapi,其pom.xml内容如下,要注意的是spring-boot-starter-json已经被排除,因此序列化工具会变为Gson(原本默认是jackson):
<?xml version="1.0" encoding="UTF-8"?>
<project xmlns="http://maven.apache.org/POM/4.0.0" xmlns:xsi="http://www.w3.org/2001/XMLSchema-instance"
         xsi:schemaLocation="http://maven.apache.org/POM/4.0.0 https://maven.apache.org/xsd/maven-4.0.0.xsd">
    <modelVersion>4.0.0</modelVersion>

    <parent>
        <groupId>com.bolingcavalry</groupId>
        <artifactId>kubernetesclient</artifactId>
        <version>1.0-SNAPSHOT</version>
        <relativePath>../pom.xml</relativePath>
    </parent>

    <groupId>com.bolingcavalry</groupId>
    <artifactId>openapi</artifactId>
    <version>0.0.1-SNAPSHOT</version>
    <name>openapi</name>
    <description>Demo project for openapi client</description>
    <packaging>jar</packaging>

    <dependencies>
        <dependency>
            <groupId>org.springframework.boot</groupId>
            <artifactId>spring-boot-starter-web</artifactId>
            <exclusions>
                <exclusion>
                    <groupId>org.springframework.boot</groupId>
                    <artifactId>spring-boot-starter-json</artifactId>
                </exclusion>
            </exclusions>
        </dependency>

        <dependency>
            <groupId>org.projectlombok</groupId>
            <artifactId>lombok</artifactId>
            <optional>true</optional>
        </dependency>

        <dependency>
            <groupId>io.kubernetes</groupId>
            <artifactId>client-java</artifactId>
        </dependency>

    </dependencies>

    <build>
        <plugins>
            <plugin>
                <groupId>org.springframework.boot</groupId>
                <artifactId>spring-boot-maven-plugin</artifactId>
                <version>2.3.0.RELEASE</version>
            </plugin>
        </plugins>
    </build>

</project>
- 新增OpenAPIDemoApplication.java,这是新工程的引导类,也有两个web接口,一个创建namespace,另一个按照namespace查询pod列表,关键位置已添加了注释,就不多赘述了:
package com.bolingcavalry.openapi;

import com.google.gson.GsonBuilder;
import io.kubernetes.client.openapi.ApiClient;
import io.kubernetes.client.openapi.ApiException;
import io.kubernetes.client.openapi.Configuration;
import io.kubernetes.client.openapi.apis.CoreV1Api;
import io.kubernetes.client.openapi.models.V1Namespace;
import io.kubernetes.client.openapi.models.V1NamespaceBuilder;
import io.kubernetes.client.openapi.models.V1PodList;
import io.kubernetes.client.util.ClientBuilder;
import io.kubernetes.client.util.KubeConfig;
import lombok.extern.slf4j.Slf4j;
import org.springframework.boot.SpringApplication;
import org.springframework.boot.autoconfigure.SpringBootApplication;
import org.springframework.web.bind.annotation.PathVariable;
import org.springframework.web.bind.annotation.RequestMapping;
import org.springframework.web.bind.annotation.RequestMethod;
import org.springframework.web.bind.annotation.RestController;

import javax.annotation.PostConstruct;
import java.io.FileReader;

@SpringBootApplication
@RestController
@Slf4j
public class OpenAPIDemoApplication {

    public static void main(String[] args) {
        SpringApplication.run(OpenAPIDemoApplication.class, args);
    }

    /**
     * 默认的全局设置
     * @return
     * @throws Exception
     */
    @PostConstruct
    private void setDefaultApiClient() throws Exception {
        // 存放K8S的config文件的全路径
        String kubeConfigPath = "/Users/zhaoqin/temp/202007/05/config";
        // 以config作为入参创建的client对象,可以访问到K8S的API Server
        ApiClient client = ClientBuilder
                .kubeconfig(KubeConfig.loadKubeConfig(new FileReader(kubeConfigPath)))
                .build();

        // 创建操作类
        Configuration.setDefaultApiClient(client);
    }

    @RequestMapping(value = "/openapi/createnamespace/{namespace}", method = RequestMethod.GET)
    public V1Namespace createnamespace(@PathVariable("namespace") String namespace) throws Exception {

        CoreV1Api coreV1Api = new CoreV1Api();

        V1Namespace v1Namespace = new V1NamespaceBuilder()
                .withNewMetadata()
                .withName(namespace)
                .endMetadata()
                .build();

        V1Namespace ns = coreV1Api.createNamespace(v1Namespace, null, null, null);

        // 使用Gson将集合对象序列化成JSON,在日志中打印出来
        log.info("ns info
{}", new GsonBuilder().setPrettyPrinting().create().toJson(ns));

        return ns;
    }


    @RequestMapping(value = "/openapi/pods/{namespace}", method = RequestMethod.GET)
    public V1PodList pods(@PathVariable("namespace") String namespace) throws ApiException {

        CoreV1Api apiInstance = new CoreV1Api();

        // String | If 'true', then the output is pretty printed.
        String pretty = null;

        // 订阅事件相关的参数,这里用不上
        Boolean allowWatchBookmarks = false;

        // 连续查找的标志,类似于翻页
        String _continue = null;

        //  字段选择器
        String fieldSelector = "status.phase=Running";

        // 根据标签过滤
        // String labelSelector = "component=kube-apiserver";
        String labelSelector = null;

        Integer limit = null;
        String resourceVersion = null;
        Integer timeoutSeconds = null;
        Boolean watch = false;

        V1PodList v1PodList = apiInstance.listNamespacedPod(namespace,
                pretty,
                allowWatchBookmarks,
                _continue,
                fieldSelector,
                labelSelector,
                limit,
                resourceVersion,
                timeoutSeconds,
                watch);

        // 使用Gson将集合对象序列化成JSON,在日志中打印出来
        log.info("pod info
{}", new GsonBuilder().setPrettyPrinting().create().toJson(v1PodList));

        return v1PodList;
    }

}
-
将OpenAPIDemoApplication运行起来,先测试创建namespace的服务,在浏览器访问:http://localhost:8080/openapi/createnamespace/dddeeefff ,浏览器返回信息如下图:

-
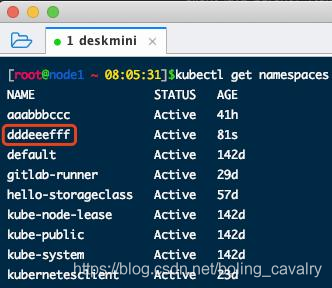
SSH登录K8S主机,执行命令查看namespace,如下图红框,已经创建成功:
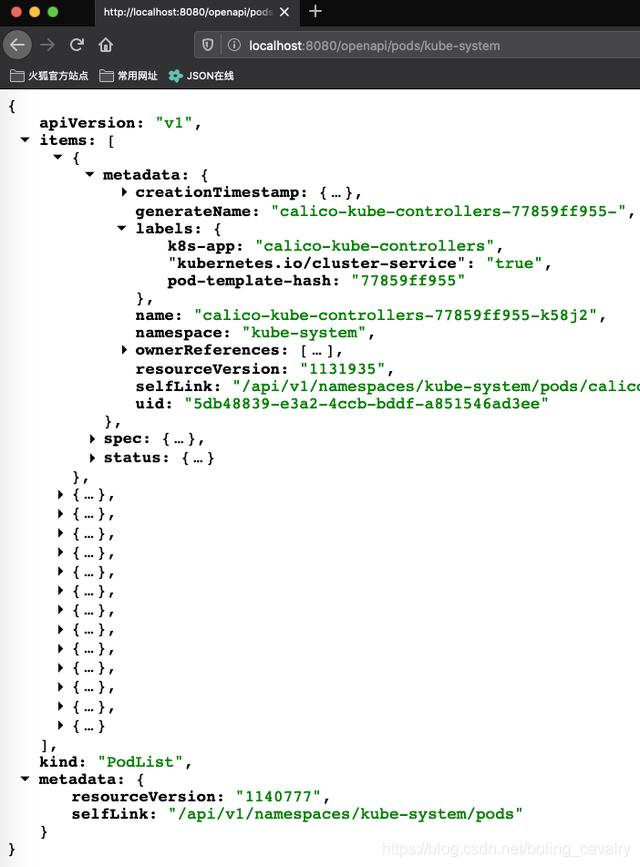
- 再试试Pod列表,地址是 :http://localhost:8080/openapi/pods/kube-system ,如下图:
- 至此,OpenAPI接口的实践就完成了,现在已将java客户端的最基本的功能都实践过了,接下来的文章咱们将开始学习精彩的高级功能;
你不孤单,欣宸原创一路相伴
欢迎关注公众号:程序员欣宸
微信搜索「程序员欣宸」,我是欣宸,期待与您一同畅游Java世界...
https://github.com/zq2599/blog_demos