在Eclipse中配置Maven
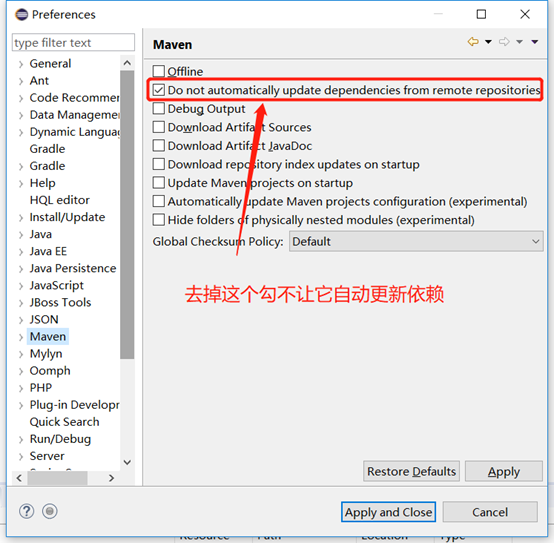
指定配置安装maven的路径
Eclipse自带的Mavan本地仓库: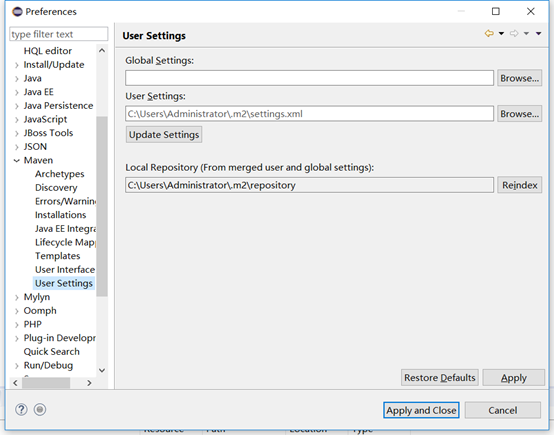
改成我们前面所配置的仓库和setting,你也可以直接使用默认自带的
关联setting.xml文件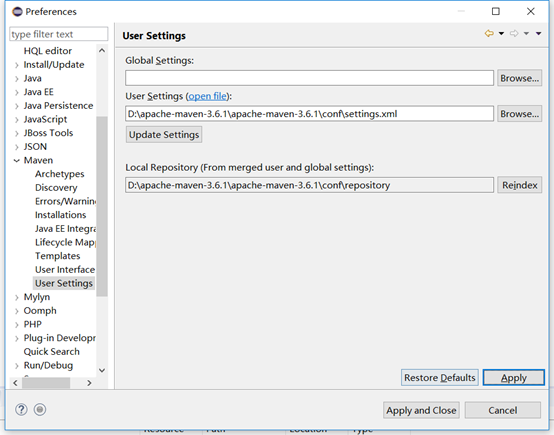
配置setting.xml,加上阿里代理镜像
中央仓库的地址在国外直接下载jar会很慢,所以我们需要通过代理的方式下载
<!-- 阿里代理镜像地址 -->
<mirror>
	<id>alimaven</id>
	<name>aliyun maven</name>
	<url>http://maven.aliyun.com/nexus/content/groups/public/</url>
	<mirrorOf>*</mirrorOf>
</mirror>
加入Tomcat插件
将动态web项目达成war包手动添加到tomcat的wabapp这种方式很麻烦,在开发过程中不高效,这时我们可以在项目中集成Tomcat插件来快速部署运行。
<project xmlns="http://maven.apache.org/POM/4.0.0" xmlns:xsi="http://www.w3.org/2001/XMLSchema-instance"
	xsi:schemaLocation="http://maven.apache.org/POM/4.0.0 http://maven.apache.org/xsd/maven-4.0.0.xsd">
	<modelVersion>4.0.0</modelVersion>
	<groupId>com.dpb</groupId>
	<artifactId>MavenDemo01</artifactId>
	<version>0.0.1-SNAPSHOT</version>
	<packaging>war</packaging>

	<dependencies>
		<!-- 因为是web项目所以需要servlet -->
		<!-- https://mvnrepository.com/artifact/javax.servlet/servlet-api -->
		<dependency>
		    <groupId>javax.servlet</groupId>
		    <artifactId>servlet-api</artifactId>
		    <version>2.5</version>
		    <scope>provided</scope>
		</dependency>
	</dependencies>

	<build>
		<plugins>
			<!-- tomcat插件 -->
			<plugin>
				<groupId>org.apache.tomcat.maven</groupId>
				<artifactId>tomcat7-maven-plugin</artifactId>
				<version>2.2</version>
				<configuration>
					<!-- 端口号 -->
					<port>8082</port>
					<!-- /表示访问路径 省略项目名 -->
					<path>/</path>
					<!-- 设置编码方式 -->
					<uriEncoding>utf-8</uriEncoding>
				</configuration>
			</plugin>
		</plugins>
	</build>
</project>
运行: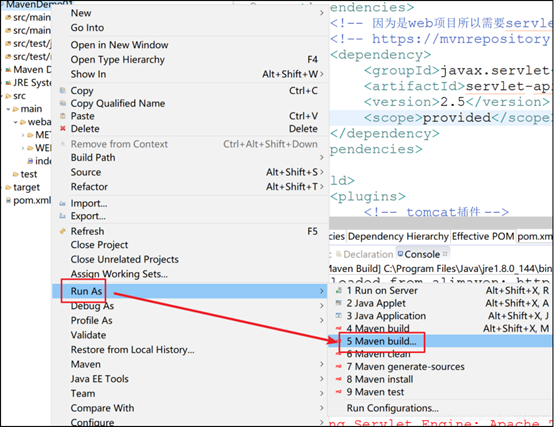
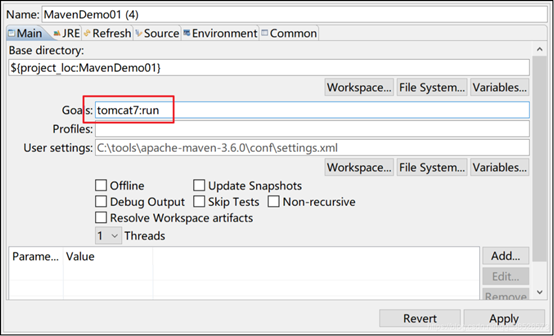
输入: tomcat7:run 然后运行
第一次要下载一些资源会比较慢。